Your TPN-Accredited CPU/GPU Cloud Rendering Services
Faster · Safer · Cost Saver · Smarter · Easier

Fox Renderfarm Cloud Rendering Steps
With Just 4 Steps To Render Your Projects
STEP 1
Registration
Create an account with us and get $25 free render coupon as a welcome gift. You can use them to access our awesome cloud rendering service for your creative projects.
STEP 2
Projects Upload
Log in and upload your projects to the web version of Fox Renderfarm.
STEP 3
Rendering
Our system will automatically analyze and render your projects.
STEP 4
Projects Download
Download the rendered frames with a few simple clicks.
Fox Renderfarm Cloud Rendering Advantages
Easy Cloud Rendering, Yet Powerful Rendering Ability And Support
Powerful Cloud Render Farm for Submission
Customized Cloud
Rendering Solution
Highly Secured Cloud Rendering Process
Professional Technical & Customer Support
- Use Raysync high-speed transfer, to achieve portable real-time file uploading & rendering
- Available to use on Windows, Mac and Linux
- The rendering service availability is up to 99.99%
- TPN-Accredited Vendor
- Possesses massive SSD storage system to solve the I/O bottleneck

How to Customize Your Cloud Rendering Project


Customized Cloud Rendering Solution Features
Confidential Private Network
Exclusive Render Storage
Bank-Grade Security
Remote Desktop & SSH via Secure VPN
Dedicated Reserved Servers
Specialized Render Environments
Pipeline Integration
Secure Data Sync via Aspera
Fox Renderfarm Cloud Rendering Works
Make The Impossible Possible, Perfect Your Cloud Rendering Journey

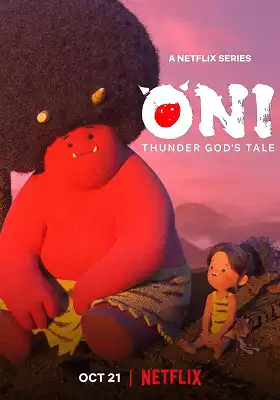
Oni: Thunder God's Tale
Two prizes winner of the 50th Annie Awards. Inspired by Japanese folklore, ONI: Thunder God's Tale tells the story of a young girl who protects her peaceful village from the threat of oni.
More
Fox Renderfarm News Center

2025-06-13
Explore Maya Render Animation: From Scene Setup to Final Export
Many people enjoy watching animated videos or characters, but their movement is only one part of the animation. Once the movements are complete, the last step is to turn everything into a smooth and detailed video. Since beginners don’t know how to prepare their scenes for this final step, they get stuck at this point. That’s because they don’t understand how to set up and render the animated scenes properly.Modern animation tools like Maya make the process easier by allowing various features and integrations. Therefore, we will explain the steps of using Maya render animation, along with a proper overview of the advanced tool. Furthermore, the guide will explain a cloud render farm service that you can use along with Maya to enhance efficiency and streamline the workflow.Part 1. Overview of Maya as a Tool for Animation RenderingAmong the best available options, Maya is a powerful software used to make animated movies and games. It allows artists to create detailed models and bring them to life using simple or complex movements. Similarly, many studios and professionals use this advanced Autodesk software because it gives full control over how things look and move on screen. You get useful polygon and NURBS modeling tools with the Maya animation render software.In addition to creating characters and modeling them, it lets you add textures and manage the lighting of the animations. Furthermore, although it takes lots of resources, the tool can render and turn your animations into a final video. You can also use its integrated Arnold renderer or let it use your GPU or CPU for power. While rendering, this innovative tool allows shaders and manages the colors in the animations.Part 2. How to Render Animation in Maya?As a reliable tool for creating animations, Maya offers many tools that also assist in rendering your digital creations. You can learn how to render an animation in Maya by going through the following steps:1. Preparing the Animation for RenderingBefore starting, make sure your animation plays smoothly from start to end. Look over the details, like characters' movements and textures, to confirm everything looks correct. Then, fix any errors you notice because they will appear in the final output. Furthermore, you should clean up the scene by removing any unused objects or materials. In the end, make sure to save the project before moving forward to avoid any loss.2. Choosing the Right Rendering EngineThe animation tool's dedicated rendering engine, Arnold, can render and process your complex creations easily. This advanced rendering engine is capable of managing complex animations by offering features like ray tracing and global illumination. Similarly, you can learn how to render a Maya animation in this engine using the tutorials shared by the platform.3. Configuring Render SettingsNow, you need to adjust the settings of the rendering engine according to your animation needs. The software provides options like ray depth and sample rates to process your animation at different speeds and quality. Similarly, adjust the frame range to choose how much of the animation you want to process or export. You should also pick the size of the image, like HD, and the file format, like PNG or EXR.4. Lighting Setup for RenderingWhile learning how to render an animation in Maya, give special attention to learning lighting angles. Good lighting makes your animation look real and attractive, so add lights to match the mood of your scene, like sunlight or a spotlight. You get options like area or directional lights to illuminate the animations according to your needs. Besides, shadows and highlights should be checked so that objects look three-dimensional.5. Texturing and Shading ConsiderationsTextures give your objects color and surface look, like wood or metals, in a properly created animation. Hence, make sure all your textures are linked properly so nothing appears grey or missing. Plus, the shading of objects should be checked to see which affects how light reflects on them. Furthermore, Maya allows you to add shaders like Standard Surface in Arnold, so use it to make surfaces look soft or rough.6. Rendering the AnimationOnce everything is set, you can start turning the animation into image frames. You can use the Batch Render option to create one image for each frame of your animation and save them in the folder you selected. While learning how to render Maya animation, you will see that the process slows down your computer. Therefore, third-party services like Fox Renderfarm can be used to render the animations efficiently.7. Post-Processing the Rendered AnimationAfter completing the rendering, you will have a set of image files, one for every frame. From here, compositing comes to help, where you combine rendered elements to create a final visual result. You can use editing programs, like After Effects, to mix the layers and apply motion blur. In this way, the animations look more realistic and polished to be shared with others.8. Exporting and Saving the Final RenderNow that you know the major steps in learning how to render animation in Maya, the last step is to export the final results. Therefore, collect all the image frames and join them into one video using video editing tools that let you export a video file in formats like MP4 or MOV. Similarly, you have to choose the right resolution and settings based on where you plan to show it.Pro Tip for Maya Artists: Improve Animation Rendering EfficiencyWhile learning Maya how to render animation, we discussed how rendering pressurizes your system and suggested using Fox Renderfarm. This online platform provides cloud rendering options and lets you choose from CPU and GPU-powered processing options. In this way, your computer becomes free for more important tasks, like post-production of the animations. Furthermore, it releases thousands of nodes to process your animations quickly.You can even use this render farm for animation projects that include complex scenes, since the tool supports Hollywood-level production. Users and studios can use the platform without any security concerns, as Fox Renderfarm is ISO27001 certified. Another highlight of this tool is its ability to provide 24/7 support. The rendering service allows signing NDAs to ensure your uploads are not disclosed publicly.Key FeaturesAPI Integration: Studios can make Fox Renderfarm a part of their production pipeline using its API keys. Hence, it becomes easier and quicker for them to render their animations while saving costs on unnecessary upgrades.System Support: The online render farm service is accessible on all major operating systems. You can also access it on your Windows and Linux systems via desktop clients.Transmission Speed: Since it uses Raysync’s advanced transmission technology, it ensures quick upload of the animation files. In the same way, you can download the processed animations at the same quick speed.Quality Storage: The render farm service makes use of the SSD storage to keep your animation files for rendering. Thus, you don’t face any bottlenecks during the input or output of your files.Widespread Compatibility: The platform works with all the major animation programs to help with the rendering process. In addition, it is compatible with most animation plugins and enhances their functionality.ConclusionTo conclude, Maya renders animation using its Arnold rendering engine, which supports complex visuals with ease. Steps like adjusting lighting and compositing the final results may seem simple, but special attention is needed to get lifelike results. Similarly, you will need the help of Fox Renderfarm to process the animations on its online servers. The advanced online solution has various rendering options to offload pressure from your computer.
More

2025-06-12
What Animation Program Does Pixar Use to Create Blockbuster Projects
Many animation fans and aspiring creators are curious about how Pixar makes its stunning movies. From Toy Story to Inside Out, each film shows great detail and smooth movement. This leads individuals to ask, "What animation program does Pixar use to bring these stories to life.” Thus, understanding Pixar’s tools helps artists and learners see how top studios build great animations.Moreover, it gives insight into how software and creativity work together in modern filmmaking. Therefore, this article explores Pixar’s history and the main programs it uses for animation. Apart from that, we will share tips for improving 3D animation rendering. If you struggle with slow or poor-quality rendering, we will discover a service that helps solve this challenge.Part 1. History of Pixar Animation StudiosThis studio began its journey in 1979 as part of Lucasfilm. George Lucas brought in Ed Catmull to lead a team focused on computer graphics. Upon progressing a few years, John Lasseter joined and helped create Pixar's first short films. The Adventures of André & Wally B. was their first work, shown in 1984. Moreover, Steve Jobs bought the group and named it Pixar in 1986, which marked the start of a new age.Besides, their significant achievement came in 1995 with the release of Toy Story, the first film made entirely with computers. As the years progressed, the platform released several hits like Finding Nemo and Inside Out. Along the way, they progressively developed their own tools to bring stories to life effortlessly. When individuals ask, "What animation software does Pixar use?” the answer is Presto, their own program.Part 2. What Software Does Pixar Use for Animation?Upon knowing how Pixar creates animated movies, let’s explore the tools behind the scenes. So, this section will give you a clear and simple answer whenever someone asks, “what software does Pixar use for animation:”2.1 The Role of RenderMan in Pixar FilmsRenderMan is a powerful tool Pixar uses to bring its animated scenes to life with rich detail and lighting. It basically comes with ready-to-use features like built-in materials and light effects, so artists don’t need to write extra code. When asking “what does Pixar use to animate,” RenderMan stands out for its ability to create realistic light and skin using a special system called MaterialX Lama.AdvantagesIt includes physical light tools with support for exposure and special filters used in professional feature film lighting.RenderMan works smoothly with major 3D software like Maya and supports top plugins.The platform includes out-of-the-box materials and light systems, allowing artists to start working quickly without complex development work.RenderMan features MaterialX Lama, a powerful layering tool that helps artists create complex and HD texture details easily.2.2 Presto: Pixar's Animation ToolReleased in 2008 and first seen in the Pixar short film Presto, is Pixar’s powerful in-house animation tool. Initially, it was designed to meet the exact needs of Pixar’s artists and directors. When someone asks, “what animation program does Pixar use,” Presto gives animators fast, smooth control, helping them shape expressions and timing.AdvantagesPresto runs smoothly even with complex scenes, helping animators work quickly without waiting for the software to catch up.Animators can instantly see changes as they work by making adjustments to movements and improving character expressions.It can handle characters with lots of parts, like Sulley’s fur or Merida’s hair, without slowing down performance.Presto works well with Pixar’s other software, allowing effortless movement between animation and rendering steps.2.3 Other Tools Used by PixarBeyond Presto and RenderMan, Pixar employs additional tools to enhance its animation process, like Autodesk Maya. This tool basically assists in building the characters and settings seen in Pixar films. Another essential software is Houdini, which specializes in generating complex visual effects like smoke and explosions. Houdini's capabilities allow Pixar to create realistic and dynamic scenes. When considering “what animation software does Pixar use,” it's clear they combine these tools.AdvantagesAutodesk Maya actually helps Pixar model complex characters with precision, which ultimately supports animation and rigging within the tool.Maya works with many famous plugins, which add extra effects and tools for creativity.Houdini can automatically generate animations based on rules, saving time on repetitive tasks.They even let users build effects step-by-step and create complex things like smoke and fire.Pro Tip for 3D Animators: Improve Animation Rendering EfficiencyMany creators face issues like rendering complex scenes. It basically takes a lot of time and consumes heavy computer power, which ultimately slows down the work. To solve this, using a cloud rendering service like Fox Renderfarm is very helpful. It offers fast and secure rendering using powerful servers, so you don’t depend on your local device.Moreover, this advanced render farm platform allows rendering on both CPU and GPU, offering flexibility depending on the project’s needs. In addition, Fox Renderfarm uses Raysync technology to quickly upload and download large project files, saving valuable time. With 24/7 support and flexible pricing, it helps animators save time and focus on creativity. Alongside that, new users can effortlessly get a free trial coupon to try it risk-free.Key FeaturesRender Nodes: It offers thousands of connected servers working simultaneously to process large rendering jobs quickly and efficiently. This large-scale cloud infrastructure enables projects to be rendered within hours instead of days.NDA Available: The platform’s Non-disclosure Agreement is available to protect your project’s intellectual property and internal production. It helps animators build trust and ensure legal safety for clients working on confidential or unreleased material.Storage Support: Fox Renderfarm’s fast SSD storage reduces I/O lags and allows quicker access and storage of massive project files during rendering. This boosts performance, especially when dealing with texture-heavy or HD animation sequences.Uptime Guarantee: It even ensures 99.99% system uptime, so rendering services remain continuous, even during maintenance or heavy usage periods. Thus, when reliability is critical for studios under tight production deadlines, opting for Fox Renderfarm could be a wise move.Software Support: It works well with tools like Blender, Maya, V-Ray, and RenderMan, so you don’t need to switch software to render. It supports most animation tools professionals use, which makes it easy to continue your work without issues.ConclusionIn summary, understanding “what animation program does Pixar use," gives you a clear picture of how professionals create quality animated films. Pixar's mix of custom and commercial tools shows how the right software boosts both quality and speed.Besides, rendering can still be slow and difficult even with the best programs. That's why using Fox Renderfarm is best for speeding up your work and reducing the extra load on your computer.
More

2025-06-11
1st Place in Chasm's Call: LescArt’s Winning 3D Workflow using Fox Renderfarm
City Siege © LescArtWe are pleased to welcome Lennard Schmidt aka. LescArt, a talented 3D generalist from Northern Germany and the 1st Place winner of pwnisher’s Chasm’s Call Challenge. His stunning entry—a meticulously crafted medieval battle scene—stood out among thousands of submissions, showcasing his expertise in crowd simulation, environmental storytelling, and dynamic lighting. Join Fox Renderfarm, the industry’s top cloud rendering services provider and render farm, as we explore the process, challenges, and insights behind this award-winning project.Fox Renderfarm: Hi LescArt! We are honored to have you here! Please introduce yourself to our readers.LescArt: Hi, thank you very much for having me! My name is Lennard a.k.a. LescArt, I'm a 3D generalist from Northern Germany, and I've been passionate about filmmaking, visual effects, and CGI in general for the last 15 years. I've been doing this professionally for 6 years now, but I still do a lot of personal projects on the side when I find the time.Fox Renderfarm: Congratulations on winning 1st place in the Chasm’s Call Challenge. What was the most rewarding part of the experience for you? Can you briefly introduce your project to us?LescArt: Thank you so much! The 1st place came really unexpectedly for me. Especially after I nearly missed the deadline. When I started working on my entry, I was really unsure if I would have enough time to do it in the given timeframe; I was fairly sure I wouldn't. So I picked a topic that I knew I would like to explore further, even if I can't make the deadline. And that was a large-scale crowd simulation. As a teenager, I was obsessed with the extensive making of the material from “The Lord of the Rings” movies. It's what really pushed me to pursue filmmaking and visual effects. I remember building miniatures of castles, filming them, and trying to put myself on the wall, just like they did with the amazing miniatures in the movies. So I always wanted to create a big battle scene in tribute to the epic battles in The Lord of the Rings, and the given template for the challenge was also a good fit.The Lord of the Rings © New Line CinemaAfter watching “Kingdom of Heaven” again recently, I decided to shift the whole look more towards a Mediterranean environment because I liked the look and I thought it would be a nice contrast to have a Mediterranean world where it's probably mostly sunny, but then very dark and contrastingly lit to emphasize the dark and grim atmosphere of the action in the shot. The whole foreground is inspired by the tense wait before the battle of Minas Tirith; it is too late to leave the city, and there is no escape, only waiting for the great battle. But then there's the fearless leader, between his men, overseeing the city's defense. Or maybe he's taking it a little too easy and plans to eat his snacks while others do the fighting, who knows…Kingdom of Heaven © 20th Century StudiosReferences © LescArtFox Renderfarm: Can you share with us the creation process of your work? What software did you use, and how long did it take you? LescArt: Of course! After gathering some references and creating an initial plan of what I wanted to include in the shot, I started by blocking in some basic shapes for the city and testing some initial lighting. Blocking in the army formations was also an important factor, as they would take up half of the image, and it was important to get the right distance/height from the ground to make it look massive but still be able to make out individuals in the crowd.Early Blockout © LescArtOnce I was happy with the blockout, I started detailing the city, mainly using KitBash sets and re-shading everything with a few different procedural shaders via triplanar mapping. To keep my scene as light as possible, it was important to work with proxies and referenced objects as much as possible. For the ground outside the city, I used satellite photos from which I extracted several masks by selecting different color ranges to use as distribution maps in Forest Pack to scatter rocks and bushes. Ground texture and extracted scatter masks © LescArtScattering rocks and bushes with Forest Pack © LescArtThe ground inside the city is just a large flat texture that I compiled from aerial imagery. For this, I rendered a top view of the city, which I used as a guide in Photoshop. With most of the background environment in good shape, I knew I had to start working on the crowd simulations before it got too late. I already knew from previous challenges that rendering could end up being a very dangerous bottleneck. So I started rendering the static city relatively early while I was working on the crowds.For the crowds, I brought the basic crowd layout (just a bunch of evenly segmented faces) from Max to Houdini and used the points of the geometry as emitters. By assigning different sections to different groups, I was able to art direct the initial behavior and various influences, such as steer targets and path constraints. I also used in-mesh triggers with random probability and time delays per crowd agent to get some of the front rows marching and eventually attacking.The defending crowd agents on the city walls were a bit more complicated. They initially run or walk along the wall, but when they get close to the front edge and have a bow, they walk up to the edge and start aiming and shooting at the attackers. After a random amount of time, they retreat and walk back along the wall (probably to resupply with arrows). While I refrained from actually implementing flying arrows, I triggered some of the crowd-attacking agents through a few different rules and randomized probabilities when they approached the walls, putting them into a ragdoll state.Attacking the crowd in the Houdini viewport © LescArtWhen I started rendering the crowd simulations, I quickly realized that it would take too long for the deadline if I still wanted to work on the foreground and not have my PC rendering nonstop. This is when the last week started, and I still hadn't put any time into working on the foreground. That's when Fox Renderfarm saved my submission. I downloaded the desktop client, redeemed the free coupons from the challenge sponsorship, and it worked. Not only did I render all the crowd elements on the farm, but I knew I could work on the foreground for 2 more days because I could pretty much render it on the farm at the last minute.The Foreground © LescArtFor the foreground environment, I made extensive use of Megascan assets. The characters were purchased models from CGTrader. Instead of rigging them directly, I took a slightly different and faster approach. I reused the low-poly model from the crowd simulations, which I had already auto-rigged through Mixamo, and used it as the deformation base for the high-poly FG character models. I split the model geo into 3 different parts. Deforming (Body, tight clothing), Transforming (Armor Plating), and Simulated (Cloth, hanging Belts, etc.). The parts were deformed directly with the movements of the low-poly models. As this is mainly skin and underlying clothing, and the movements are not very large, small errors go largely unnoticed. The transforming parts were packed and then transformed with the movements of the low-poly model, as I wanted to avoid that typical look of deforming armor parts that are just skinned to the rig. The simulated parts, the cloth, the belts, the flags, and the cape, I ran through a vellum cloth simulation. In total, I prepared 5 different animations for the guard and one for the commander.Red - Deforming, Green - Transforming, Blue - Vellum Sim © LescArtOnce I had all the rendered elements, I assembled the final composition in Nuke and. Elements such as the godrays and some of the cloud breakup were done entirely in Nuke because it gave good control and was very quick to render and edit. Raw Render © LescArtFinal Comp © LescArtFox Renderfarm: Have you tried or heard about Fox Renderfarm’s services before? What is your impression of our cloud rendering services?LescArt: I've heard of Fox Renderfarm here and there, but never really bothered to try it out. Before Fox Renderfarm, I only used another online render farm once, that was a while ago, and it was a pretty rough experience because it took a long time to get everything set up and working without errors or missing dependencies. The experience with Fox Renderfarm has been extremely smooth so far, and that was a big surprise for me, but a very welcome one! I will definitely continue to use it on upcoming projects! LescArt’s Social Media:Instagram: https://www.instagram.com/_lescart_/YouTube: youtube.com/@_LescArt_
More