C4D Tutorial: How to Make a Doraemon Modeling And Rendering

As the best cloud rendering services provider, Fox Renderfarm will share you with how to make the cute Doraemon with C4D step by step.

Part 1. Head Production

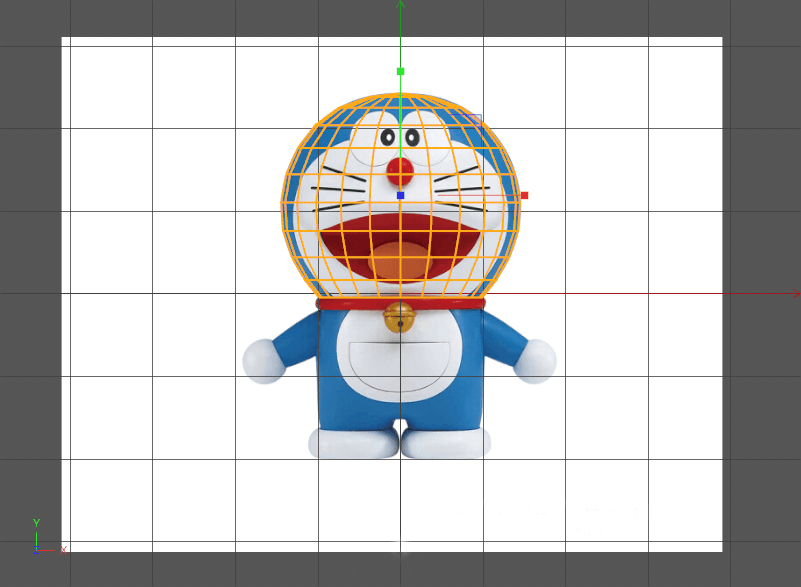
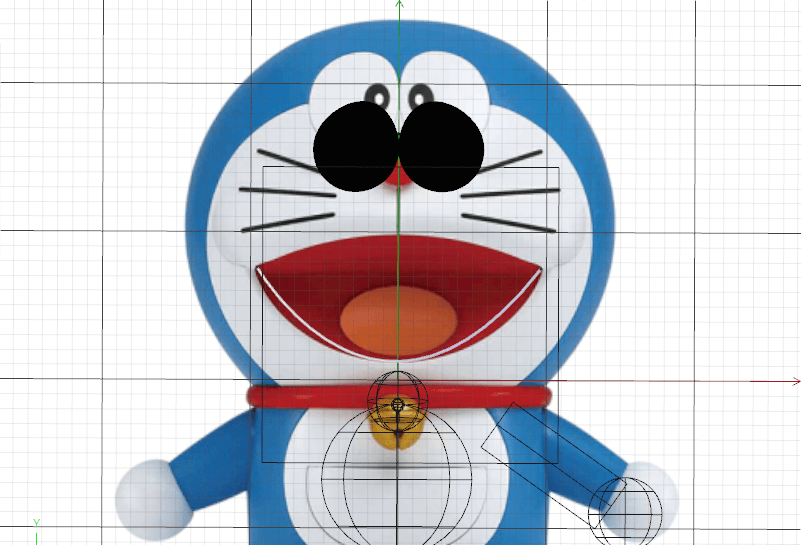
Step 1. In the front view mode, press the shift+V key to select the background and place the material "Doraemon" into the front view. Set the horizontal offset to "-10" to align it with the reference line for easy operation.


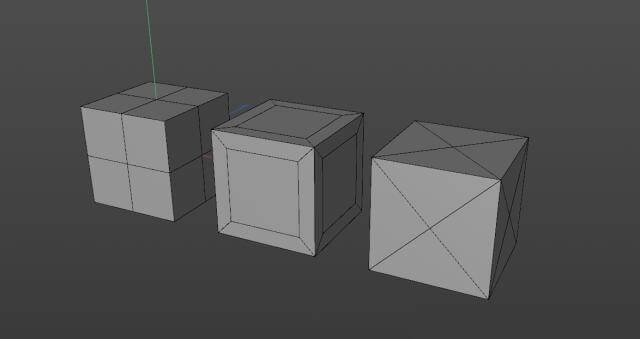
Step 2. Create a new "sphere", press the E key to adjust the position, press the T key to resize it to match the position of the head in the reference image, and then convert the "Sphere" into an editable object. In online mode, use the box tool to select the bottom edge and press the Delete key to delete it. Then adjust the size of the sphere so that it is the same size as the head in the reference image. Create a new "HyperNURBS" and make "Sphere" a subset of "HyperNURBS", making its edges more rounded and natural.

Step 3. In the front view mode, create a new "sphere". Use the same method to adjust the position of the line segment layer by layer to make it exactly coincide with the position of the face in the reference picture. Create a new "HyperNURBS" for the sphere to make its edges more rounded and natural. Rename the two "HyperNURBS" to "Face" and "Head" respectively.

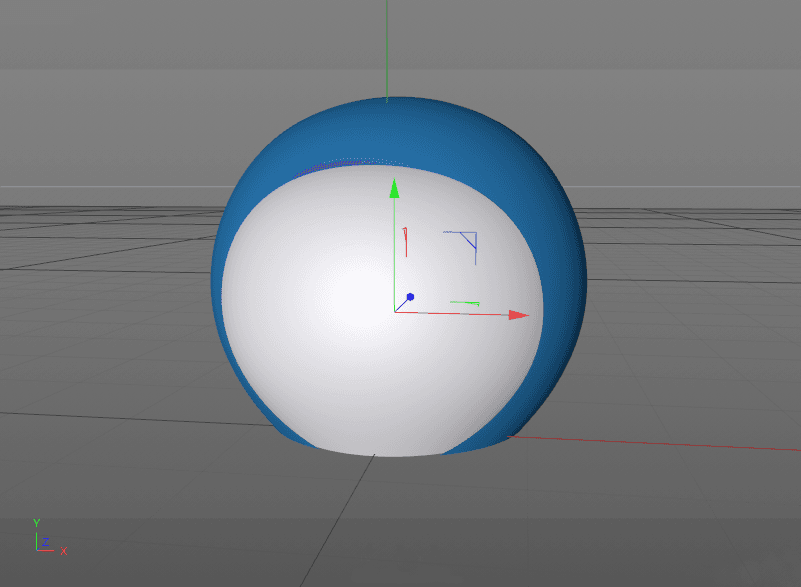
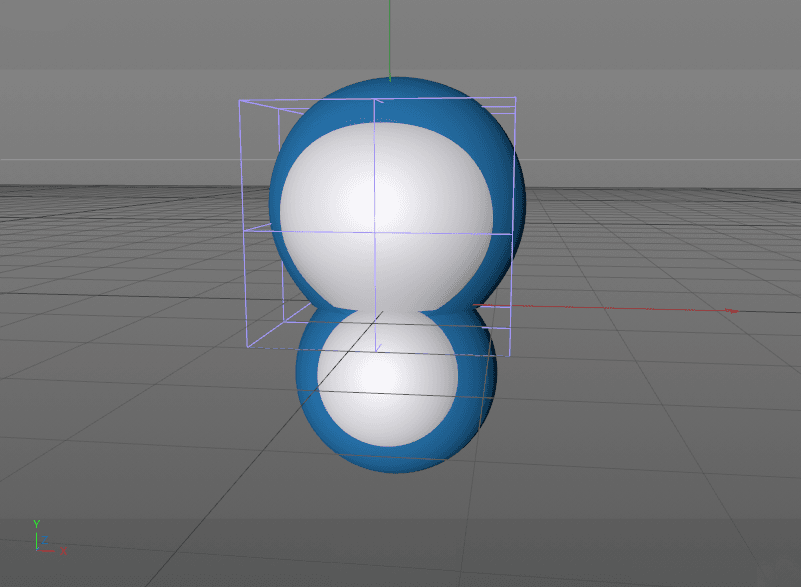
Step 4. Create two new shaders to adjust the color to blue and white, giving the "head" and "face" respectively for easy viewing. Use "Booleans" to cut the appropriate size in the "head". Results as shown below.

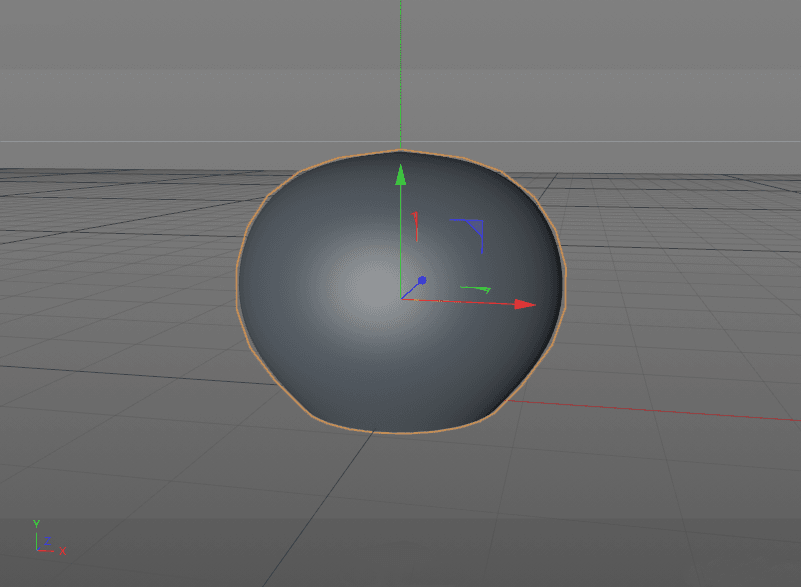
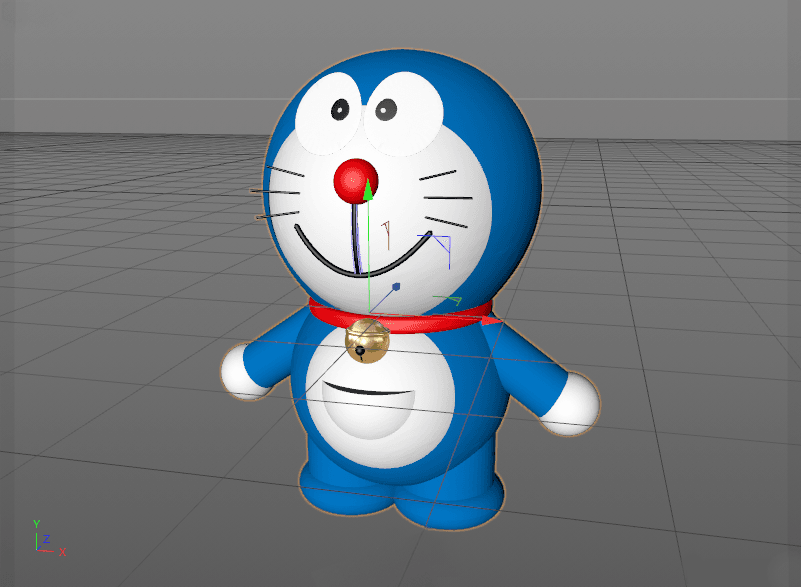
Step 5. Add a "FFD" to the face model to adjust the position of the point.

Part 2. Body Production

Step 1. Create a new "sphere", resize it so that it matches the position of the body in the reference image, and rename the "sphere" to "body". Then use the method of making the head to create a "belly", remember to add HyperNURBS. Then adjust the size of your body and stomach.

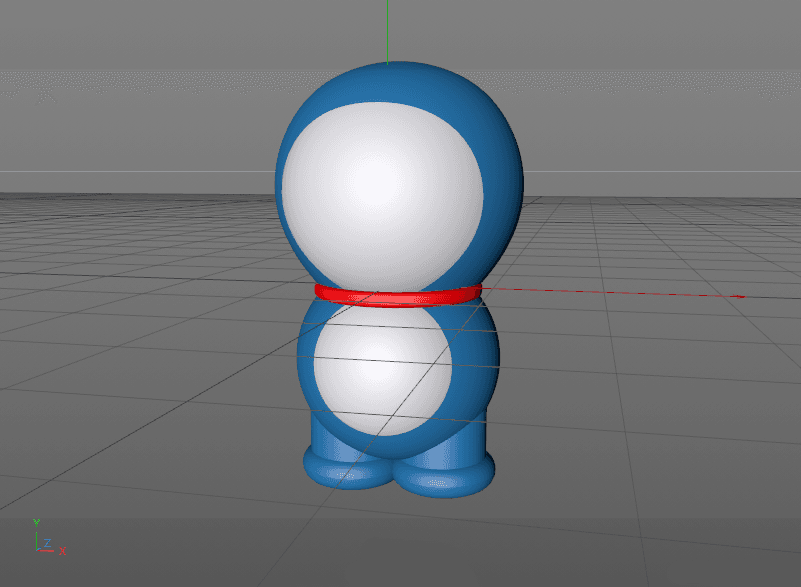
Step 2. Create a new "Tube" to make the collar, resize and position and assign a red shader. Then use 2 cylinders to make your feet. Remember to change the names of all parts.

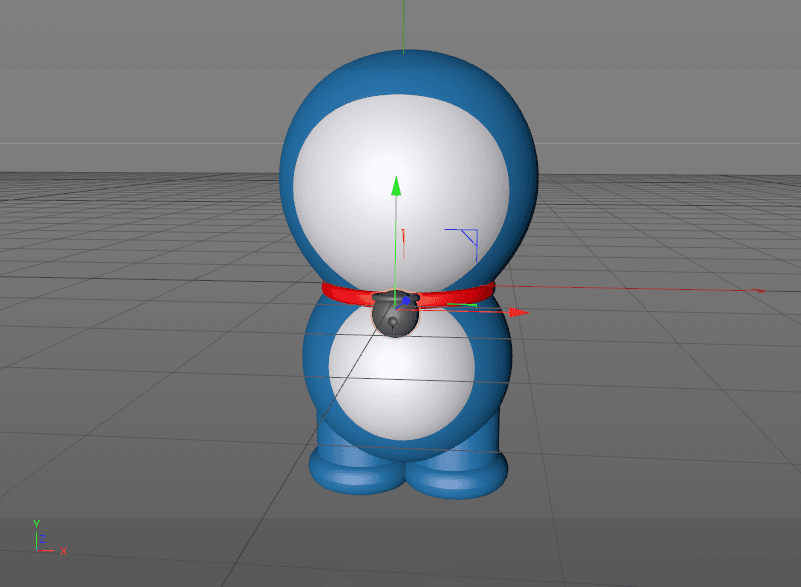
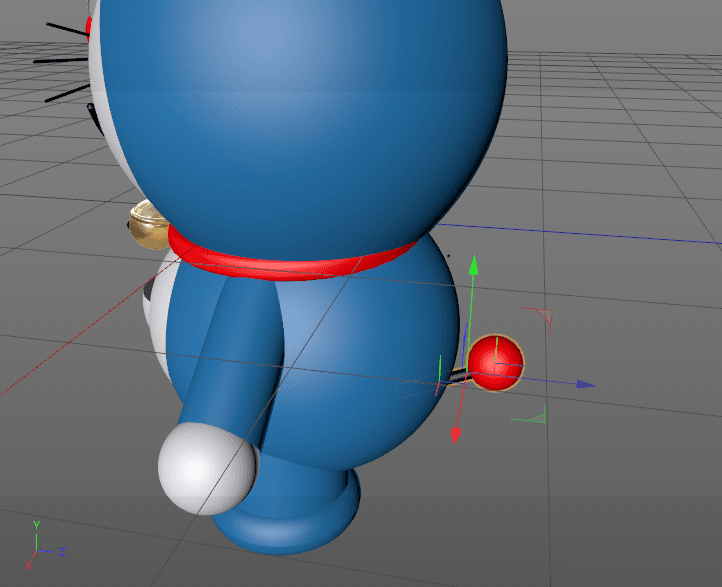
Step 3. Now make the bell and add HyperNURBS to it. Then resize and position.

Step 4. Use the sphere to make the exit pocket using Booleans to resize and position. The arms and hands are also made using a sphere.

Part 3. Production of Eyes, Mouth, Nose

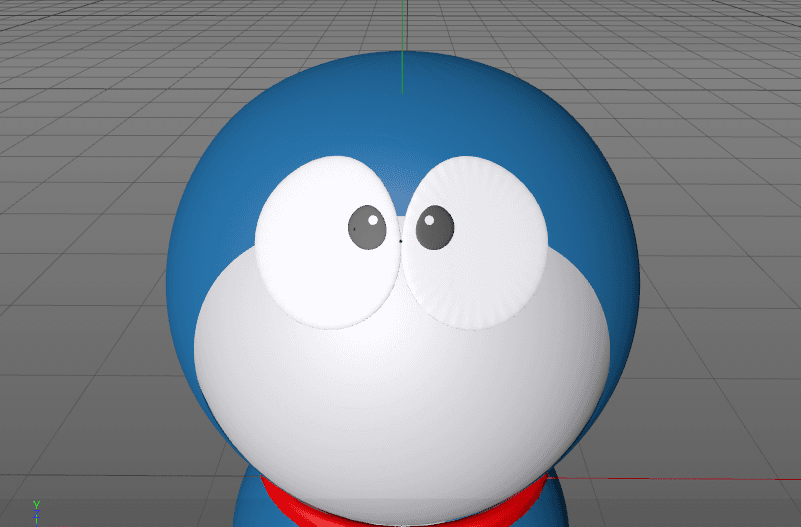
Step 1. Create a new "Disc" and adjust the position and size to match the position of the eye in the reference image. Then adjust the position of the point in point mode and pull out a little thickness, then use Close Polygon Hole. Make a copy and make your eyes. Remember to change the naming. Create a new eye shader.

Step 2. Use the "brush" tool to draw the mouth of Doraemon, the effect is shown below.

Step 3. Use the ring to create your mouth and nose. Use the sphere to create the tail, remember to modify all layer names.

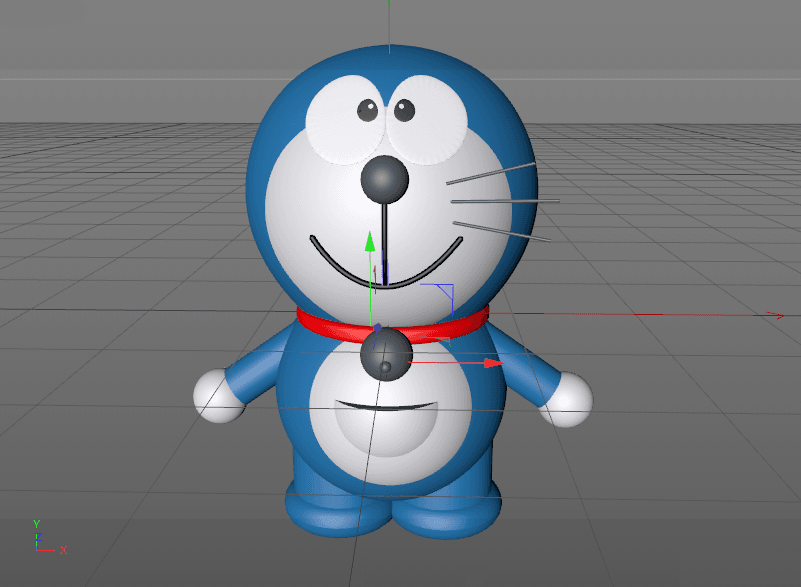
Step 4. Adjust the position of all parts.

Part 4. Rendering

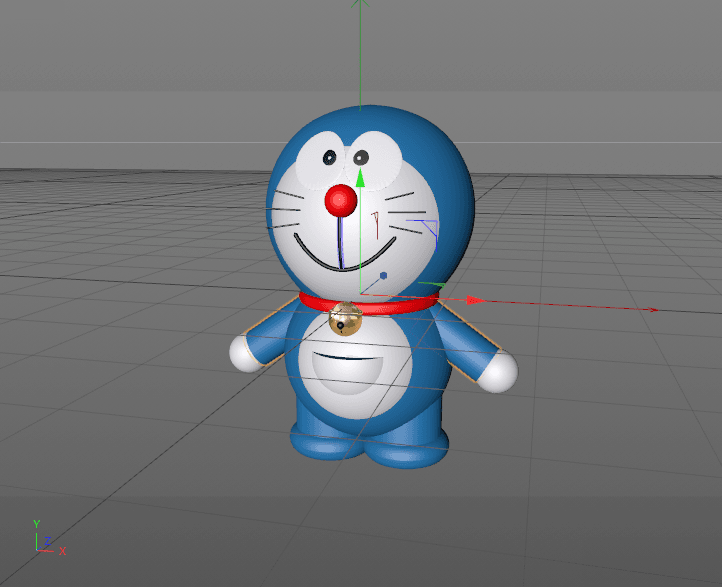
Create a new shader and set the texture to "gradient" in the color channel. Modify the color parameters to set the gradient to dark blue and light blue. In the bump channel, set the texture to "Simple Noise" to give the head and body a blue material. Copy a blue shader, set the color to white, leave the other parameters unchanged, and then give the face and body and hands. Also need to create a new gold shader, modify the color parameters, set H to "35.866%", set S to "100%", and set V to "70.196%". Add a "GGX" to the reflection channel and set the roughness to "15%". In the layer Fresnel, set Fresnel to "conductor", preset to "gold", and assign it to the bell.

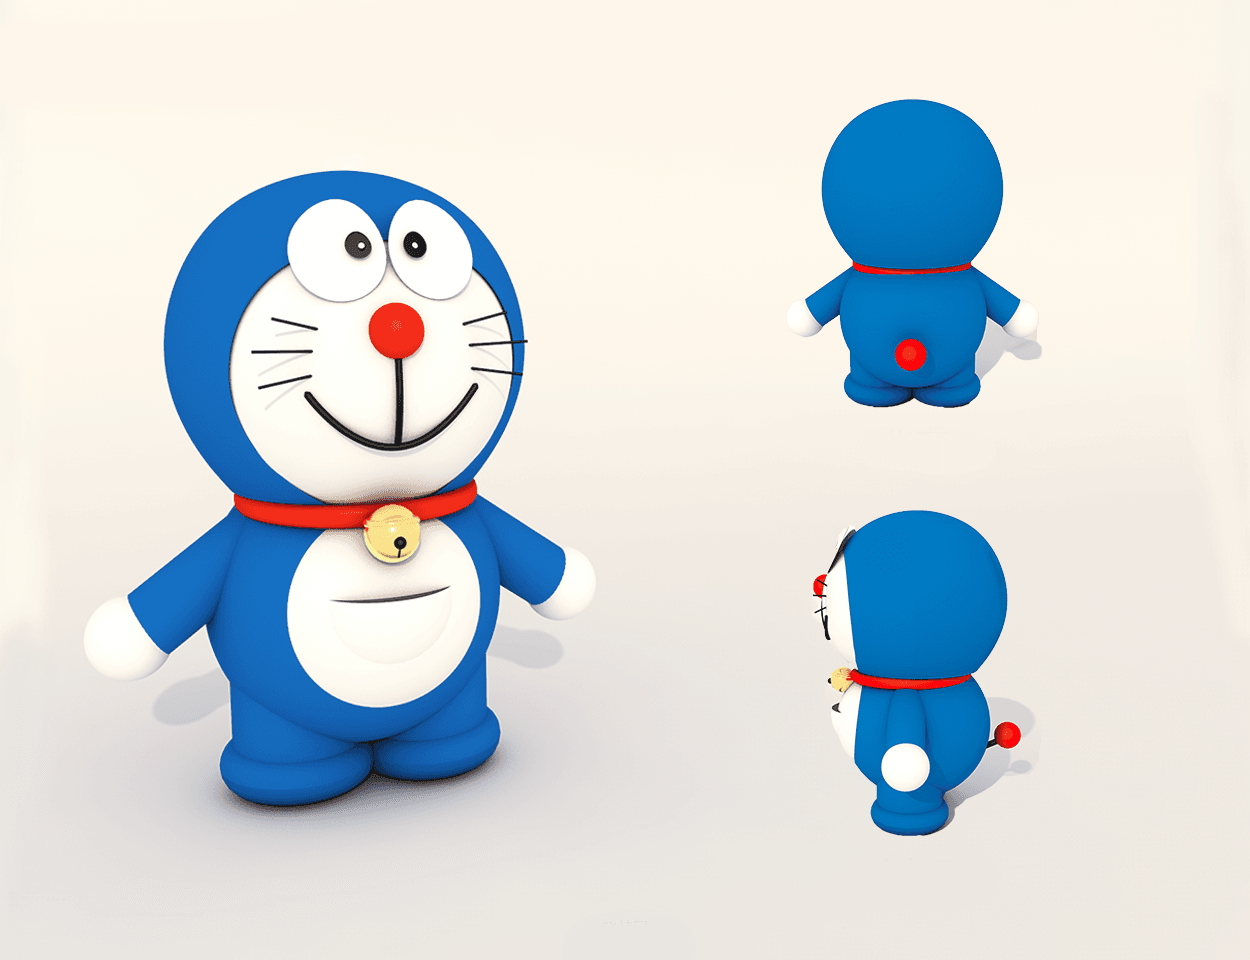
Set up a simple scene, the effect after rendering is shown below.

Fox Renderfarm hopes it will be of some help to you. As you know, Fox Renderfarm is an excellent cloud render farm in the CG world, so if you need to find a render farm, why not try Fox Renderfarm, which is offering a free $25 trial for new users? Thanks for reading!

Design by An Qi.

Welcome to join us

render farm free trial

Recommended reading


How to Render High-quality Images in Blender

2023-01-13


Top 9 Best And Free Blender Render Farms of 2024

2023-05-06


Revealing the Techniques Behind the Production of Jibaro "Love, Death & Robots", Which Took Two Years to Draw the Storyboard

2023-01-13


How to Render Large Scenes with Redshift in Cinema 4D

2022-06-09


Top 10 Free And Best Cloud Rendering Services in 2024

2023-09-26


Top 8 After Effects Render Farm Recommended of 2023

2023-02-02


How to Reduce Noise in Corona Renderer - Corona Denoising

2023-01-13


Arnold for Maya Tutorial: How to Render Wireframe

2023-01-13


Partners

Interested

Any Free Render Farm for Cinema 4d, Maya, 3ds Max?
I think you always search for a free render farm for Cinema 4d, Maya, 3ds Max, but you will find that a completely free render farm does not exist, to be honest, most of the platforms needs to charge due to the reasons below.1. Hardware costThe bigger the render farm network, the quicker the rendering speed. According to the top render farm companies such as FoxRenderfarm, they have over 30,000 physical servers, you can calculate the hardware cost.2. Maintaining CostNeed to rent a room in the data centre to place all of the rendering nodes. It would also be a large expense every year.3. Human Resource CostNeed a lot of specialists in customer service, technical support, research &x26; development, marketing.However, you can find out which render farm is the cheaper one, at the same time, you can get a free trial from the render farm. I would like to introduce Fox Renderfarm, the best cloud rendering service in the world. It has high compatibility, supports most mainstream software and plugins, including 3ds Max, Maya, Arnold, V-Ray, Redshift etc.Fox Renderfarm is a leading cloud rendering service provider in the industry. Since the operation in 2011, Fox Renderfarm has earned a good reputation for its quality performance, great customer service, and flexible pricing scheme. With over 20 years of experience, the pioneering core team served more than 200,000 users and top leading visual effects companies and animation studios from over 50 countries or regions, clients including multiple awards and Oscar winners.Web-based Cloud Rendering PlatformThe picture is the web-based interface of the platform,1. The upper right corner is message, guide, setting and account info;2. The left is rendering steps;3. The middle is the dashboard of render info.Desktop ClientThe picture is the desktop client interfaceReady for Windows and Linux users;Drag-and-drop batch submission;Submit your jobs inside your 3D software.**Ready For Windows*Supported Software:Maya 2015 64bit+ / 3ds Max 2014 64bit+Fox Renderfarm's Data Center is powered by 100% green, renewable energy:Hydro Wind turbinesPUE 1.2The users of Fox Renderfarm are making a big contribution to reducing greenhouse gas emissions and protecting our environment.If you want to learn more about Fox Renderfarm, we offer a US$25 free trial to new users, welcome to take an experience. Enjoy your cloud rendering journey with Fox Renderfarm!
More
2023-10-18
Is There Any Good Service for Cinema 4D Cloud Rendering?
Maxon's Cinema 4D is a powerful 3D computer animation, modeling, simulation and rendering software, and it is also widely considered to be one of the easiest 3D software to learn and use. The existence of Cinema 4D can be seen in the many works created by CG companies or artists. Cinema 4D also supports many renderers, such as Arnold, Redshift and Octane, which is a great help for its rendering.After making a scene or model in Cinema 4D, the last step of rendering sometimes takes a long time, and then your computer is also occupied with this work without being able to do anything else. The rendering speed depends on many factors, such as the amount of rendering work, camera, models, etc. So how to improve C4D rendering? As a leading C4D render farm and C4D cloud rendering service provider in the CG industry, Fox Renderfarm will introduce you some ways to speed up C4D rendering.How to Speed up C4D Rendering?1. Update your software and renderer to the latest version.2. Optimize the polygon mesh. For the far view you can reduce the number of unnecessary mesh faces.3. Optimize the objects or polygons in the scene as needed. Some places that the camera can't shoot, such as the reflection of lights, refraction, glossiness, etc., can be hidden or deleted.4. Reducing the rendering accuracy as needed can speed up the rendering speed.5. Use Cinema 4D cloud rendering service for batch rendering and speed up Cinema 4D rendering.There are many render farms that offer cloud rendering services for Cinema 4D, but here we introduce you Fox Renderfarm, which also supports renderers Arnold, Redshift and Octane.Advantages of Fox RenderfarmPowerful On-Demand RenderingMultiple Software &x26; Plugins Supported: 3ds Max, Maya, Arnold, V-Ray, Redshift, etc.CPU &x26; GPU Rendering Are Both AvailableSecure &x26; Confidential: TPN-Accredited VendorOscar-Winning Entries Service Team24/7 Live Customer Care &x26; Technical SupportMassive SSD Storage System to Solve the I/O BottleneckProgram to Help CG Students and Educators Realize DreamsLet's take a look at the tutorial for using C4D cloud rendering online.Step 1. Preparations for Cinema 4D web submission:1.1 Register to get an account with $25 free trial. In the case of web login, please visit web login for details.1.2 In the case of web transfer, please visit web-upload for details.1.3 Compare the local and could asset directories.Step 2. Cinema 4D web submission process (4 steps: submit > analyze > render > download):2.1 Click the “Submit” button on the left, select the software for submission > set a project path (Note: this project path contains all the materials used for the Max file) > select the document for rendering, after that, click “Continue”.2.2 Select software version and hardware configuration corresponding to the file (Note: selection of the rendering system), click "Go Analysis", and wait patiently for the analysis to complete.2.3 Click the job with “Analysis Done”, set render parameters and then submit it for rendering (Note: the actual rendering only starts at this job)2.4 On the rendering page, click the job > export the file > download.That is all about tutorial of Cinema 4D cloud rendering online. If you have anything else you don't understand, you can consult the customer service or your account manager, but remember to sign up to get an account, and the benefit for new users is a $25 free rendering voucher. If you are a student or educator, you can get a bigger discount, check out our GoCloud Program. Fox Renderfarm is always committed to providing better and more affordable cloud rendering services for everyone in the CG industry!
More
2023-05-06
What are topology and retopology of 3D models?
IntroductionIn this article, the best CPU &x26; GPU render farm and cloud rendering services provider, Fox Renderfarm, will tell you what are topology and retopology of 3D models and how to retopologize a model in C4D.When using 3D software for modeling, everyone has their methods and processes, and the construction of the same model will vary from person to person. But what makes a good model? If a model is poorly structured, how to optimize it? These problems involve the topology and retopology of the model. With these questions, let's take a look at what problems we need to pay attention to in the modeling process.What are topology and retopology?Traditional topology is a subject related to mathematical geometry, but we discuss the topology concepts related to 3D modeling here. Now let's understand the topology, and then the retopology.•TopologyWe know that a model is represented in 3D software by a series of surfaces combined at different angles. In my opinion, the topology of 3D modeling is the structural distribution of the surfaces of a model, which is wiring. There are so many ways to combine surfaces when trying to represent and make a 3D model. For example, look at the cube below, although the distribution of surfaces is inconsistent, the appearance looks exactly the same.Each model has its own topology. Some are industrial models exported by industrial design software, such as ProE and SolidWorks; some are made by scanning or other reverse engineering; some are the common model format, such as *.obj, *.fbx, etc. that are exported by different 3D software. Here comes a problem: even if it is the same model, the topology generated in different ways can sometimes give us troubles in the subsequent animation and reprocessing.•RetopologyOnce you understand topology, retopology is straightforward. It is about reconstructing and representing the same model, using a better topology-a more appropriate distribution of surfaces.When retopologizing a model, it will pay more attention to using an appropriate number and size of surfaces to represent a model. And if you need to make point level animations (character’s body animation, cloth, etc.), you should pay more attention to building out some ring and loop structures, so that you can deal with the unsatisfactory animations (such as model collision, overstretching, etc.) produced after extrusion and stretching the surfaces.What is a good topology?First of all, making a good model should try to avoid triangular surfaces and n-gon surfaces connected by more than 5 edges, and try not to make poles with more than 5 edges in important positions. Otherwise, crossed surfaces or unsmooth effects may appear in these places when making subsequent point level animations. For example, for models designed by industrial software, there are a lot of triangular surfaces after the format is converted, and it will be troublesome to create chamfering effects or add subdivisions for these edges.Secondly, a good model should have a good edge flow, which is not only convenient for selection, but also offers a good tension during subsequent animation production.Some positions that need to be animated, such as eyes and mouth, should be modeled with appropriate structures and enough surfaces to support the animation details.What are the benefits of retopology?•A good topology can make the animation betterModels with reasonable structures will show better modeling when it is squeezed and deformed. As three cubes with different topologies that are shown below, some surfaces of them will be torn after they are twisted to a certain degree.•Models with good topology will be reworked more efficientlyFor these models, when we want to add chamfers or add some details to them, we can quickly modify a specific part of the surface. However, for models with unsatisfied wiring, we can only add details by increasing the distribution of modification lines again, which will be inefficient for some complex structures.•Retopology allows for faster mappingFor the production of some mapping, the stretching of UV is needed. If the density of different areas of the model is so different, or if there are both triangular surfaces and N-gons, it will make our work very tedious. So after retopology, the model can make the production and performance of material mapping become more effective.What are the ways of retopology in C4D?There are not many ways to retopology in C4D, but we usually use other software's retopology function to improve the modeling. I will introduce 3 methods of retopology as follow.•Remake some parts of the modelFor some parts with simple structures, it can be made directly through geometry, and then connecting these parts to the model.For some surfaces, shrink wrap and polypaint can be used to retopologize parts of the structure. For example, use shrink wrap to fit some evenly distributed surfaces to the model, and then optimize and merge the structure.•Using volume objectsIn the version after R20, using volume objects can directly generate a model with relatively uniform wiring, but there is not much room for manipulation, and sometimes the edges are not ideal. And if you want more details, you have to produce a lot of surface models.•Using QuadRemesherIn addition to the two methods above, we can also use the QuadRemesher plugin for retopology. For this plug-in, the developer has only released and tested the version applied to Maya and 3ds Max before. Recently, the C4D version has finally come out. I can say that C4D did not have an easy-to-use retopology plug-in before, so the release of QuadRemesher allows us to save more time. Its use is also very simple. Only need to adjust the number of generated surfaces, size and density, you can directly get an ideal model.ConclusionRetopology can help us get a more satisfied model, but how to build and process a model depends on our production needs. Here is a good guide article for you to know more: 3D Modeling Tutorial: Handheld Fan. If you want to create your work using the shape of the model only, then you can just create the shape that meets the needs. If you want to make mapping, animations and others for the model, then you should add lines appropriately according to the requirements of the animation. The model structure can improve the efficiency for the later stage.After the model is built, if you are not too pleased with the effect of C4D rendering, you can look for a cloud rendering farm like Fox Renderfarm to help you render. Hope this article helps you!
More
2022-07-05
  • Foxrenderfarm

    Powerful Render Farm Service

  • TPN
  • TPN

    Business Consulting

    Global Agent Contact:Gordon Shaw

    Email: gordon@foxrenderfarm.com

    Marketing Contact: Rachel Chen

    Email: rachel@foxrenderfarm.com

    Connect with Us

Fackbook Customer Reviews