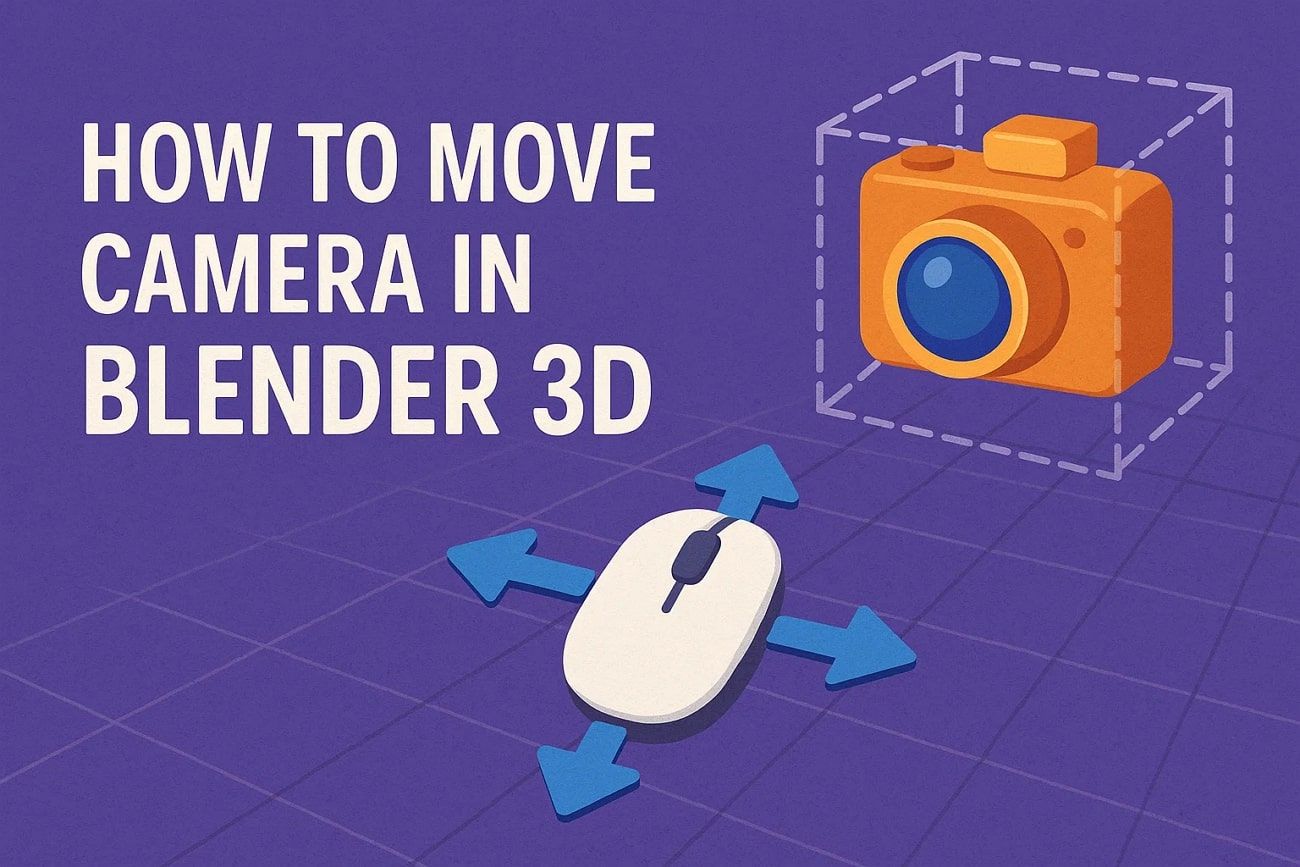
Step-by-Step Guide for Smooth Blender Camera Movement
Although Blender looks complex at first, learning camera control makes it far easier. Many beginners think moving objects also moves the camera, but that’s not true. Therefore, understanding Blender camera movement helps create perfect angles and realistic scenes in projects.
This guide explains every step of moving camera in Blender clearly, from adding a camera to using advanced tools. You'll find it easy to move and control the camera with a few tricks.
Part 1. What is a Camera in Blender?
A camera in Blender is a special object that shows what part of a scene you will see. It helps you decide the view for your pictures or animation renderings. You can change its position, rotation, and settings to frame shots perfectly.
Understanding how to move camera in Blender is essential for controlling the scene's viewpoint and creating smooth animations. Cameras have properties like focal length and lens type, helping simulate photography. Many individuals mentioned that initially, they tried moving objects instead of the camera, which caused unexpected results.
>> Related: Easy Cel Shading Tutorial for Cartoon in Blender Within 2 Minutes
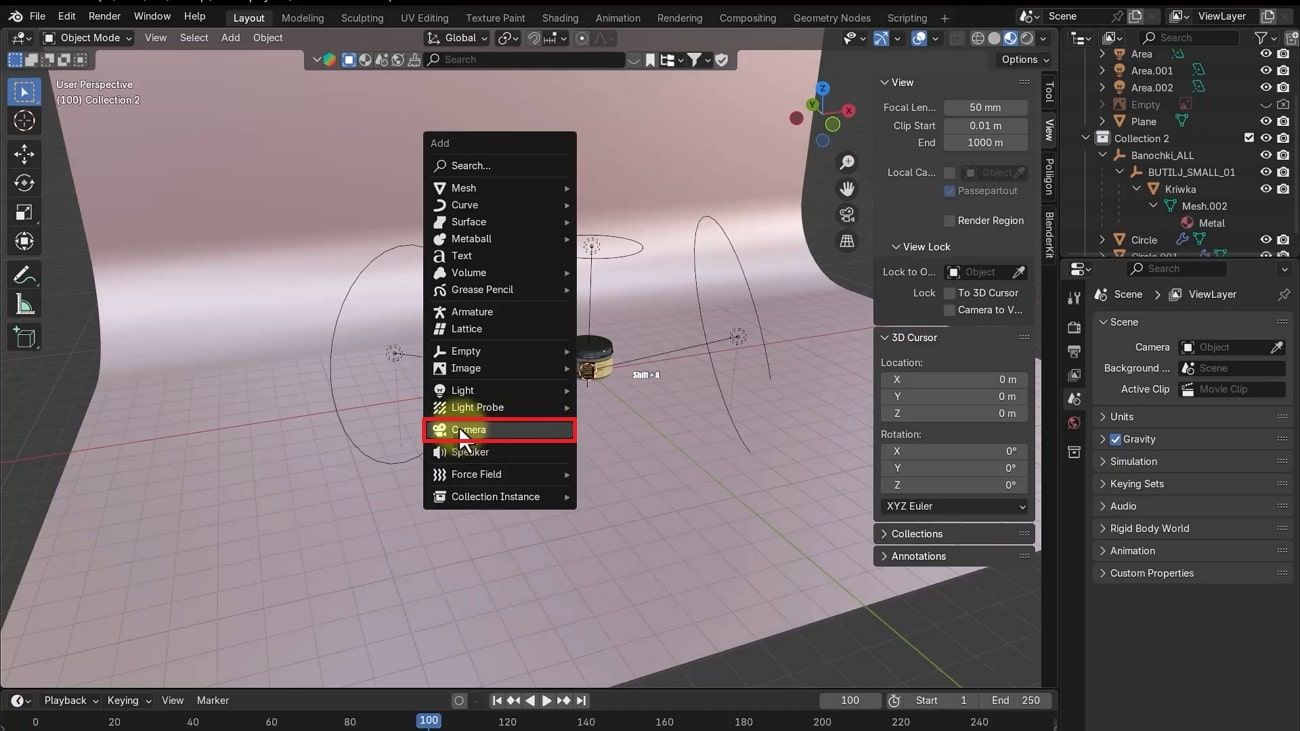
Part 2. How to Add a Camera in Blender?
Adding a camera in Blender is simple and gives complete scene control. You can position it anywhere to adjust lens settings and preview exactly what will render. The camera allows you to compose and replicate real effects such as depth of field. So, take guidance from the given steps in order to add a camera to your Blender:
Initially, the keys "Shift + A" are pressed simultaneously in the 3D Viewport to invoke the menu of the Add. From the displayed list, choose “Camera” to create and place a camera object.
Part 3. 5 Methods to Move the Camera in Blender
There are several easy ways to change your camera position and angle in Blender. So, this part shows you 5 different ways to understand how to move the camera in Blender:
Method 1. Move the Camera with Basic Controls
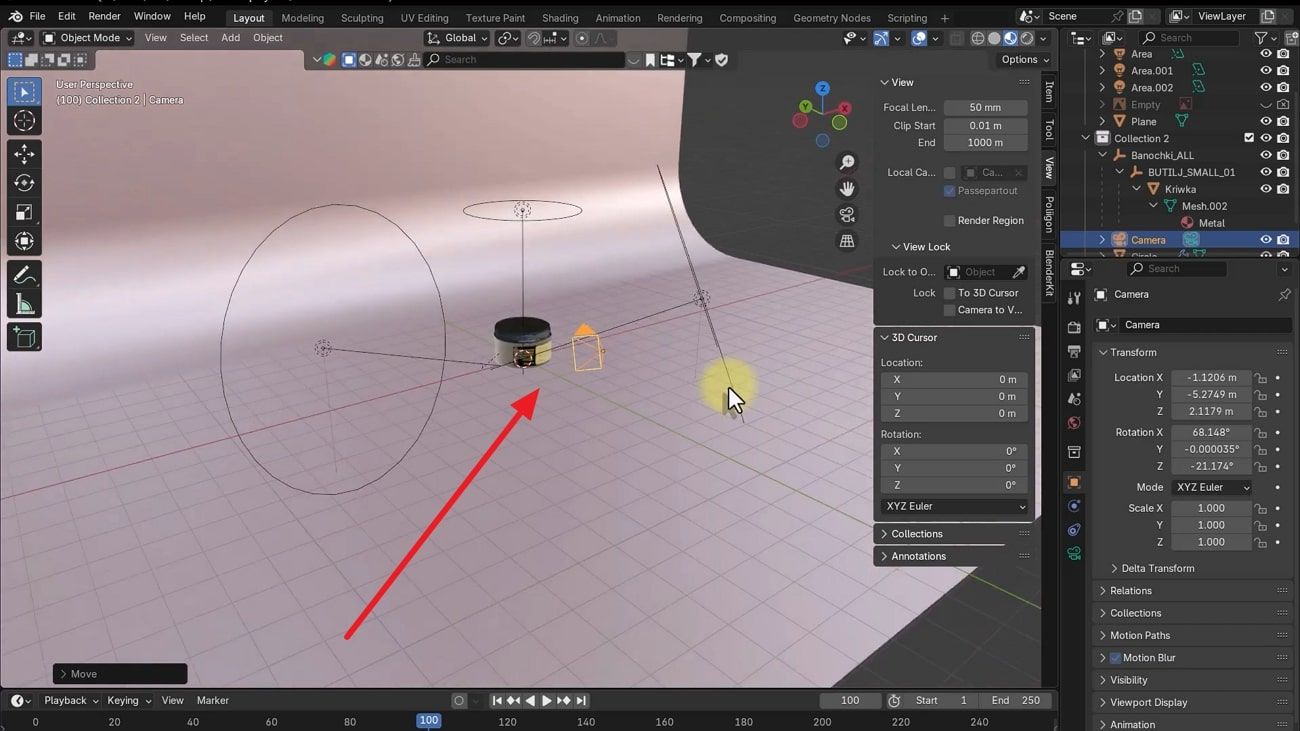
Using basic controls lets you quickly adjust camera position and angle in Blender. You can rotate and slide the camera freely to frame your scene perfectly. It’s a basic but effective way to position your camera exactly where needed. Review the following steps to know how to Blender camera move:
When a new camera appears at the current 3D cursor or default scene position, select it, press “G,” and constrain with “X”, “Y”, and “Z.”
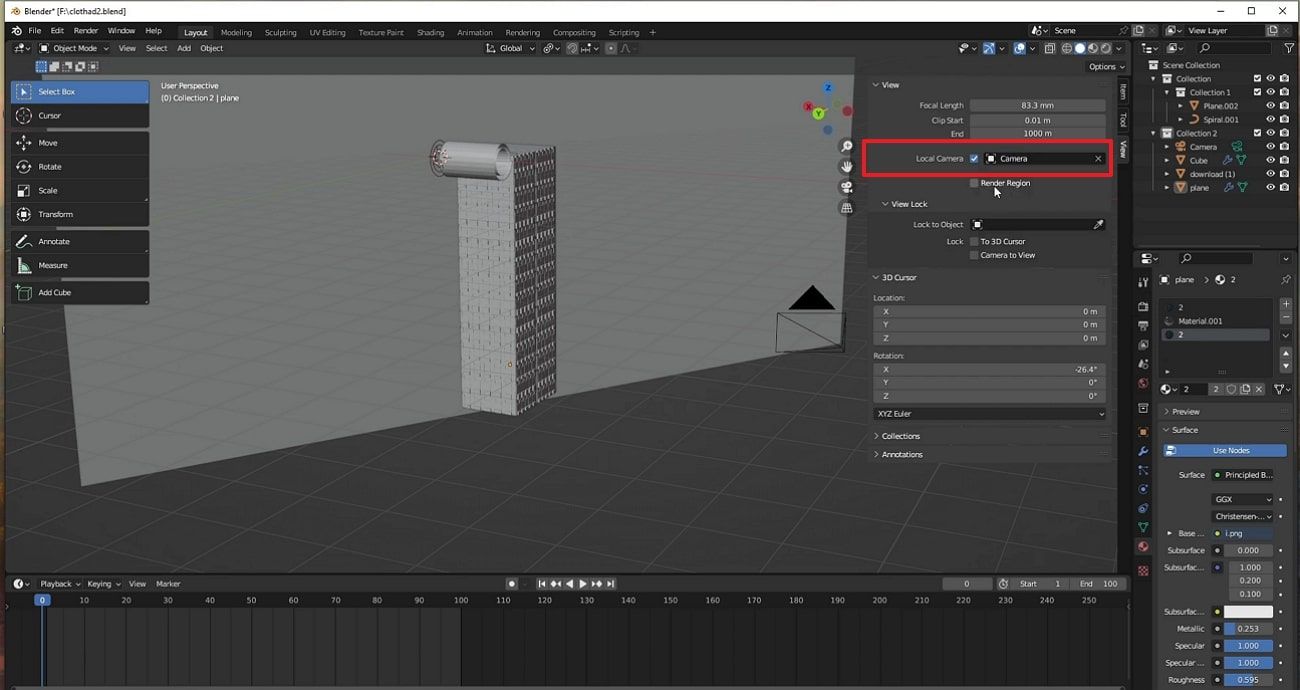
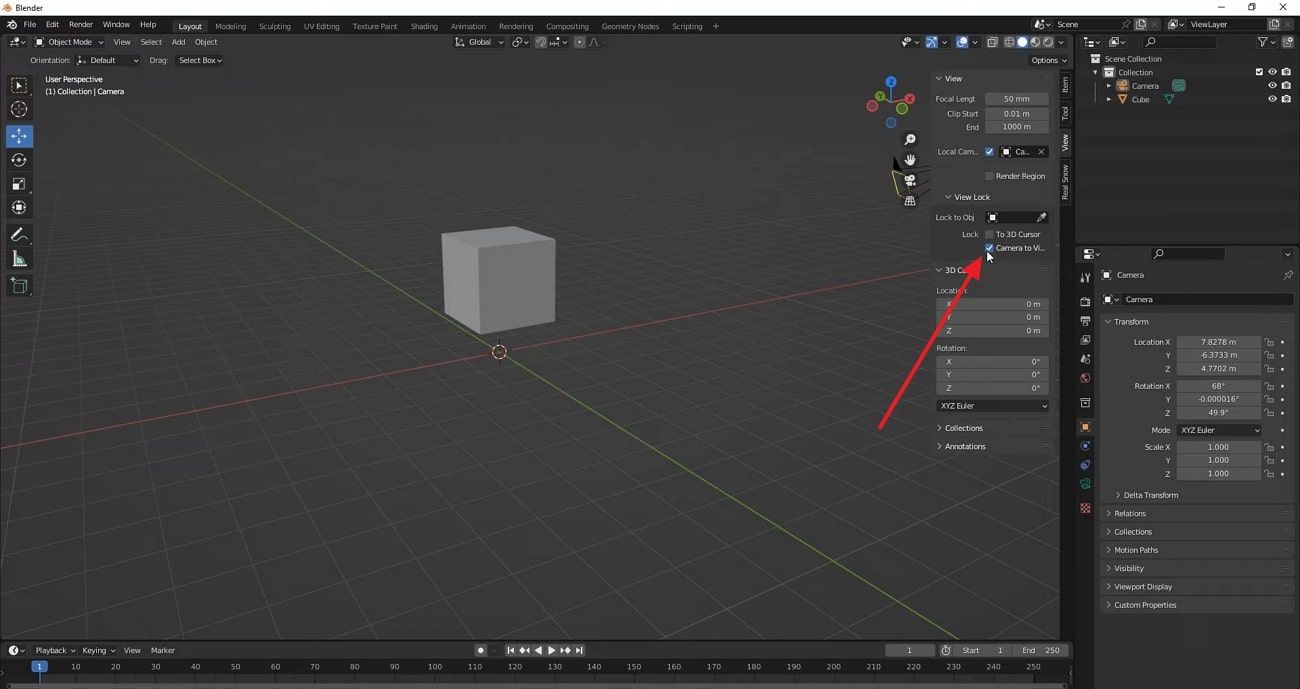
Method 2. Lock Camera to View
Locking the camera to view allows you to move the scene while keeping the perspective. This feature links viewport navigation with the camera, making framing easier. You can zoom and pan naturally to see precisely what the camera captures. Thus, go through the given guide to lock your camera:
Step 1: Press “Numpad 0” to switch into the active “Camera View” in your scene. Subsequently, hit “N” to open the sidebar and navigate to the “View” tab to access settings.

Step 2: Here, find and enable the “Camera to View” option under the “View Lock” section.
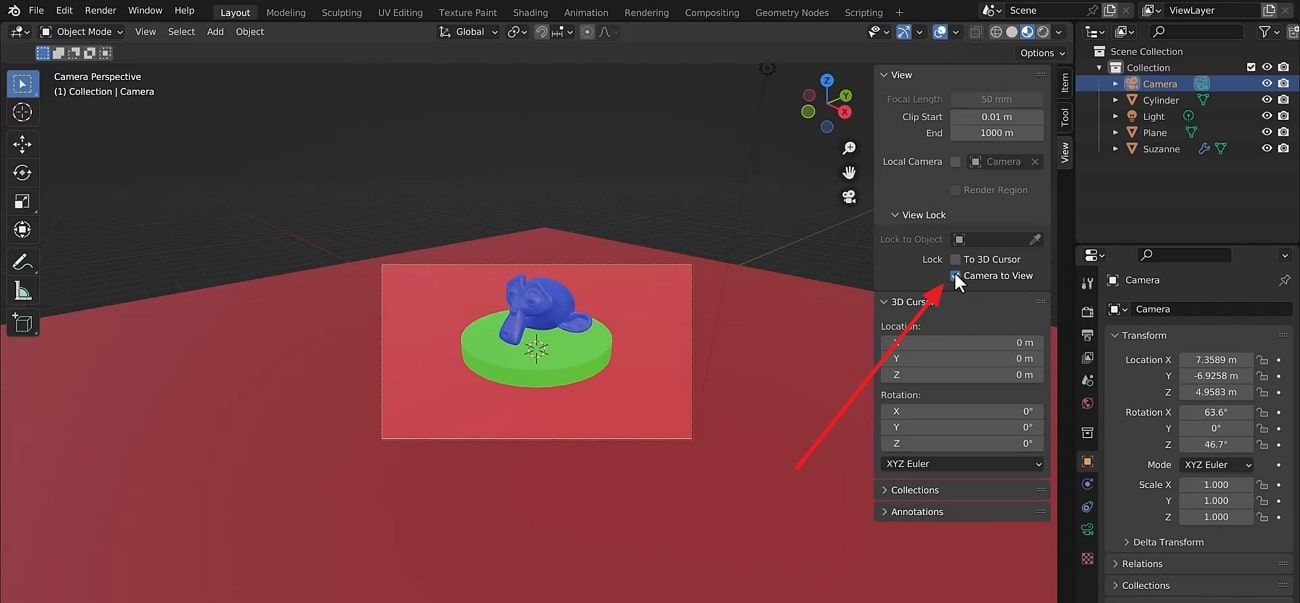
Several beginners and pros found the Lock Camera to View feature especially helpful for quickly framing their first scenes.
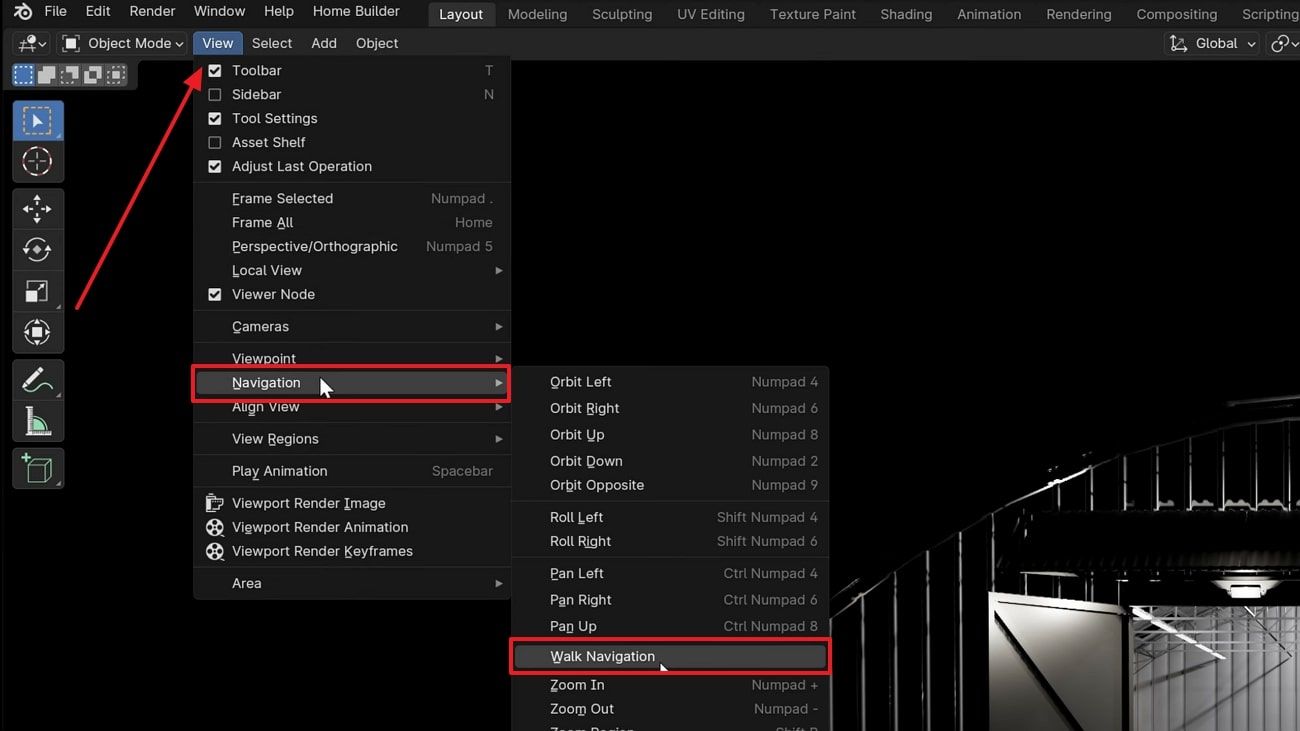
Method 3. Fly/Walk Navigation (First-Person Style)
Fly or walk navigation basically lets you move the camera like a first-person view. You can explore scenes freely while flying through objects and adjusting angles easily. This method gives precise control over camera paths, ideal for walkthroughs. Adhere to the steps below to learn how to move the camera through the lens in Blender:
Head to the “View” tab to access the “Navigations” section and opt for the “Walk Navigation” option.
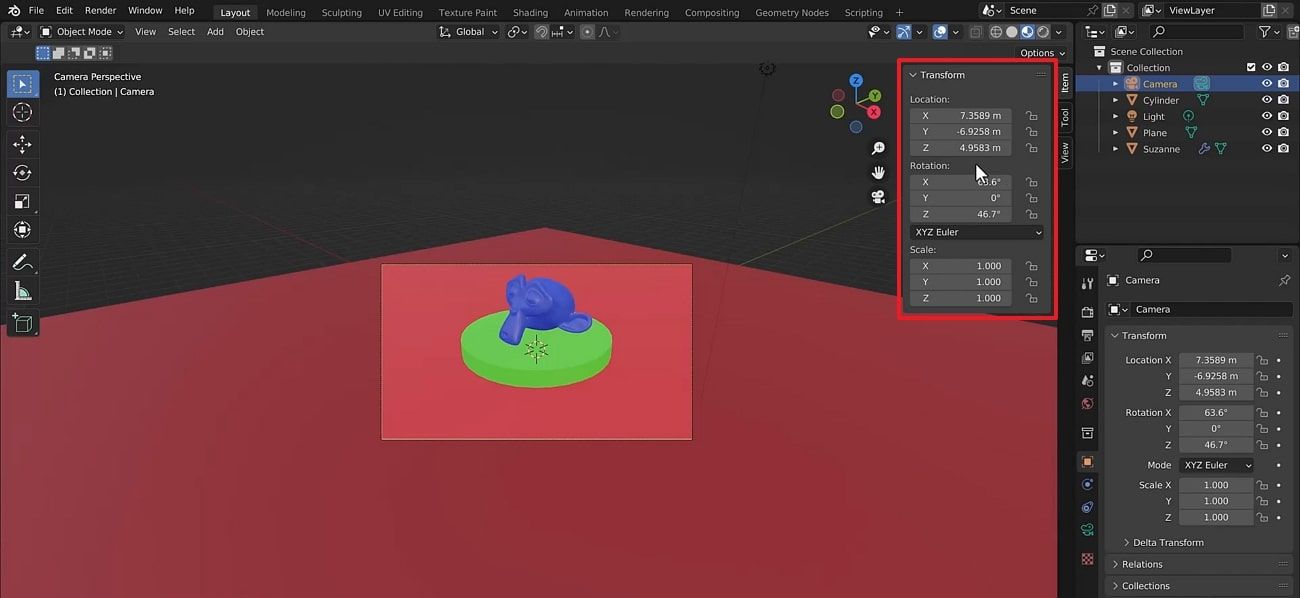
Method 4. Adjust Camera Transform from Sidebar
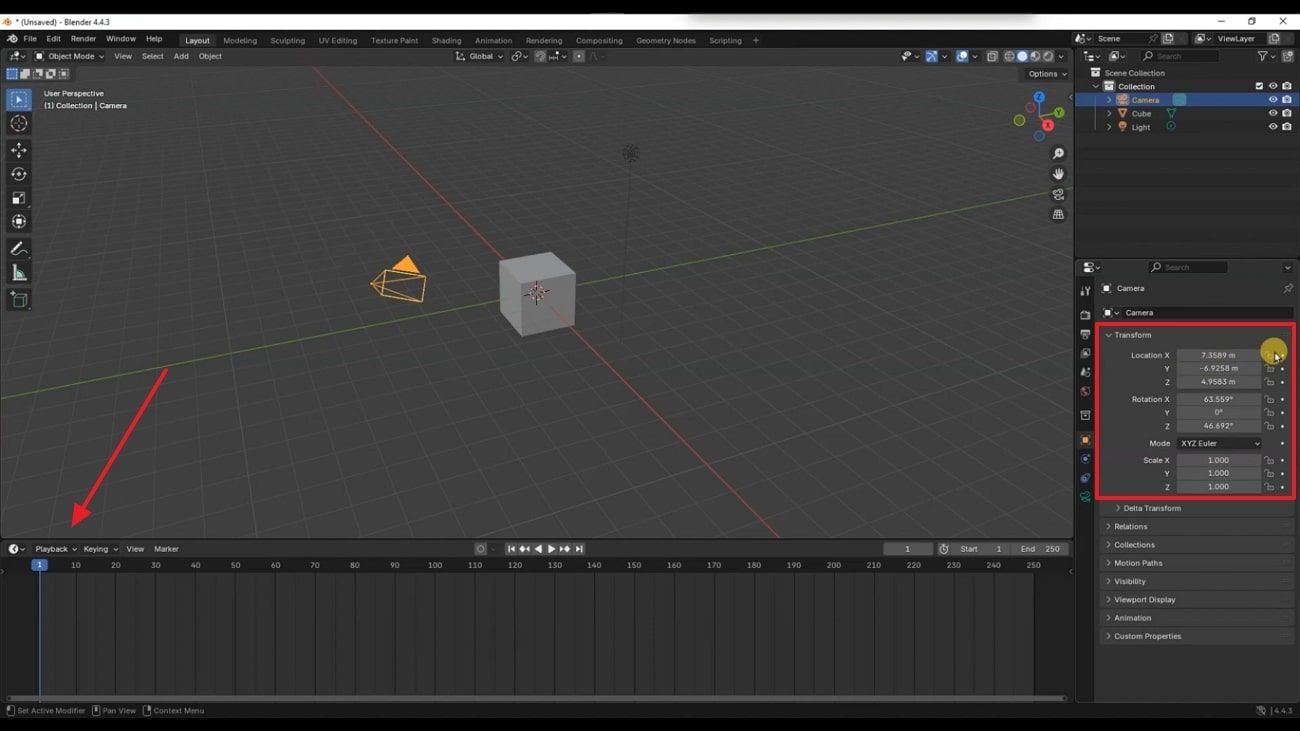
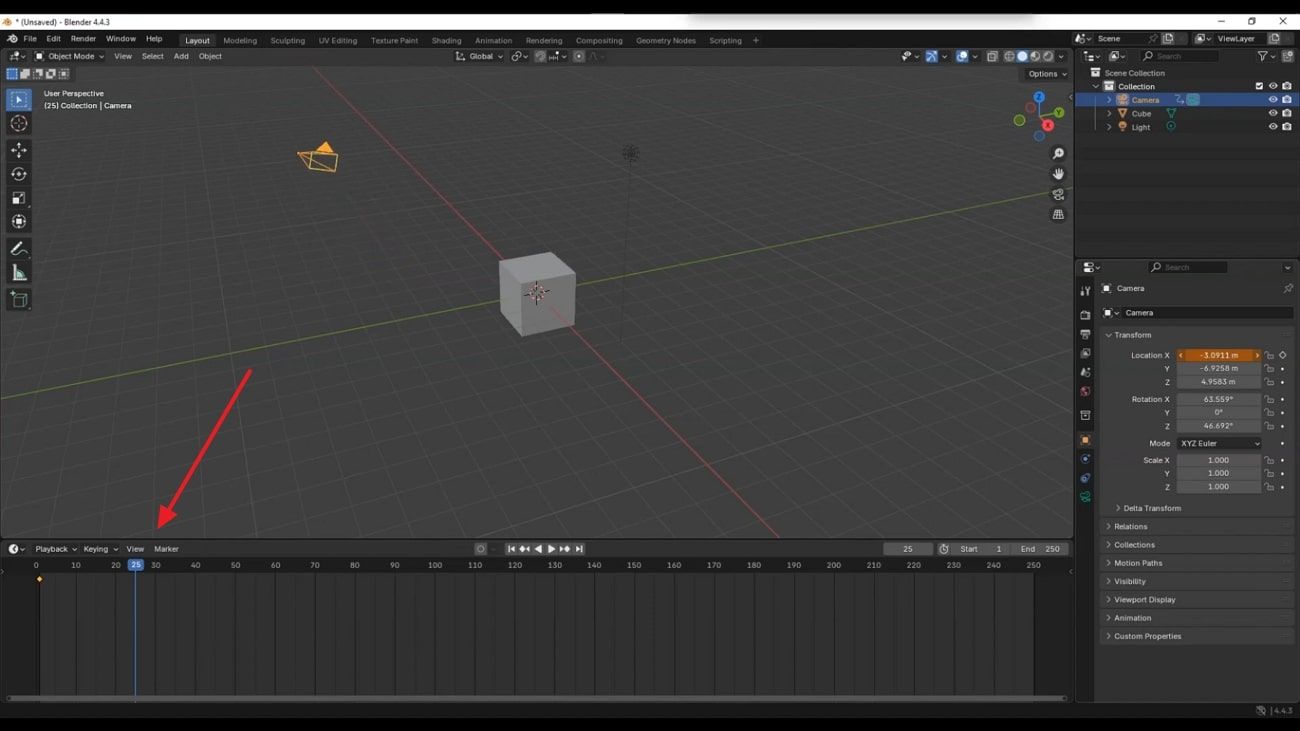
Adjusting the camera transform from the sidebar lets you enter the exact position. You can control location and scale numerically for precise framing. Also, using these tools simplifies Blender camera movement. So, let’s explore how you can adjust the camera transform from the sidebar:
To initiate, click on the camera in the scene or select it from the Outliner. Afterward, press “N” in the 3D Viewport to access the “Item” tab. You can then access the “Transform” panel containing Location, Rotation, and Scale properties for the camera.
Method 5. Use the Camera Gizmo
The camera gizmo provides on-screen controls to move and scale your camera easily. You can click and drag arrows or circles for precise adjustments, making framing faster and more visual. Faster and more visual. You follow the steps for easy and visual Blender camera move control:
Enable the “Transform Gizmo” by clicking the Move, Rotate, Scale, or combined icon. Following this, select the camera; colored handles in red, green, and blue will appear. Drag arrows to move, circular rings to rotate, and handles to scale the camera.

Part 4. How to Animate a Camera in Blender?
Animating a camera in Blender lets you create smooth motion and dynamic shots easily. You can set keyframes for position, rotation, and lens settings over time. This method allows precise control of angles for storytelling or walkthroughs. After learning how to move camera Blender, you need to go through the steps to animate your camera:
Step 1: Select the camera in either the “3D Viewport” or the “Outliner” panel. Afterward, move the “Timeline” cursor to the starting frame, such as frame 1. Hover over the 3D Viewport or camera properties, press “I,” and insert a keyframe.
Step 2: Advance the “Timeline” to a later frame, adjust the camera, and insert another keyframe. Play the animation to see the camera move between the set keyframes.
Part 5. Advanced Camera Movement Techniques
Advanced camera techniques help create professional and dynamic shots in Blender. The given points allow precise control over movement and angles while learning how to move the Blender camera effectively:
1. Camera Targeting: You should use an Empty object for the camera to track automatically. This ensures the camera always points at moving objects precisely.
2. Path Follow: Attach the camera to a curve and add a "Follow Path" constraint. Animate progress along the route for smooth, repeatable tracking movements in your scene.
3. Handheld Shake: Simulate handheld motion by adding subtle random location and rotation changes. Consequently, it generates realistic and dynamic shots in an effective way.
4. Dolly Zoom: As the lens is zoomed in the opposite way, move the camera in the forward direction. This creates a dramatic vertigo effect for cinematic impact.
5. Motion Tracking: Tracking tools in Blender can be used to align the virtual camera with the reality footage. Hence, it will eventually facilitate the live-action shots of 3D elements.
Part 6. Quick Fixes for Common Camera Movement Problems
Apart from the above, you might also face issues when adjusting camera angles in Blender. Therefore, knowing quick solutions from the following parts improves Blender camera movement:
Problem 1: Camera Won’t Move
Many times, the camera seems locked and doesn't respond to movement commands. This issue usually happens when objects are selected incorrectly or when constraints are active. Checking these settings fixes the problem and lets you control the camera again. Thus, go through the given steps to resolve the issue when the camera won't move:
Enter Camera View using “Numpad 0,” then press “N” to open the sidebar and switch to the “View” tab. Enable the “Local Camera” option and make sure your active camera is selected there. Also, check whether “Lock Camera to View” is turned on; disable it if the camera moves unintentionally.
Problem 2: Camera Keeps Rotating
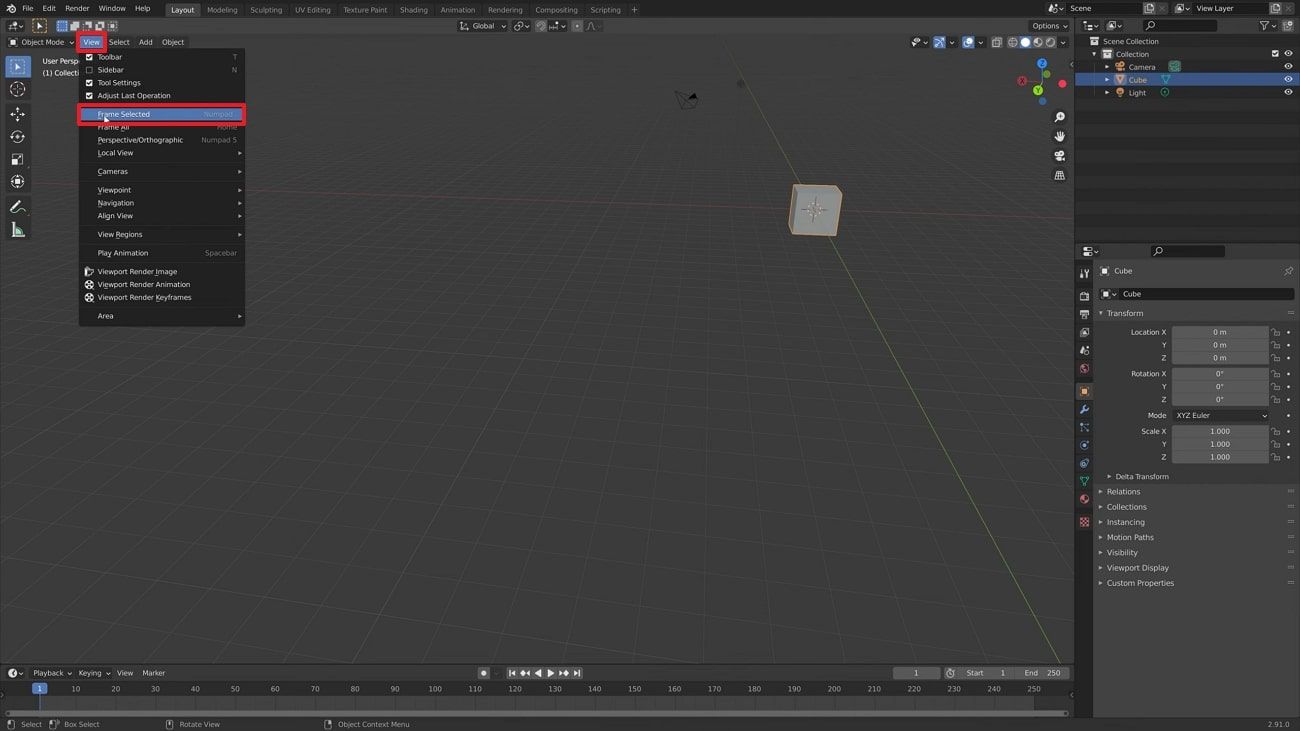
This occurs due to unwanted constraints or parenting affecting the camera's rotation. Another cause is faulty keyframes that create unwanted rotation between frames. Fixing these settings restores standard control and helps beginners easily move the camera blender without confusion. Following these steps allows you to move the camera without strange rotations:
To initiate, you need to select your main object and then head to the “View” tab. Afterward, opt for the “Frame Selected” option to reset the viewport orbit.
Problem 3: Can't Find Camera
Losing the camera in a busy scene is a common issue for many beginners. This problem usually occurs when the camera is moved far from objects or hidden mistakenly. You can also focus on it quickly to regain control. Therefore, you can go through the guide below to resolve the issue when you can’t find the camera:
When you can’t find the camera, head to the “View” tab and disable the “Camera To View” option under “View Lock.”
Part 7. Best Way to Render Animation Fast in Blender
Many times, rendering can become slow when scenes grow complex, especially after detailed Blender camera move work. This makes artists search for faster and safer ways to finish animation output quickly. To cater to this need, Fox Renderfarm offers a powerful cloud rendering service that speeds up production significantly. It provides thousands of render nodes that activate instantly for fast project processing at any time.
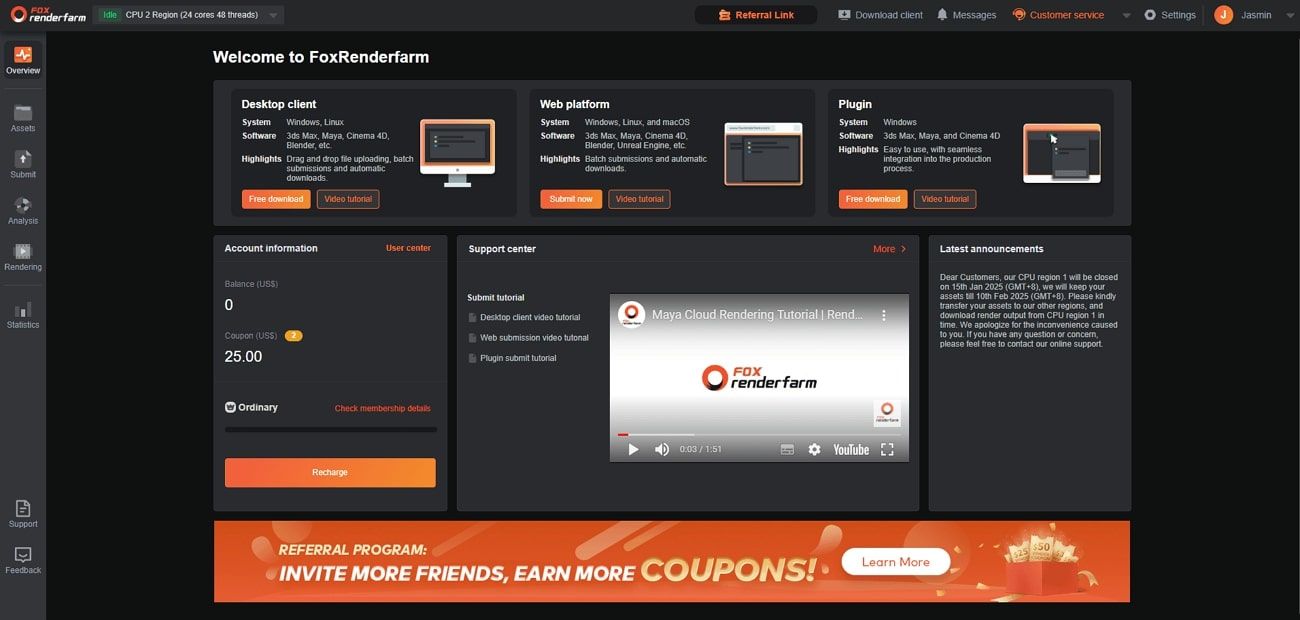
Moreover, this advanced and dedicated render farm supports CPU and GPU rendering to meet different project needs easily. It identifies your software environment automatically and manages resources automatically. Fox Renderfarm is also compatible with Windows, macOS, and Linux, while offering a high level of uptime. Moreover, API integration allows the groups to get Fox Renderfarm seamlessly integrated into their pipelines. Hence, artists praise the cloud render farm for drastically speeding up their workflows.
Key Features
1. Speed Transmission: The Raysync technology allows for fast uploading and downloading of large project files. It minimizes transfer delays and keeps work moving effortlessly.
2. Vast Storage: Fox Renderfarm even provides ample SSD storage that handles heavy project data without issues. This storage reduces loading time and keeps essential files safe during the entire process.
3. Strong Security: The ISO 27001 certification guarantees high security levels for the information of your projects. There is a professional level of confidentiality and privacy.
4. Software Support: It is also compatible with various famous software, including 3ds Max and Unreal Engine. This broad compatibility supports all major 3D creation and rendering software.
5. Automatic Error Detection: The system detects common rendering errors automatically before the job fully starts. It avoids wasted time and helps artists correct problems before losing resources.
Part 8. FAQs about Blender Camera Movement
1. Why can't I move my camera?
The camera may have transform locks or active constraints that prevent normal movement completely. You might also have “Lock Camera to View” enabled, limiting navigation outside camera view. Many times, selection restrictions can also stop camera movement until the settings are reset.
2. How to move the camera in Blender with no mouse?
You can move the camera using keyboard shortcuts like G for movement and R for rotation. Use X, Y, or Z after these keys to control movement along specific scene axes. Press Numpad 0 for camera view, then navigate using the arrow keys without a mouse.
3. What is the easiest camera movement method for beginners?
The easiest method for beginners is enabling the helpful Lock Camera to View feature. It lets you move naturally in the viewport while the camera follows every step. This makes framing scenes simple because standard navigation automatically adjusts the active camera position.
Conclusion
To sum up, Blender becomes much easier once you understand basic controls and improve your Blender camera movement skills. The explored methods help you frame scenes better and create smooth shots in any project. When your scenes grow heavy and slow to render, using Fox Renderfarm helps finish animations faster with reliable performance.