How to Render in Maya: Step-by-Step Guide for Beginners
Rendering in Maya is the final step that turns your 3D models into polished images or animations. While the process may seem complex at first, understanding the basic workflow makes it much easier to get high-quality results.
In this guide, you will learn how to render in Maya step by step, including setting up lighting, applying materials, adjusting cameras, and choosing the right render settings for your project.
Part 1. Essential Render Settings and Tips for High-Quality Renders
According to Reddit, when rendering in Maya, the best choices for Arnold GPU are RTX 4090, RTX 4080 SUPER, or RTX 4070 SUPER. To know to what extent this is true, this section lists some of the best presets before you render your projects in Maya.
Start Fast: Best Presets for Beginner Maya Users
All the mentioned preset settings work well for simple product shots, small props, or tiny interiors:
1. The “Golden” Render Presets (Common Tab)
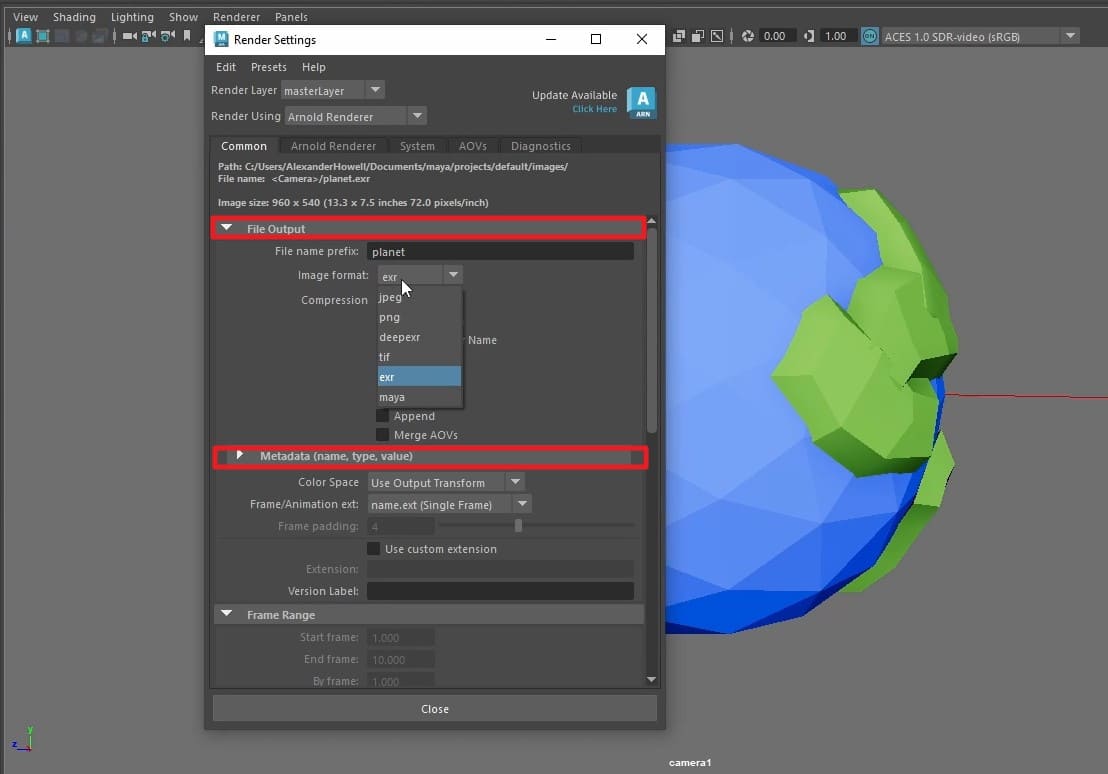
Before using advanced settings, go to Windows > Rendering Editors > Render Settings and stay on the Common tab.
- Image Size Preset: Use HD or 1080 for clear images without slowing your computer too much.
- File Format: Choose EXR or TIFF to keep quality; avoid JPEG files completely.
- Frame/Animation Ext: Change to name.#.ext so each frame gets a unique number automatically.
- Frame Padding: Set to 4 so file names are 0001, 0002, preventing software errors later.
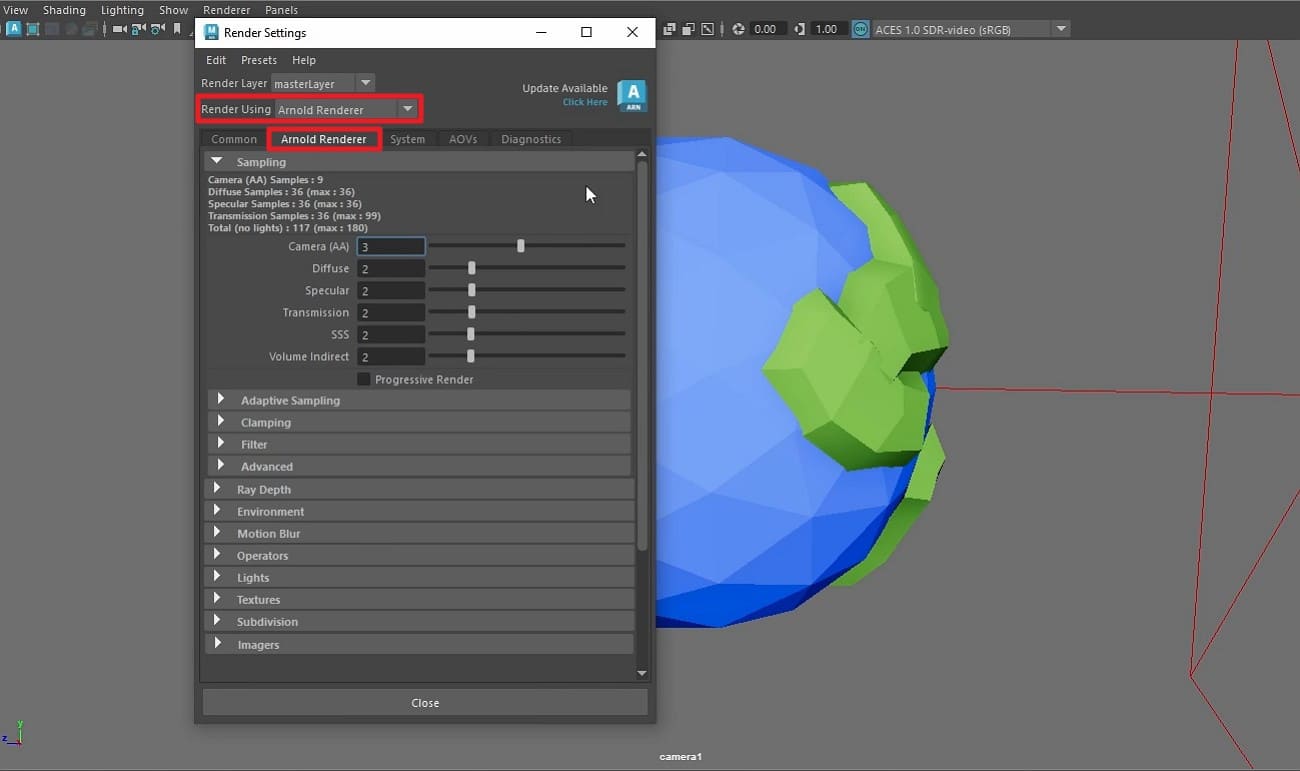
2. Arnold “Beginner Quality” Presets (Arnold Renderer Tab)
Use these sampling values to get a clean image faster while “rendering animation Maya.”
- Camera (AA) Quality: Set to 3 (Draft) or 5 (Final), as this is the master quality control.
- Diffuse & Specular Settings: It's better to set both to “3” since this handles your base colors and reflections.
- Transmission for Glass: If you have glass, set this to 3; if not, set it to 0 to save time.
- Subsurface Scattering (SSS): Set to 0 unless you are rendering skin or wax.
3. The “Don't Forget” Checklist
As you enable other settings, make sure the listed ones are not left untouched in Maya render:
- Renderable Camera: Set to your animated RenderCam, not the default perspective camera.
- Alpha Channel: Check it to easily remove or change the background later.
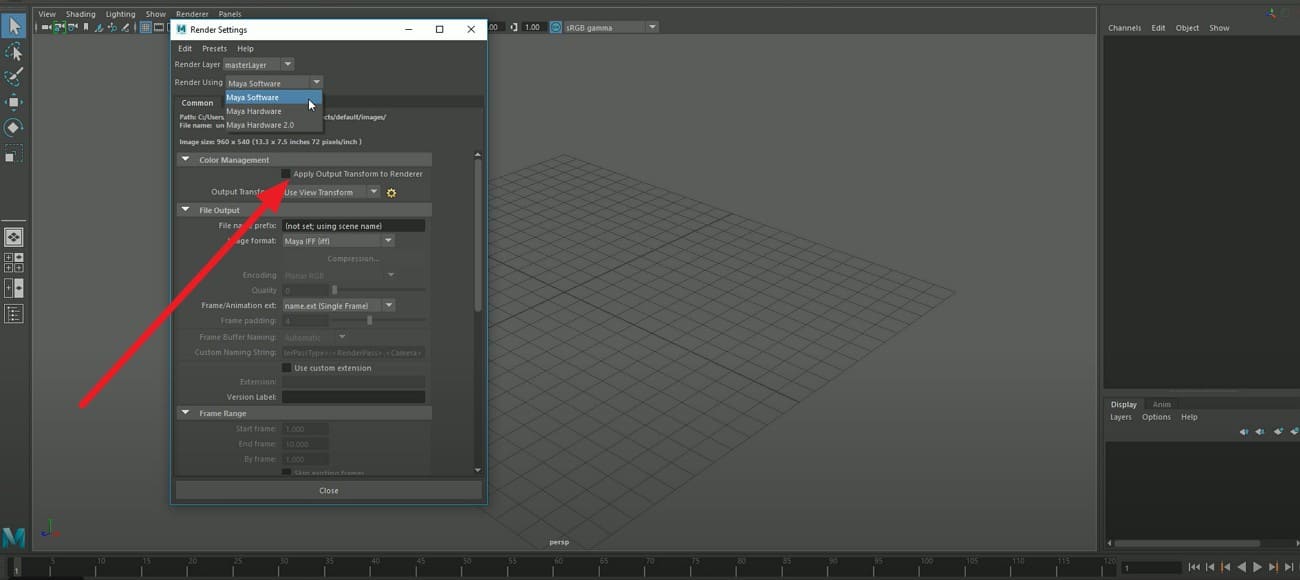
- Color Management: Leave “Apply Output Transformation” unchecked to keep colors exact.
Part 2. How to Render in Maya: Step-by-Step Rendering Process Explained
Forbes says that Maya is key for visual effects and production work. In this report, Emerson said it is reliable, has been used since 1998, and is well known among many skilled artists. So, if you want to count yourself as an expert artist, learn how to render animation in Maya via the simple guide mentioned ahead:
Step 1. Set Project and Basic Render Settings
First, prepare the scene and go to File > Set Project to ensure all rendered files are saved in the correct folder structure. Now, choose the “Render Settings,” such as image format, Frame/Animation Ext, and Start or End Frame.

Step 2. Select Arnold as the Render Engine
Within the Render Settings window, head to the “Arnold Renderer” tab, open the menu for “Render Using” and set it to Arnold Renderer. There, choose the desired settings for the rendering engine you prefer.

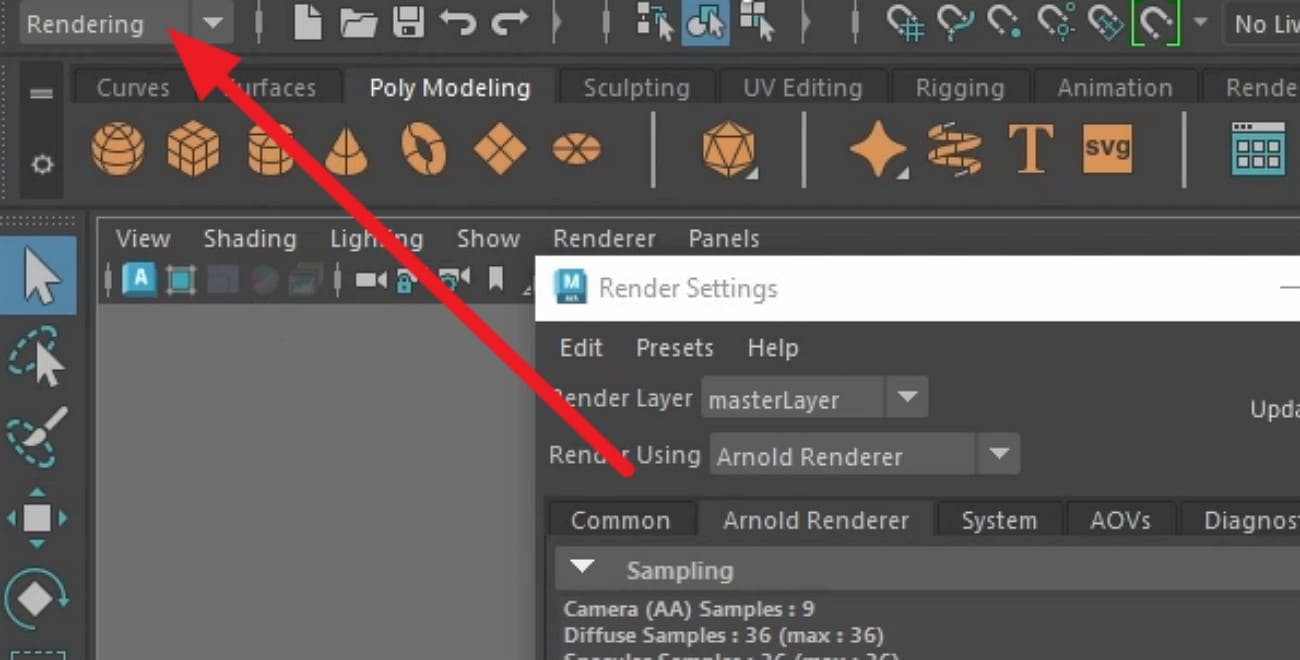
Step 3. Switch to the Rendering Menu and Choose Camera
Expand the menu for “Modeling” in the top left corner and set it to “Rendering.”
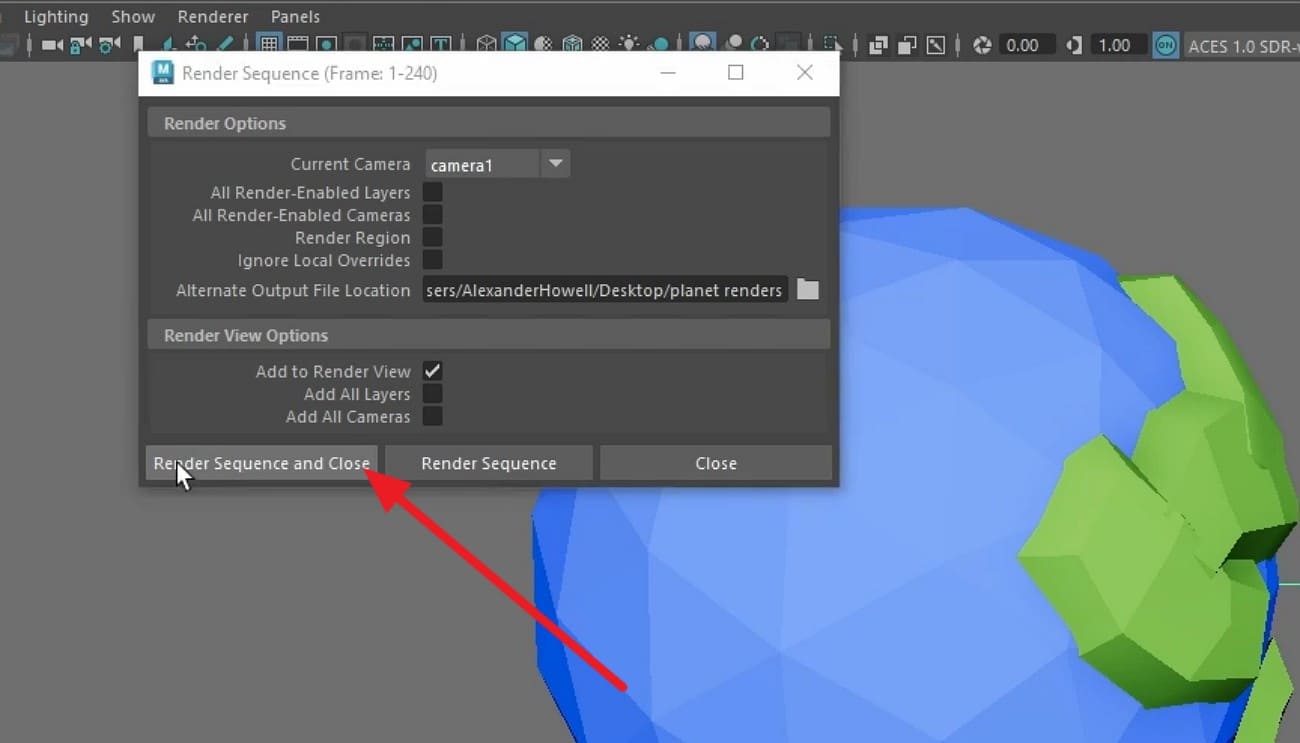
After that, go to the “Render” tab and uncheck “Render Sequence” if it's enabled, as you render the Maya project.

When the popup menu appears, check the correct “Camera” and press the “File” icon.
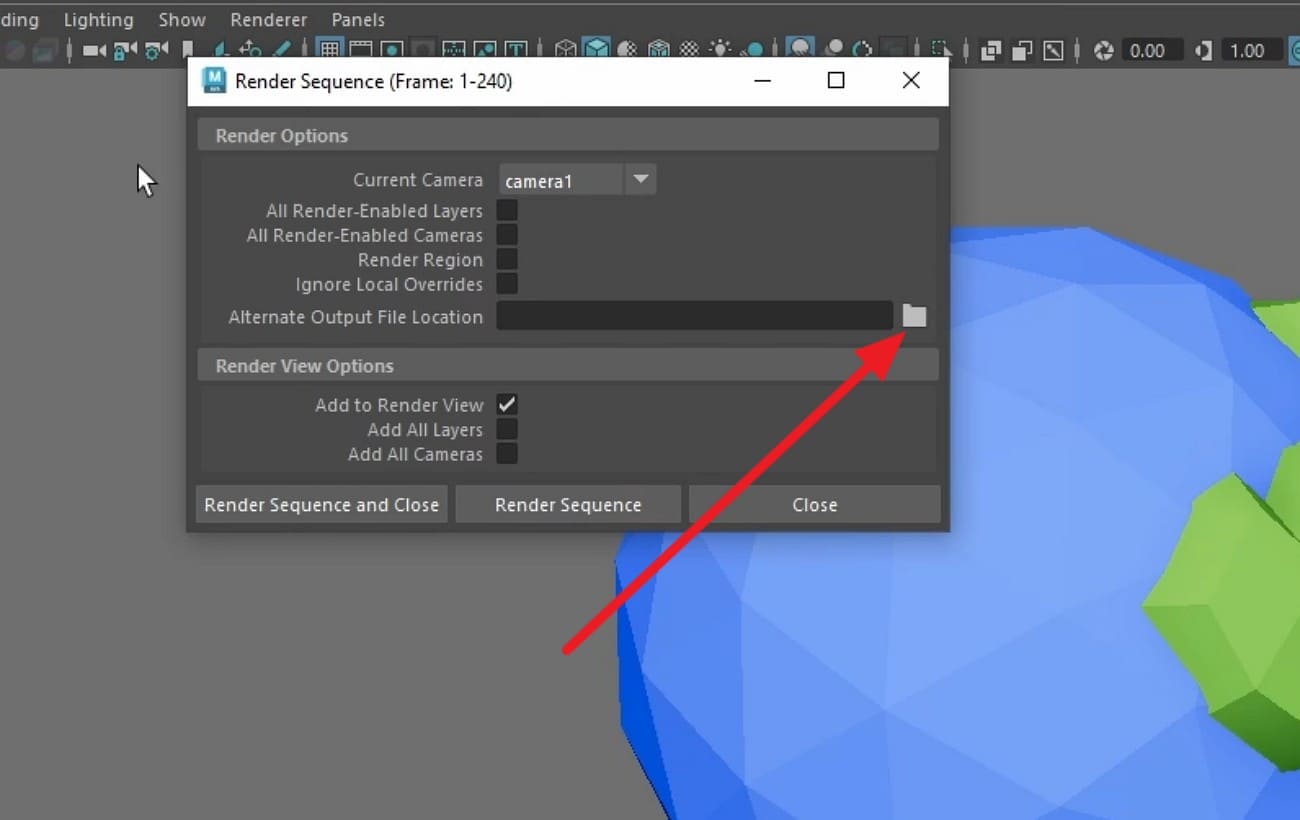
Now, select the project output location and tap on the “Render Sequence and Close” option to continue.
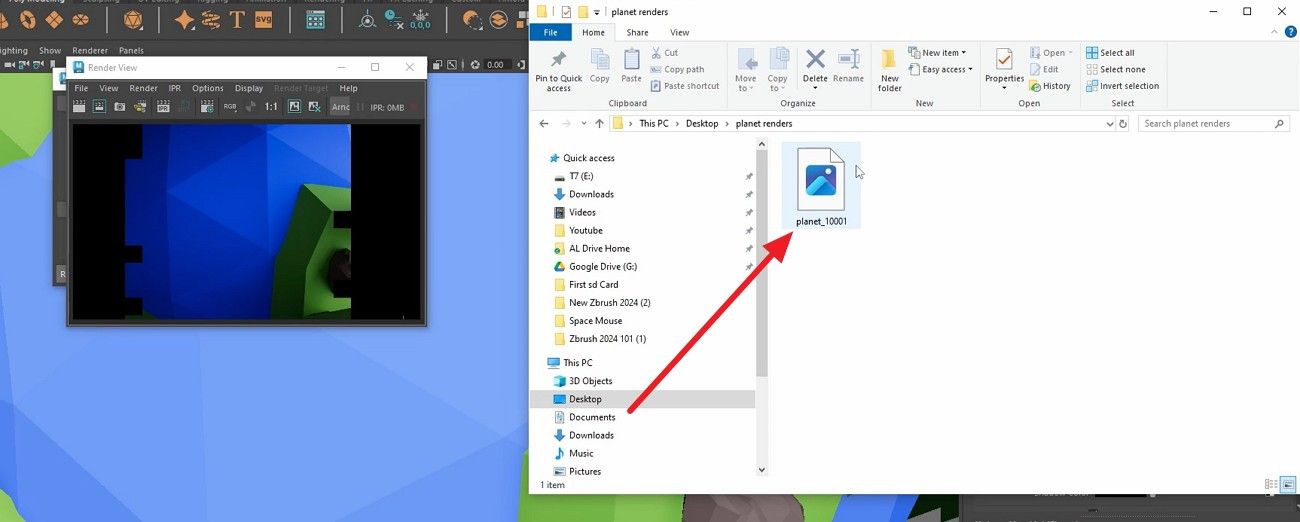
Step 4. Monitor Progress and Check Output Files in the Project Folder
Maya will render frames from the chosen camera into your project folder. There, a window shows each frame, the time taken, and any warnings. When rendering ends, open your project folder and go to the images or subfolder.
You will see numbered images, like shot01_cam_main.0001.png, in your chosen format. Check a few frames in an image viewer to confirm resolution and color, and to ensure no errors, noise, or missing textures appear.
Part 3. Render in Maya: Common Rendering Issues and Limitations
Now that you are clear on how to render animation in Maya, know that this process comes with certain limitations. Thus, if you want to know what they are and what could be the best option, review the mentioned details:
- Long Render Times: During rendering, heavy geometry, large textures, and complex effects can make frames take hours. Additionally, excessive camera (AA) and extra effects may increase time without noticeable benefits.
- Noisy or Grainy Frames: Most of the time, low sample counts or poor lighting setups cause noise in dark areas. Not just that, cranking samples may remove noise, but slow rendering, not fix the setup.
- Black Frames or Missing Objects: Wrong camera, hidden lights, or missing textures cause black frames. Additionally, objects on non-renderable layers or wrong paths appear grey or invisible.
- Viewport vs Final Render: During rendering animation in Maya, the Viewport looks brighter and sharper than the final Arnold Render. Consequently, beginners set the wrong settings, resulting in inconsistent colors and extra work.
- Hardware Limits: High-polygon models, large textures, and displacement maps exceed RAM or GPU VRAM. Furthermore, older laptops or desktops require smaller scenes, simpler meshes, or external rendering help.
Pro Tip: How to Render Maya Projects Faster?
When rendering in Maya, especially with engines like Arnold, complex scenes, high-resolution frames, and detailed lighting can quickly slow down your local computer. This is a common issue for both beginners and professionals working on larger projects.
In such cases, using a render farm like Fox Renderfarm can significantly speed up the process. Instead of relying on your own hardware, you can upload your Maya project and let powerful remote servers handle the rendering. This approach, known as cloud rendering, allows you to produce final frames faster while keeping your local machine responsive.
Fox Renderfarm supports Maya and popular renderers like Arnold, V-Ray, and Redshift, making it easy to integrate into existing workflows. With its dedicated Maya plugin, you can submit jobs directly, automate scene analysis, and manage rendering tasks efficiently. For users working with complex scenes or tight deadlines, a render farm provides a practical way to improve rendering speed without upgrading hardware.

Key Features
- Maya-Optimized Rendering: Fully supports Maya with Arnold, V-Ray, and other render engines, ensuring stable rendering for complex scenes.
- High-Performance CPU & GPU Nodes: Handles heavy lighting, simulations, and high-resolution frames efficiently.
- Maya Plugin Integration: Automatically analyzes scenes, uploads assets, and manages rendering jobs with minimal setup.
- Flexible Job Control: Pause, resume, and monitor rendering tasks with frame-level control for better workflow management.
- 24/7 Technical Support: Assistance for Maya setup, plugin issues, and rendering optimization.
FAQs about Maya Rendering
1. What is the fastest way to render Maya animation?
Use Arnold GPU for fast frames, and consider Fox Renderfarm to speed up the complex scenes. Moreover, reduce unnecessary samples to save render time and optimize lighting and materials to keep scenes clean while maintaining high quality.
2. How do I safely manage render output files?
Set correct project folders and unique file names to prevent overwriting or losing frames. In addition, use frame padding so the software reads numbered sequences correctly for post-production or composting.
3. Can I preview my animation without rendering the full sequence?
Use Playblast to quickly check motion and composition without rendering every frame. Afterward, render the final frames with Arnold for full quality after confirming the timing and camera angles.
4. Is cloud rendering worth it for beginners?
Yes, cloud rendering with Fox Renderfarm saves time and avoids the limitations of heavy hardware for large or complex projects. Moreover, beginners can use pay-as-you-go models to complete projects without investing in expensive machines.
Conclusion
To sum up, learning how to render in Maya becomes much easier when you understand the right settings, lighting, and workflow. With the step-by-step methods in this guide, you can confidently render Maya animation and create high-quality images.
As your projects grow more complex, combining these techniques with a render farm solution like Fox Renderfarm can help you render faster and handle heavy scenes without relying on local hardware.