TOTAL CHAOS: Chaos Group Launched Its Second Annual Computer Graphics Conference

On May 17, Chaos Group launched its Total Chaos conference in Sofia, Bulgaria with a keynote from the minds behind V-Ray and Corona. The company reinforced its dedication to research and innovation, its commitment to bringing V-Ray to diverse creative industries and its continuing support for the creative community.
After an energetic performance from Rio Dance Crew 360 and singers Torlashki Napevi, CCO Lon Grohs welcomed the 1,000-strong audience of Total Chaos attendees to the Sofia Tech Park. Next, Peter Mitev, Chaos Group’s co-founder and CEO, presented the highlights of a busy year for V-Ray and Corona including the launch of V-Ray Next for all major platforms, V-Ray for Unreal, Corona 2 and 3 for 3ds Max and Corona for Cinema 4D.
The teams behind V-Ray and Corona have been collaborating closely on new technology. At Total Chaos, Corona’s Research and Development Partner Jaroslav Křivánek officially launched Chaos Research, a laboratory which will combine resources, experiment with new ideas and create the rendering technology of the future.
Jaroslav handed over to Corona’s Founding Partner and Main Developer Ondřej Karlík, who celebrated the innovative renderer’s 10th birthday with a demonstration of recently introduced features of Corona, including its caustic effects, and gave a glimpse at how they’ll be refined in the future.
No Total Chaos Keynote would be complete without a few words from Vlado Koylazov, Chaos Group’s co-founder and CTO. He introduced some of the exciting features users can expect in V-Ray Next updates for Maya, 3ds Max and Unreal, as well as the official release of V-Ray for Houdini.
VP of Product Management Phil Miller joined Vlado on stage to wrap things up. Together, they introduced a brand new demo of Project Lavina, the incredible real-time iteration of the V-Ray engine.
DAY ONE
The day started with an incredible keynote from the most important people behind V-Ray and Corona. Then, the 1,000-strong crowd dispersed to check out a diverse array of presentations from professionals in the CG industry.

·Art track
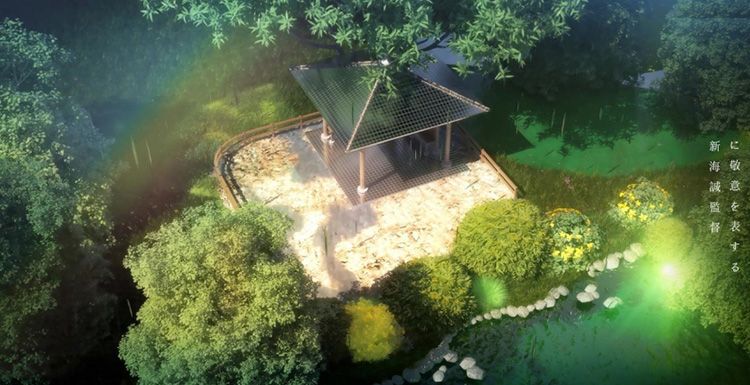
Arch viz and interior design was the focus of the first two talks on Total Chaos’ biggest stage, with WeWork’s Gregory Rogers and Kengo Kuma Architect’s Tomohiro Matsunaga deconstructing workflows and delving into the role V-Ray plays in their visuals.
Then, we switched lanes to a presentation from Sonja Christoph. Her inspirational and moving talk looked back on a varied career which has taken her from work on movies, including Tomorrowland and Doctor Strange, to her current role as an environment artist at Massive Entertainment for games such as The Division 2.

There are many ways of representing the human form, and a trio of presenters showed their approaches to digital characters. Victor Hugo charmed the crowd with his uniquely stylized characters, Ian Spriggs showed how he’s using traditional techniques with cutting-edge technology and anatomy expert Scott Eaton blew the audience's minds with his research in AI and human figures. In a hugely exciting announcement, Ian even debuted a new portrait of THU event founder Andre Luis.
·Women in tech panel

Total Chaos was host to a packed discussion on how women can forge successful careers in the worlds of tech and CG. Juice’s Natalia Lasota, Chaos Group’s Albena Ivanova, Avengers: Endgame’s Production Technology Manager Piya Wadia, Massive Entertainment’s Sonja Christoph and INK’s Ioanna Ivanova talked about their unique career paths and switching between industries, personal and workplace challenges, advice on time and stress management and communication in the workplace, and — above all — how to follow your heart and stay true to yourself. 

The Code track area is all about delving into the nuts and bolts of the technology behind powerful CG software. The lineup included software developers Javor Kalojanov (Weta Digital), Steven Parker (NVIDIA), Adrian Graham (Google), Prof. Dr.‐Ing. Philipp Slusallek (German Research Center for Artificial Intelligence), Attila Áfra and Jim Jeffers (Intel), and Asen Atanasov (Chaos Group).

This is where Chaos Group’s CTO and Co-founder Vlado Koylazov unveiled some supersmart new features coming to V-Ray Next for 3ds Max, including memory tracking, shader debugging, GPU advances and bump shadow improvements. He also shed light on a new Light Cache algorithm which even works with Project Lavina, Chaos Group’s real-time ray tracing technology.

·Craft track
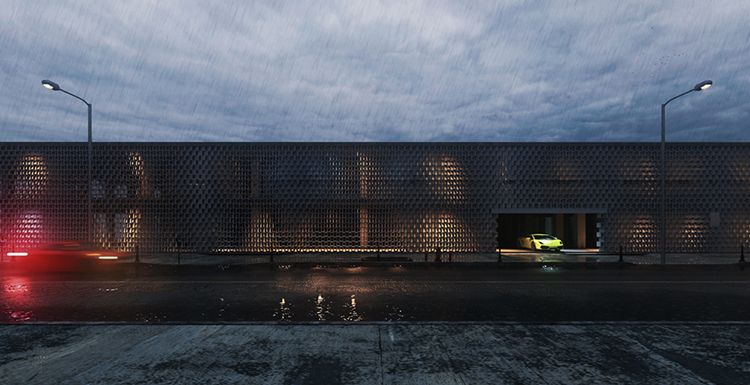
Volvo revved up the Craft Track with a presentation on how it has developed a fully integrated pipeline for real-time and offline rendering and the knock-on effect this has had on the way its cars are built. Porsche’s Andre Matos was in swift pursuit with a look at how V-Ray GPU and VRscans have supercharged his workflow, and he was followed by fascinated and varied talks from Tobias Nientiedt (OTTO), Tarran Kundi (Woods Bagot), Adam Tunikowski and Natalia Lasota (Juice), and Anthony Christov (IDEA Academy).

London’s INK Studio has made a name for itself in creating clean-but-playful images, animation and VR experiences for the likes of Honda and Audi, and in Ioanna Ivanova’s presentation she showed off some of the tricks of the trade. She demonstrated how Cinema 4D can be used for quick and easy previews, showed a head-spinning Escher ad — and revealed why you should never, ever try to work with cats.
The Craft track finished with a journey into the (occasionally horrific) heart of Hellboy from Bulgarian VFX studios Nu Boyana and WorldWide FX.
DAY TWO
Total Chaos's second and final day was every bit as good as the first. The line-up of 34 presentations and discussions across four stages demonstrated the incredible diversity of the CG industry. The crowds were astonished by AI-powered world builder Promethean AI, inspired to create a mobile game with Gameloft Sofia, learning how Blur Studio coordinates artists around the world or discovering the inner workings of Chaos Cloud.
Architecture and design was the theme of the Art track’s morning session. Gensler’s Scott de Woody was the first to grace the Total Chaos podium with his overview of the multinational architecture firm’s approach to creating buildings people want to work in — including an appropriately triangle-based HQ for chip firm NVIDIA.

Continuing the architecture theme was KPF’s Cobus Bothma, who detailed how the company built its cutting-edge pipeline with new V-Ray tools such as V-Ray for Unreal for creating Hololens scale models and easy, beautiful real-time walkthroughs in Project Lavina. The trip down the VR rabbit hole continued with Marko Margeta and Jose Pareja Gomez of Zaha Hadid Architects, and Factory Fifteen’s exhilarating Nissan Formula E experience.
Madrid-based creative studio Beauty and The Bit has brought big-screen sensibilities to the arch viz movie with “Landmark.” In his presentation, art director Victor Bonafonte Morales explained his initial intentions and demonstrated how his sketches and previz fed into the final movie.

Meanwhile, in the Craft track, Ingenuity’s Grant Miller went procedural with a guide to how the company uses Houdini and V-Ray for Houdini to create environments populated with dense fauna, crowds of thousands for a Kelly Clarkson music video and piles of bodies for The Walking Dead. There are sure to be some audience members who will make use of Grant’s techniques to cut out the fiddly bits of their VFX pipelines.

Quickfire round! Back in the Art track, ILM’s David Wortley and Falk Boje showed how V-Ray for 3ds Max has been used seamlessly to create environments in big movies including Black Panther’s Wakanda, A Wrinkle in Time’sfloating mountains, Jurassic World: Fallen Kingdom’s Isla Nublar, Star Wars: The Last Jedi’s Skellig Island (with Phoenix FD for the sea) and Rogue One’s tropical battleground. Despite covering so many films, there was no shortage of tips and tricks here.

The Assassin’s Creed series takes pride in its accurate historical recreations — albeit with a dash of 21st-century parkour. In Yavor Yakovliev’s presentation, he showed how Ubisoft Sofia used procedural techniques to recreate Ancient Egypt for Assassin’s Creed: Origins. Next door, in the Craft track, Slashcube’s Thomas Vournazos flew us to “Moon Village.” Developed in conjunction with architect SOM, the European Space Agency and the Massachusetts Institute of Technology, this short film used Corona for Cinema 4D to visualize a human colony on Earth’s natural satellite.

How can VR help the architecture industry? And what happens when we create spaces in VR without the constraints of the real world? These are the questions Agile Lens’s Alex Coulombe answered with his dynamic and charming presentation. He looked at how VR has changed the way we plan and explore prospective theaters, and how it inspires new forms of architectural, artistic and theatrical expression.

The day came to an epic end with two major players in the visual effects industry. Digital Domain’s Deke Kincaid showed the evolution of the company’s digital humans and characters, culminating in a thorough breakdown of its spellbinding V-Ray rendered work on Avengers supervillain, Thanos. After DD’s analysis of the 750,000-year-old big bad, Method Studios showed the techniques it used to create a photorealistic baby with an adult voice for a commercial project.
The wheels are already turning on Total Chaos 2020. Stay tuned, and we’ll see you in Sofia next year!
Cr.Chaos Group website
https://www.chaosgroup.com/news/total-chaos-the-keynote
https://www.chaosgroup.com/blog/total-chaos-day-one-recap
https://www.chaosgroup.com/blog/total-chaos-day-two-recap 

Welcome to join us

render farm free trial

Recommended reading


How to Render High-quality Images in Blender

2023-01-13


Top 9 Best And Free Blender Render Farms of 2024

2023-05-06


Revealing the Techniques Behind the Production of Jibaro "Love, Death & Robots", Which Took Two Years to Draw the Storyboard

2023-01-13


How to Render Large Scenes with Redshift in Cinema 4D

2022-06-09


Top 10 Free And Best Cloud Rendering Services in 2024

2023-09-26


Top 8 After Effects Render Farm Recommended of 2023

2023-02-02


How to Reduce Noise in Corona Renderer - Corona Denoising

2023-01-13


Arnold for Maya Tutorial: How to Render Wireframe

2023-01-13


Partners

Interested

Creation Analysis: Using 3D to Make 2D Style Scene(1)
The best cloud rendering services provider and 3ds Max render farm, Fox Renderfarm will share with you a tutorial of using 3D to make 2D style scene.In this case, we show the use of 3ds Max to create 2D animated movie-style scenes and will focus on explaining the Makoto Shinkai-style picture performance. From his animation works, we can feel a strong personal style, exquisite light, and shadow applications, strong light and dark contrast and gorgeous colors are the biggest features of his works, these features make his works look more real. Reference material from Makoto Shinkai’s animated film "Koto no ha no niwa".Some pictures material comes from the 2D animated film "Koto no ha no niwa", and some screenshots are found for reference.The whole idea:Composition layout and lighting testMaterial adjustment and rendering settingsUse of channelsColor comparison and synthesisComposition layout and lighting testIt is very important to make scene lights in this style, often in small details, such as the bright and dark junction of very bright objects, reflections in small details, the color gradient of objects under the influence of light, and the objects interspersing and blocking, the resulting changes in light are all things we need to pay attention to. Every time I watch an animation, I am always moved by these nuances. The models used in this tutorial are very simple. When doing interior scenes, it is often to build a simple BOX first and modify the approximate shape to test the lights to see if they meet the expectations. But when making, it is better to have an imaginary picture first, so that you can judge whether you have achieved the desired effect when you are done, but you must know what kind of effect you want before you do it.This is a scene from the animated movie "Koto no ha no niwa", which is real in Shinjuku Gyoen Park, Japan. What I want to do now is to make the 2D animation feel with 3D. First, use a simple model to determine the main pavilion. And the location of the surrounding trees, place the camera, as the picture shows:Then we can see through the original animation that the light is shining from the bottom left corner.Here, a standard target parallel light is used as the main light source. The angle of light and the attenuation range of the illuminated area are adjusted. The shadow length and direction of the trees are observed and adjusted to a suitable position. Adjust the UVW in the shadow parameters to blur the tree projection to make it unreal. Open the environment and effects panel, add a VRaySky map to the environment map, drag it to the material panel by example, check the first column, pick the target parallel light in the scene, and set the map light intensity to 0.03. You will get a sky environment that matches the scene lighting, making the rendering more realistic.A high light and dark contrast picture is needed here, so no ambient light is used in this scene. In addition, a VRayLight was created in the direction of the light to simulate a small range of strong sunlight. It can produce more intense light and shade. The parameter settings are the shape of the light is spherical, the intensity is 200, the color is warm, and the light is not visible.Open GI and test the lighting effect, as follows:After the lights are almost well, we start to refine the scene, and finally, it looks like this:In order to simulate the feeling of the rainy season in the original animation, I used the 3ds Max particle system to simulate some raindrops, created a standard particle flow source, and added a random rotation to make the raindrops have some random changes.I also used the MultiScatter plugin to plant some grass.Material adjustment and rendering settingsIn terms of materials, I will focus on the material of the pavilion and the surface of the water. The material of the pavilion must be rendered wet and wet. Because the scene is rainy, I chose mirror high reflection on the material. I did not check Fresnel. The top will be completely reflected in the surrounding trees, plus the projection of the tree occlusion to get a similar effect.The water surface did not make it reflect the sky and clouds like the original painting, but chose a green that matches the scene, as shown in the following figure:The material of water is as follows:Next, we can adjust the rendering parameters. Anti-aliasing uses Catmull-Rom with a certain sharpening effect, which can make the details of the trees richer. Turn on the reflection environment. A VRayHDRI map is added to the reflection environment. The exposure selection is the last one. The term Reinhard mixed exposure is similar to the combination of exponential exposure and linear exposure. Set the blend value to 0.7.VRayHDRI is displayed as a sphere with an intensity of 4.Using the VRayHDRI map can increase the reflection details of some scenes. Turn on the GI and use the Irradiance Map for the first bounce. The first bounce is the first global light calculation for the direct light. The second bounce uses the Light Cache. Actual calculation, turn on display calculation phase. As the picture shows:Open the rollout of the light cache, set the light subdivision to 1500, andcheck the options in the figure.The rendering effect is as follows:Now please follow the best CPU &x26; GPU render farm and cloud rendering services provider to our next part: Creation Analysis: Using 3D to Make 2D Style Scene(2).
More
2022-07-27
Creation Analysis: Using 3D to Make 2D Style Scene(2)
As the leading cloud rendering services provider and GPU &x26; CPU render farm, Fox Renderfarm is here to continue to share with you how to make 2D scene with 3D.Creation Analysis: Using 3D to Make 2D Style Scene(1)In this article, we still show the use of 3ds Max to create 2D animated movie-style scenes and will focus on explaining the Makoto Shinkai-style picture performance.The use of channelsWhen rendering into a map, we need to add some channels to the rendering elements to help us post-process the scene. I added VRGI channels, VR lighting channels, VR reflection channels, VR shadow channels, VR highlight channels, and Z channel. The Z channel needs to test the distance of the camera in advance. It can be measured directly with a tape measure, or the camera's ambient range display can be turned on. The rendering results are as follows:Adjust the color and compositionIn the last step of color processing, you must first have a clear understanding of the overall picture effect processing ideas. Let's analyze the original picture of Makoto Shinkai first. "Koto no ha no niwa" uses the delicate design and delicate application of color elements to enhance the overall expression of the work. In the picture, the author uses a variety of green and gray with different purity and brightness. Multi-tones such as blue, white, and white are painted and painted. The crystal clear and colorful colors contrast with each other, forming the vivid art style of the film. The courtyard scene uses high-purity dark green forest leaves as the main thing, and the dark parts are generally biased to cool gray, so we must focus on these factors in the post-processing.Select the color of the GI channel and the reflection channel for the superposition method, and select the soft light for the superposition method of the light channel. Adjust the opacity of the screen overlay according to the picture conditions. The Z channel is reserved, and then the center of the picture is brightened with warm colors. The colored sky map gives the original image a soft light overlay. The opacity is set to 50% to make the picture breathable. Then adjust the color balance, saturation, and curve of the overall picture to improve the overall color purity and contrast of the picture. Warm color filter, as shown below:Next, use the Z channel to create the blue fog effect in the dark part at the top of the screen. Display the Z channel separately, adjust the color level to make the black and white obvious. Then, in the RGB channel, Ctrl + left mouse button to select the white selection area. One layer, fill it with blue-gray, and adjust the opacity as shown:Create a new layer, use the radial gradient in the gradient to make a rainbow in the upper left corner, wipe out the desired shape, and then add a Gaussian blur to give the rainbow a foggy feel.Next, create a soft light effect for the overall screen. Ctrl + Alt + Shift + E stamps all visible layers duplicates one layer and uses Image-Adjust- Threshold to change the image to black and white. Similarly, select the white part of the selection, Ctrl + J duplicates one layer, uses soft light for the superposition method, and gives a Gaussian blur with a value of 10, so that you can get a soft light effect that enhances the bright part of the overall picture, adding a depth of field effect, and the final effect is shown in the figure:Fox Renderfarm hopes it will be of some help to you. It is well known that Fox Renderfarm is an excellent cloud rendering services provider in the CG world, so if you need to find a 3ds Max render farm, why not try Fox Renderfarm, which is offering a free $25 trial for new users? Thanks for reading!
More
2020-02-12
Rainy Scene Performance of Building Exterior
The best cloud rendering services provider and GPU &x26; CPU render farm, Fox Renderfarm will share with you a good 3D tutorial to make rainy scene.This is a rainy scene performance of building exterior, from 3D artist Han Shilin. The software used is SketchUp, 3ds Max, V-Ray for 3ds Max, Photoshop, and Substance Painter, etc.How to be "realistic"?"Realism" doesn't just give each material a very accurate parameter that can be applied to any environment, so that it can render a very realistic effect. It also refers to realistic performance = according to your own visual experience, controlling parameters to make the map in line with expectations.The difference between the two understandings is that the former has no control and expectation of the final result, and is based on the idea that "parameters are correct.".ReferenceThe reference picture is very important, this is an expectation of the final effect, such as light and shadow, atmosphere, composition. And it is recommended to combine all the reference pictures into one plate.In order to show a sense of tranquility and quietness, a darker, rainy weather was set. The architectural details of this scene are not many, the atmosphere of light and the treatment of the ground part are very important.ModelingGrasshopper makes the appearance, imports SketchUp to make the main body of the building, and then imports into 3ds Max, and rendered with V-Ray. The process is very simple.The important thing is to do a good job of layering, otherwise, it will become more troublesome when importing into 3ds Max.As for the composition, a very low angle was used, as much as possible to expose the ground material and the wider sky.TextureThe main body of the building is far away from the lens, so only ordinary materials are needed, and the texture of the materials can be maintained. Taking the skin material as an example, the rest of the building materials are very basic.Sidewalk and road eaves: indoor concrete texture package, because there will be a lot of dirt in the outdoor scene, so the concrete texture and the dirt texture are mixed together. The area in the close shot is relatively small, so the repeatability of the material is serious. Since it is a rainy scene, the roughness value is also very low.PS. The main building can be modeled in SketchUp and then imported into 3ds Max. The environment and settings of the scene are best created with 3ds Max because the SketchUp model will have some problems when imported into 3ds Max, such as the UV will be messed up.Performance details (Substance Painter draws some textures)From the perspective of the camera, the pavement greatly affects the picture, so its material is very important. You need to import this pavement into Substance to draw textures.Import the mesh file that needs to draw textures into Substance Painter.Remember to turn off the channels other than the natural color when drawing the natural color map. After drawing the natural color map, create a new layer and draw the bump.Then you can add some standing water to both sides of the road.There are many ways to draw. One of the simpler methods is to add a material to adjust a very flat height and then apply it several times with a dirt brush to get a better random effect. Because what to do is a rainy scene, there is no wet feeling. So adjust the level of the roughness layer.One thing to note is that if you want to get the same effect in 3ds Max as in Substance Painter when importing the texture, adjust the blur to 0.2. For sharper effects, lower it. In addition, the imported map gamma needs to pay attention to, the map color of the natural color is selected automatically, and the rest are all 1.0.Then it is relatively simple work and found some model-rich scenes from Evermotion's model library.Such as the middle and lower left cars. After that, I used V-Ray rendering in 3ds Max, and finally adjusted it in Photoshop.Fox Renderfarm hopes it will be of some help to you. It is well known that Fox Renderfarm is an excellent cloud rendering services provider in the CG world, so if you need to find a render farm, why not try Fox Renderfarm, which is offering a free $25 trial for new users? Thanks for reading!
More
2022-07-13
  • Foxrenderfarm

    Powerful Render Farm Service

  • TPN
  • TPN

    Business Consulting

    Global Agent Contact:Gordon Shaw

    Email: gordon@foxrenderfarm.com

    Marketing Contact: Rachel Chen

    Email: rachel@foxrenderfarm.com

    Connect with Us

Fackbook Customer Reviews