FAST & SECURE
RENDER FARM SERVICES
 24/7 SupportCPU & GPU SupportedMassive Render NodesTPN-Accredited Vendor


Partner with Us for Global Success
Join Fox Renderfarm as a global distributor to deliver exceptional rendering services, expand your reach, and access exciting growth opportunities.
Learn More

Invite Friends
Earn CPU Render Coupons!
Discover Referral Program


Why Choose Fox Renderfarm?
Get to Production Faster With On-Demand Rendering
Powerful Rendering
Secure & Confidential
Dedicated Service Team
Support Multiple Software & Plugins
Easy to Use
Flexible Render Farm Pricing
Industry Leading Cloud Render Farm Service

Thousands of Render Nodes
Fire up thousands of rendering nodes instantly

Multi-OS Support
The render farm service runs on Windows, Mac, and Linux with 99.99% uptime

Automatic Detection
Automatically detects IT environment and matches cloud infrastructure service

API Supported
Production pipeline integration via API

Immediate Render
High availability, no waiting necessary

CPU & GPU Rendering
CPU & GPU rendering are both available

Massive SSD Storage
High-performance SSD storage solution that eliminates I/O bottlenecks

High-speed Transmission
Raysync's high-speed transmission allows real-time file upload and download
Fox Renderfarm is Absolutely Secure & Confidential for Customers

ISO27001 Certification
Fox Renderfarm is ISO27001 certified to keep your assets and information secure.

TPN-Accredited Vendor
The Trusted Partner Network (TPN) is owned and managed by the Motion Picture Association (MPA), a leader in third-party entertainment industry assessments.

NDA Available
Non-disclosure agreement is available for customers to protect their rights and interests.
Dedicated Service Team
Fox Renderfarm's professional and dedicated customer service & technical support team are waiting for you!

Partner of multiple-award-winning teams

24/7 Live customer care & technical support

Contact available via WhatsApp/Email/Live chat

With Hollywood-level production experience for years

Response time: within 15 mins


Simply Upload, Render And Download Your Projects
With just 4 steps to render your projects
STEP 1
Registration
Create an account with us and get $25 free render coupon as a welcome gift. You can use them to access our awesome cloud rendering service for your creative projects.
STEP 2
Projects Upload
Log in and upload your projects to the web version of Fox Renderfarm.
STEP 3
Rendering
Our system will automatically analyze and render your projects.
STEP 4
Projects Download
Download the rendered frames with a few simple clicks.
Testimonials for Fox Renderfarm
Over 400,000 happy customers from 100+ countries and regions.
Flexible Cloud Render Farm Pricing
Easily estimate the cost before you start rendering.
Calculate Now!
Free Trial
Register and receive $25 of free render coupon.
Competitive Pricing
As low as $0.0306 per core hour.
Render More, Save More
Volume discounts available up to 50%.
Industry Care
Special discounts for teachers, students, educational facilities, and freelancers.
Easily estimate the cost before you start rendering.
Calculate Now!
Learn more details for render farm pricing.
Industry Care From Cloud Render Farm


Education Discount
Education Program to help CG students and educators realize their dreams.
Learn More


Get Sponsored
Get Sponsorship for Your Rendering.
Learn More


Freelancer Support
Freelancer Program to empower CG freelancers to focus more on creation.
Learn More


FGT Community
Welcome to join our FGT ART campaign and FGT 3D challenge to share your artwork and win great prizes.
Learn More
Fox Renderfarm News Center
2025-07-18
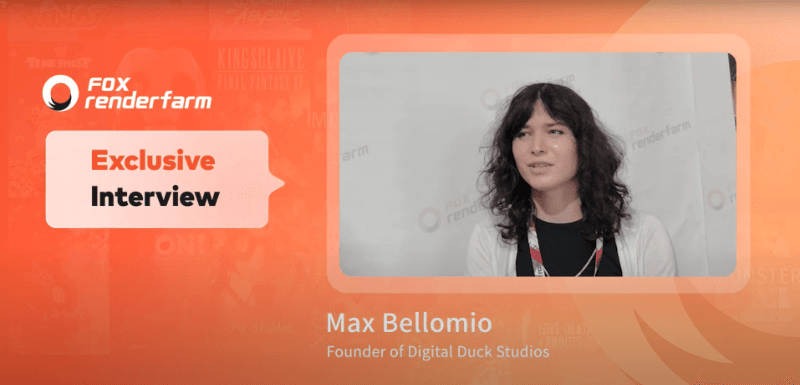
Annecy 2025 Interview: Max Bellomio, Founder of Digital Duck Studios
With a passion for visual storytelling and a strong foundation in 3D visual effects, Max “Amber” Bellamio is the founder of Digital Duck Studios, an independent animation studio dedicated to pushing creative boundaries through CG animation. Max is currently leading the production of Forgotten Bloodlines, a CG-animated nature documentary created entirely in Blender and uses Fox Renderfarm for all rendering needs. In this interview at MIFA 2025, Max shares the hands-on experience with Fox Renderfarm, provides thoughtful feedback, and highlights the importance of accessible tools for small studios working within high-end animation pipelines. Join Fox Renderfarm, a leading cloud rendering services provider and render farm in the industry, to discover how technology empowers creators like Max to bring complex animated worlds to life with speed, efficiency, and creative freedom.Video Interview: https://www.youtube.com/embed/4vKW927WCE0?si=BN-ui-aqPeYi3wsQ Fox Renderfarm: Thank you for joining us! Please briefly introduce yourself.Max Bellomio: I am Max “Amber” Bellomio. I am a 3D VFX artist, and I'm currently running my own indie animation studio, Digital Duck Studios.Max Bellamio Portfolio Websitehttps://www.maxbellomioart.com/ The big project we're working on is Forgotten Bloodlines, a CG animated nature documentary created in Blender. We use Fox Renderfarm for all of the rendering and everything related to that.Forgotten Bloodlines PosterFox Renderfarm: How has your experience with Fox Renderfarm been so far? We’d love to hear your feedback!Max Bellomio: I feel like it's very easy to use for almost everything. The only issue I’ve had is that sometimes the downloads don’t work right away, so I have to wait a bit and try again. But I understand you're probably very busy and have a lot going on.Fox Renderfarm: Do you have any advice to help Fox Renderfarm improve?Max Bellomio: Honestly, it's hard to think of any advice. I feel like the download issue is really the only thing I’ve run into. Everything else is great. I get my frames back really quickly, it's very easy to recharge my payments, and it's very fast to talk to someone when I need help.I guess the only advice I would give is to make the desktop app software a bit easier to navigate, especially when it comes to finding the download options and choosing where to save your frames. That’s pretty much it.Max’s Social MediaInstagram: https://www.instagram.com/max_bellomio/ YouTube: https://www.youtube.com/@DigitalDuckOfficial Twitter: https://x.com/digital_duck
More

2025-07-16
Enhance Your Workflow: Harnessing the 3D Cursor in Blender
When modeling or animating, a 3D Cursor in Blender might seem like a small point, but it can make a huge impact on how smoothly and precisely you work. Basically, it acts as a smart helper that guides you to place things exactly where you want them. However, many beginners might overall look at its usage, which leads to unnecessary struggles with alignment.Due to this, learning about this point and its functionality becomes necessary to ensure a smooth workflow. For that, this article offers you a complete guide on how to use this tool while highlighting how to move it in various software. So, review the guide and explore an innovative tool by the end of this guide that will help you in rendering while using the 3D Cursor.Part 1. What is the 3D Cursor in Blender?As stated, a 3D cursor is a small point in space with position and rotation capabilities that may be utilized for a variety of modeling and animation applications. This point can be positioned in 3 ways, including direct placement with the mouse, in the sidebar, or in snapping. In "Direct Placement with Mouse," you can position the 3D cursor with orientation choices by using the Cursor tool or by pressing Shift + Right-Click.In terms of "Sidebar" can be positioned by adjusting the respective values of "Location" and "Rotation” in the sidebar. However, “Snapping" lets you move the Blender 3D cursor to the origin of the selected object.Part 2. How to Use the 3D Cursor in BlenderWhile getting an overview of the 3D Cursor, animators might seek to learn how Blender moves the 3D Cursor accurately for better control in animation and modeling tasks. Hence, to know that, adhere to the given details, highlighting how this point is moved and through which shortcuts:3D Cursor ShortcutsPrior to determining its movement, here are some shortcuts that animators use to position the 3S Cursor:ActionShortcutDescriptionPlace 3D CursorShift + Right-ClickPlaces the 3D Cursor at the clicked location in the viewport.Use Cursor Tool (Toolbar)LMB (Left-Click)With the Cursor Tool active, left-click to position the 3D Cursor.Reset Cursor to World OriginShift + CCenters the 3D Cursor at (0, 0, 0) and resets the view.Cursor to SelectedShift + S → SelectMoves the 3D Cursor to the center of the currently selected object(s).Cursor to GridShift + S → GridSnaps the 3D Cursor to the nearest grid point.Cursor to ActiveShift + S → ActivePlaces the 3D Cursor at the location of the active (last selected) object. Move 3D CursorTo fully control object placement and editing flow, here is how to move the 3D Cursor in Blender:1. How to Move the 3D Cursor in Blender?Enter the "View" tab from the toolbox and head to the "3D Cursor" menu, where you have to enter the coordinates like X, Y, and Z to position the Cursor.2. How to Move the 3D Cursor to World Origin?For that, start by pressing the "Shift + S" key simultaneously and choose the "Cursor to World Origin" option to place it in the center of the scene. If not, choose the "Object" menu and select the "Cursor to World Origin" option under the "Subject" option.3. How to Move the 3D Cursor to Selection?To place the 3D Cursor at the center of the current selection, press Shift + S and choose “Cursor to Selected” from the “Snap” pie menu.Hide the 3D CursorAfter you move the 3D Cursor Blender, there are times when you seek to hide it, mainly when it visually causes a distraction in modeling and animation. Hence, here is how you can hide it from the viewport to focus on your projects:Instructions: Stretch the drop-down menu for “Viewport Overlays” and uncheck the “3D Cursor” option from the list.Pro Tip for Blender Artists: Improve 3D Animation Rendering EfficiencyOnce you have set the Cursor to the origin of Blender, you might face slow speed due to complex animation, affecting your workflow badly. Thus, in such a case, you need a cloud rendering service like Fox Renderfarm that offers you CPU and GPU support to reduce rendering time significantly. Not just that, this rendering service detects the IT environment and matches the cloud infrastructure service automatically for efficient resource allocation.Unlike other solutions, this render farm also comes with an SSD storage solution that eliminates I/O bottlenecks to ensure faster data access. Along with these traits, it comes with thousands of rendering nodes that allow for parallel processing, making it ideal for handling complex animation. Once done with animation or modeling, Raysync's high-speed transmission will enable you to upload and download large project files quickly and securely.Key FeaturesAPI Integration Available: Let animators make use of pipeline integration via API to automate rendering tasks and manage projects programmatically. It also enables them to connect Fox Renderfarm with their existing production workflows seamlessly.Multiplatform OS Support: Unlike other rendering services that have limited OS support, Renderfarm can be easily accessed on Windows, Mac, and Linux with 99.99% uptime. This makes it a highly reliable and versatile choice for studios and individual artists working across different platforms.TPN-Accredited Vendor: The Motion Picture Association oversees the Trusted Partner Network, of which Fox Renderfarm is a member. This means that this service ensures industry-standard security and trusted third-party content protection for animation and VFX projects.NDA Available: For users concerned about data security, a Non-disclosure agreement is available to secure the user’s rights and information. Leveraging this feature, it becomes the ideal choice for those who seek legal and dependable options.Software Support: It works well with tools like Blender, Maya, V-Ray, and RenderMan, so you don’t need to switch software to render. It supports most animation tools professionals use, which makes it easy to continue your work without issues.Part 3. Common Pitfalls and Troubleshooting for Blender 3D CursorEven though an animator learns how to set the 3D Cursor to the origin, there is a high chance that they face some common Cursor issues. This either affects their productivity or leads to misaligned objects, which can be resolved after reviewing the problems and the solutions given below:Accidentally Moving the 3D Cursor: By pressing the Shift and right click on the mouse, the Cursor can easily move from designated places. Hence, disable accidental input using custom keymaps or lock the cursor location in the Sidebar by following this path: "Go to View > View Lock > Lock to 3D Cursor."Incorrect Object Placement: If the Cursor is in an off-screen position, you might be able to place new objects accurately. So, reset it in the default position with coordinates like 0,0,0 by pressing the “Shift + C” shortcut.Cursor Not Snapping Accurately: When the animator snaps by hitting “Shift + S,” the snapping may feel off due to view angle or mesh origin issues. To cater to this, choose the subject > View > Perspective/Orthographic to pick Numpad 1/3/7.3D Cursor Not Visible: While animating, the 3D Cursor sometimes might vanish from view, affecting the whole process. To make it visible, head to the ViewPort menu and ensure "3D Cursor" is enabled there.Wrong Rotation Alignment: If the orientation is not set accurately, there is a chance that the Cursor will not rotate objects as it is supposed to. So, head to Toolbar > View menu > and review “Location” and “Rotation” settings.ConclusionIn a nutshell, the 3D Cursor holds significant importance in animation and modeling, which makes users wonder how to move the 3D Cursor in Blender. Thus, this guide has uncovered these queries while resolving the possible issues users might face with 3D Cursor.Moreover, for an efficient and smooth workflow, a cloud rendering service like Fox Renderfarm is suggested since it comes with API, CPU, and GPU support.
More

2025-07-15
The 5 Best Render Engines for Blender Explained in 2025
To render in Blender is like watching your imagination come to life by turning creative sparks into creative visuals. However, some engines are very fast, while others are photorealistic. So, whether you create hyperrealistic scenes, stylized animation, or game-ready assets, the rendering engine you opt for will shape the quality of your work.Thus, to assist you in making the finest choice, this guide will review the 5 best Blender render engines while highlighting their role. Each engine’s pros and cons will be reviewed along with pricing plans to determine if they suit your needs. Upon reviewing these, we’ll narrow down a 3D rendering software that is secure and supports multiple plugins and software.Part 1. Definition and Role of Render Engines for BlenderThe rendering engine is the "Add-on" of the 3D software that turns a 3D scene into an animation and is used in a more photorealistic way, unlike the default render. Some of the most common rendering engines are Corona Renderer, V-Ray, Redshift, etc., and they play a role in shaping the look, feel, and performance of your projects.Among the best render engines for Blender, some of them focus on realism by using complex light simulation, while others focus on speed for stylized effects. While highlighting their role more explicitly, know that choosing the right render engine can dramatically change your workflow, especially depending on your goals.Part 2. The 5 Best Render Engines for Blender in 2025After knowing the basics, if you seek to pick the best Blender render, this section uncovers 5 of the best options for you. So, review the details along with the pros and cons, and find the perfect match for your creative goals:1. CyclesAs a physically based path tracer for production rendering, Cycles is designed to offer photorealistic results. It accurately simulates how light interacts with surfaces by using features like global illumination, caustics, and ray-traced reflections. Additionally, there is support for multi-core CPU rendering with SIMD acceleration to improve performance across high-resolution scenes. Offering GPU rendering with NVIDIA technologies like CUDA and OptiX, it offloads heavy calculations to the graphics card and boosts speed.ProsThis best render for Blender supports GPU rendering on AMD graphics cards using HIP.Having multi-GPU support, Cycles lets users harness the power of two or more graphics cards simultaneously.ConsAs this render engine focuses on realism, it uses complex light calculations, which makes it slower than real-time engines.To get smooth performance and fast renders, powerful GPUs or CPUs are required.Pricing PlansFree2. EeveeEevee is based on rasterization, and it determines what surface is visible from the camera. Plus, it works on PBR principles that let artists use realistic materials and lighting techniques that closely mimic real-world visuals. Furthermore, this render engine’s material is generated using the same shadow nodes as Cycles. This makes it easy to switch between the 2 engines rather than creating a whole new material setup from scratch.ProsAmong Blender's best renders, Eevee uses a whole camera model to render a scene just to produce a focused image.Using a post-process filter, it can simulate the optical depth of field for blurring objects that are out of focus.ConsIn terms of attributes and properties, Eevee supports only 14 attributes from Geometry Nodes.As compared to Cycles, the size of the spotlight remains the same and doesn't alter the softness of the cone.Pricing PlansFree3. OctaneRenderFeaturing 2-5x render speed, Octane RTX hardware acceleration boosts the speed of ray tracing by leveraging dedicated RT cores on NVIDIA RTX GPUs. Its new layered material system enables the artist to generate complex materials by stacking up 8 layers on top of the base layer. Additionally, this best Blender render engine has an updated Random Walk medium that creates ultra-realistic skin and scattering materials in Octane.ProsIt has Vectron™ software that uses vector-polygon geometry to create complex procedural shapes without using traditional mesh data.OctaneRender also enables you to choose procedural and OSL vertex displacement prior to rendering.ConsThis rendering engine only works with NVIDIA GPUs, as it relies on CUDA and RTX technologies, meaning users with AMD or Apple Silicon hardware cannot use it.The node system and UI differ from Blender’s built-in engines like Cycles or Eevee.Pricing PlansStudio+ Monthly: €23.95/monthStudio+ Annually: €19.99/month4. ArnoldBeing an advanced Monte Carlo ray tracing renderer, this engine can seamlessly switch between CPU and GPU rendering to balance performance and quality. Unlike other engines, its ray-traced subsurface scattering facility takes off the hassle of creating a complex setup and creating hyper-realistic skin. Regarding motion blur, the 3D motion blur interacts with shadows, reflections, and volumes to generate realistic motion effects that enhance speed and depth in animated scenes.ProsUsing the Catmull-Clark subdivision, this non-native best render engine for Blender creates smooth curved surfaces.Unlike other engines, it supports Open Shading Language to write custom shaders for more control.ConsAs a subscription-based rendering engine, it offers annual and monthly pricing plans that are pretty expensive.Arnold is designed for professional renderers, requiring a steep learning curve for amateurs.Pricing PlansAnnual: $430Monthly: $555. RedshiftAs the best third-party Blender render that can be integrated through unofficial plugins, it offers UDIM support for working with high-resolution tile-based textures. These textures can be previewed in Cinema 4D's viewport materials in real time while working. Furthermore, it comes with simplified Ambient Occlusion AOV to isolate and adjust shadowing details in post-production. With USDZ support, it smoothly integrates into modern 3D pipelines, ideal for studios working across apps like Blender.ProsWith USDZ support, assets and scenes are to be exported or shared in a format that's compatible with Apple AR.Working as a biased GPU renderer, it sacrifices some physical accuracy, which makes it one of the fastest rendering engines.ConsRedshift does not have an official Blender integration, so using it requires workarounds.Unkline Blender’s native render engine, Redshift, isn’t free and requires hefty charges to work on.Pricing PlansRedshift Monthly: $49/monthRedshift Yearly: $24.08/monthPro Tip: Improve 3D Animation Rendering EfficiencyWhile working on intricate Blender scenes like lighting, hair particles, and 4K textures, have you stumbled across rendering where your local PC takes hours to render each frame? In such cases, sometimes the best render engines for Blender can fail to offer smooth performance, too. Thus, a cloud service like Fox Renderfarm can offload the heavy lifting since it comes with thousands of rendering nodes.Unlike other solutions, this render farm service can efficiently operate across platforms like Windows, Mac, and Linux with 99.99% uptime. While rendering, it automatically detects the IT environment and matches the cloud infrastructure to optimize performance. For efficient workflow, this rendering supports major software like Maya, Blender, and Unreal Engine. What makes it compelling is its facility for production pipeline integration via API to automate task submissions.Key FeaturesSupports CPU & GPU Rendering: Renderfarm supports CPU and GPU rendering and gives artists the flexibility to choose the best rendering mode based on their project's needs. While ensuring fast performance, this also verifies compatibility with a wide range of render engines and complex scenes.Extra SSD Storage: Its high-speed SSD storage solution eliminates I/O bottlenecks, allowing large scene files, textures, and caches to load quickly. It is ideal for reducing lag and delay during rendering and improving overall efficiency.High-speed Transmission: Supporting Raysync's high-speed transmission, this rendering service enables lightning-fast uploads and downloads of large project files. Thus, it ensures smooth data transfer between your local device and the cloud, mainly for teams working with high volumes of data.ISO27001 Certification: Fox Renderfarm is ISO27001 certified, and it meets international standards for information security management.NDA Available: For users concerned about data privacy, a non-disclosure agreement is also available for extra peace of mind. This feature makes it a reliable choice for users who seek to work on sensitive content without data disclosure.ConclusionSumming up, rendering in Blender is highly dependent on the type of render engine you opt for since it shapes your project. Thus, this guide has gathered native and non-native Blender best renders along with extensive details. However, users looking for a dependable choice can consider Fox Renderfarm, a cloud-based rendering service that is not just compatible but also ISO27001-certified for an extra layer of privacy.
More