

3ds Max Plugin Submission
The plugin submission process for 3ds Max primarily consists of four steps:
1. Download & Install;
2. Launch;
3. Submit;
4. Upload;
5. Rendering and download;
6. Uninstall the plugin.
In the following sections, we will provide a detailed description of each of these steps. Includes video tutorials and text description tutorials.
Video for 3ds Max plugin submission
Step1: Download & Install
1.Visit the official website and download the cloud rendering client that matches your local operating system.
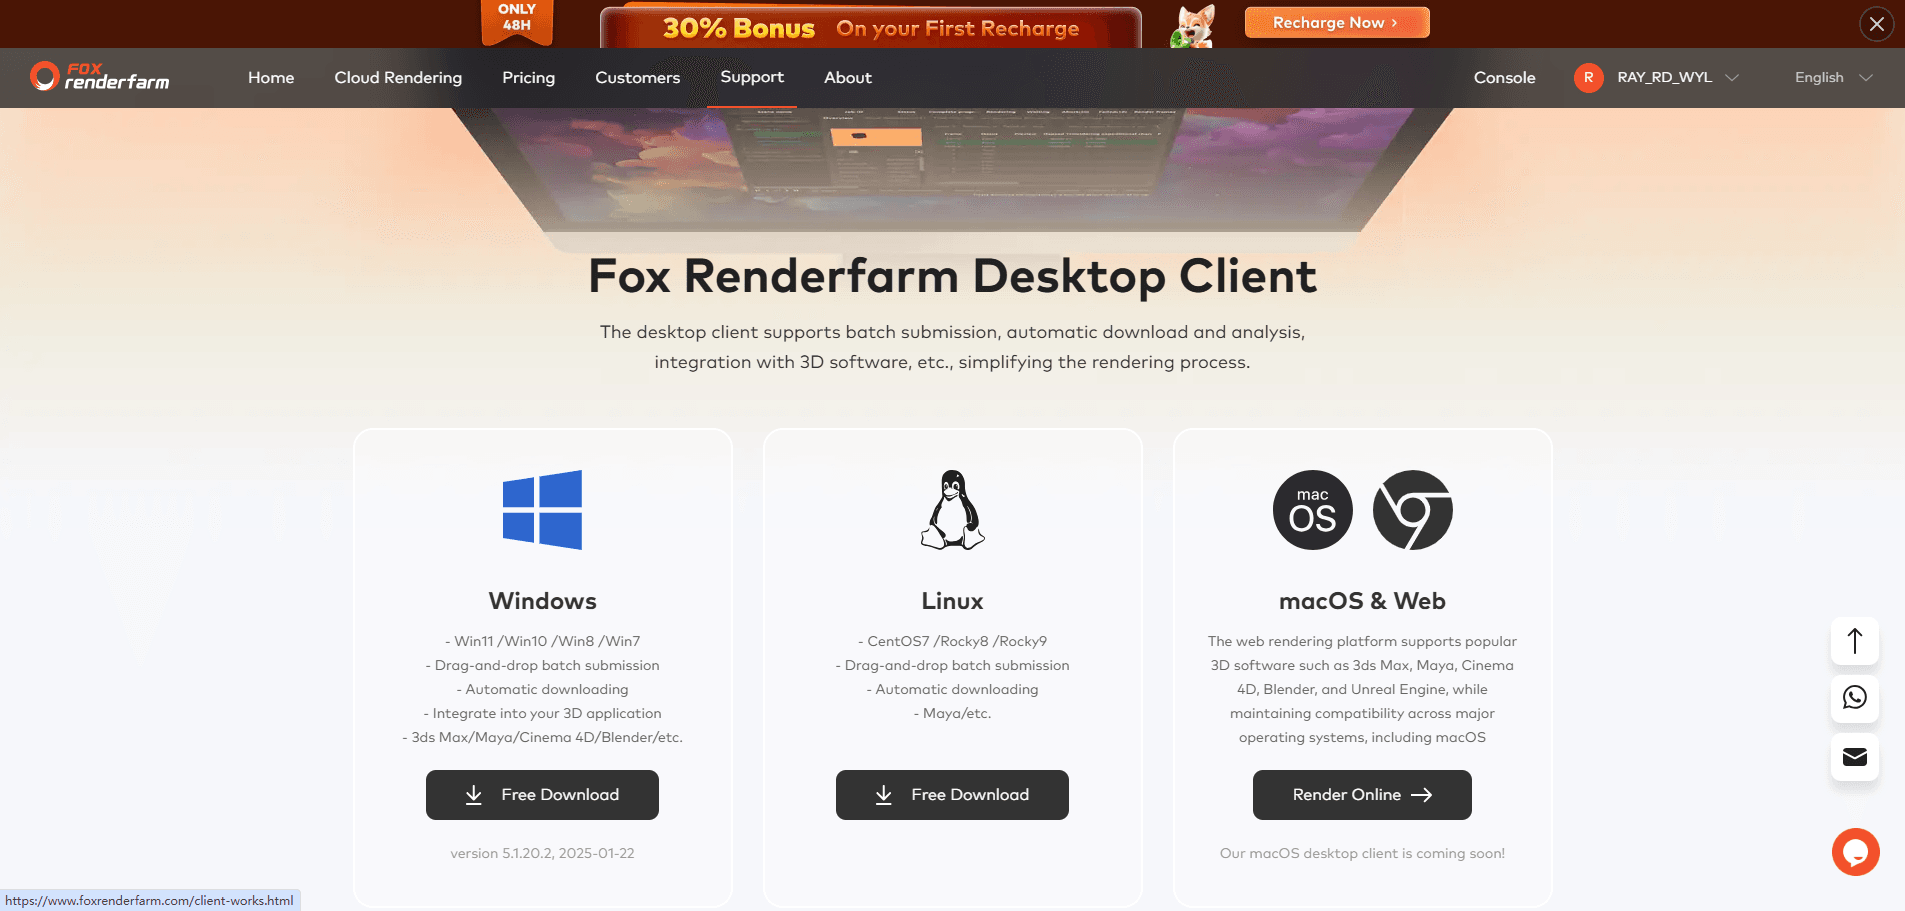
2. Install the Renderbus client; the plug-in will be automatically installed along with the installation process.
Step2: Launch
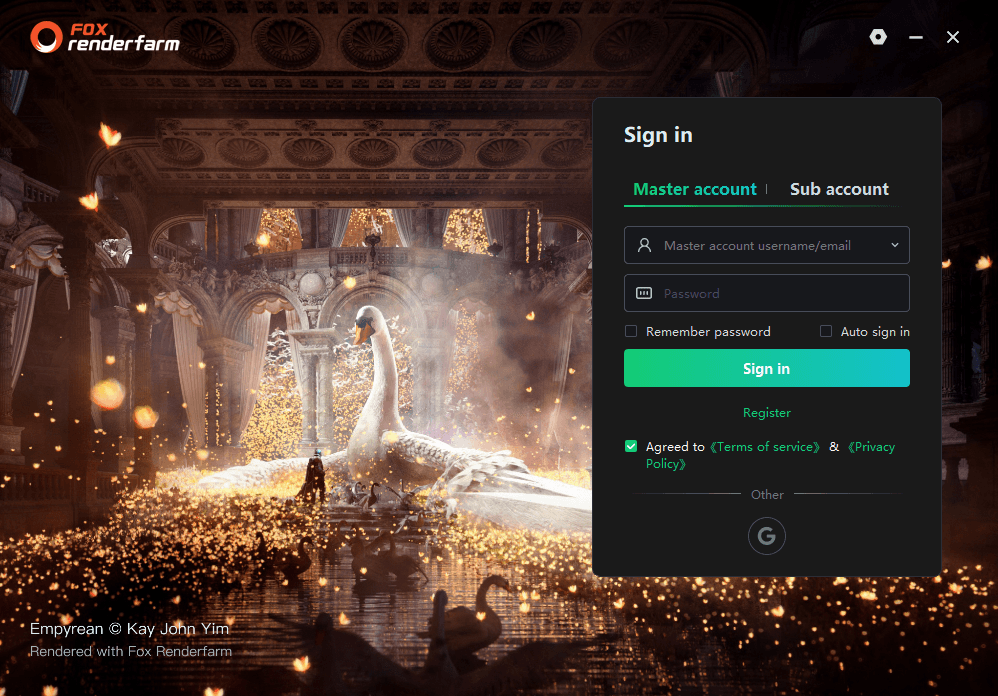
1.After starting the client, please log in first. For users without an account, click [Register] to start creating an account.
2.Open the 3ds Max software and locate "Renderbus" in the menu bar. If "Renderbus" is not found in the menu bar, please go to the plug-in management page of the client to install the plug-in manually.

Step3: Submit
1.Basic settings
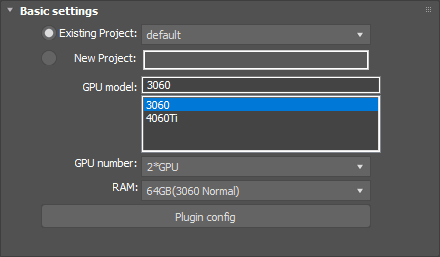
Project:You can create a new project or select an existing project name. Adding a project will facilitate subsequent project management and billing statistics;
Rendering Model:Select an appropriate rendering machine per your requirements. The superior the configuration, the higher the rendering efficiency, enabling rapid completion of rendering tasks.
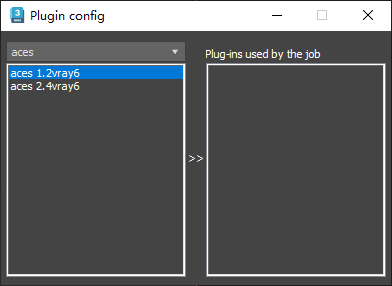
Plugin config: If the current scene needs to be used with other plug-ins, please select the corresponding plug-in here and specify its specific version.
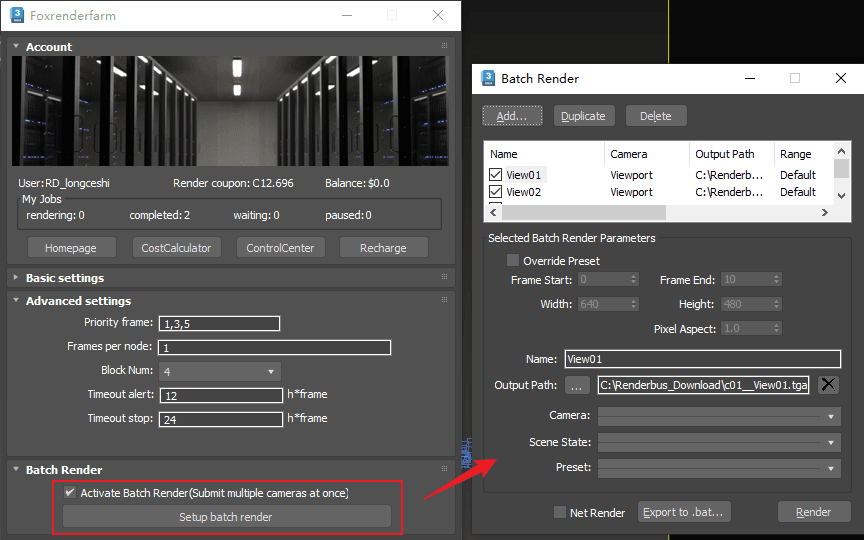
2.Advanced settings
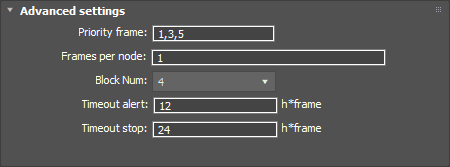
Priority frames: Custom test frames are allowed, with a maximum of 10 frames that can be entered.After the test frames are rendered, confirm that they meet your expectations. If so, click [Full Render] in the [Render List].
Frames per node: Number of frames rendered by one node(machine);
Block Num: Each frame will be divided into a specified number of blocks for rendering, and then the blocks will be synthesized.
Note:
- With each rendering engine’s specialty ,it maybe exsit composition errors on block rendering result, please use block render cautiously.
- Once enabled, the multi-frame per machine setting cannot be modified.
Timeout alert: An email alert will be sent if the rendering frame time exceeds the set limitation. The receiving email can be configured by yourself in Web->Message seetings->Job message settings;
Timeout stop: If the time - consuming of a rendering frame exceeds the set limitation, it will be automatically stopped and you will be informed via email. The receiving email can be configured by yourself in Web->Message seetings->Job message settings.
3.Batch Render
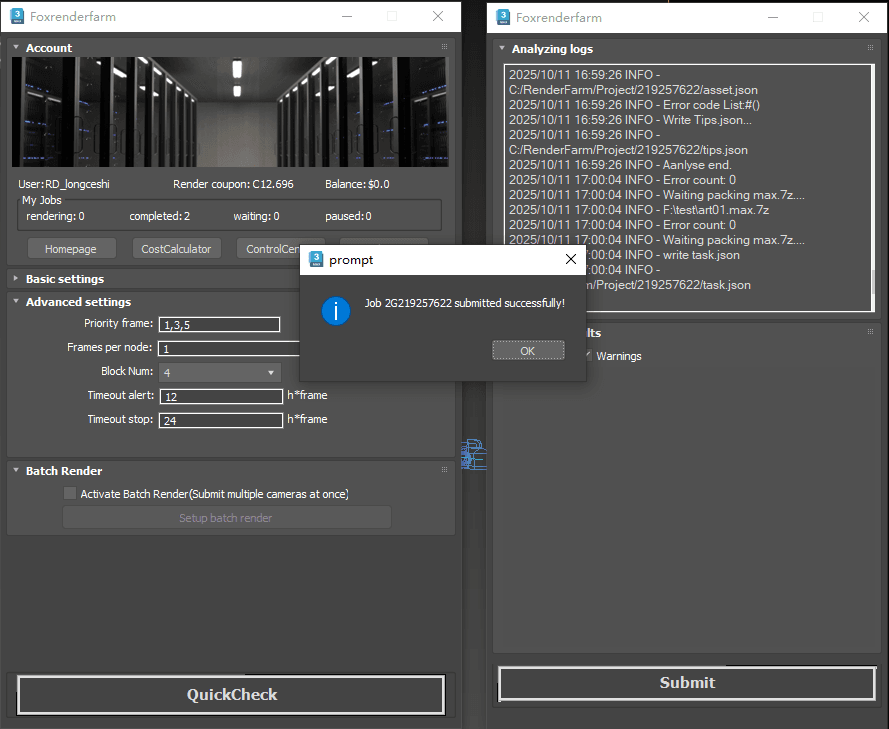
4.QuickCheck
After Clicking “QuickCheck” it will start analysis, pop up analysis progress page (Note: corresponding prompt will appear in case of any error in the analysis results or warning thereof. You can click on a single prompt to view the solution, or enter the problem solving interface to view specific solutions.)
5.Submit
After confirming the scene inspection is error-free, click "Submit". Once the task is submitted successfully, you can return to the rendering client to check the rendering progress in real time.
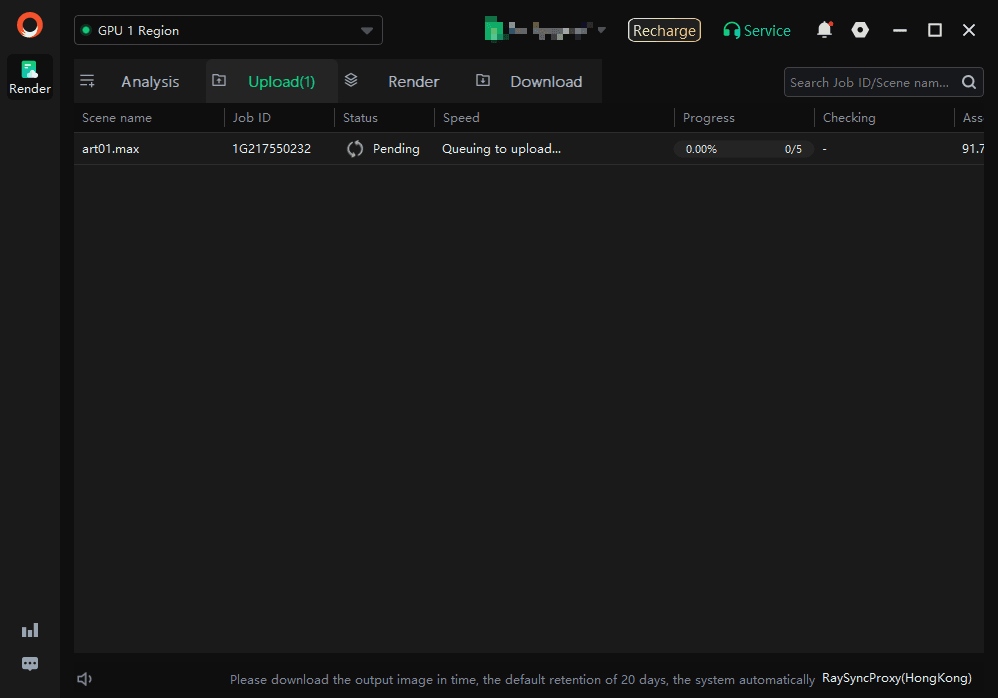
Step 4: Upload
After submitting the rendering job in 3ds Max, return to the Fox client to view the file upload progress. After the upload is completed, it will be automatically rendered.
Step 5: Rendering and download
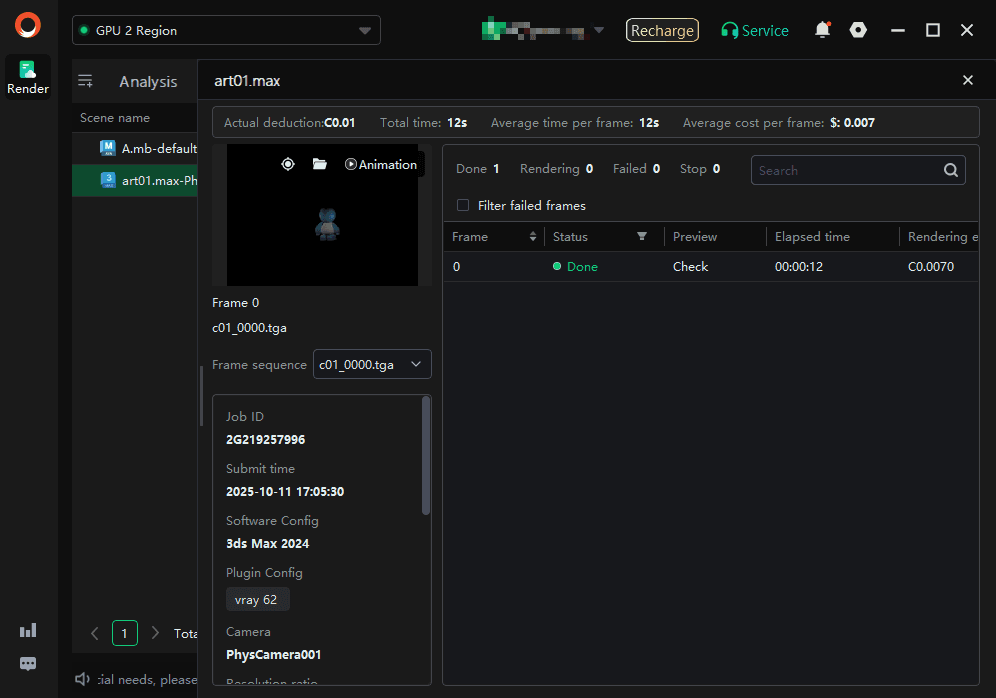
1. During the rendering process, you can click on jobs to view rendering details;
2. After rendering is completed, the rendering file will be automatically downloaded to the local.
Step 6: Uninstall the plugin
Go to the animation client, click on the "Settings" -> "Plug setup" functions in sequence, select the plugin version to be uninstalled and click "Uninstall". The uninstallation will be completed once the operation is finished.


