The cilent submission process for Houdini primarily consists of four steps:
1. Submit;
2. Analyze;
3. Upload;
4. Rendering and download.
In the following sections, we will provide a detailed description of each of these steps. Includes video tutorials and text description tutorials.
Step 1: Submit
1.After starting the client app, please log in first. For users without an account, click [Register] to start creating an account.

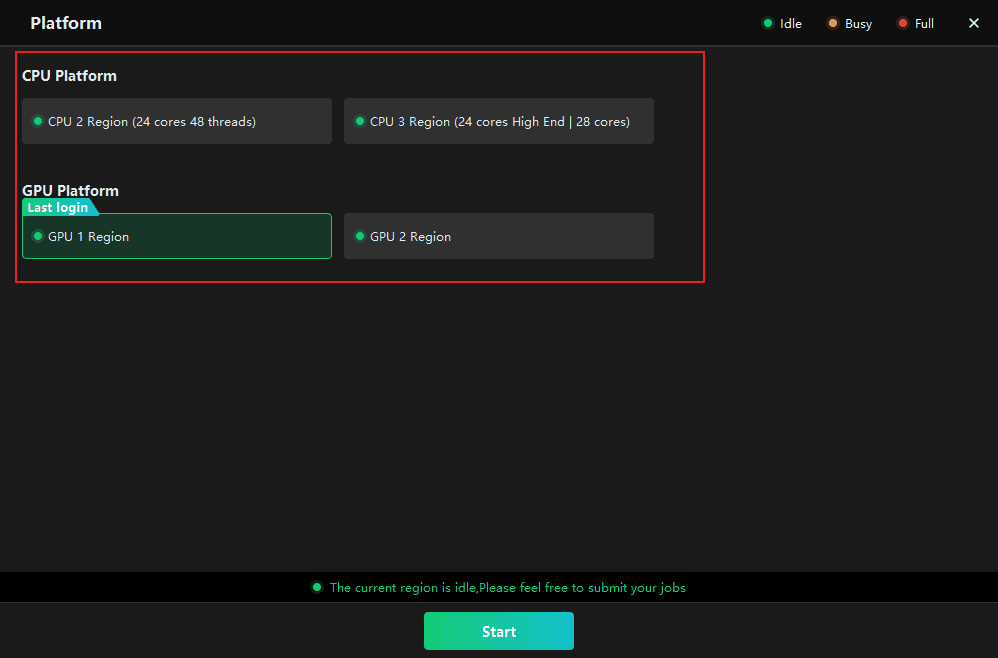
2. Select a region and then click [Start].
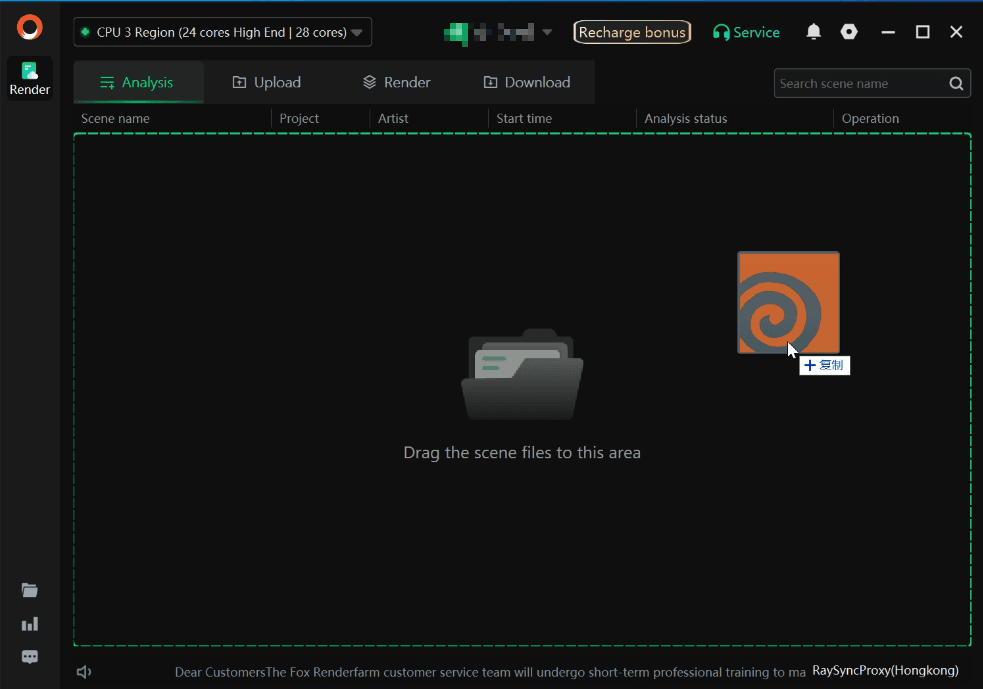
3. Drag the local houdini scene file to any location on the client interface.
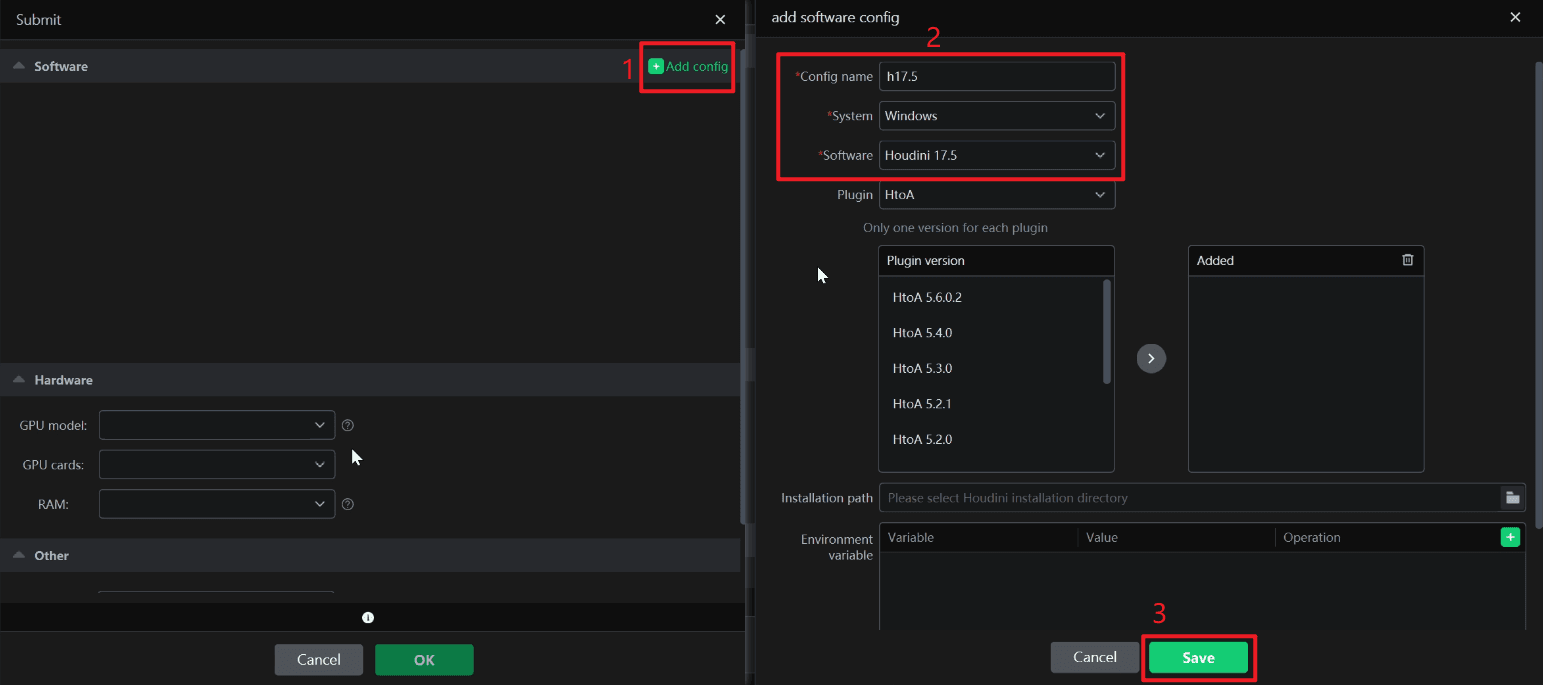
4.Add the software and plugin configuration. In the configuration box, set the config name, system, software, plugin and the installation path of the houdini software.
If the required plug - in information is not found, you can feedback to the customer service for customization.
After the settings are completed, click [Save].
5.After configuration is completed, select the newly set software plug-in configuration and rendering machine model, then click [OK]. The job will enter the analysis phase.
Software: Ensure that the selected software and plug-in configurations match your scenes.
Hardware: Select an appropriate rendering machine per your requirements. The superior the configuration, the higher the rendering efficiency, enabling rapid completion of rendering tasks.
Otner: Select an existing project or create a new one; setting up a project facilitates subsequent verification of consumption bills.

Step 2: Analyze
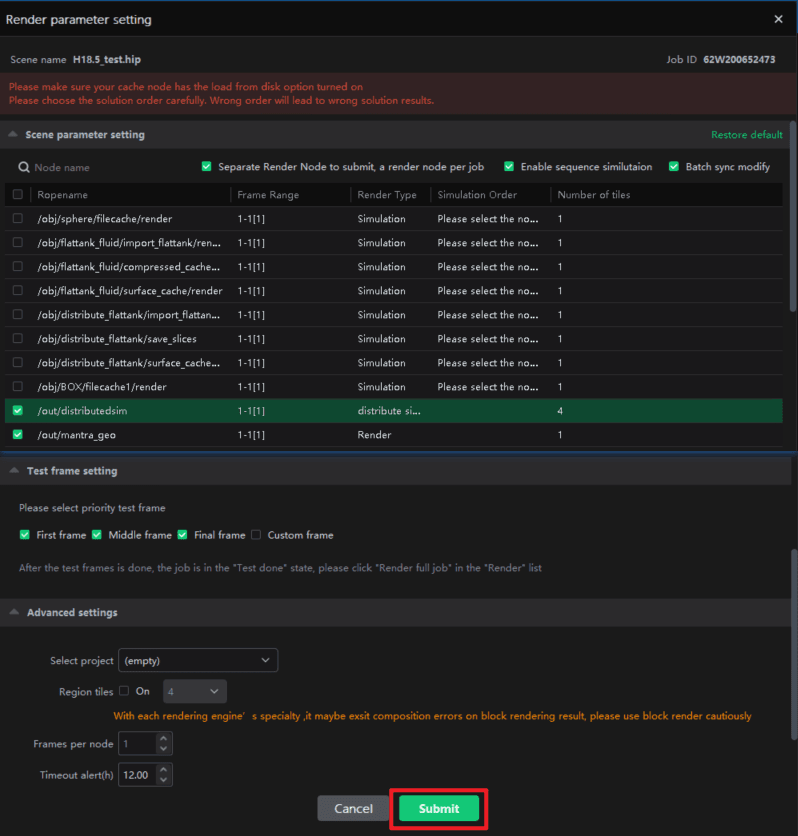
1. After analysis, if there are no errors or warnings, click "Next " to submit the rendering. If there are warnings, you may ignore them and proceed with submission; if there are analysis errors, please modify as prompted before proceeding.

2. Set rendering parameter. The specific Settings are as follows:
2.1 Render parameter setting
1)Frame range: input the range of frames you want to render.
2)Render Type: Automatically analyze and display corresponding render types(Simulation or Render)
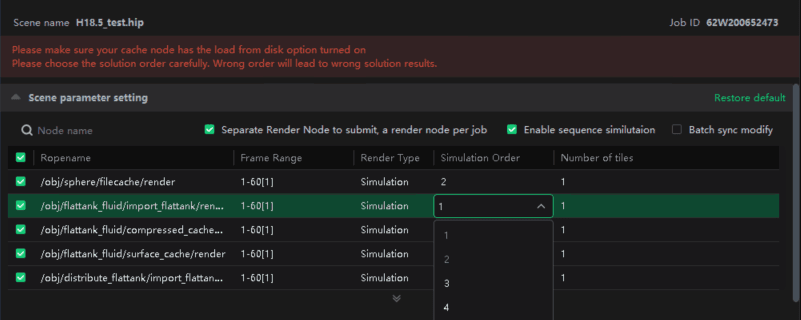
3)Enable node simulation:Supports the sequential control of the solution tasks with interdependent relationships. When you turn on this feature, you will see the Simulation Order field,where you can set the order of the simulation nodes.
Note:
●Please make sure your cache node has the load from disk option turned on
●Please choose the solution order carefully. Wrong order will lead to wrong solution results.
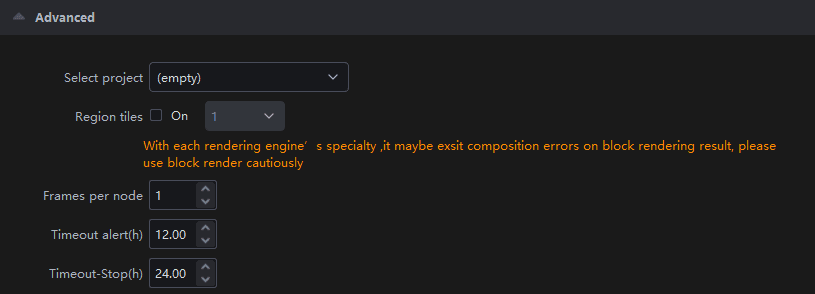
4)Region tiles:Each frame will be divided into a specified number of blocks for rendering, and then the blocks will be synthesized.
Note:
●With each rendering engine’s specialty ,it maybe exsit composition errors on block rendering result, please use block render cautiously.
●You need to check"Tick Submit by node(each node is a job)"
5)Simulation Mode: Multi machine Simulation(used with caution)
Note:
●This function is used when the node supports multi-machine simulation (not dependent on the front and back frames), such as particle cache converting to surface output, which is not related to dynamic simulation; non-pyro and fluid dynamics, If you still have doubts,please contact online customer service.
6)Frames per node: Number of frames rendered by each node(machine)
Note:
●Houdini Simulation tasks do not support the multi-frame function on one machine
2.2 Test frame setting
To ensure optimal results, we recommend that you prioritize test frames before clicking [Submit]. After the test frames are rendered, confirm that they meet your expectations. If so, click [Full Render] in the [Render List]. If you have any questions, please contact our online customer service.
In the initial state, three frames—the first frame, middle frame, and final frame—are automatically selected.

Custom test frames are allowed, with a maximum of 10 frames that can be entered.

2.3 Advanced setting
Select project: You can create a new project or select an existing project name. Adding a project will facilitate subsequent project management and billing statistics;
Region tiles: Each frame will be divided into a specified number of blocks for rendering, and then the blocks will be synthesized.
Note:With each rendering engine’s specialty ,it maybe exsit composition errors on block rendering result, please use block render cautiously.
Frames per node: Number of frames rendered by one node(machine);
Timeout alert(h): An email alert will be sent if the rendering frame time exceeds the set limitation. The receiving email can be configured by yourself in Web->Message seetings->Job message settings;
Timeout stop(h): If the time - consuming of a rendering frame exceeds the set limitation, it will be automatically stopped and you will be informed via email. The receiving email can be configured by yourself in Web->Message seetings->Job message settings.
3. Click "Submit " to initiate rendering.
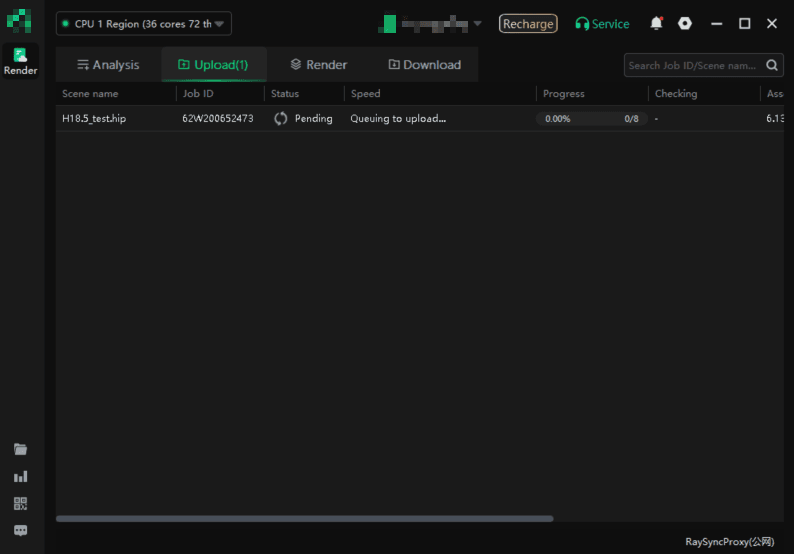
Step 3: Upload
The job will appear in Upload Page; after upload, it will automatically enter the rendering phase.
Step 4: Rendering and download
1. During the rendering process, you can click on jobs to view rendering details;

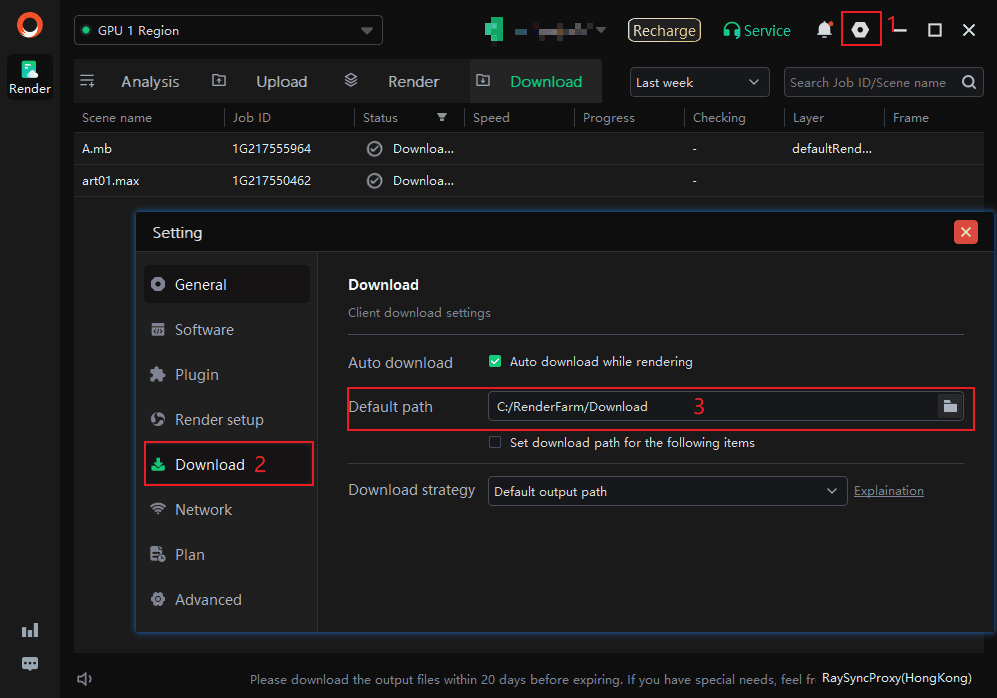
2. After rendering is completed, the file will be automatically downloaded to your computer. The relevant settings for the rendering result output path can be operated in Settings - >Download ->Default path.