How to Build a Mechanical Warrior in Zbrush(3)

To continue with part 1 and part 2, Fox Renderfarm, the No.1 cloud rendering services provider and render farm, will still share with you the tutorial from the 3d artist Dong Chao of part 3 about how to build a mechanical warrior with Maya and ZBrush.
Lighting
Adjust a simple POSE, and then add a scene used in the previous project to test the light rendering. A total of 5 lights were used in this project, 4 VRay Area light sources and one Dome light source. The Dome light source is mainly to add an HDR map inside. Normally, you can check Dome Spherical in the settings, and then add an HDR. Because the final effect is more to highlight the main body, so the intensity is reduced to 0.5.

The other light sources are all adjusted in size and intensity color. One is the overhead light source, the other is the main light on the side and the two backlights. The final lighting effect is as follows.


The final renderer uses VRay, and all elements in the scene use VRaymtl material. VRaymtl is very easy to use, it only needs simple adjustment to get good results. Especially for the character body, I used a VRayblend material and FastSSS+Vraymtl. In addition to the SSS texture of the character itself, I also wanted to adjust the highlights more delicately, so I superimposed the highlight texture directly on the highlight color of vraymtl. In order to speed up, I used the completed Normal texture to convert it with the Ndo plug-in, and converted it into a concavity and Ao texture, Then I copied the concavity to highlight the concave effect of the skin, and superimposed the previous color texture and adjusted it again can. And the Scatter texture in the SSS material is not drawn, only the color texture is used to modify. The following are the settings of the head body part and the shader of the highlight map,


Rendering
In the final rendering, I improved the lighting quality and rendering quality, and replaced the body with a 3-level subdivision model in ZBrush, and then used a normal map. In the test, the normal details are displayed better and faster than using displacement maps.
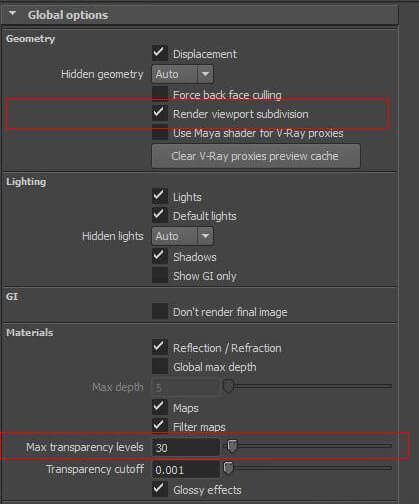
Finally, the rendering is divided into channels, and then adjusted using Photoshop. The resolution of the final image is 2.5K * 3K, and the rendering time is about one and a half hours. The following are the renderer settings, and the red box is the place that needs special attention.


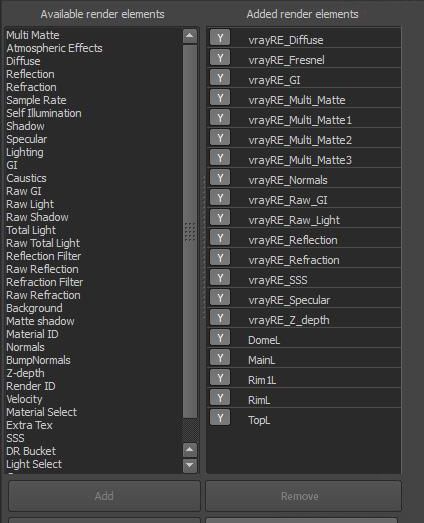
In the compositing stage, I added all the channel renderings to Photoshop for adjustment. I used the channels to refine the final effect, adjusted the depth of field blur, color adjustment, and superimposed a layer of dust and shadows.
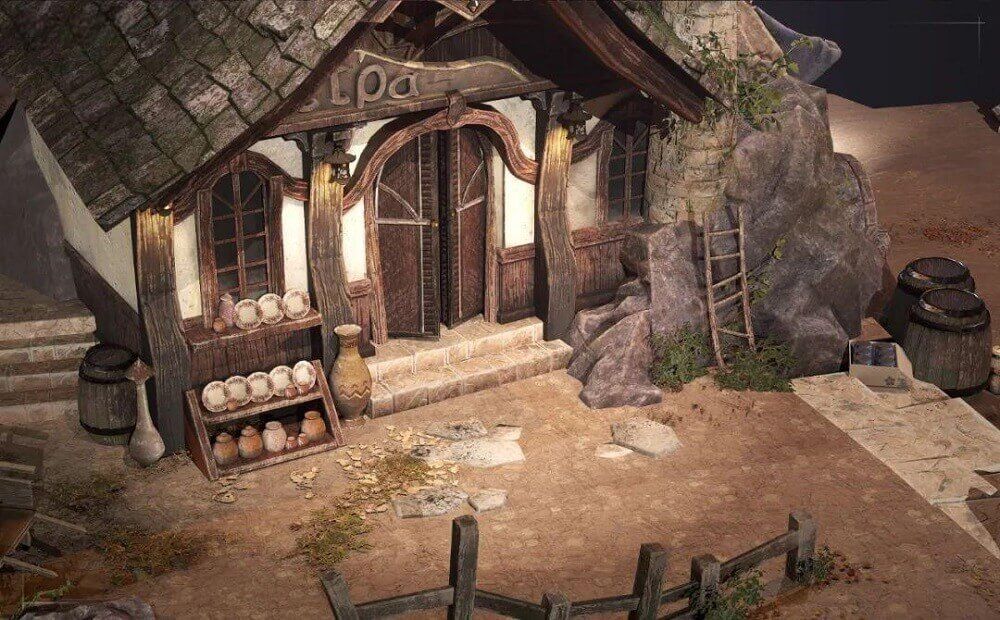
Final render: