

Path Tracing Explained: How It Works, Software Support, and Best Practices
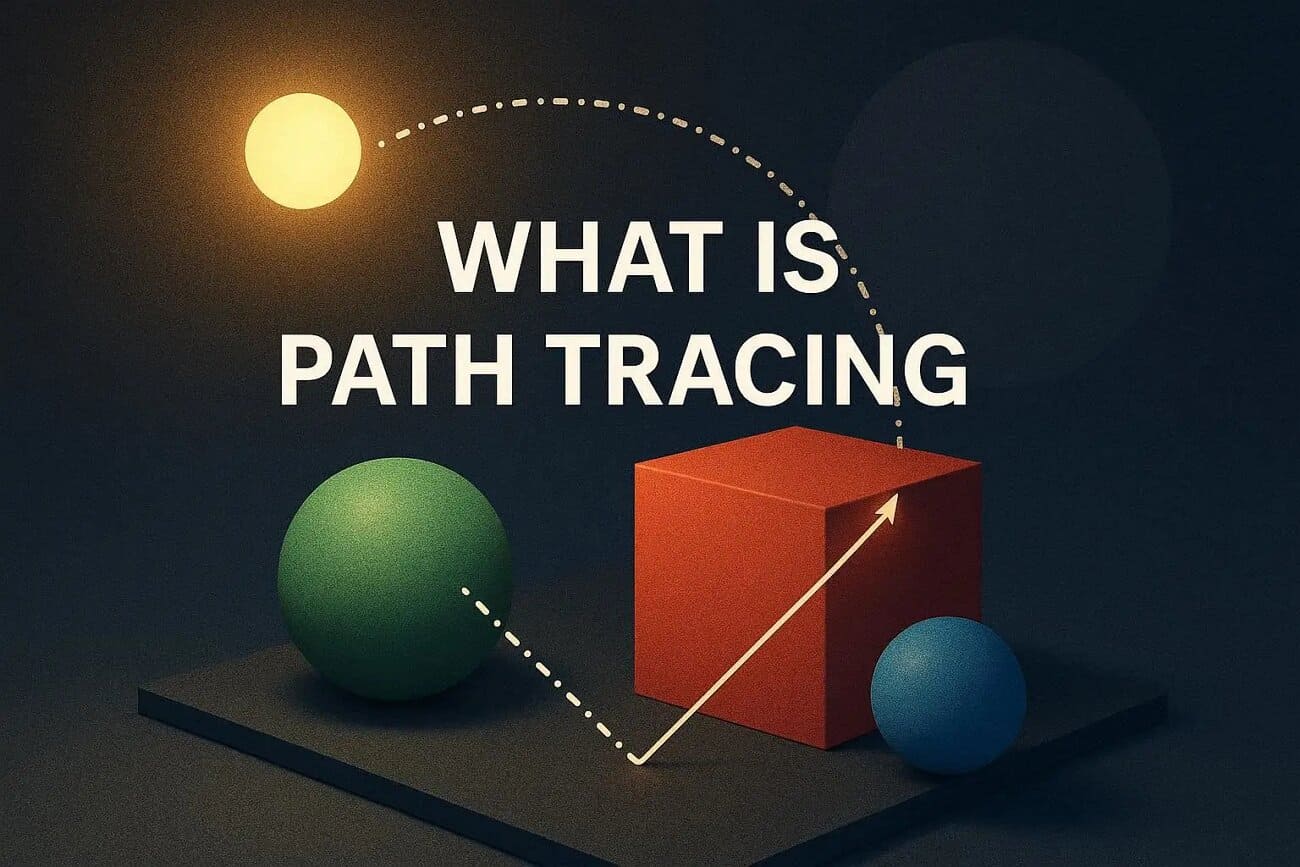
The 3D graphics world is expanding rapidly, and the realistic images are well appreciated. Path tracing helps artists and designers create scenes that resemble the real world. A lot of beginners are confused by the workings and the reasons why it is essential for games or animations. Path tracing, unlike simpler approaches, models light reflections and shadows more realistically.
However, it is slower to render since it computes numerous light paths. Thus, having a background in path tracing helps to select the appropriate settings and software. This guide explains path tracing and offers tips and tricks to use it effectively.
Part 1. What is Path Tracing?
Path tracing is a physically based rendering technique that simulates real-world light behavior inside a 3D scene. Many beginners ask, “what is path tracing,” and why it matters in 3D graphics. By tracing random light paths, path tracing calculates how light bounces between surfaces to create photorealistic images. This method reproduces reflections, shadows, and light behavior that look naturally accurate.
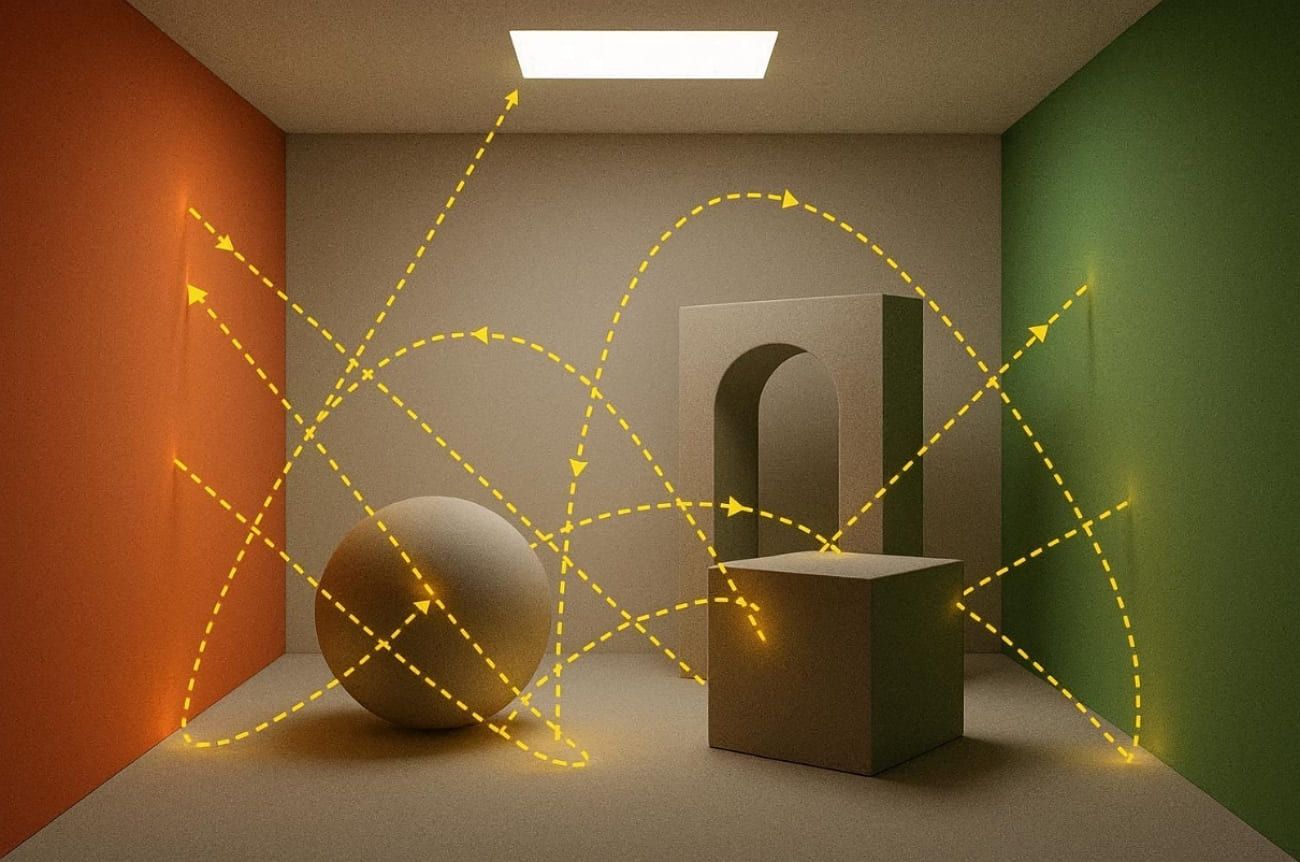
Alongside that, every light line contributes some light to the last pixel. Therefore, since it simulates natural lighting, it produces a soft glow, color mixing, and realism. Despite being slower, path tracing produces highly lifelike visual results.
Key Features
Path tracing achieves realism because it models physical light behavior rather than approximated shading. The following features explain why it produces more accurate lighting than traditional rendering methods:
- Unbiased Algorithm: Uses Monte Carlo sampling to estimate lighting without bias or systematic calculation errors.
- Global Illumination: Simulates color bleeding and indirect lighting to achieve higher visual realism.
- Complex Effects: Properly capture the caustics, fog, transparency, and soft shadows in various conditions of lighting.
- Adaptive Flexibility: Supports bidirectional path tracing and volumetric lighting for more complex lighting scenarios.
- Noise Handling: Reduces grainy results by averaging multiple light samples to produce more polished renders.
Limitations of Path Tracing
Although path-traced images deliver highly realistic lighting, they require extensive computation because each pixel is calculated through repeated light sampling and multiple bounces. The limitations below explain why performance and hardware demands remain significant.
- High Cost: Each pixel demands thousands of ray calculations, significantly increasing rendering and processing overhead.
- Persistent Noise: Low sample counts create speckled artifacts in glossy areas and indirect lighting zones.
- Slow Convergence: Bright surfaces and closed interiors form long light paths that converge significantly slower.
- Hardware Dependency: Real‑time path tracing depends on modern GPUs supporting advanced denoising and temporal accumulation.
- Engine Gaps: Some engines omit shader nodes or volumetrics when enabling full path tracing.
Difference Between Path Tracing and Ray Tracing
Beginners often ask about path tracing vs ray tracing when comparing realistic lighting techniques. The following table clearly shows key differences, helping readers quickly understand their main contrasts:
|
Aspect |
Ray Tracing |
Path Tracing |
|
Goal |
Accurate shadows, reflections, and refractions. |
Full global illumination, photorealistic images |
|
Light |
Direct light plus limited bounces |
Direct and multi-bounce indirect lighting |
|
Realism |
Good shadows and reflections, limited indirect light |
Soft shadows, caustics, and realistic lighting |
|
Performance |
Faster, suitable for real-time graphics |
Slower, computationally intensive, needs strong GPUs |
|
Usage |
Games, visualization projects |
Film, VFX, archviz, emerging real-time modes |
Part 2. How Does Path Tracing Work?
Many beginners ask, “Is path tracing better than ray tracing?" when trying to create realistic lighting effects in 3D scenes. Understanding how it works reveals why it creates natural lighting effects that stand above traditional methods. Below is a stepwise section to explore how path tracing actually works:
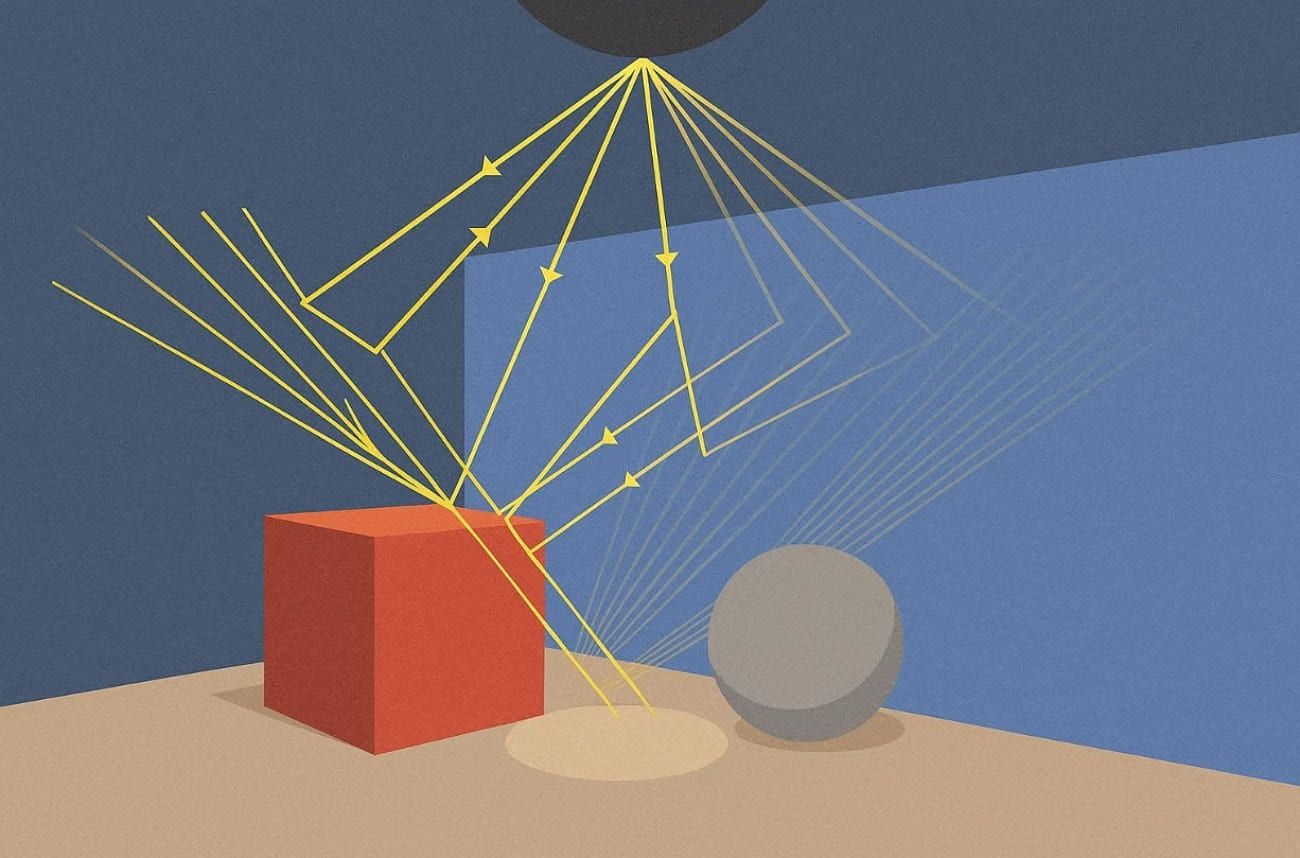
1. Shooting Rays from the Camera
Path tracing begins by shooting rays from the camera through each pixel into the 3D scene. Each ray travels through a specific pixel, representing a possible view of the scene’s visible geometry. These rays determine which objects are hit first, forming the foundation for later calculations involving light reflection and surface color interaction. According to SideFX's 2025 tutorial, path tracing originates rays from camera pixels for accurate scene visibility.

2. Locating Surface Intersections
In a path-traced scene, each ray is tested against objects to locate its first intersection point. The renderer then records data, such as surface position and material response, to ensure accuracy. Thus, such details define the interaction of light with the surface in terms of reflections/refractions. Many bounces may occur around 4 to 12 times to achieve natural illumination.
3. Sampling Light and Adding Contributions
At each surface intersection, path tracing algorithms accurately calculate the amount of light that contributes to each pixel. The algorithm naturally adds light from direct sources and surface emission when applicable. Alongside that, each contribution uses the surface's BRDF and probability density for precise radiance estimation. Plus, Scratchapixel's path tracing lesson explains BRDF sampling at intersections with direct light contributions.

4. Bouncing Rays with Random Directions
After each surface hit, the algorithm randomly determines a new direction based on material properties. The ray may reflect or scatter diffusely, continuing its visual journey through multiple surfaces. With every bounce, it gathers more light information, enriching realism and global illumination accuracy essential for cinematics and physically consistent 3D scenes.
5. Repeating Paths and Averaging Samples
To fully understand “what is path tracing," it's essential to know how repeated sampling refines accuracy. Rays continue bouncing until they lose energy or exit the scene entirely. Thus, this process repeats thousands of times per pixel, and all light paths are averaged together.
Part 3. Which Software Supports Path Tracing?
Several commercial renderers and game engines have path-traced modes to provide more accurate lighting and reflection effects. Hence, the table below summarizes famous software options that support this technique across different rendering workflows:
|
Category |
Software / Engines |
Usage Focus |
|
3D Production Renderers |
Blender Cycles, Autodesk Arnold, V‑Ray, OctaneRender, Corona, RenderMan |
Film, VFX, and architectural visualization |
|
Real‑Time Engines |
Unreal Engine Path Tracer, Twinmotion, D5 Render, NVIDIA RTX Path Tracing |
Games, interactive projects, and visualization tools |
|
Hybrid / Research Tools |
LuxCoreRender, Indigo Renderer, YafaRay, PBRT, Maxwell Render |
Academic research, testing, and open‑source rendering experiments |
Part 4. How Can You Speed Up Path Tracing Renders?
Rendering complex scenes with path tracing can be time-consuming, especially at high sample counts or resolutions. The following approaches can help reduce render time while preserving visual quality:
1. Use Online Rendering for Projects
Outsourcing heavy path tracing workloads to a render farm can boost performance significantly. A recommended choice is Fox Renderfarm, which supports common 3D tools, including Blender and 3ds Max, with optimized infrastructure. By sending frames to its GPU and CPU nodes, artists can render without occupying local hardware. With the help of cloud rendering, you can save hours or days while keeping photorealistic lighting and effects intact.

2. Reduce Samples and Rely on Denoising
Understanding “what is path tracing” also means knowing how to balance samples and denoising effectively. Instead of using 2,000 to 5,000 samples per pixel, many renders look clean with about 100 to 500 samples. Moreover, advanced AI‑based denoisers rebuild fine details from minimal data efficiently. This approach significantly reduces render time while keeping realistic lighting and details.
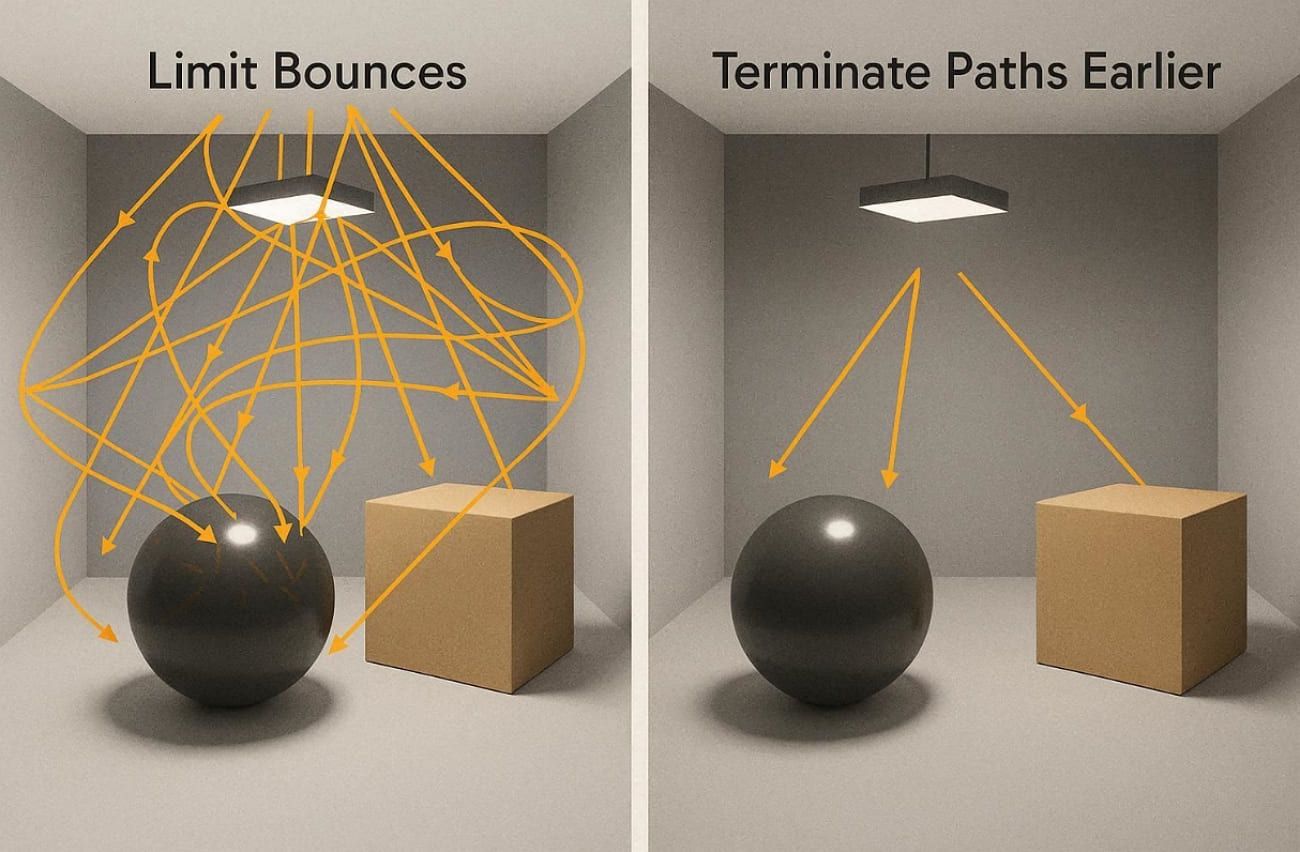
3. Limit Bounces and Terminate Paths Earlier
In a path-traced workflow, limiting maximum bounces from 12 to around 6 to 8 can improve efficiency. Fewer bounces reduce intersection tests and light evaluations without significant visual compromises in most scenes. Additionally, applying Russian roulette termination after several bounces cuts total rays by nearly 30%, achieving roughly 1.4× faster rendering performance.
4. Optimize Ray–scene Intersections
Speeding up ray–scene intersections is also crucial for faster rendering performance in path tracing games. For that, using BVH acceleration structures can reduce intersection tests by nearly 70% effectively. Plus, simplifying unseen geometry and optimizing scene hierarchy further boost overall path traversal efficiency significantly.
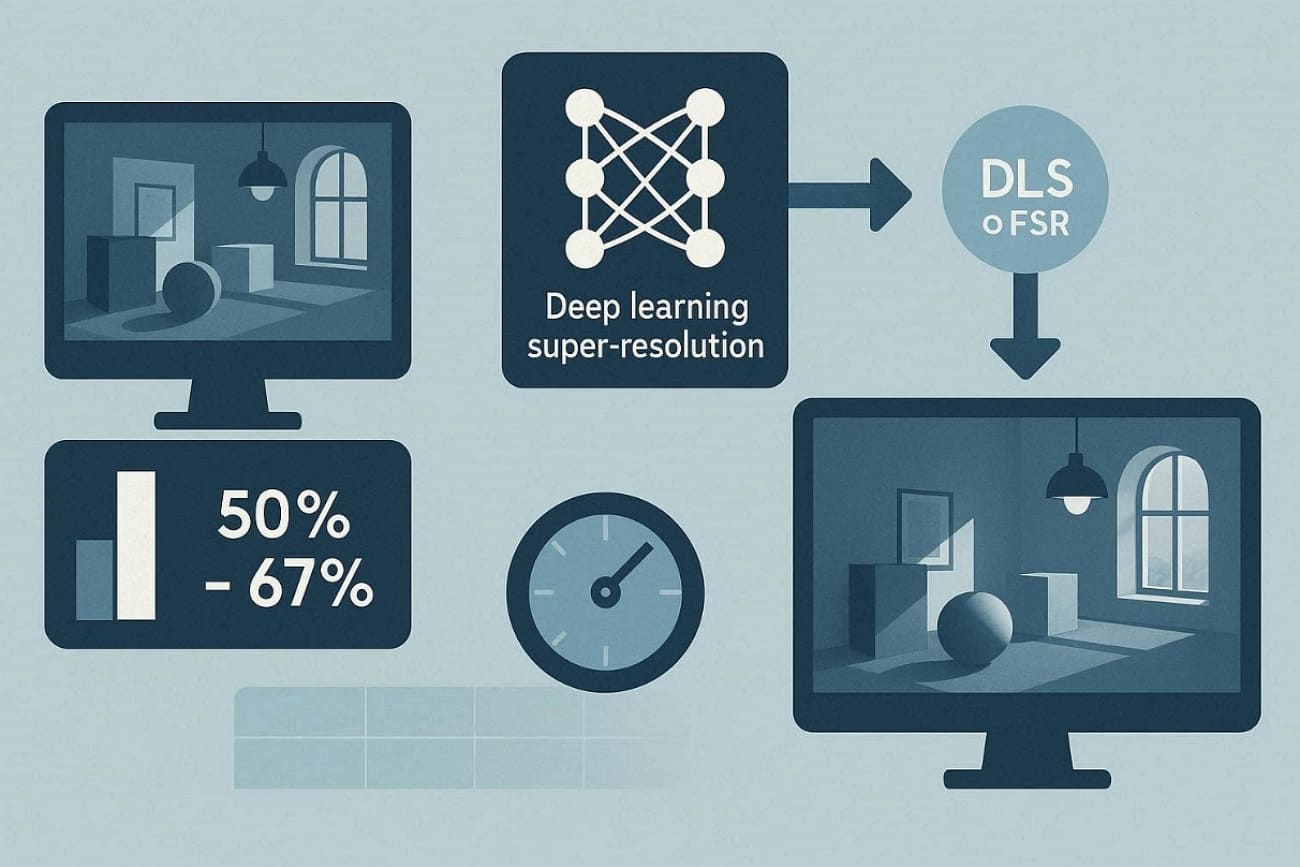
5. Lower Resolution, Then Upscale
Rendering scenes at 50 to 67% of the target resolution can significantly improve overall processing efficiency. Modern AI‑based super‑resolution tools like DLSS or FSR upscale output without visible quality loss. So, this workflow achieves interactive frame times without sacrificing believable global illumination accuracy.
Part 5. When Should You Use Path Tracing?
Choosing when to apply path tracing vs ray tracing depends on your project's realism and rendering goals. Still, below are some use cases where path tracing delivers its most significant benefits across different workflows:
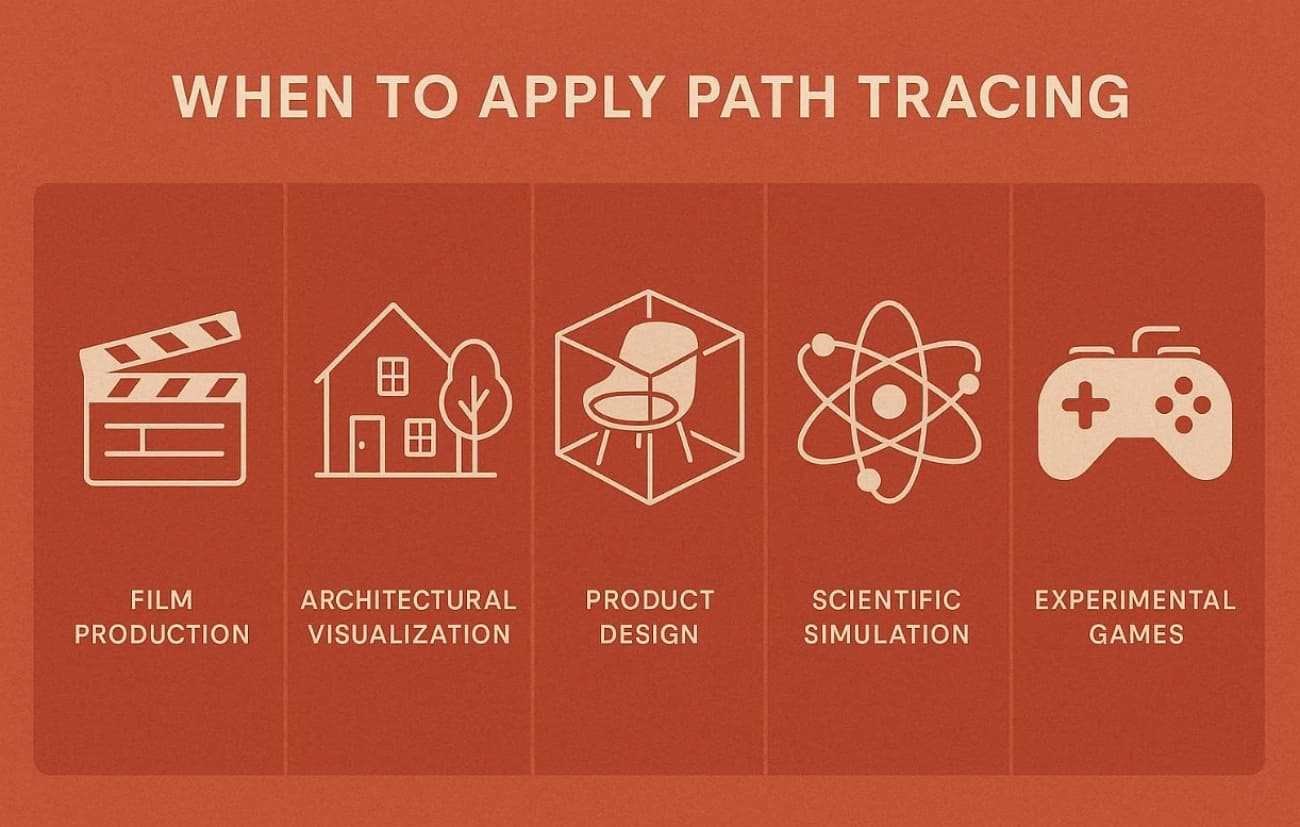
- Film Production: Ideal for VFX sequences needing natural color bleeding and physically precise reflections. It guarantees consistency in cinematic quality shots through a realistic balance of light transport and global illumination.
- Architectural Visualization: Perfect for capturing lighting in detail inside buildings with glass and reflective surfaces. This creates lifelike spaces, capturing warm ambient bounce lights for a space that appears naturally illuminated.
- Product Design: Helps designers visualize how materials respond under complex lighting with physically accurate reflectance results. It supports material evaluation, ensuring that fabrics and metals appear consistent across multiple lighting conditions.
- Scientific Simulation: Path tracing is required when visual output must correlate with measurable optical behavior. This includes multi-bounce scattering and accurate energy-conserving light transport.
- Experimental Games: Used in next‑gen path tracing games for showcase or cinematic gameplay modes requiring immersive lighting. It delivers unified light behavior, though it's limited to high‑end GPUs that support advanced denoising frameworks.
Part 6. FAQs about Path Tracing
Q1. Is Path Tracing better than Ray Tracing?
Path tracing provides higher realism with full global illumination and multi-bounce lighting effects. Nonetheless, ray tracing is available at a faster speed and in practice in real-time gaming and interfaces all over the world. So, choose path tracing when maximum photorealism justifies significantly longer rendering times and processing demands.
Q2. Why does Path Tracing produce noise?
Path tracing uses random Monte Carlo sampling, causing pixel brightness to vary noticeably with few rays. Moreover, low sample counts per pixel create unstable averages, resulting in grainy speckles, especially in dark, shadowed areas. Therefore, indirect lighting and complex bounces need thousands more samples to smooth out fireflies and patchy noise.
Q3. How many samples do you need for Path Tracing?
There is no fixed sample count; real-time uses dozens, while previews typically need hundreds. Most artists start previews around 100 to 300 samples per pixel for faster feedback. Render client stills at 500 to 2,000 spp with denoising for a clean, professional presentation quality. Moreover, demanding scenes like caustics need 5,000+ samples for noise-free final prints and cinematic outputs.
Conclusion
Path tracing simulates physically accurate light transport, producing realistic shadows, reflections, and global illumination in films and 3D visualization. This guide explained how it works, supported software, and optimization methods like sampling, bounce limits, and denoising.
Understanding these principles helps artists balance realism with hardware performance. For large or urgent productions, render farm such as Fox Renderfarm efficiently process path-traced workloads while maintaining consistent visual quality.


