
From subtle character movement to explosive action scenes, animation depends on keyframes, which are known as markers that define starting and ending points of change. Whether for gaming, advertisement, or films, artists and creators are using Blender, an open-source 3D creation suite, to take full control of their vision. In this software, a keyframe captures the value of property, such as location, rotation, and scale, at a specific moment.
When multiple keyframes are set, it automatically generates the in-between frames, also called interpolation, and creates smooth transitions from one state to another. However, to achieve fluid and realistic animations, mastering keyframes in Blender is crucial, which seems daunting for beginners in this field. If you are also one, read this guide about Blender adding keyframes, their importance, advanced techniques, common issues, and efficient tips.
Part 1. Importance of Keyframes for Animation in Blender
Before mastering Blender how to add keyframe concepts, delve below and understand how much importance they hold for animation in Blender:
- Enable Precision: By defining keyframes, users can control every aspect of an object’s movement, which is important for detailed and stylized animations.
- Collaboration: Since keyframes act as reference points or sketches in animation, teams can review key poses without needing full animation, saving significant time.
- Cleaner, Manageable Workflow: When only necessary keyframes are added using Blender, revisions become easier through an uncluttered view.
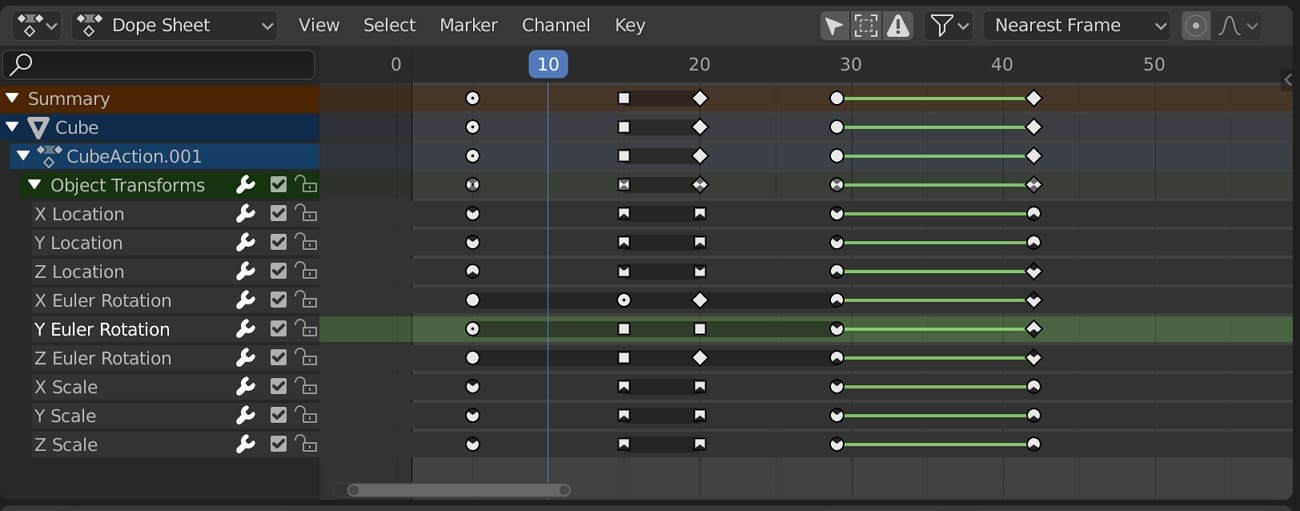
- Allow Automation: Once all keyframes are set, Blender’s dope sheet layout and graph editor enable you to adjust motion without renovating the full sequence.
- Editable Animation: After keyframing, Blender lets you tweak motion curves and timings, providing animators creative freedom.
- Efficiency: Users don't always need to animate every frame; they have to define key poses, and Blender can handle in-between.
- Better Quality Animation: When interpolation in Blender creates smooth and natural movements, users can fine-tune keyframes to avoid jerky results.
Part 2. Methods for Adding Keyframes in Blender
Since animation in Blender is highly context-dependent, there are various methods to create keyframe Blender, some of which are demonstrated next:
Method 1: Using the “I” Key
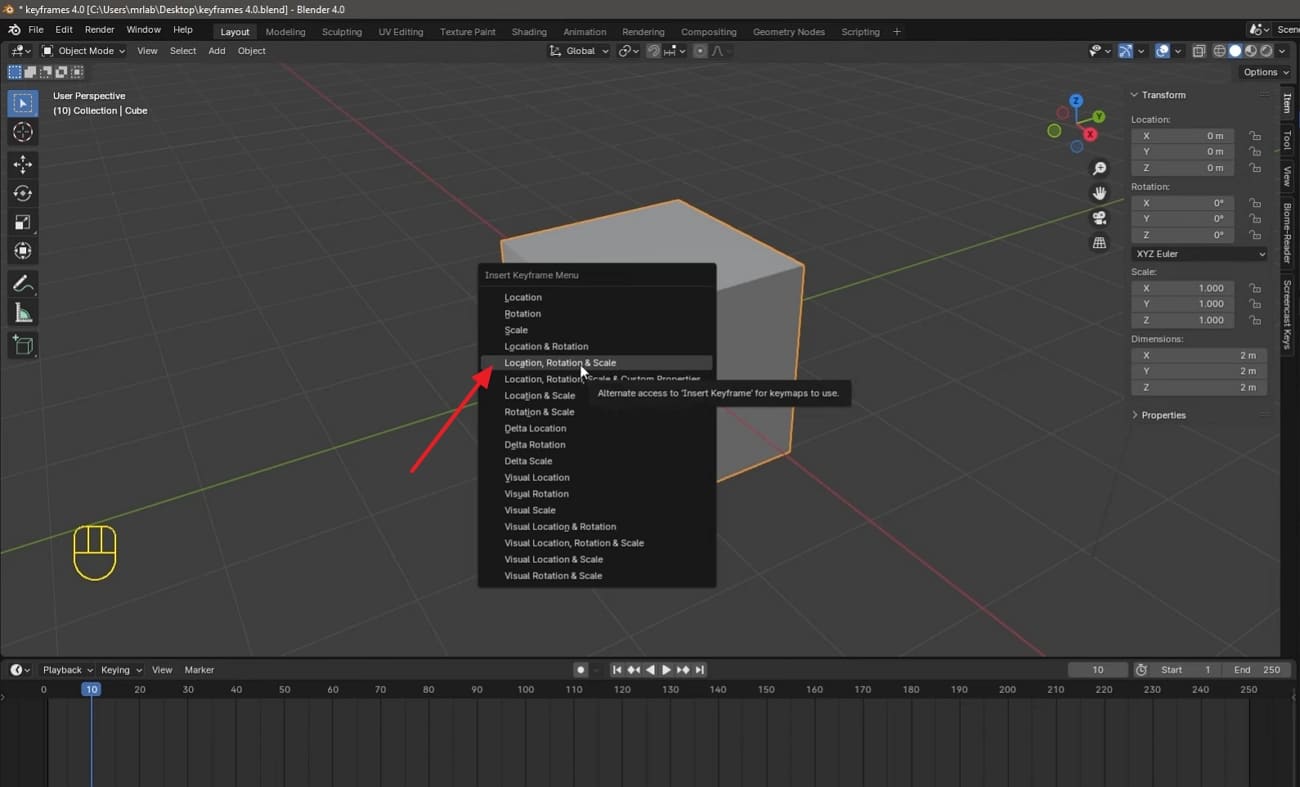
In 3D Viewport: For quick and accessible keyframing, beginners just need to select the targeted object and press the "I" key to open the "Insert Keyframe" menu. Using it, select the preferred transform, such as "Location, Rotation, and Scale," to add a diamond-shaped keyframe at the timeline.
Hover and I: Access the right-side panel, go to the “Items” tab, hover over the preferred transform, and press the “I” key to add the keyframe.
Method 2: Right-Click Context Menu
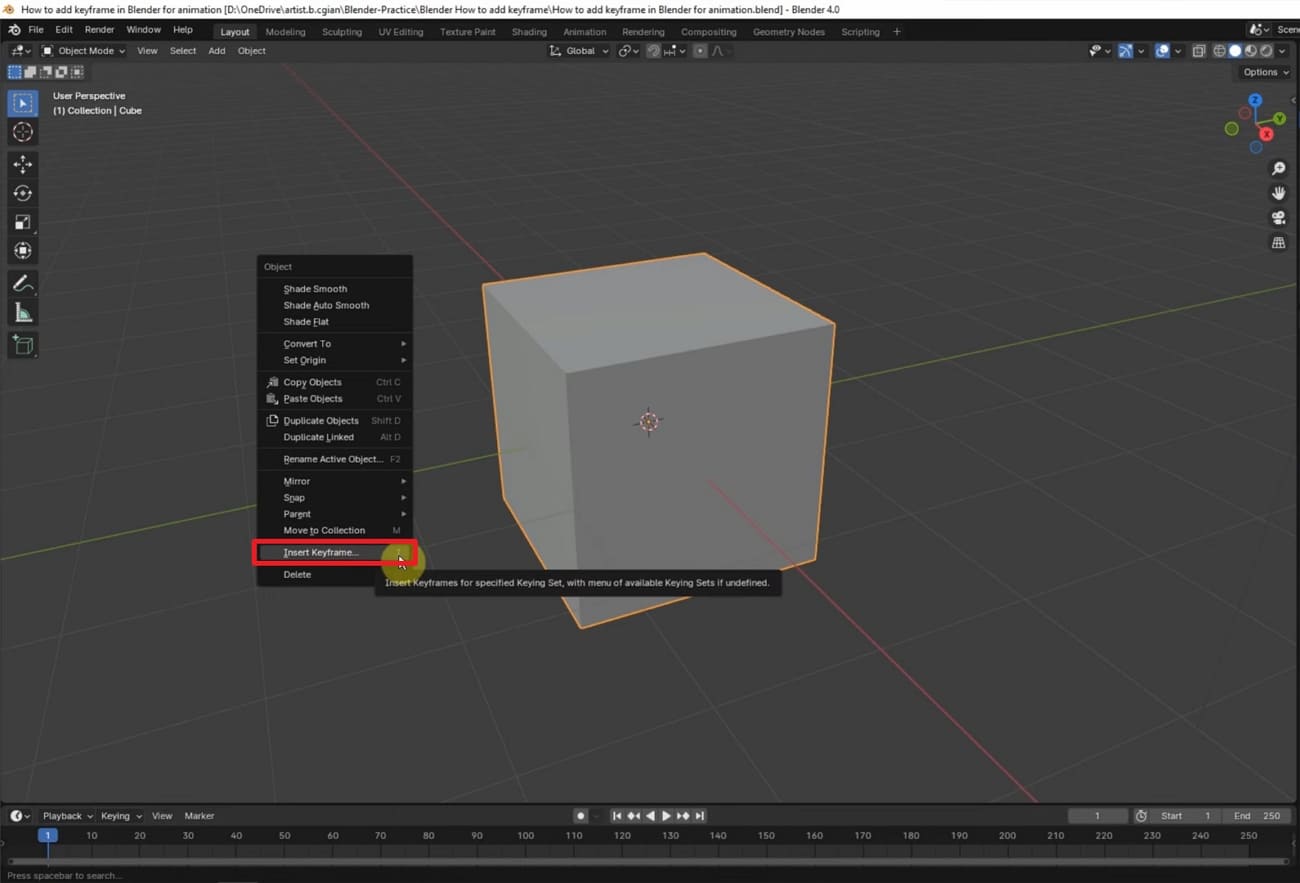
Despite using the shortcut key “I,” Blender users can right-click the properties and choose the “Insert Keyframes” option. This way, they will access the “Insert Keyframes Menu” to select location, scale, rotation, and many other transform options altogether.
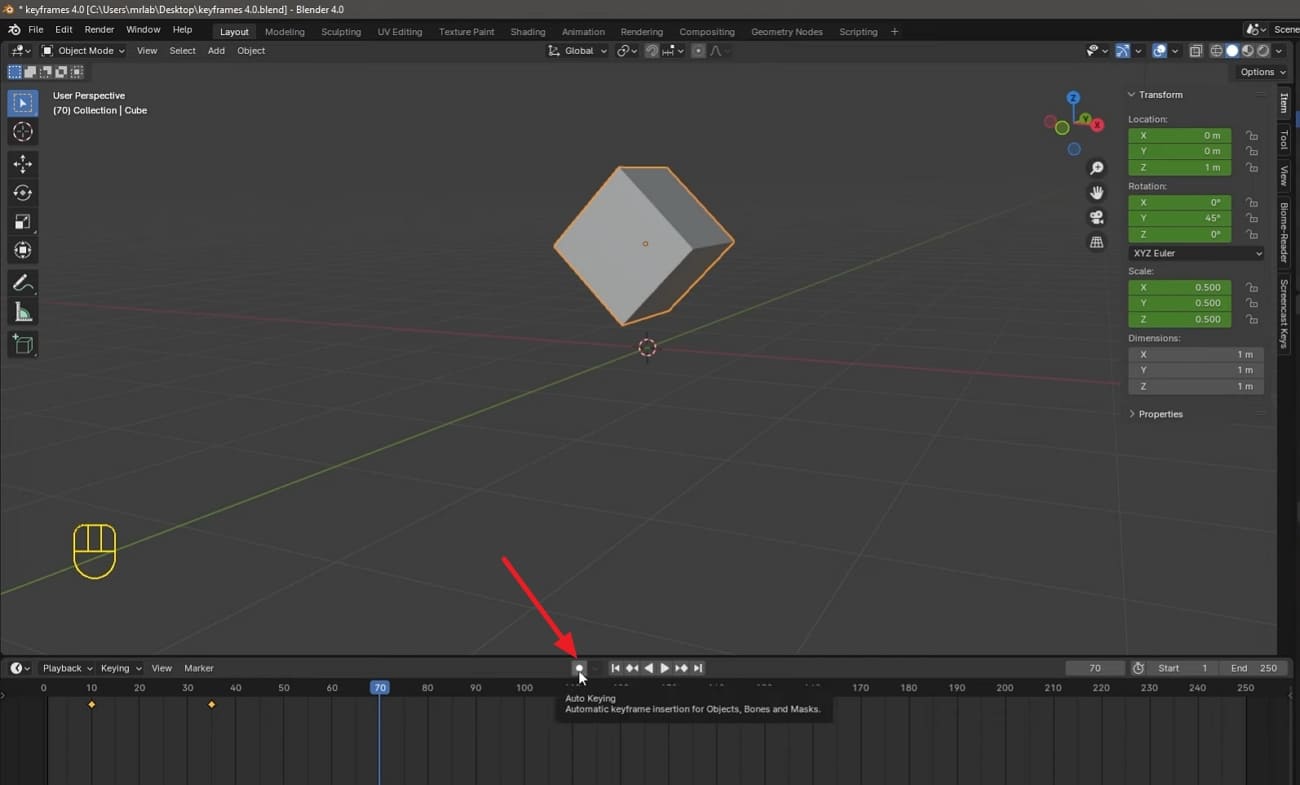
Method 3: Auto-Keyframe/Record Mode
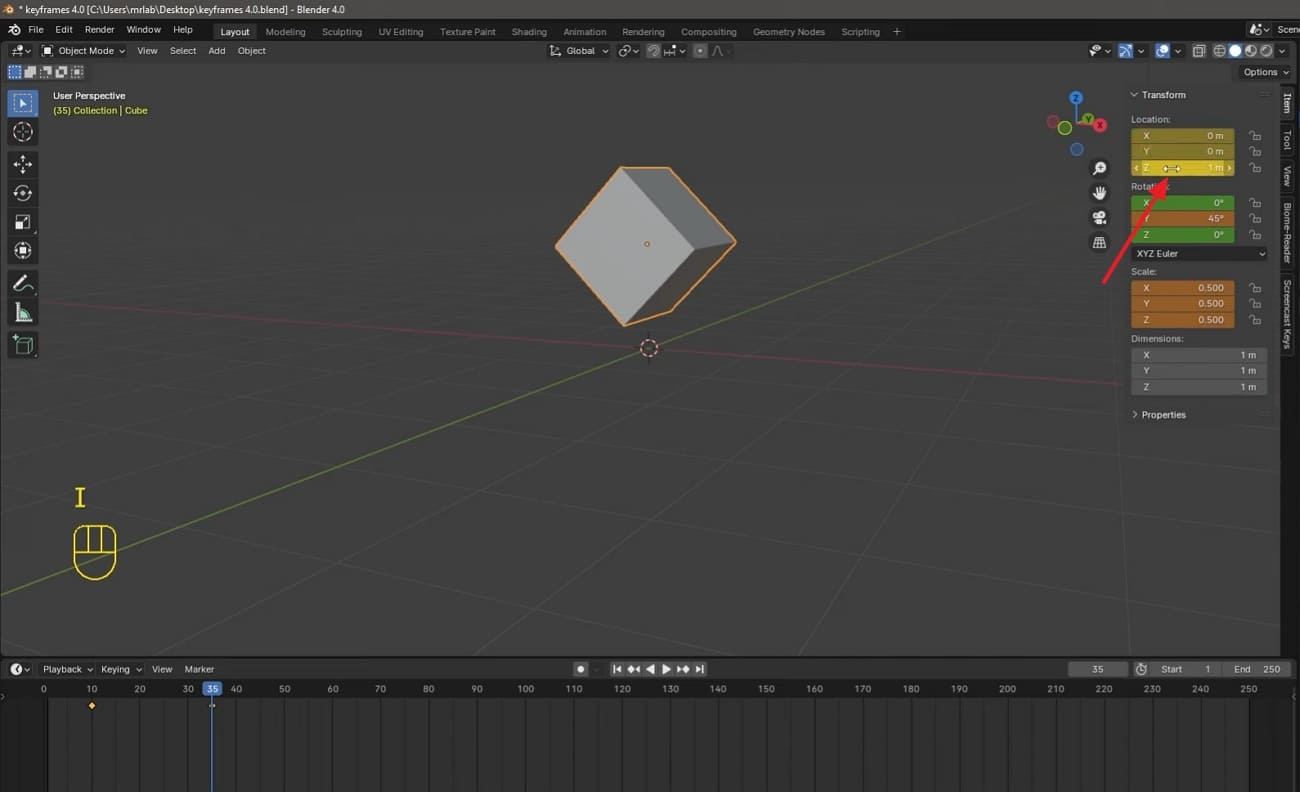
Although it is the easiest way for Blender to add keyframes, you need to pay careful attention to the object. After applying it, any changes made to the object will automatically be added to the movements/transforms at the right panel. To add this, specify the location in the timeline, adjust the objects’ parameters, and click the “Auto-Keying” icon in the timeline toolbar.
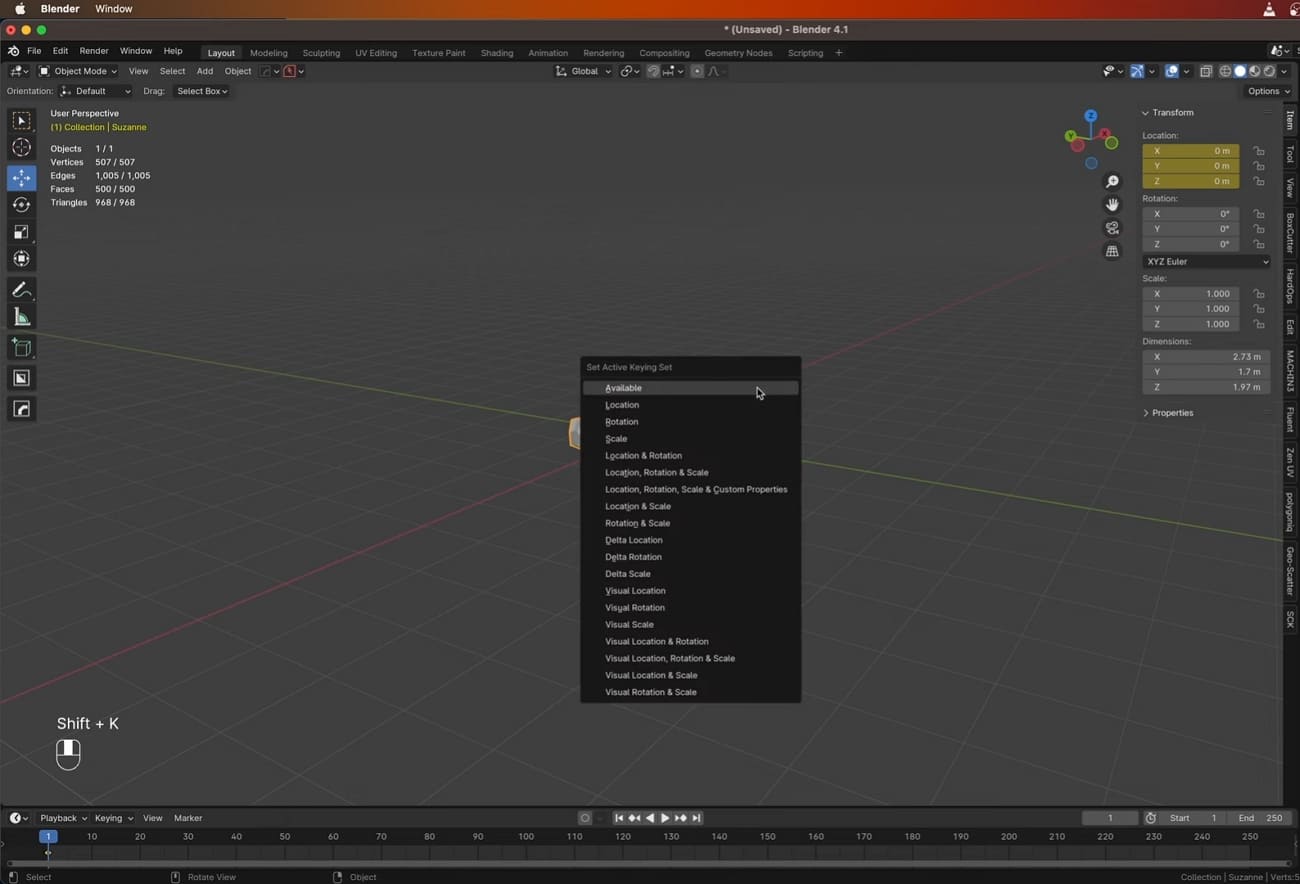
Method 4: Insert Keyframes with Keying Sets
To automatically insert multiple keyframes at once, you can opt for this approach that can be customized for rigging. For this, press the “Shift + K” keys on your keyboard and access the “Set Active Keying Set” menu to choose the preferred transforms. Later, hit the “I” key and get keyframes added, but remember keying sets shortcut only works on Blender 4.1 and above version.
Part 3. Advanced Keyframing Techniques in Blender
After mastering Blender how to add keyframes, let’s get familiar with advanced keyframing techniques that will elevate your animation from good to great:
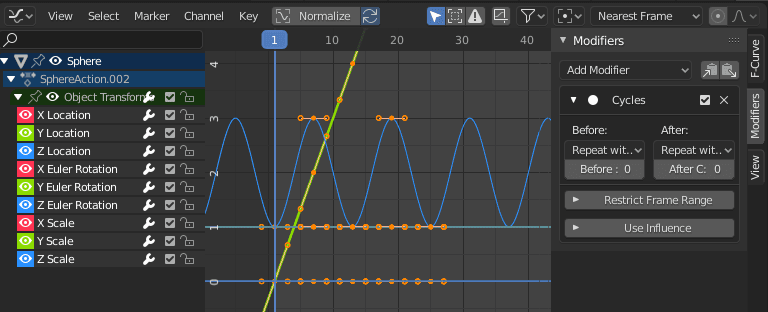
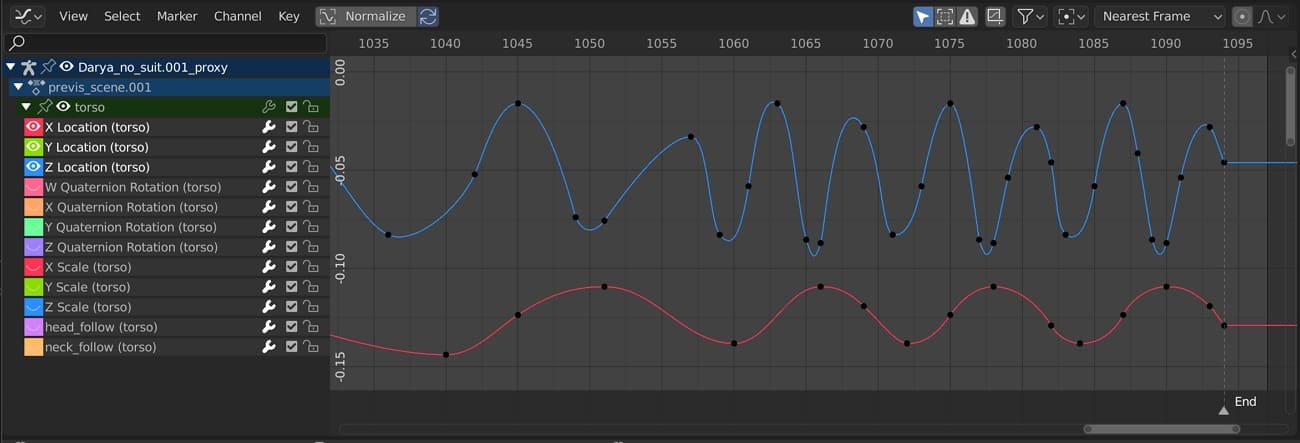
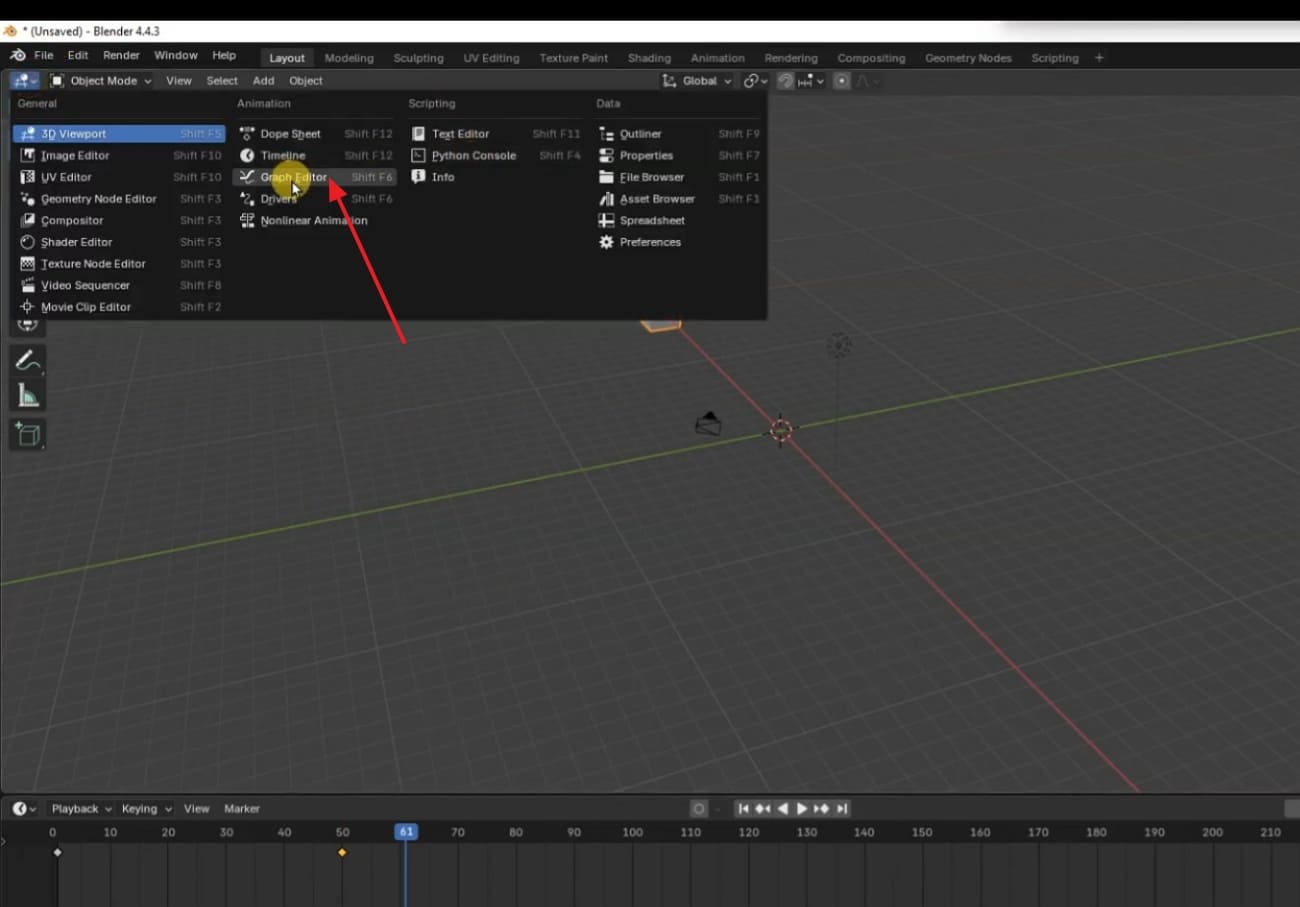
Technique 1: Master Graph Editor & F-Curves
For sharp and snappy motion, switch to Linear/Vector handles and go for Bezier handles to get smooth easing. Besides, in the graph editor, use a 2D cursor as a pivot while rotating or scaling keyframes. Additionally, leverage Noise and Cycle modifiers that add organic jitters and automate loop animation, respectively.
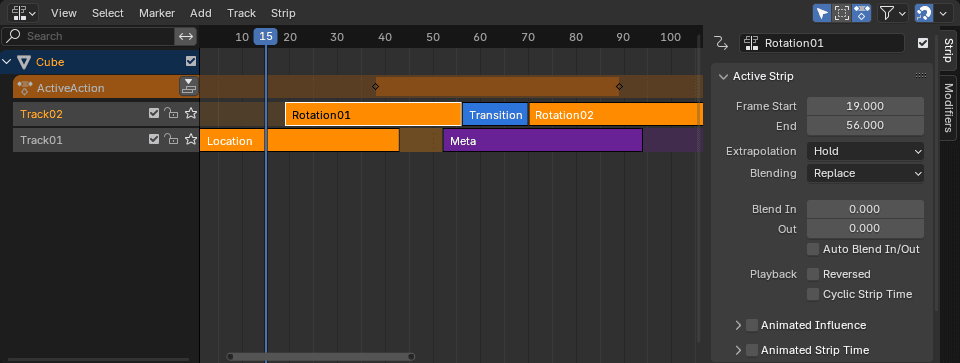
Technique 2: Integrate Auto-Keyframing & NLA Editor
To avoid destroying underlying animations, you must use the NLA editor for layering and blending actions. Furthermore, it is advised to activate auto-keyframes to record when animating and polish with manual editing later, which is ideal for capturing fluid motion.
Technique 3: Utilize Driver for Procedural Control
According to the community, Blender users must simplify rigging “Muscle Deformation” using driving shape keys and bone rotations, avoiding manual keying. In addition, experts suggest switching to Graph and Driver mode to tweak expressions.
Technique 4: Breakdown Workflow & Keying Sets
While working on character animation, you should press the “Shift + E” keys and create in-between poses via blending between keyframes. Besides, users are recommended to customize keying sets with group-related properties that save tons of manual keying.
Pro Tip for Blender Artists: Improve 3D Animation Rendering Efficiency
Applying effective ways to create keyframe Blender is not the only time-consuming procedure; real struggle begins while rendering animation with complex scenes. If animators render on a system with insufficient resources, the expected deadline shown on the system could multiply. Hence, choosing a cloud computing service and offloading rendering tasks to services like Fox Renderfarm is a wise choice today.

This leading cloud render farm service supports both CPU & GPU rendering, which users can opt for based on their project needs, providing customized service. It will quickly render your animation and 3D project no matter how many complex scenes it contains, freeing up your system for other tasks. From Blender to Maya and 3ds Max, Fox Renderfarm supports almost all popular 3D software across the globe.
Key Features
- Secure Service: While being concerned regarding your project’s privacy, know that the service is ISO27001 certified and belongs to a TPN-Accredited Vendor. It means your projects will remain secure and confidential during and even after rendering.
- Affordable Plans: Being a student or freelancer, you can avail yourself of special discounts. Besides, first-time users can avail themselves of a $25 free coupon upon their registration, making rendering more affordable than investing in upgrading the system.
- Massive SSD Storage: While providing Raysync's high-speed transmission for quick rendering, it has massive SDD storage. It means your projects will be quickly uploaded and downloaded without letting you face I/O bottlenecks.
- Multiple OS Support: For quick and easy access to rendering service, you can go for the Fox Renderfarm web version in your preferred browser. Otherwise, the service comes compatible with Windows, Mac, and Linux with 99.9% uptime.
- API Supported: You can integrate this service into your production pipelines via API. Additionally, it automatically detects the IT infrastructure of your system to provide optimized services by matching the cloud environment.
Part 4. Common Issues and Troubleshooting
Being a newbie learning Blender adding keyframe, it's common to encounter issues, but the thing that matters is how quickly you troubleshoot them. Take guidance from the following examples:
- Keyframe Appear But Don’t Animate: If that happens, double-check you are animating the right object, ensure they are all not on the same frame, and verify that the timeline isn’t muted.
- Wrong Interpolation: It happens when animation is too fast, too slow, and doesn't correctly ease out and in. To address it, open Graph Editor, select keyframes and choose Linear, Constant, or Bezier.
- Animation Doesn’t Loop: When your animation doesn't repeat smoothly, use Graph Editors to approach Modifiers and adjust Cycles to loop F-Curve.
- Can’t Delete or Move Keyframes: In case your keyframes won’t shift along the timeline, enable Graph Editor, select keyframes, and press the “Delete” or “G” keys to move them.
- Keyframes aren’t Updating: If you press the “I” key and nothing appears in the timeline, switch to Graph Editor to confirm keyframes are added and check the properties are animatable.
Conclusion
In essence, animating with precision depends on your mastery of Blender how to add keyframe concept, as demonstrated in this guide. Upon going through each keyframe-adding approach, you have learned some advanced techniques to polish your skills.
Now that you have understood Blender's keyframe-related features, remember that rendering the final animation could be time-consuming without a cloud computing service like Fox Renderfarm.