

Arnold Renders Motion Vector Channel
 Arnold's motion vector channel has always been a bug.
Today the best render farm are talking about another way to implement the correct Arnold motion vector channel.
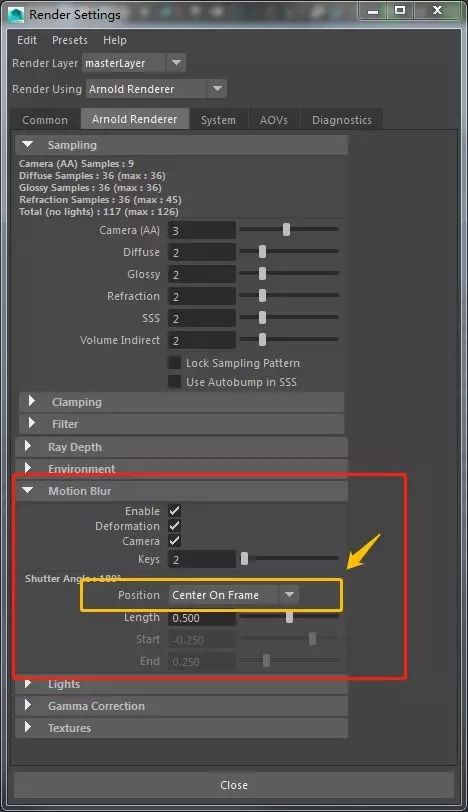
Step 1: Turn on Motion Blur
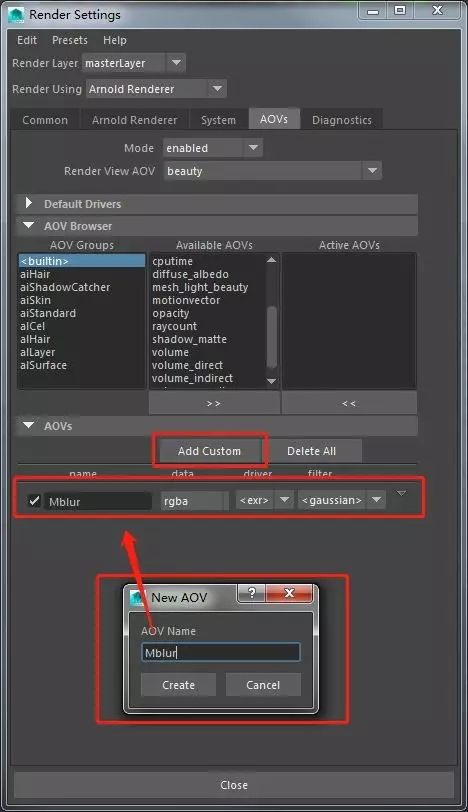
Step 2: Manually create an MBlur channel (named according to your preferences)
Step 3: Create two nodes aiUtility and aiMotionVector respectively
Tick aiMotion Vector's Encode Raw Vector Assign aiMotionVector to aiUtility's color Change aiUtility's Shade Mode to Flat


Step 4: Change Shutter Start and Shutter End to 0.5 under the camera property Arnold menu that you are rendering.
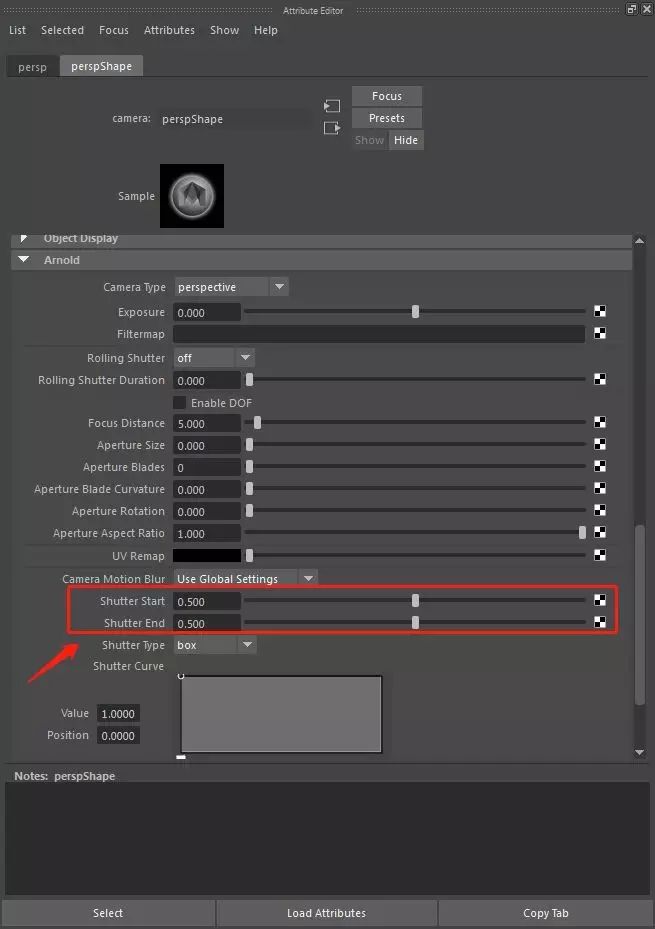
This ensures that the rendered material layer is free of motion blur and that the AOV channel has the correct motion vector channel.
Cloud rendering give you a note: The values of Shutter Start and Shutter End under the camera properties for the three motion blur modes.


Fox Renderfarm hopes it will be of some help to you. As you know, Fox Renderfarm is an excellent cloud rendering farm in the CG world, so if you need to find a render farm, why not try Fox Renderfarm, which is offering a free $25 trial for new users? Thanks for reading!


