The Guide of V-Ray Rendering Manual Model (3)

In the Guide of V-Ray Rendering Manual Model (2), when you work hard on the lights and the lens, you suddenly find that the lack of details is a big problem. Finally, let's talk about the details of the drawings.
About the details, one to point out is that if you still have the passion for learning and the desire to know, you should do it in 3d MAX and MAYA, or even ZBrush and Houdini.
Try to use high-quality textures, in addition to the resolution of the touch, more importantly, it usually provides more than diffuse reflection, but also provides textures used by other important channels, which saves you the time to go to PS .
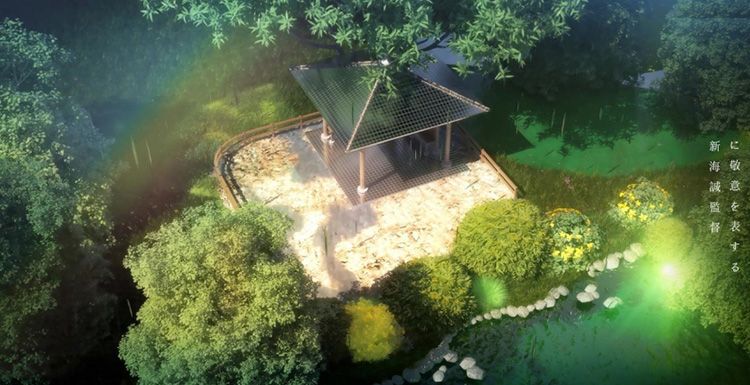
Use texture to create a material similar to the following (gravel floor)
But in most cases of architecture, there is no need to be so complicated, too complicated and sometimes make your material look worse.
In this wooden hand model, the wood part Rifle does not even add reflection. As for the glass, a dirt texture is used, which is attached to the transparency of the diffuse reflection.

Another point you need to be aware of is: avoiding repetitiveness. By adjusting the texture UV of each face, the regularity is disrupted.
Any manual model has a logical structure of basic production. Keeping these frameworks in a timely manner is a common way to improve the credibility of the model, and it is simple.

Manual models always leave some hand marks in the production. For example, in the position where the plate is joined, the cut position or the corner portion, there will be signs of wear or stains. In V-Ray, the dirt program texture is usually used to simulate. Essentially the dirt map works the same way as AO. What it looks like in the model. The wood map is used in the regular part of the dirt map, and the dirt part is given a white color directly.


 Although we can use permutations to increase the detail of the model surface, the most fascinating beauty maps are all used for full-mode rendering.
For most of the partners who already have some experience with V-Ray, the picture does not show the feeling, not that you will not use the software, sometimes focusing on the secondary aspect, losing important aspects, such as: life ps Material, but not willing to work hard on modeling. I hope that the guide of v-ray rendering manual model compiled by Fox Renderfarm can help you.

Welcome to join us

render farm free trial

Recommended reading


How to Render High-quality Images in Blender

2023-01-13


Top 9 Best And Free Blender Render Farms of 2024

2023-05-06


Revealing the Techniques Behind the Production of Jibaro "Love, Death & Robots", Which Took Two Years to Draw the Storyboard

2023-01-13


How to Render Large Scenes with Redshift in Cinema 4D

2022-06-09


Top 10 Free And Best Cloud Rendering Services in 2024

2023-09-26


Top 8 After Effects Render Farm Recommended of 2023

2023-02-02


How to Reduce Noise in Corona Renderer - Corona Denoising

2023-01-13


Arnold for Maya Tutorial: How to Render Wireframe

2023-01-13


Partners

Interested

Top 5 V-Ray Render Farms in 2024
Chaos' V-Ray is a powerful rendering engine widely used in the computer graphics industry. It provides high-quality and realistic rendering for various 3D software applications such as 3ds Max, Maya, Cinema 4D, and more. V-Ray offers advanced lighting and material options, global illumination effects, and efficient rendering algorithms, allowing artists to create stunning visuals for their projects.Using V-Ray for rendering can achieve higher quality results, but sometimes V-Ray rendering can be slow, taking several days to render just a minute of video. Apart from making some adjustments in your project files, another option to speed up V-Ray rendering is utilizing a V-Ray render farm for faster and more efficient rendering.Next, as a leading render farm and cloud rendering service provider in the industry, Fox Renderfarm will introduce you to some excellent V-Ray render farms.1. Fox Renderfarm - Best V-Ray Render FarmFox Renderfarm has over 20 years of experience in cloud rendering services and as a V-Ray render farm, it is committed to providing the best V-Ray cloud rendering service. In addition to V-Ray, it also supports 3D software such as Cinema 4D, 3ds Max, and Maya that can work with V-Ray. Both CPU and GPU rendering are supported. They have an online rendering platform as well as a desktop application, both of which are constantly maintained and updated. Currently, they offer a $25 free trial for all new registered users. Additionally, they provide real-time chat support where you can reach out to their customer service representatives if you have any questions about V-Ray rendering services.2. RebusFarm - Your V-Ray Render FarmRebusFarm is a renowned render farm service provider that supports various rendering engines, including V-Ray. It is not exclusively a V-Ray render farm but offers support for V-Ray along with other popular rendering engines. With RebusFarm, users can submit their V-Ray projects for rendering and benefit from the farm's powerful infrastructure to accelerate the rendering process. RebusFarm provides a user-friendly interface, reliable cloud rendering services, and efficient support for V-Ray and other compatible rendering software.3. iRender - Powerful V-Ray Render FarmAs a V-Ray render farm, iRender is a cloud-based rendering platform that specializes in providing efficient and powerful rendering services for V-Ray users. They offer support for V-Ray rendering with both CPU and GPU options. iRender provides a user-friendly interface and scalable cloud resources, allowing users to render their V-Ray projects quickly and effectively. Whether you need to render architectural visualizations, animations, or product designs, iRender can help accelerate the rendering process by leveraging their dedicated infrastructure and computing power.4. GarageFarm - Effective V-Ray Render FarmGarageFarm is also a V-Ray render farm. It is a popular cloud rendering service provider that supports various rendering engines, including V-Ray. With GarageFarm, users can submit their V-Ray projects for rendering and take advantage of their powerful infrastructure to speed up the rendering process. GarageFarm offers flexible pricing options, extensive software compatibility, and 24/7 support to ensure a smooth rendering experience. Whether you are working on architectural visualizations, animations, or other V-Ray projects, GarageFarm can provide the rendering resources needed to achieve high-quality results in a timely manner.5. Super Renders Farm - Affordable V-Ray Render FarmSuper Renders Farm is a cloud rendering service provider that supports V-Ray rendering along with other popular rendering engines. Super Renders Farm offers a user-friendly interface, flexible pricing options, and powerful cloud infrastructure to accelerate the rendering process for V-Ray users. You can submit your V-Ray projects to the Super Renders Farm platform, and they will distribute the rendering workload across their network of high-performance servers to deliver fast and efficient results.ConclusionWe hope you find the best V-Ray render farm for you. But if you can't decide which one to use, try Fox Renderfarm, which is also a TPN-Accredited render farm and is now offering a $25 free trial for new users.
More
2023-08-04
Creation Analysis: Using 3D to Make 2D Style Scene(1)
The best cloud rendering services provider and 3ds Max render farm, Fox Renderfarm will share with you a tutorial of using 3D to make 2D style scene.In this case, we show the use of 3ds Max to create 2D animated movie-style scenes and will focus on explaining the Makoto Shinkai-style picture performance. From his animation works, we can feel a strong personal style, exquisite light, and shadow applications, strong light and dark contrast and gorgeous colors are the biggest features of his works, these features make his works look more real. Reference material from Makoto Shinkai’s animated film "Koto no ha no niwa".Some pictures material comes from the 2D animated film "Koto no ha no niwa", and some screenshots are found for reference.The whole idea:Composition layout and lighting testMaterial adjustment and rendering settingsUse of channelsColor comparison and synthesisComposition layout and lighting testIt is very important to make scene lights in this style, often in small details, such as the bright and dark junction of very bright objects, reflections in small details, the color gradient of objects under the influence of light, and the objects interspersing and blocking, the resulting changes in light are all things we need to pay attention to. Every time I watch an animation, I am always moved by these nuances. The models used in this tutorial are very simple. When doing interior scenes, it is often to build a simple BOX first and modify the approximate shape to test the lights to see if they meet the expectations. But when making, it is better to have an imaginary picture first, so that you can judge whether you have achieved the desired effect when you are done, but you must know what kind of effect you want before you do it.This is a scene from the animated movie "Koto no ha no niwa", which is real in Shinjuku Gyoen Park, Japan. What I want to do now is to make the 2D animation feel with 3D. First, use a simple model to determine the main pavilion. And the location of the surrounding trees, place the camera, as the picture shows:Then we can see through the original animation that the light is shining from the bottom left corner.Here, a standard target parallel light is used as the main light source. The angle of light and the attenuation range of the illuminated area are adjusted. The shadow length and direction of the trees are observed and adjusted to a suitable position. Adjust the UVW in the shadow parameters to blur the tree projection to make it unreal. Open the environment and effects panel, add a VRaySky map to the environment map, drag it to the material panel by example, check the first column, pick the target parallel light in the scene, and set the map light intensity to 0.03. You will get a sky environment that matches the scene lighting, making the rendering more realistic.A high light and dark contrast picture is needed here, so no ambient light is used in this scene. In addition, a VRayLight was created in the direction of the light to simulate a small range of strong sunlight. It can produce more intense light and shade. The parameter settings are the shape of the light is spherical, the intensity is 200, the color is warm, and the light is not visible.Open GI and test the lighting effect, as follows:After the lights are almost well, we start to refine the scene, and finally, it looks like this:In order to simulate the feeling of the rainy season in the original animation, I used the 3ds Max particle system to simulate some raindrops, created a standard particle flow source, and added a random rotation to make the raindrops have some random changes.I also used the MultiScatter plugin to plant some grass.Material adjustment and rendering settingsIn terms of materials, I will focus on the material of the pavilion and the surface of the water. The material of the pavilion must be rendered wet and wet. Because the scene is rainy, I chose mirror high reflection on the material. I did not check Fresnel. The top will be completely reflected in the surrounding trees, plus the projection of the tree occlusion to get a similar effect.The water surface did not make it reflect the sky and clouds like the original painting, but chose a green that matches the scene, as shown in the following figure:The material of water is as follows:Next, we can adjust the rendering parameters. Anti-aliasing uses Catmull-Rom with a certain sharpening effect, which can make the details of the trees richer. Turn on the reflection environment. A VRayHDRI map is added to the reflection environment. The exposure selection is the last one. The term Reinhard mixed exposure is similar to the combination of exponential exposure and linear exposure. Set the blend value to 0.7.VRayHDRI is displayed as a sphere with an intensity of 4.Using the VRayHDRI map can increase the reflection details of some scenes. Turn on the GI and use the Irradiance Map for the first bounce. The first bounce is the first global light calculation for the direct light. The second bounce uses the Light Cache. Actual calculation, turn on display calculation phase. As the picture shows:Open the rollout of the light cache, set the light subdivision to 1500, andcheck the options in the figure.The rendering effect is as follows:Now please follow the best CPU &x26; GPU render farm and cloud rendering services provider to our next part: Creation Analysis: Using 3D to Make 2D Style Scene(2).
More
2022-07-27
V-Ray 3.4 For Sketchup To Make A Work "Container Cabin"
The best cloud rendering services provider and GPU &x26; CPU render farm, Fox Renderfarm, will share with you a 3D tutorial of making container cabin with V-Ray 3.4 for SketchUp.A rendering exercise using V-Ray 3.4 for SketchUp, which uses the public model of the 3D Warehouse. The software used including SketchUp, V-Ray, Photoshop.1. PreparationAn existing model is used here, and the model is derived from the 3D Warehouse.The model has a high level of detail and can be used directly as an exercise. The position of the camera uses a lower angle to look up at the building.After choosing this angle, I began to think about what kind of effect I would end up with. In architecture and landscape design, there are many times when you need to further express your plan. After browsing through many excellent renderings, we will find that rendering performance requires artistic effects, and this performance is related to architectural photography and aesthetics.In this work, I observed this angle and felt that the day view was too dull, so I conceived a picture of the evening, and the energy radiated from the back of the building. Then start the arrangement.2. ModelFirst of all, in order to add reflection trees to the glass, I copied a batch of trees to the front of the building.Then in the building, some furniture models were added to add detail.3. MaterialAfter the model is finished, it will start to be rendered.In terms of material, the structural part of the building is mainly black steel, which is the general metal making parameter. However, in order to pursue the details, it also benefits from the new material property layer. I added a rust map to the metal as a mask to make the metal more Details. (Reflect Gloss - Use Mix texture in Reflection Glossiness and use rust maps to make two gray masks.)The cement wall uses a higher resolution texture,White wall also uses a texture,Then start to illuminate the scene. In the process of lighting, it is not necessary to be too restrictive to the light. In many cases, it needs to be adjusted according to your own feelings.The light source of the entire scene is divided into three parts.The first is the dome lighting, which uses a cool-toned dusk HDR.The second is the V-Ray sphere light behind the building. The height of the sun is in line with the HDR sun height and the angle is very low.The third is the lighting in the building's interior, placed directly on top of the building, thanks to interactive rendering, constantly adjusting the intensity and color of the light source.Interactive rendering greatly facilitates the adjustment of the light. On the ground, I used the VFS grass directly, which is very easy to use, much faster than making grass.4.Rendering and post-productionI did not make too many adjustments and directly pulled up the plot parameters. And added Z channel, MID.First, camera raw adjusts the color level, then uses the mask to buckle out the sky, mixing two skyes. Then use the channel to select the background tree to lower the hue, give a curve, raise the shadow and then brush out some details of the dark part, then take a screenshot, then use camera raw to adjust the color gradation, hue contrast and so on. Finally, add light to the architectural lights, and add vignetting around.Fox Renderfarm hopes it will be of some help to you. It is well known that Fox Renderfarm is an excellent cloud rendering services provider in the CG world, so if you need to find a render farm, why not try Fox Renderfarm, which is offering a free $25 trial for new users? Thanks for reading!Article reference from 3D artist Han Shilin
More
2022-07-11
  • Foxrenderfarm

    Powerful Render Farm Service

  • TPN
  • TPN

    Business Consulting

    Global Agent Contact:Gordon Shaw

    Email: gordon@foxrenderfarm.com

    Marketing Contact: Rachel Chen

    Email: rachel@foxrenderfarm.com

    Connect with Us

Fackbook Customer Reviews