3D Works Mouse! Mouse! Production Analysis
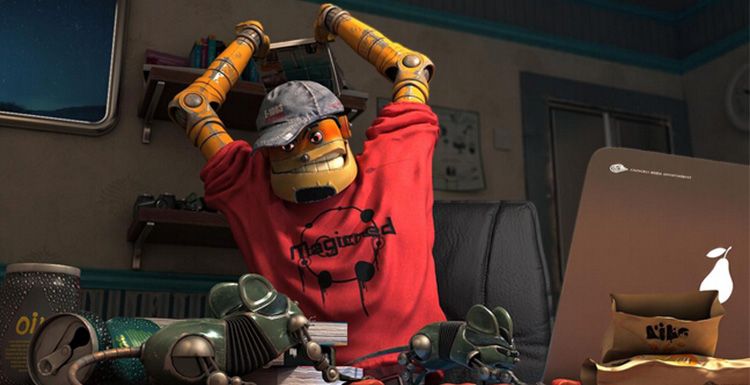
This work is the result of whim. The mouse is a relatively common animal at home. When you see it, you want to shoot it on the bricks. The mechanical characters of science fiction and the ordinary environment can have a certain association. From the visual performance, through the stop of the instantaneous action, the viewer has a kind of front and back association effect, let's share the production process with you.
Software used: 3ds Max, V-Ray, PS
First, the composition
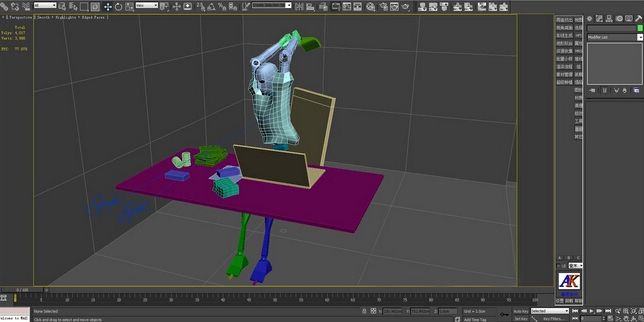
Firstly, you only need to set up a simple scene. The object is just a basic form instead. The focus is on the choice of the position and the layout of the object. Since the CG single frame rendering is performed, the object layout can be performed according to the camera view after the camera is positioned, and the layout and positioning map are as follows:
 Second, modeling and UV
1. The production of the hand
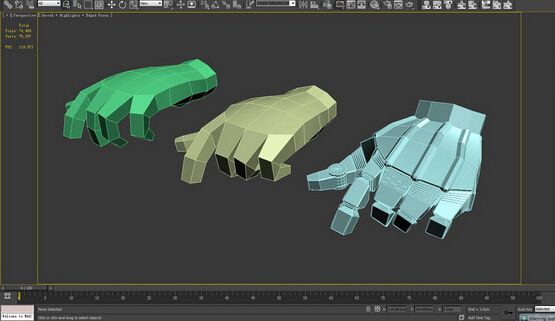
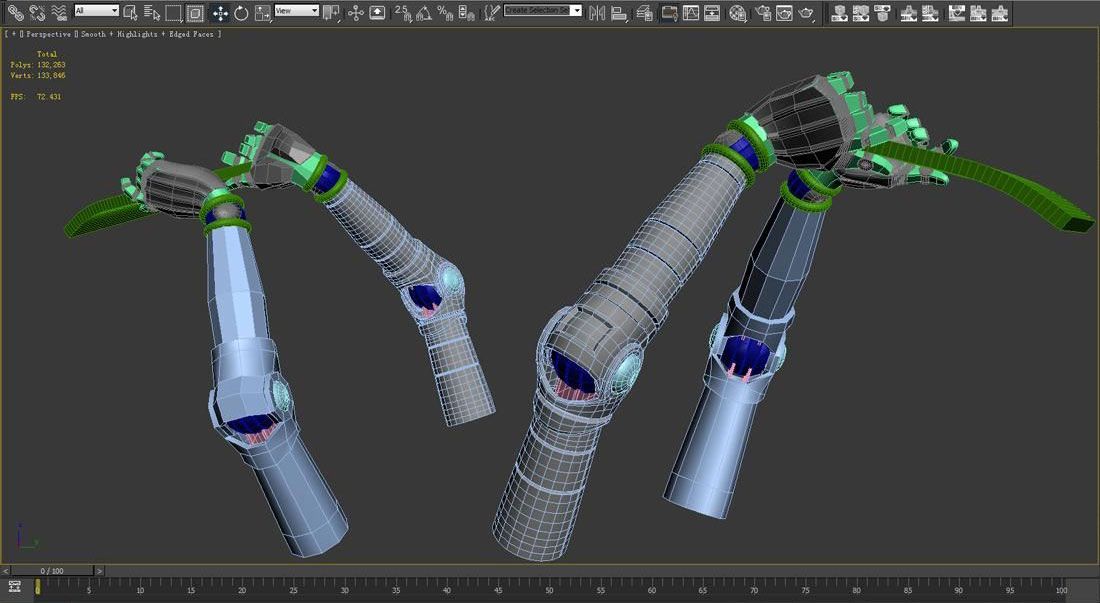
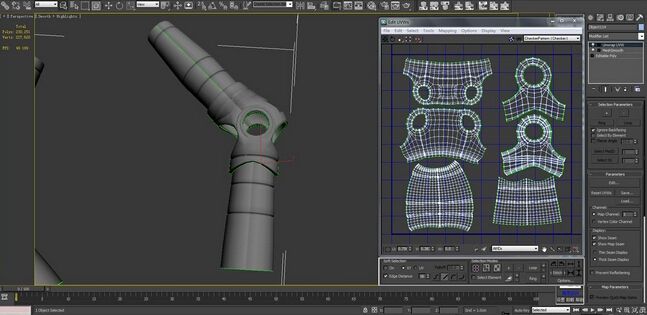
Modeling begins after the composition and general object layout are completed. This is a time-consuming basic work, but it is also the key to determining the final quality of the work. It requires basic modeling ability and patience. First select the opponent model, followed by the arm, because the movement of the whole hand determines the "pose" of the work, so I chose to make the first. Then carry out UV deployment and splitting. Specifically as shown below:
2. The production of clothing
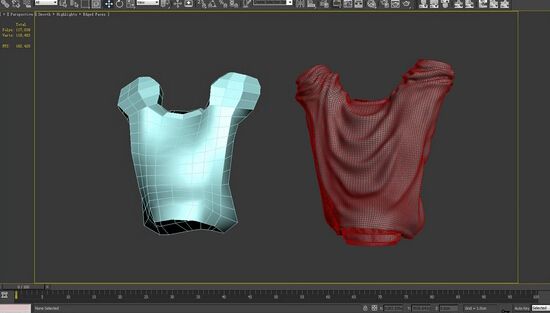
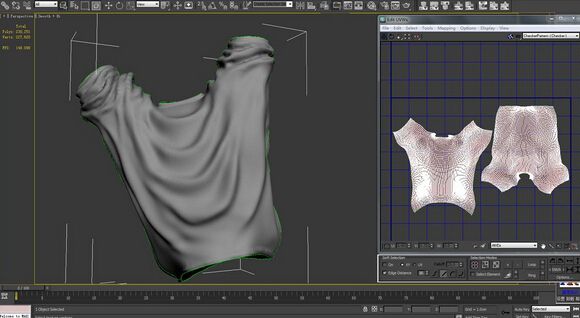
Because the character has a large movement, the clothes must be matched to have a real dynamic performance. The clothing was first modeled in 3ds Max and then imported into Mudbox for engraving. After engraving, it was imported into 3ds Max. Again, the model finishes splitting the UV for the next mapping. Figure:
3. The production of the head and expression
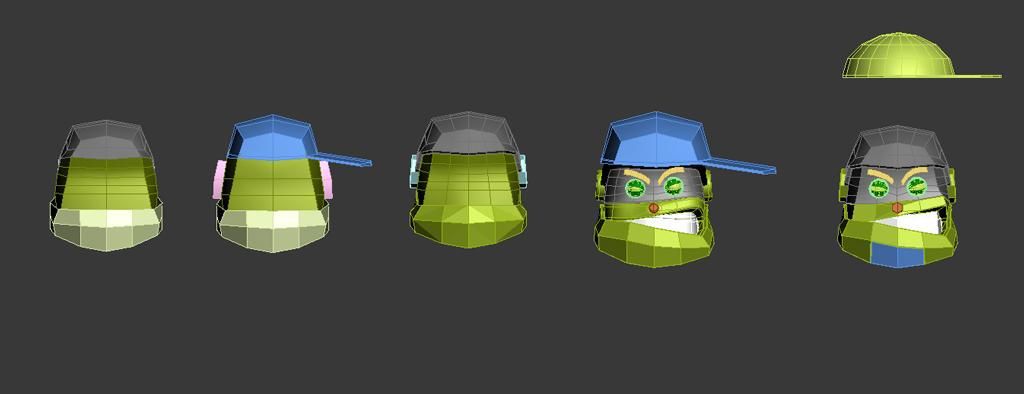
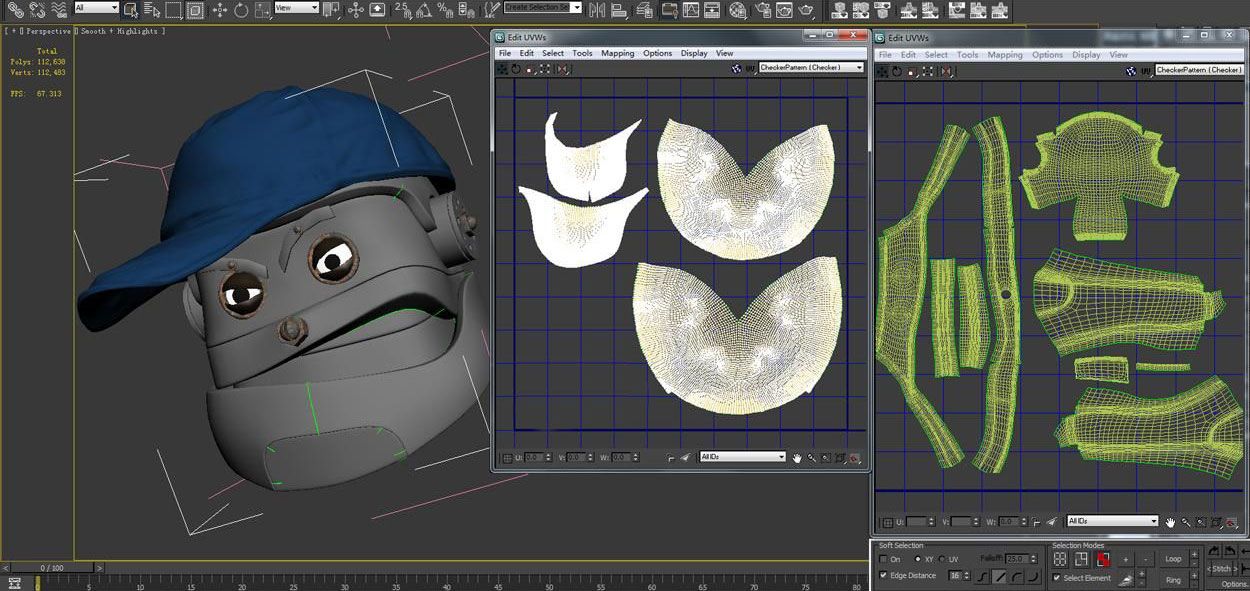
With the correct posture and the appropriate expression, the character of the work can be more vivid and interesting. In the head of the character, I made some settings in advance, and the hat of the character was also carved in Mudbox, and the number of faces was reduced after completion. Level import 3ds Max to split the UV.
4. The production of mouse
The mouse must conform to the appearance of the mouse and mechanize it. It is necessary to make some set-ups in advance. Here, only the modeling process and the UV split map are shared.
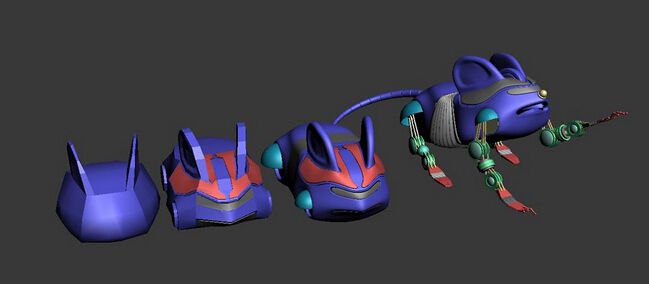
Since the mouse is a mechanical model, there is no need to rig the bones, and only the "father-child association" can be used to put POSE. The links are as follows:

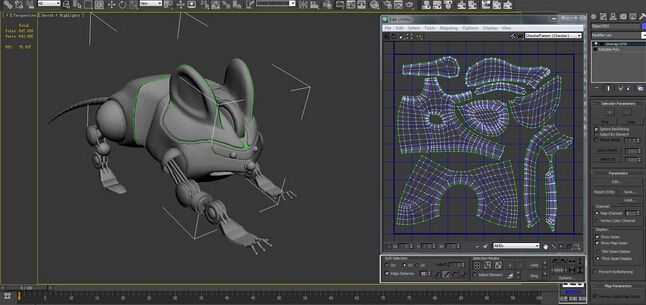
5. Model production of small objects
The model of small objects is relatively simple to make, and some of them can be completed by referring to the network search image. Here, I only share the partially completed production pictures.

Third, the material and texture
Some of the main models of this work were UV-split and mapped in Mudbox. The rest of the small objects are just attached to the map in 3ds Max and a UV Maping modifier is added. It only takes some time to split the UV, which saves a lot of time.
1. Arm texture
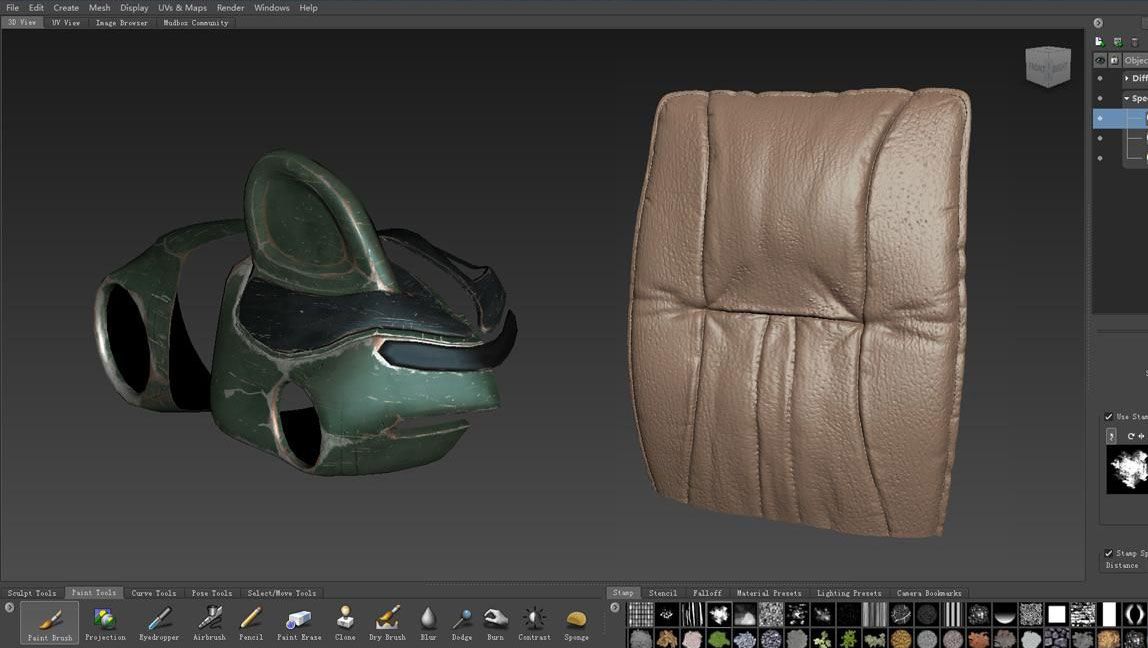
After splitting the UV in 3ds Max, you can import the model into Mudbox for texture mapping. Mudbox is very powerful in drawing textures. What I use here is the "projection" function in Mudbox. Map rust or dirt directly onto the imported model and map the model in real time.
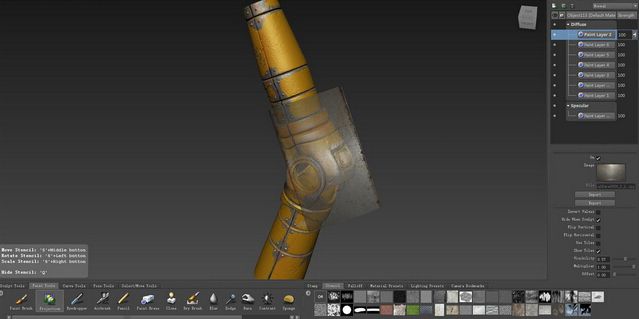
Character clothing and head can be drawn in this way. What is needed is the splicing of texture.
2. Clothing and head texture
It is similar to the method of making an arm.
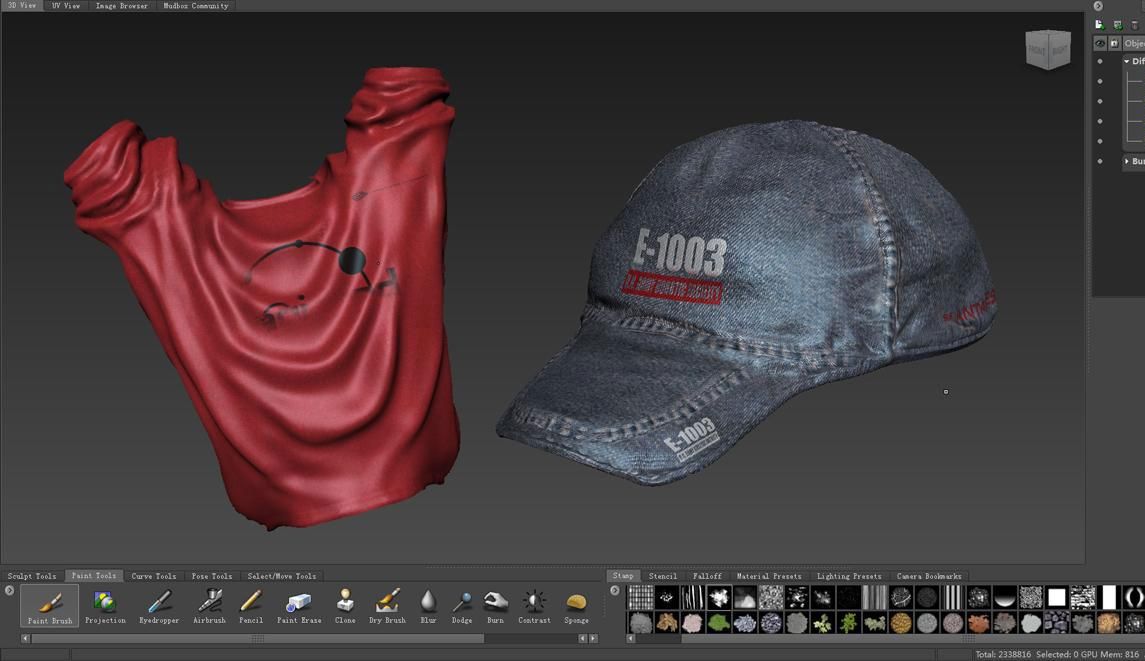
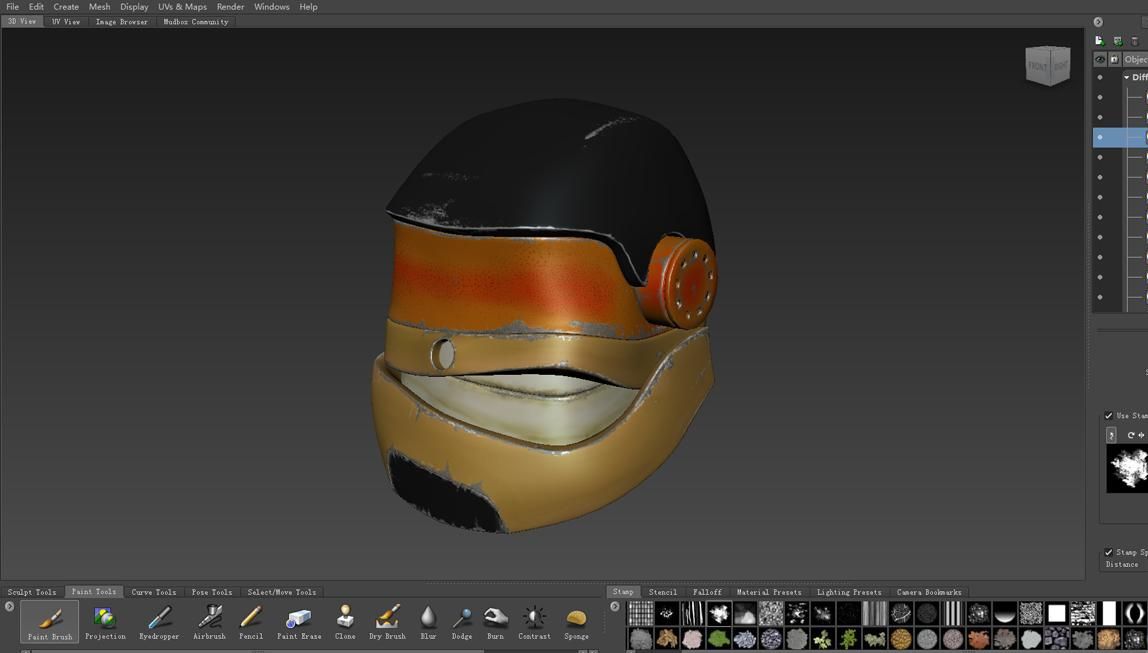
3. Mouse texture and chair back texture performance
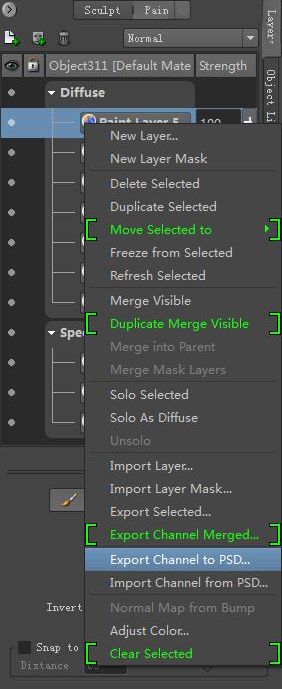
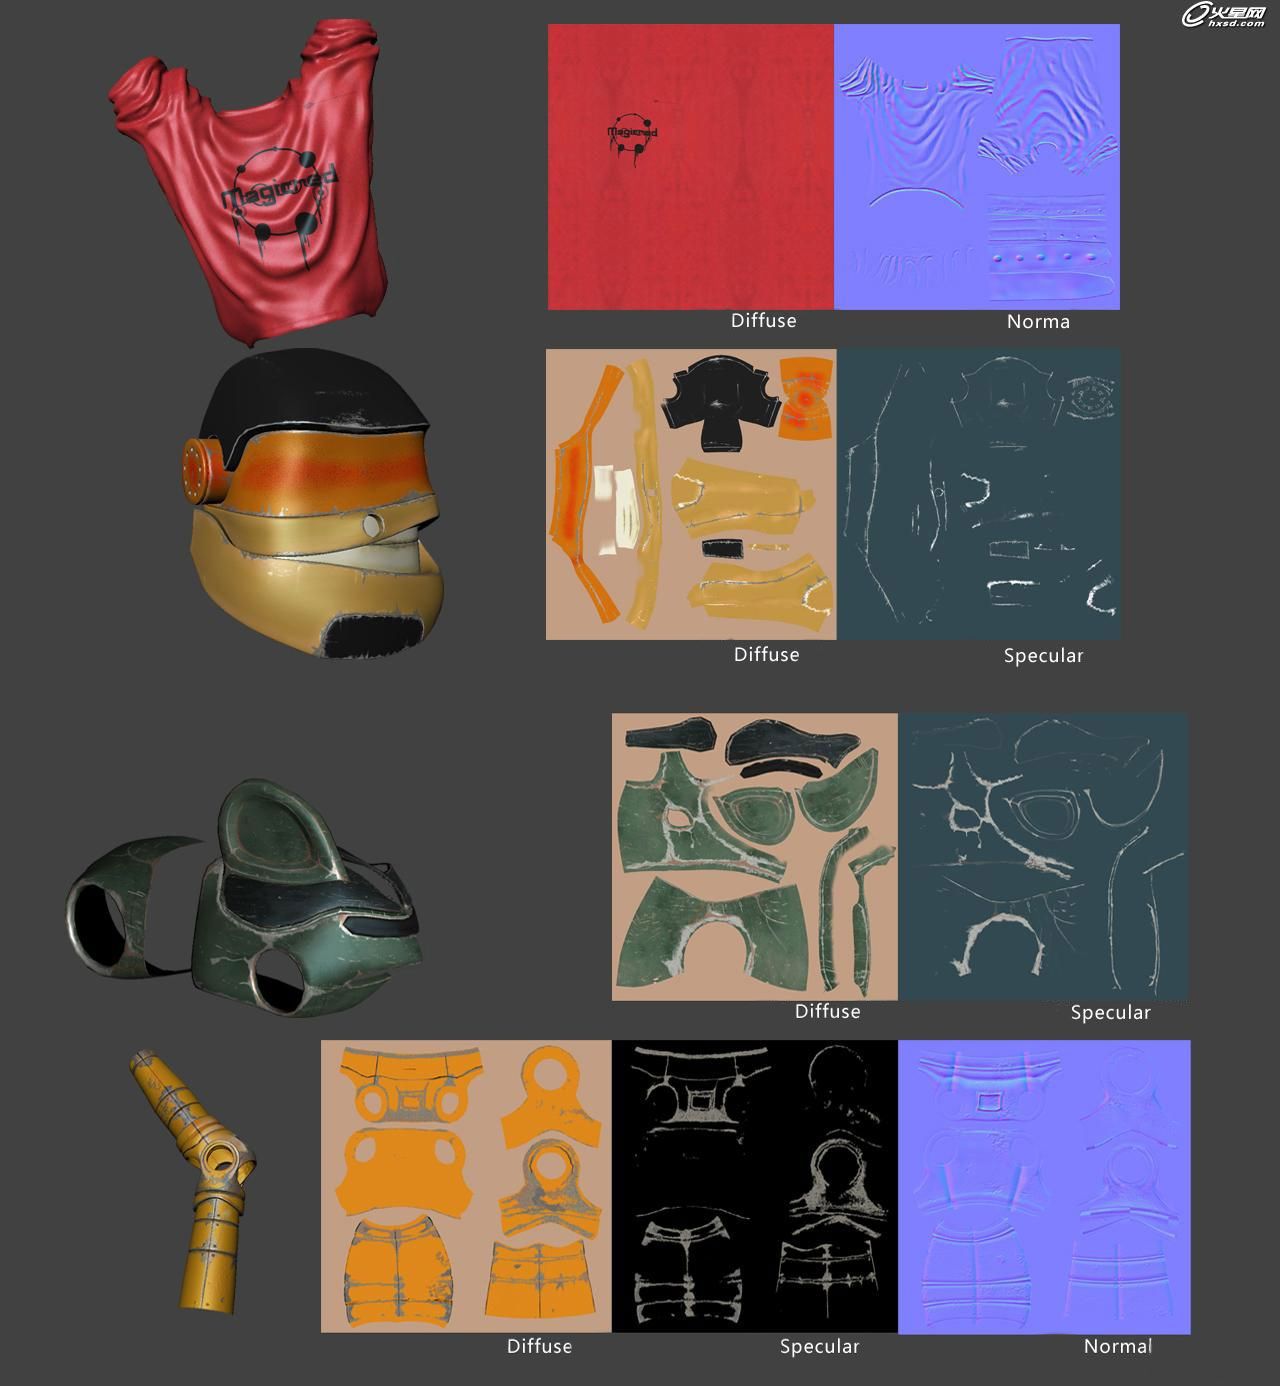
4. Complete the texture of all objects
After the texture is drawn in Mudbox, the texture is exported to the PS, and the adjustment in the PS can be added to the corresponding object channel in 3ds Max.
Fourth, lighting and rendering
1. Lighting layout
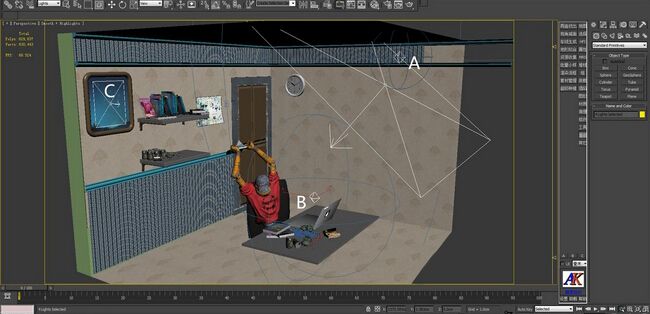
Once you've finished making all the textures, you can start designing and laying out the lights. This is indoors, and at night, the light from the computer is dark. The main light source comes from:
A. The dimly lit front wall lamp (the wall lamp is not visible here, so only the light is used to express his presence).
B. The computer screen light.
C. The weak light outside the window.
The specific layout is as follows:
2. Rendering settings
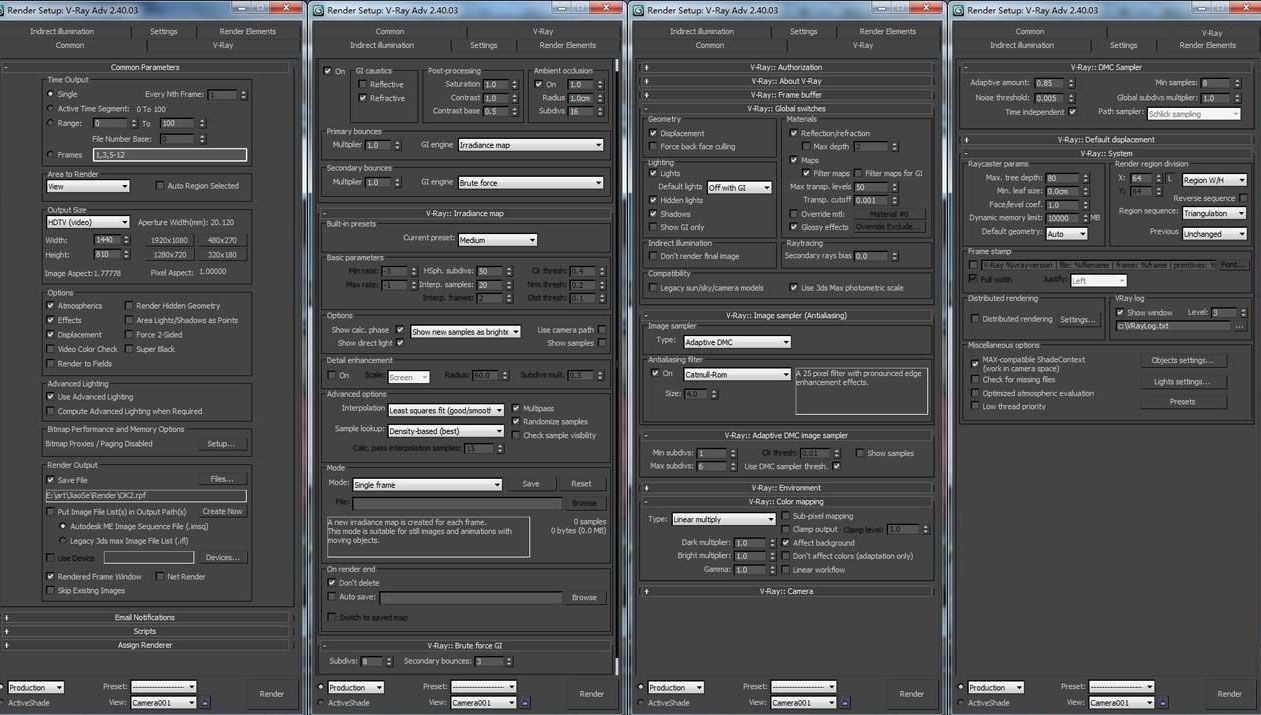
After the lighting layout, the rendering parameters can be adjusted and tested. The screenshots of the V-Ray rendering settings are shown in the figure:
3.Output the rendering
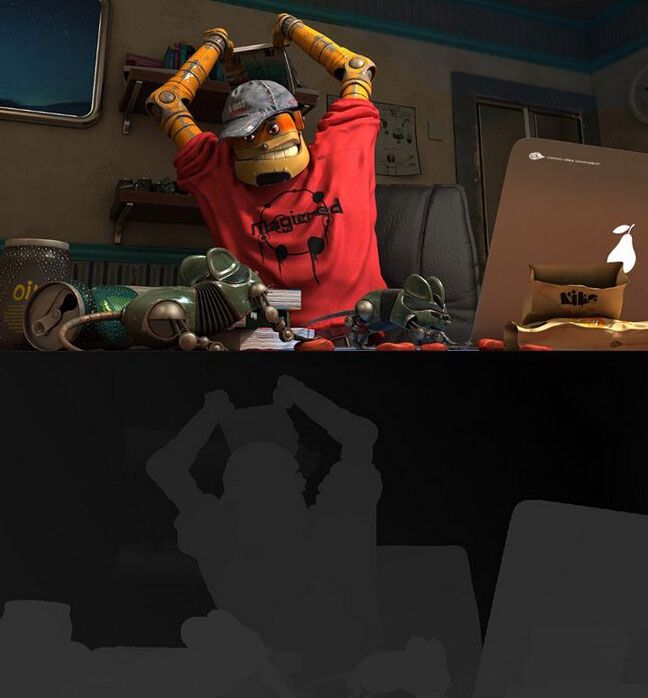
When outputting, in addition to the output of the rendered image itself, only the output of the Z channel is made.
Fifth, the adjustment of post-production
I chose to add depth-of-field effects with DFusion and color correction in post-production, and imported the file into DFusion to add depth-of-field effects with Depth Blur.
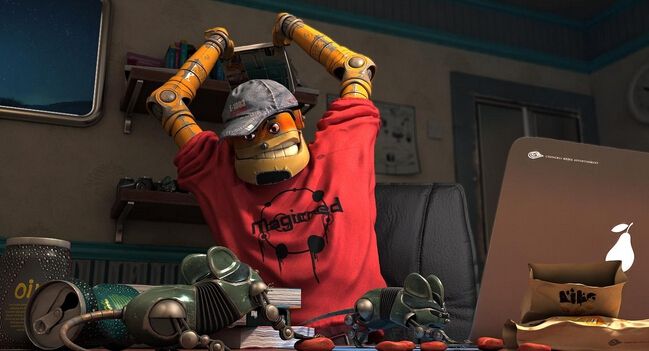
The final rendering is as below:
Author: Liang Xi
Recommended reading
Top 9 Best And Free Blender Render Farms of 2025
2024-12-30
Revealing the Techniques Behind the Production of Jibaro "Love, Death & Robots", Which Took Two Years to Draw the Storyboard
2025-02-10
Top 10 Free And Best Cloud Rendering Services in 2025
2025-03-03
Top 8 After Effects Render Farm Recommended of 2025
2025-02-10
Top 5 Best and Free 3d Rendering Software 2025
2025-02-10
Shocked! The Secret Behind Using 3D to Make 2D Animation was Revealed!
2025-02-10
How to Render High-quality Images in Blender
2024-12-04
Easy Cel Shading Tutorial for Cartoon in Blender Within 2 Minutes
2025-02-10
Partners
Previous: Dead Pool Won 151 Million RMB In The First Week Of The China Box Office
Next: How To Train Your Dragon, Let’s Say Goodbye To It With Smile
Interested
