Pradeep Durai, better known online as MadCandy, is a self-taught 3D artist from Tamil Nadu, India. MadCandy transitioned from a background in literature to becoming a full-time freelance 3D artist and educator.
In this exclusive interview with Fox Renderfarm, MadCandy shares the creative process behind his winning entry in the CGandWe 3D Challenge, "Cathedral," inspired by St. Peter’s Cathedral in Adelaide, Australia. From blocking and modeling in Blender to clever use of instancing, weighted bevels, and curve-based detailing, he breaks down the techniques that brought his vision to life.
Read on to discover MadCandy’s workflow behind his art!
Fox Renderfarm: Hi MadCandy! Thank you so much for accepting our interview! Please introduce yourself to our readers.
MadCandy: Hi! I’m Pradeep Durai. I go by the name MadCandy online. I’m from Tamil Nadu, India. I’m a full-time freelance 3D artist specializing in stylized 3D modelling and illustration. I also make YouTube videos and courses on 3D content creation. My academic background is in literature, but my passion drove me to learn 3D art and pursue it as a career.
Fox Renderfarm: Congratulations on winning the May 2025 "Architect" CGANDWE 3D Render Challenge! How do you feel about it?
MadCandy: It feels unreal that I won the contest because there were some really spectacular entries. I was rooting for one of the other cathedrals made by another contestant, as it felt much more detailed. So it’s quite a surprise for me that the judges chose me. I would like to express my gratitude to them for selecting my work.
Fox Renderfarm: Where did you draw inspiration from for 'Cathedral'?
MadCandy: This project is based on St Peter's Cathedral in North Adelaide, Australia. Modelling an entire cathedral, which has a nice ring to it, but it is a huge undertaking even to create it in 3D. So, I tried to capture most of the main architectural elements of the cathedral and added some of my own twists and turns to make it a bit different and more visually engaging. Doing all of it while not deviating so much from the original blueprint.

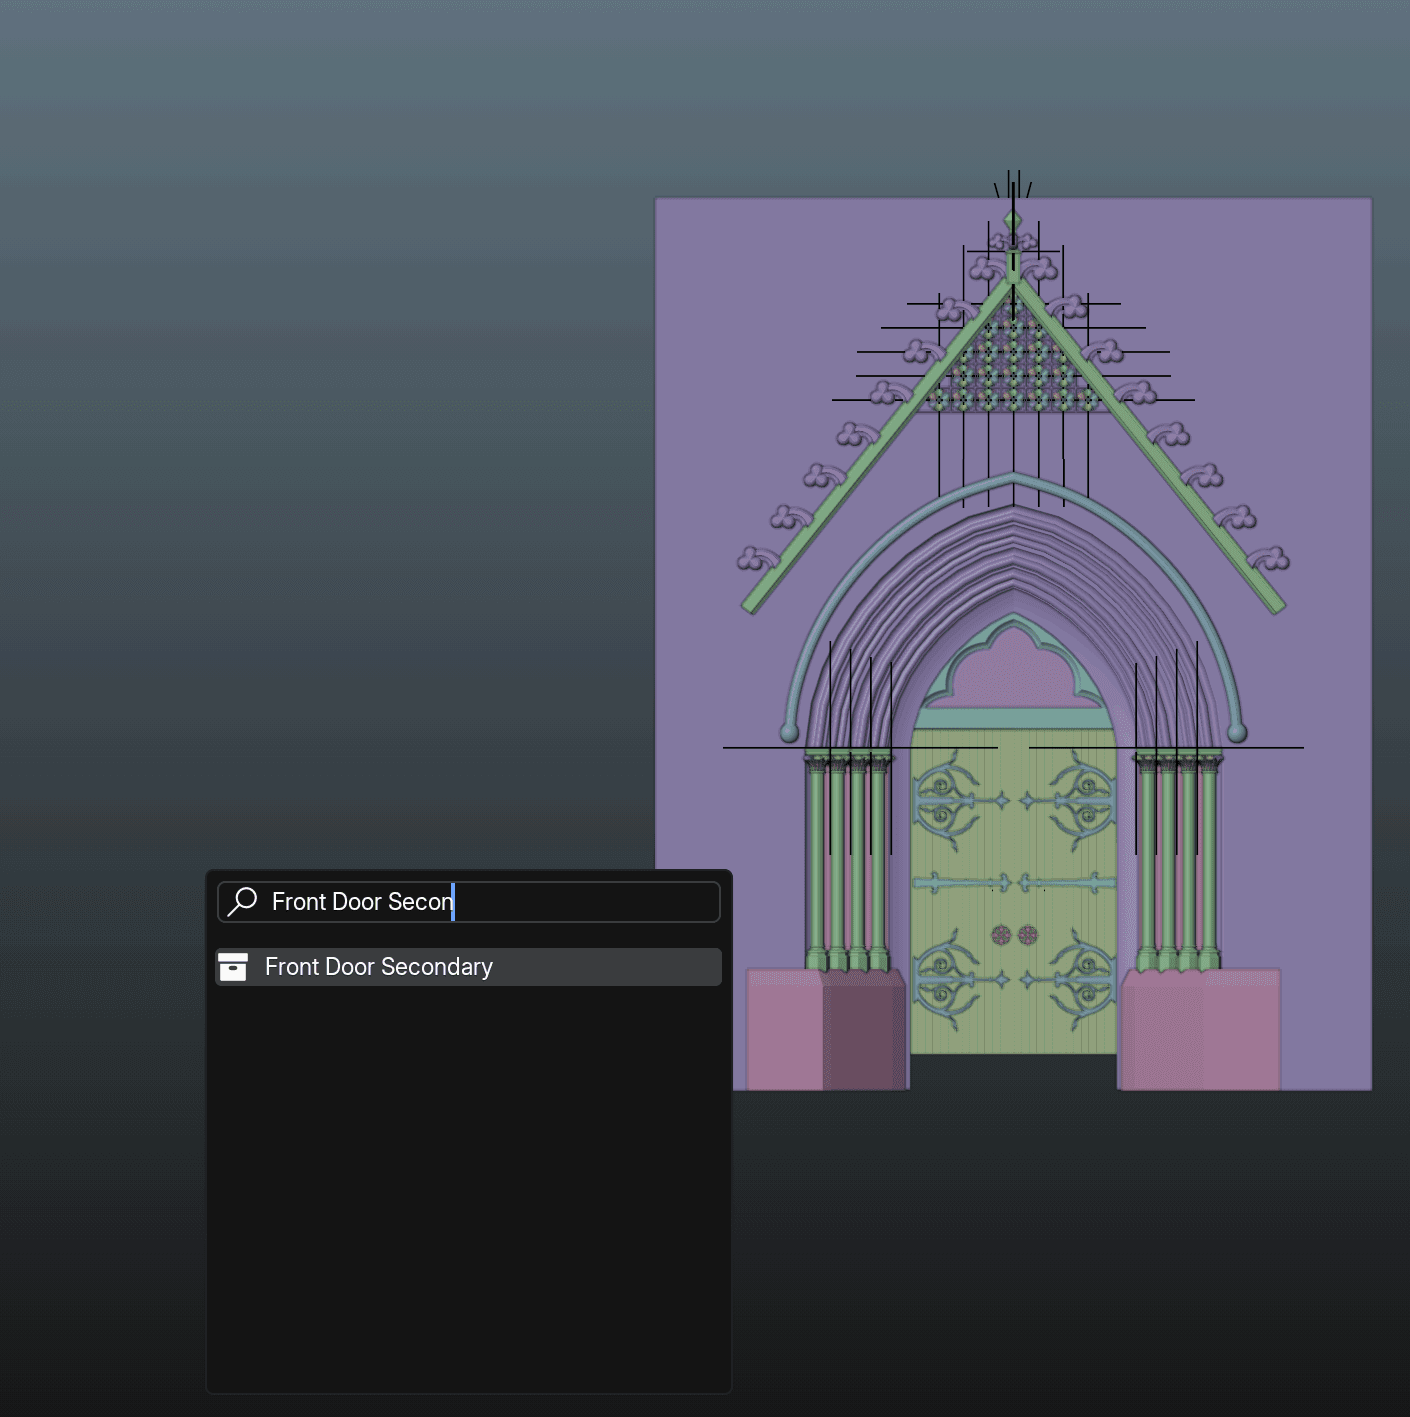
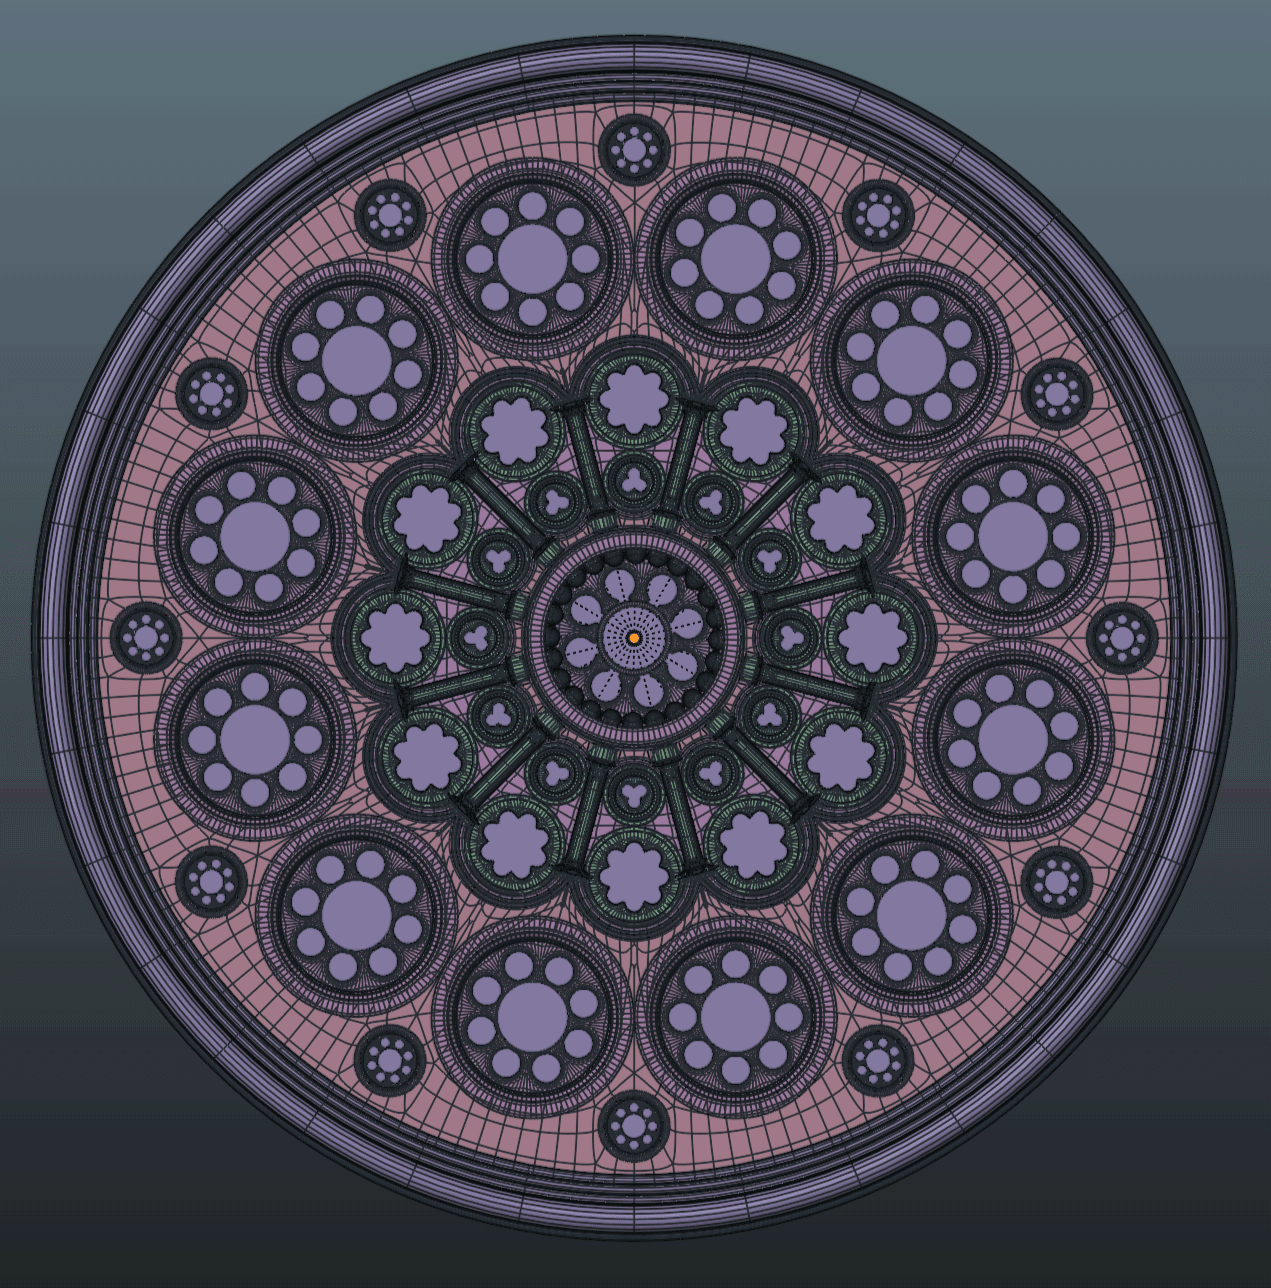
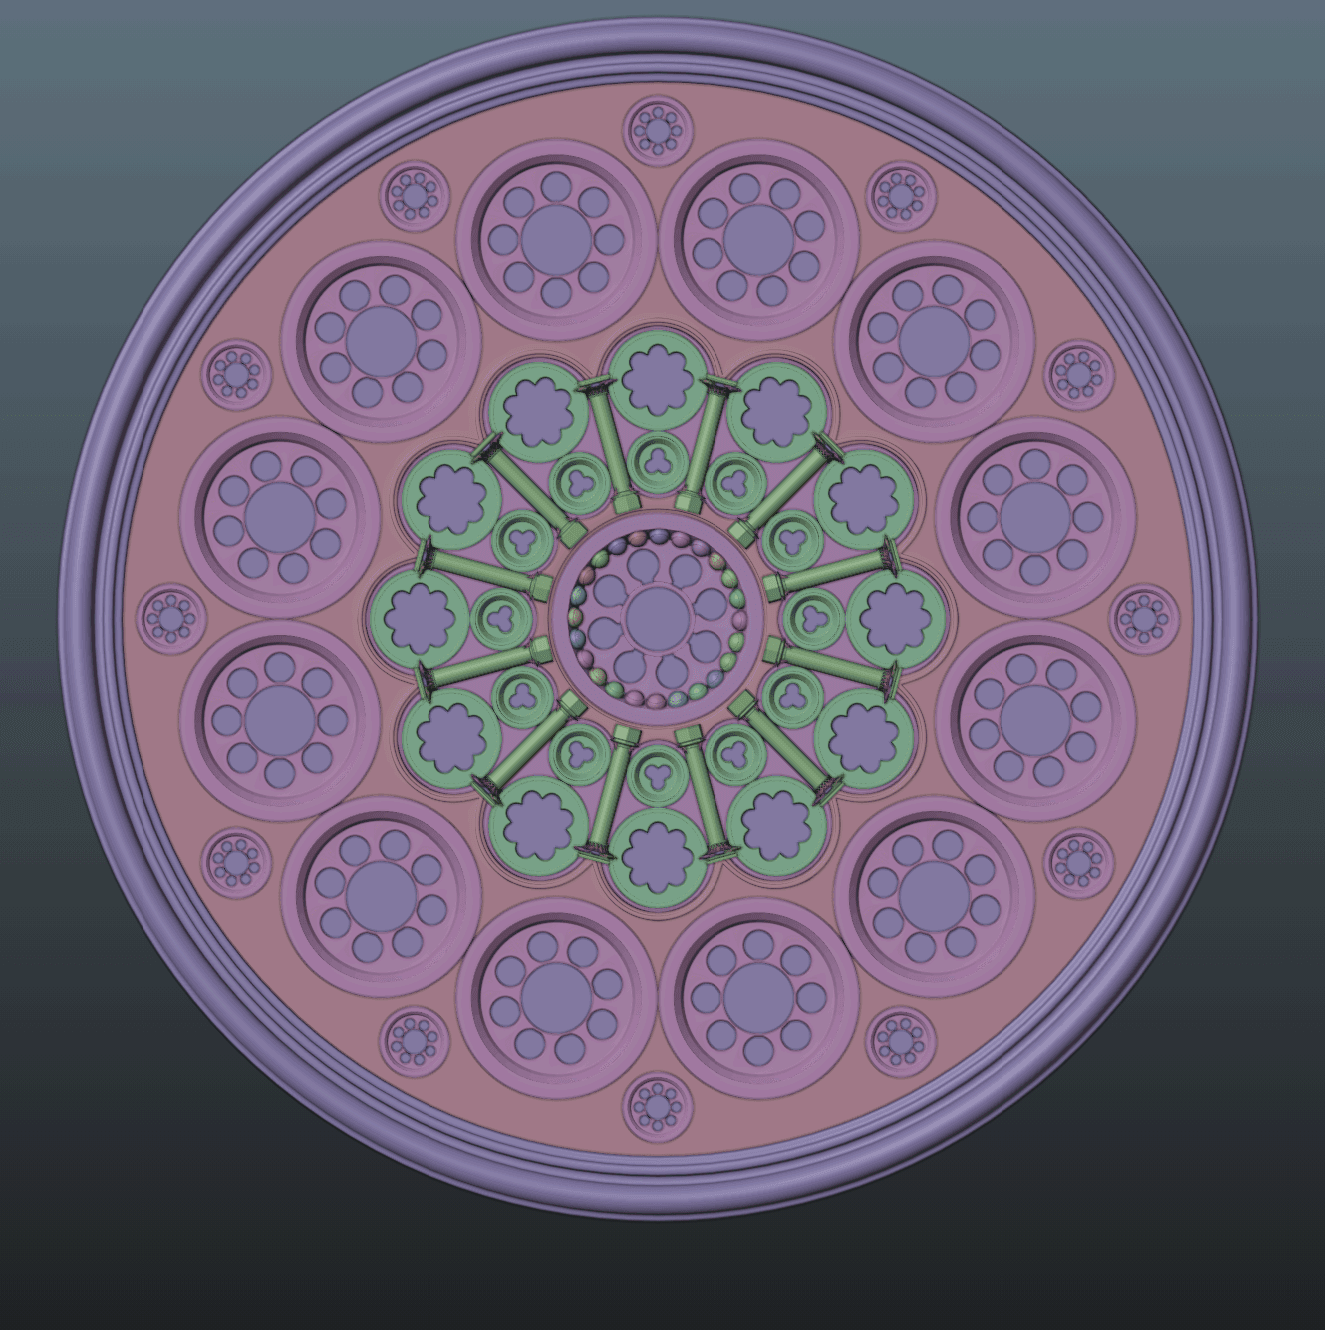
St Peter's Cathedral
There is a particular and interesting reason behind choosing this cathedral. If we break it down into small sections, except for a few organic ornamental designs here and there, the entire cathedral is made up of geometric shapes like circles, triangles, and rectangles. My hands are not experienced in creating super-detailed organic sculptures like those found on some of the ridiculously intricate cathedrals, such as Notre-Dame Cathedral of Paris. Most of the forms here are simple shapes, which is why this seemed like something within my skill set to accomplish.
Fox Renderfarm: What software did you use, and was there anything different you did for this project?
MadCandy: I create all of my work in Blender 3D, and this one is no exception. Everything—from modelling to compositing—was done in Blender. Sometimes I use Photoshop to add film grain and a slight colour boost as a final touch after the Blender compositing stage.
Fox Renderfarm: Before diving into the visual design, how much planning and pre-production work do you typically do?
MadCandy: For this project, the design had already been laid out for me, as I was recreating an existing structure. So apart from some last-minute design changes, set dressing, and lighting adjustments, I didn’t play a major role in the design process. I pretty much dove straight into the modelling phase after collecting the necessary reference images. If I were designing something entirely from scratch, I would still do all the concept design work in 3D—because I have no background in 2D drawing. In fact, I’m really terrible at it. I do all of my concepting in 3D using just basic shapes and premade assets, like the example below. That’s all I do before diving into the actual creation process.
Concept Design © MadCandy
Fox Renderfarm: Could you please tell us about your pipeline for this work? And how long did it take you?
MadCandy: After deciding what I was going to model, I started by collecting reference images. This included everything from blueprints to various photos of the cathedral, covering multiple angles and close-up shots to capture the finer details. I also studied geometric diagrams of similar architectural elements to better understand the construction and model them accurately. Pinterest.com is a great resource for gathering reference images.
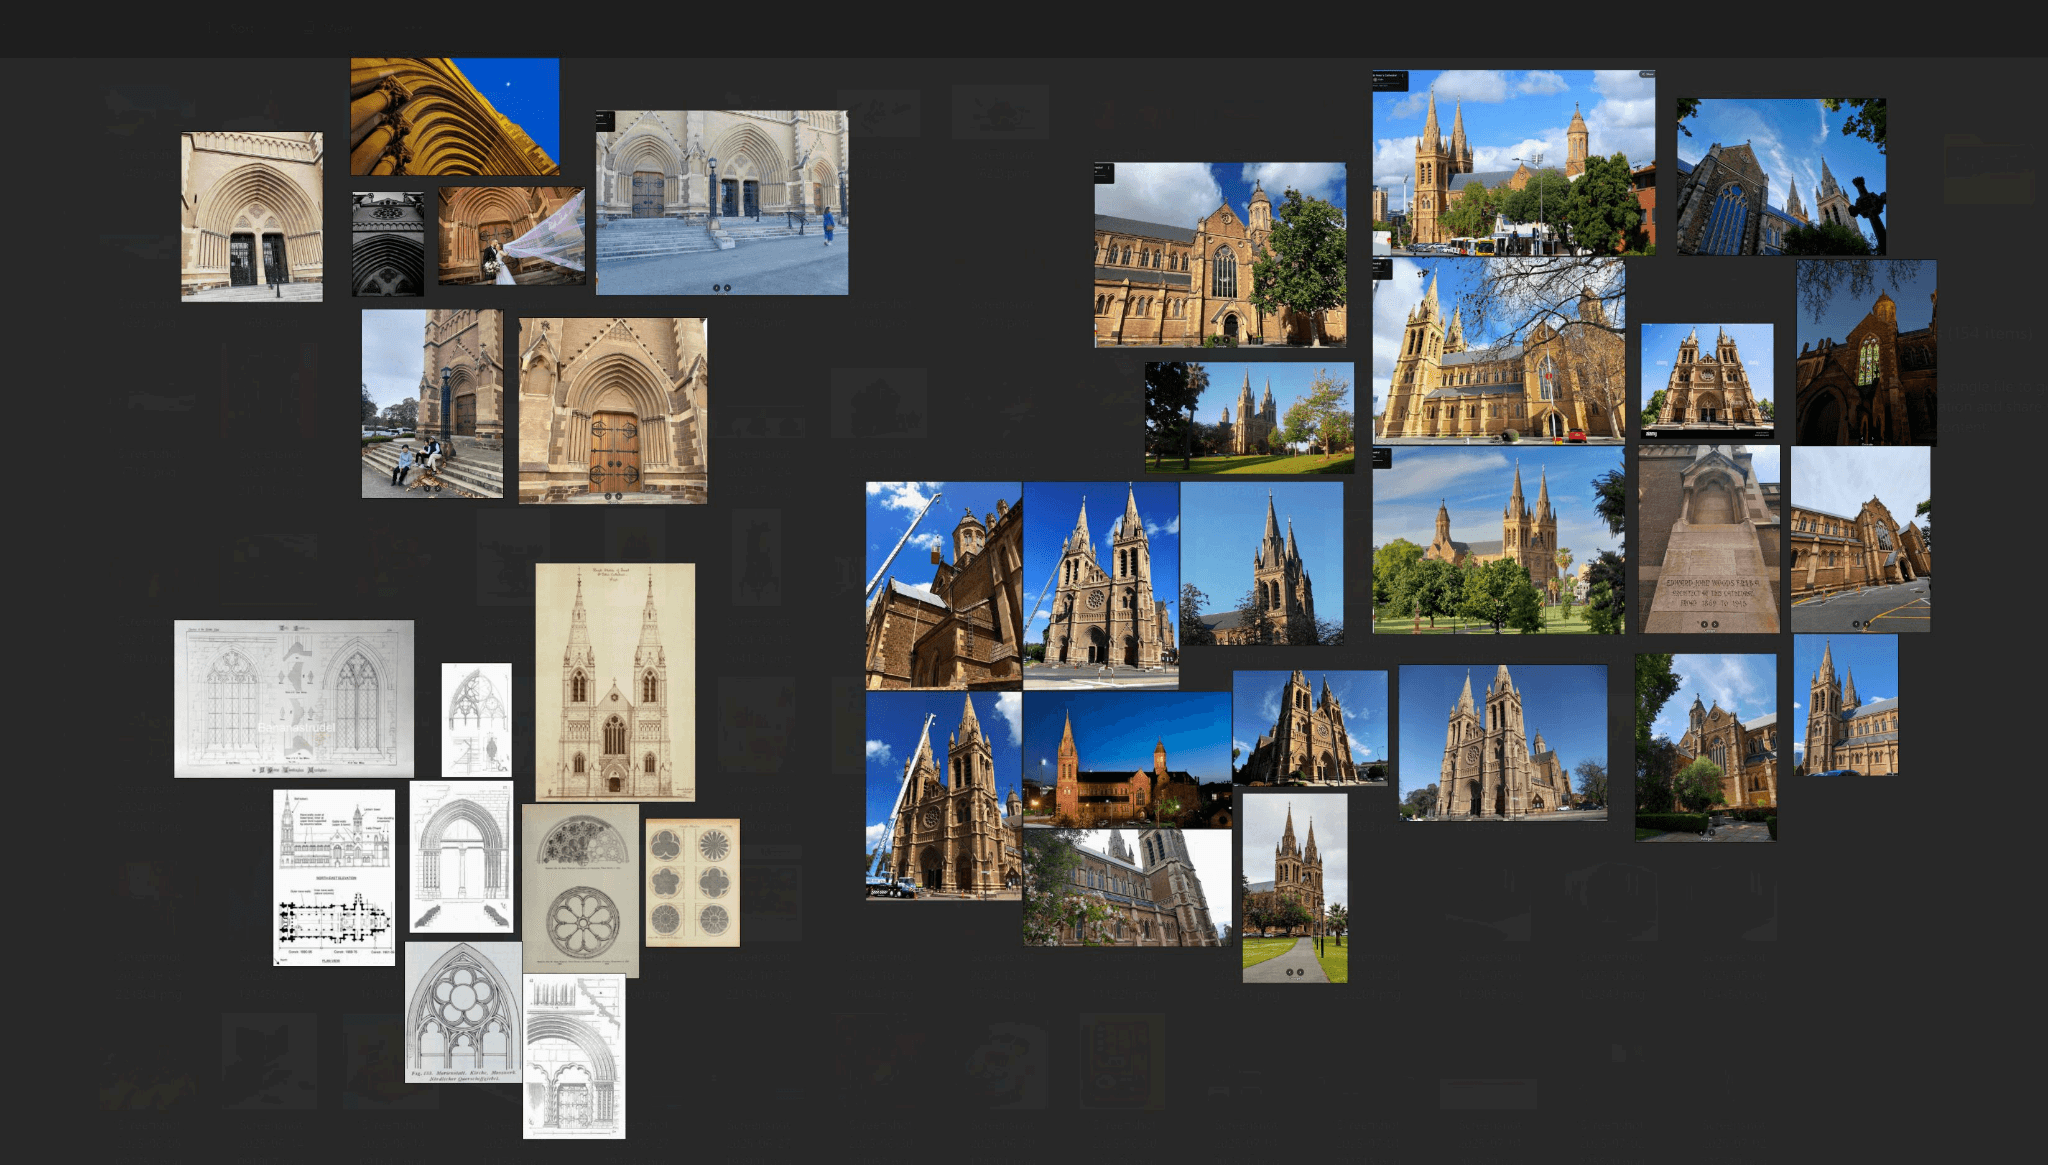
Reference Images © MadCandy
After collecting the reference images, I began by blocking out the cathedral. This is an essential step for elaborate projects like this one. Depending on the complexity of the scene, it can take anywhere from a few minutes to a few hours. But getting the proportions right early in the production is crucial. This stage also makes it much easier to explore different ideas and make significant design changes before moving forward.
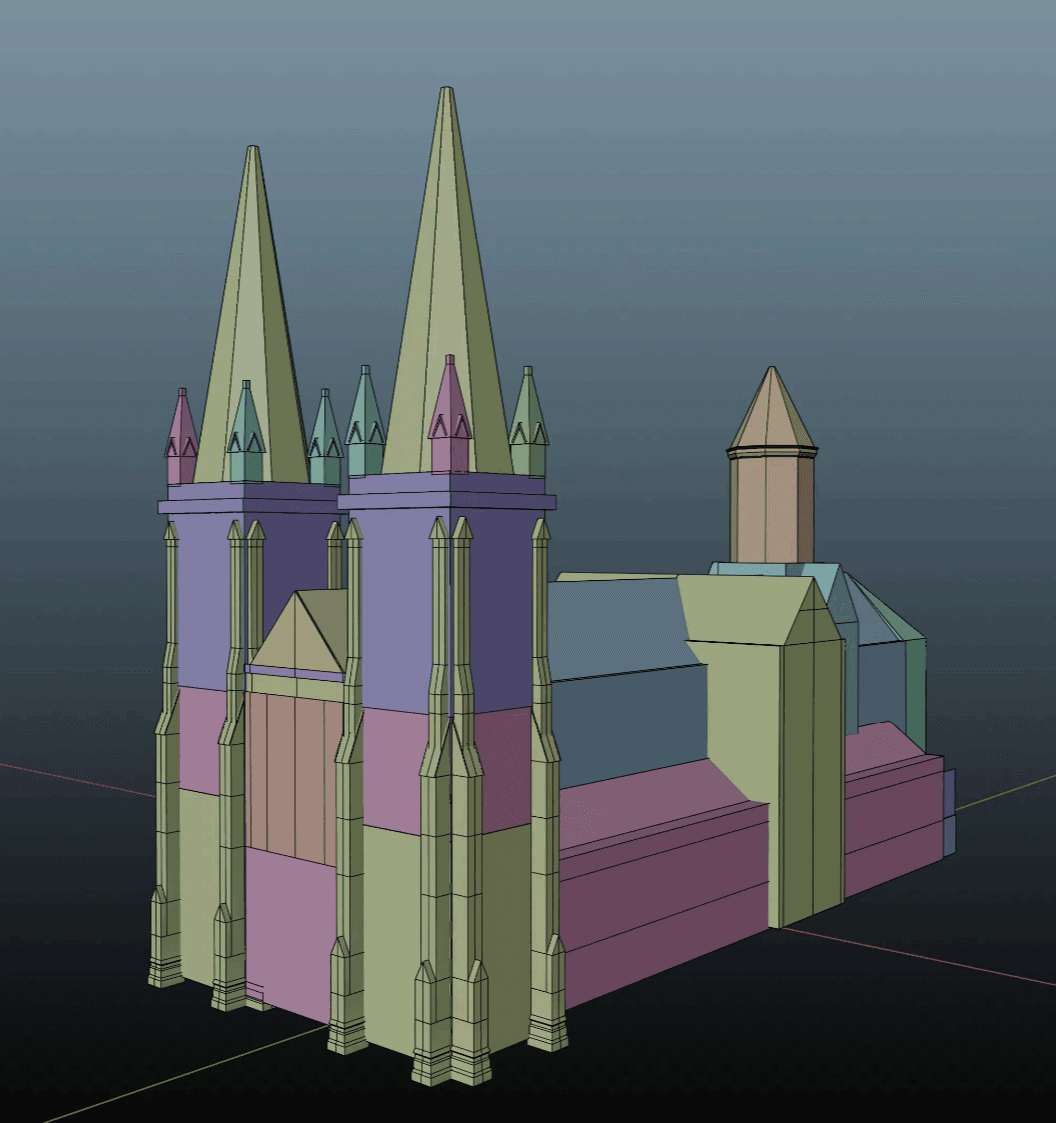
Cathedral Blocking © MadCandy
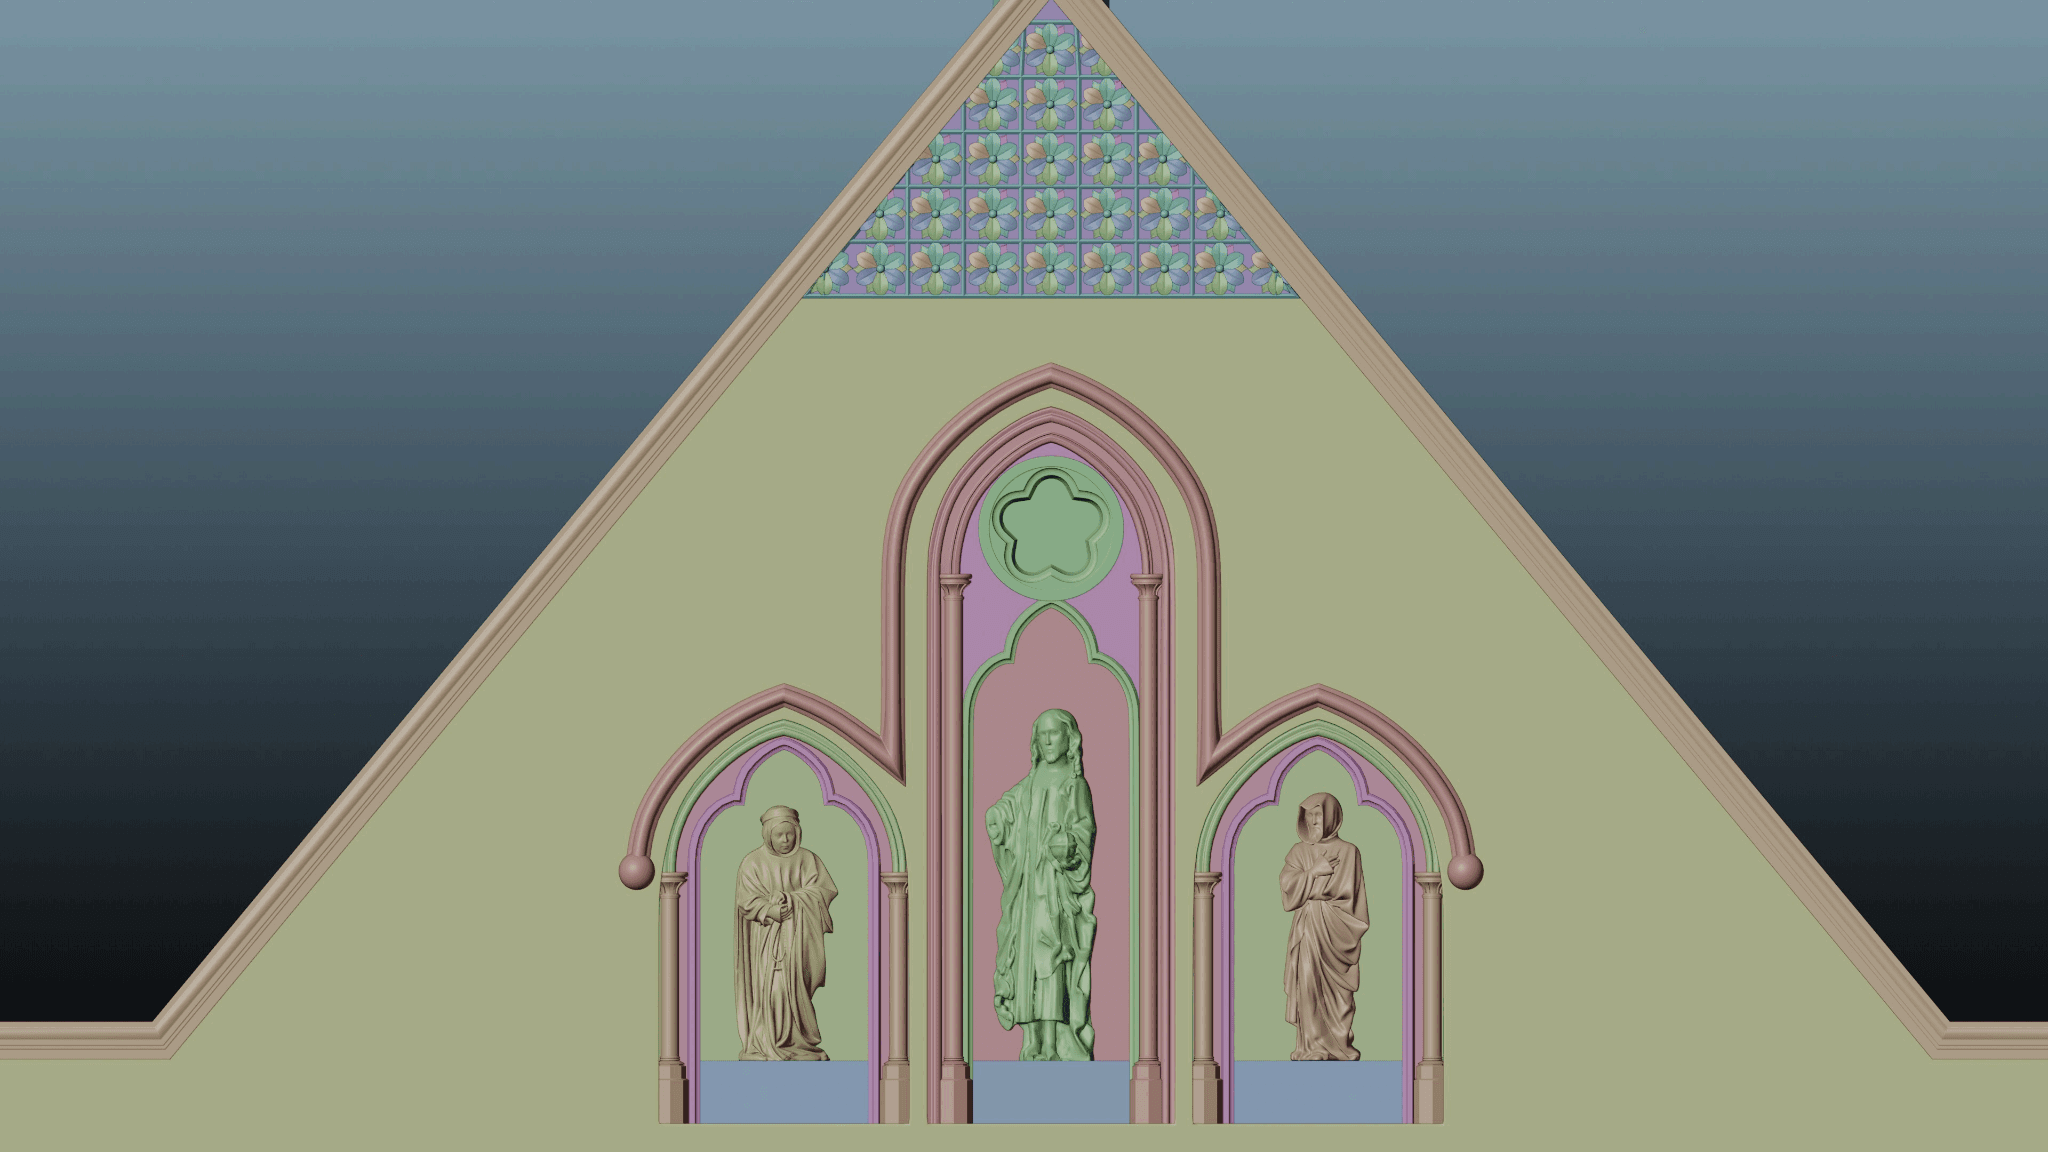
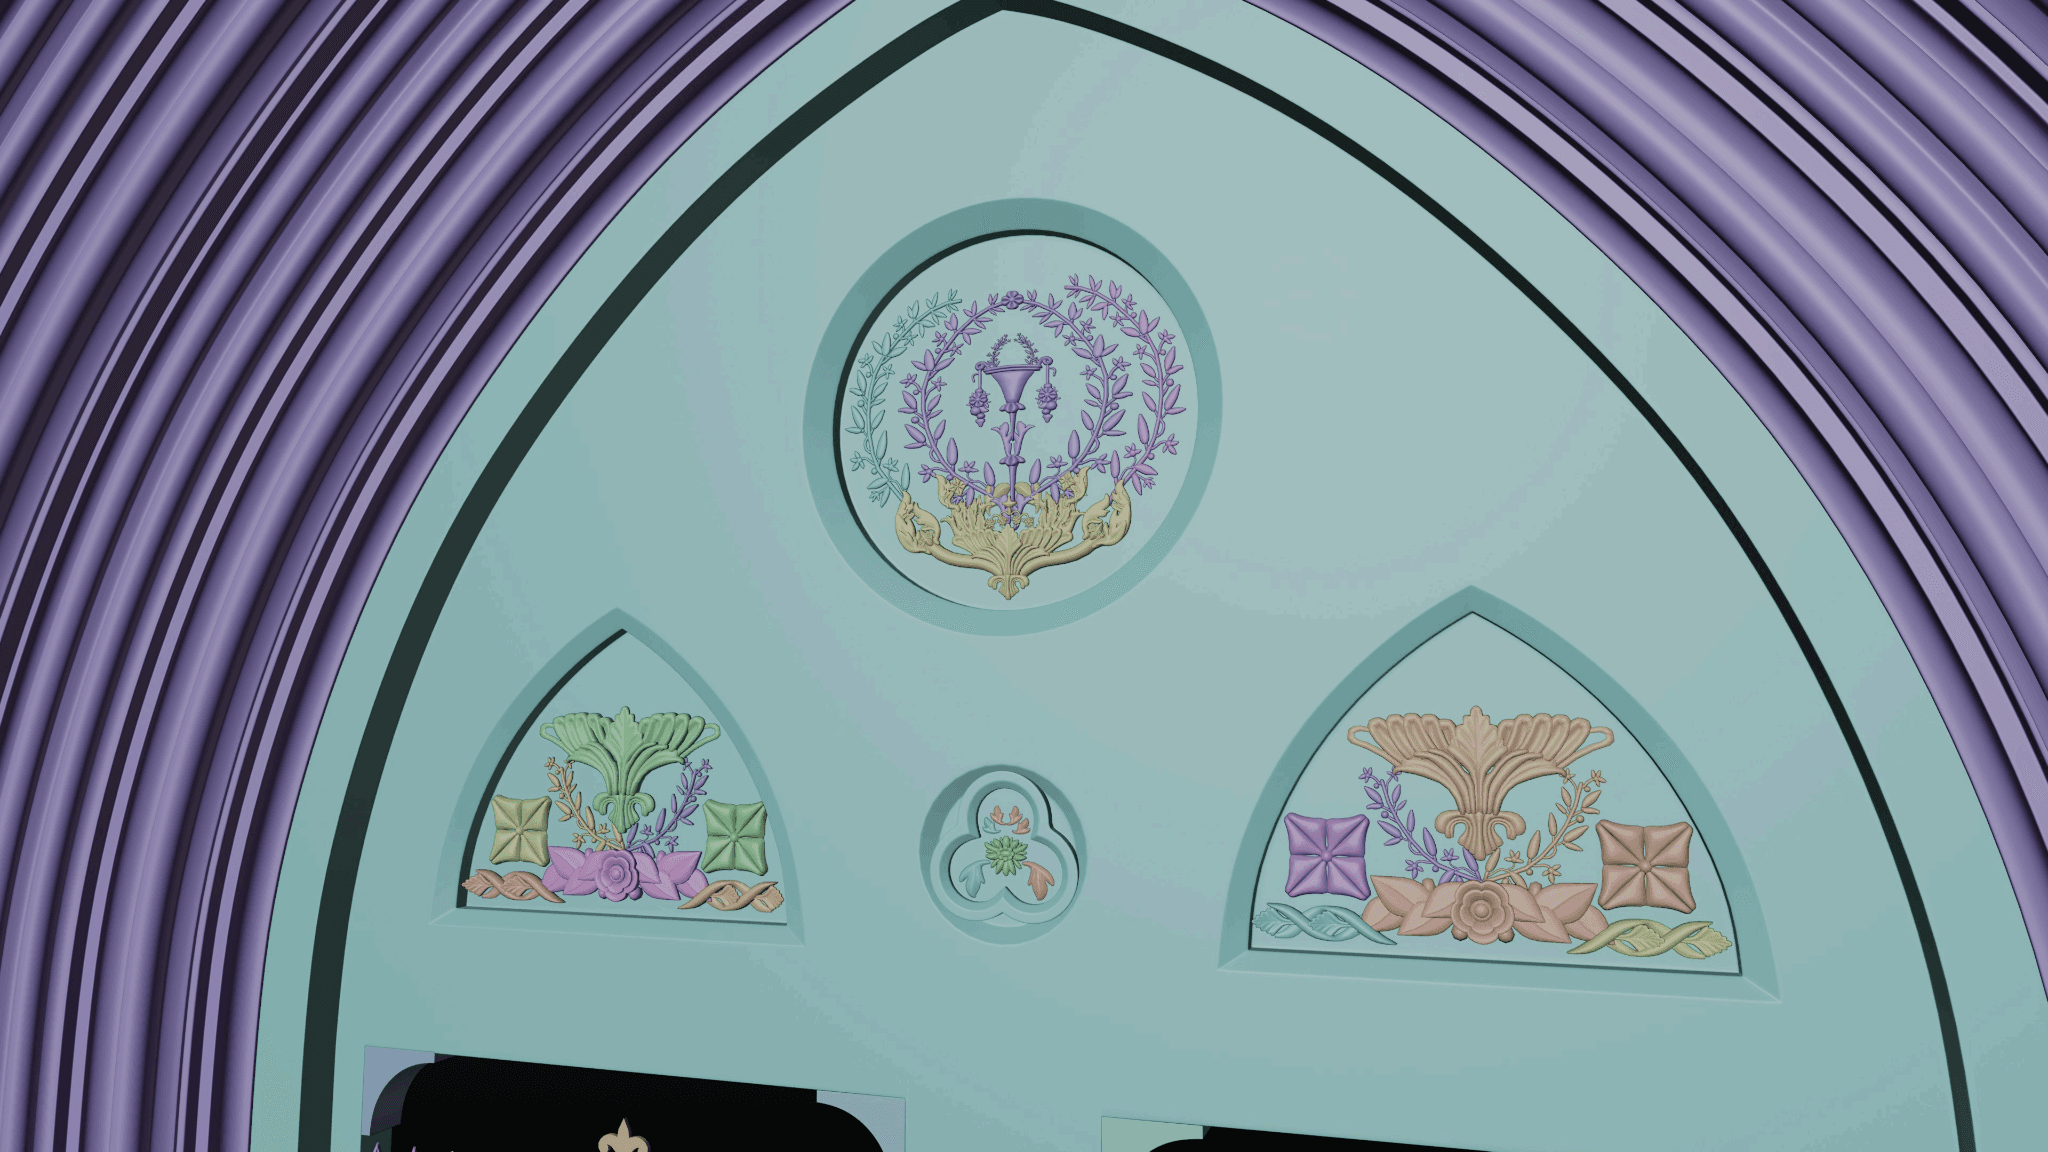
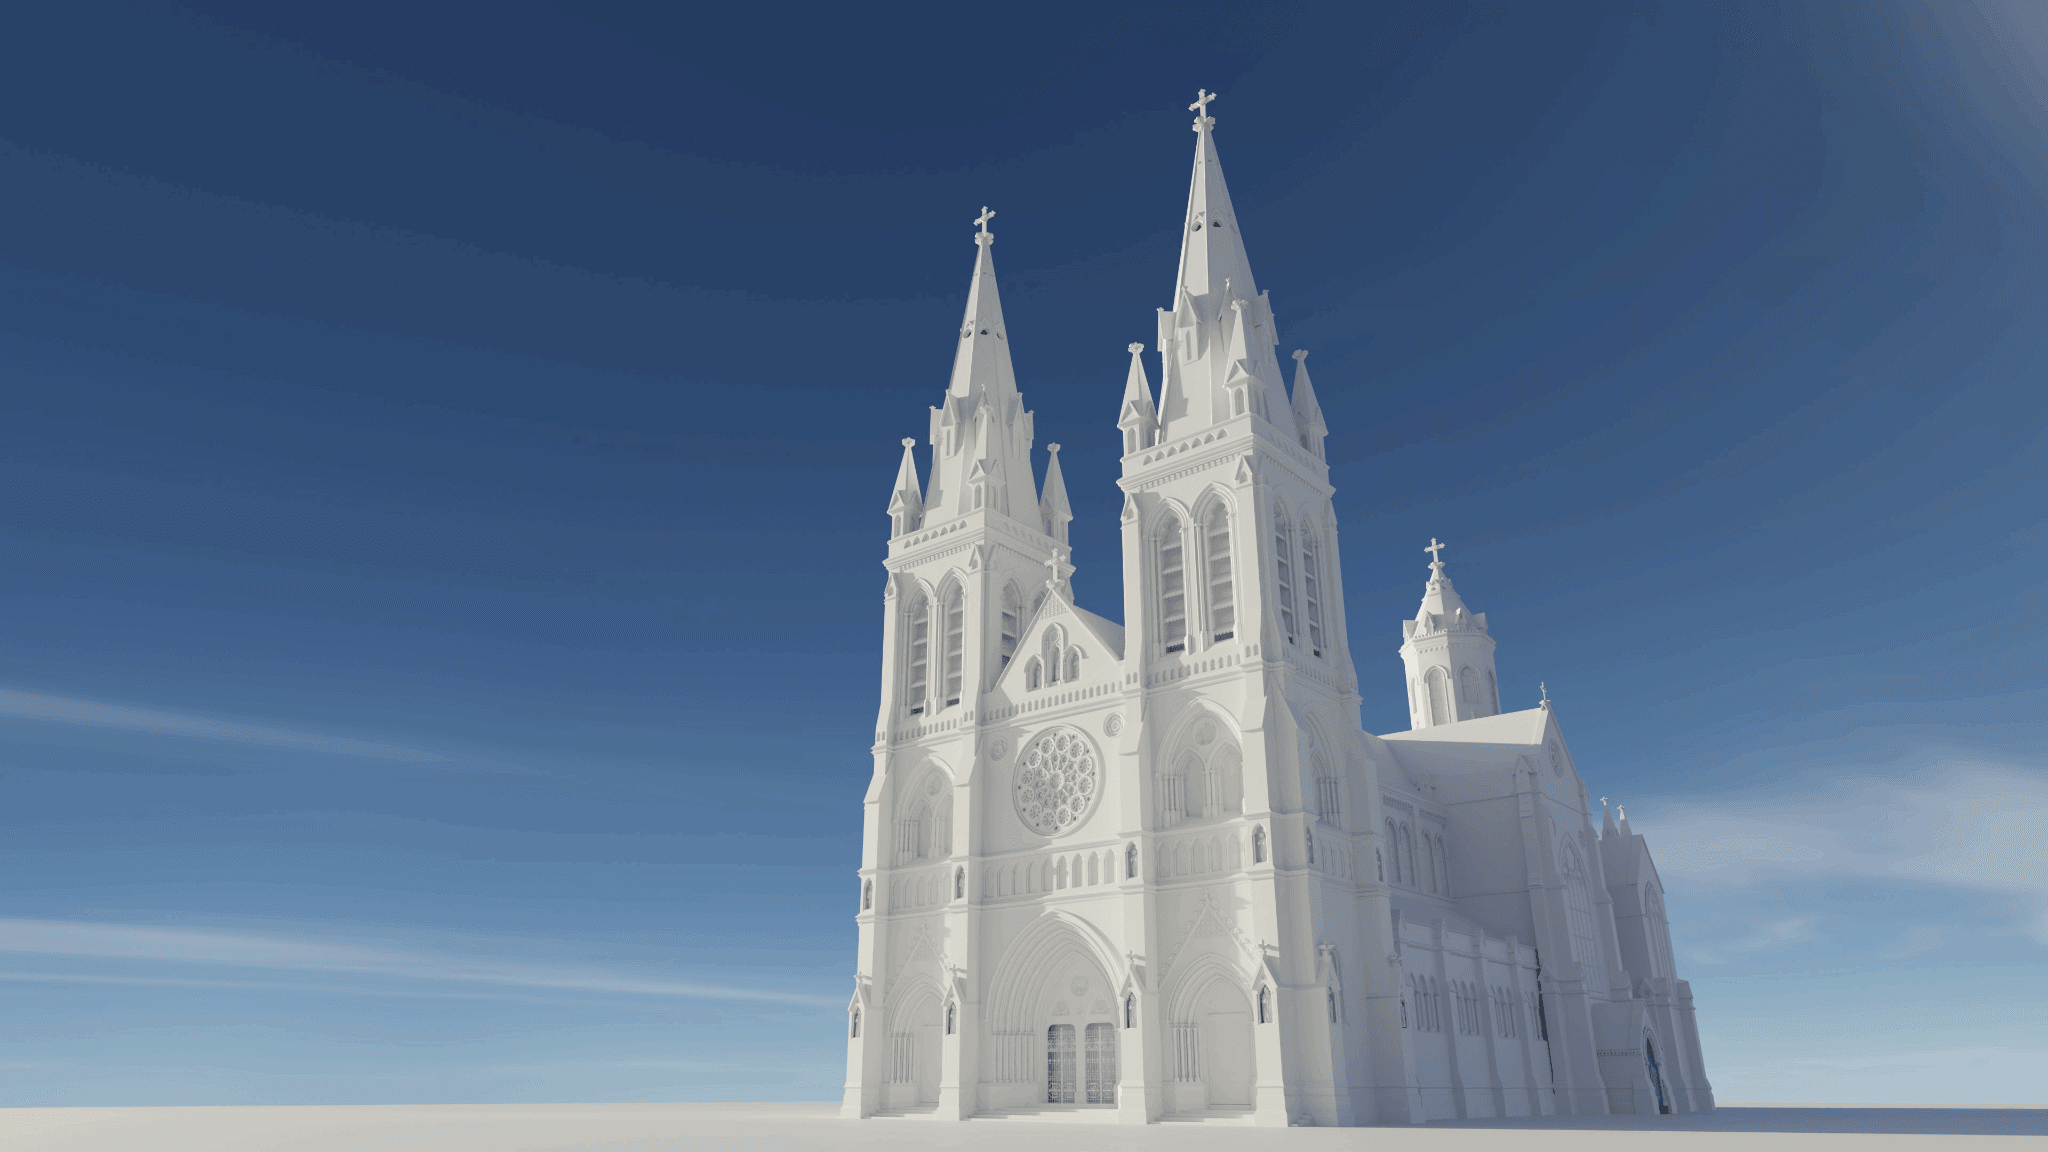
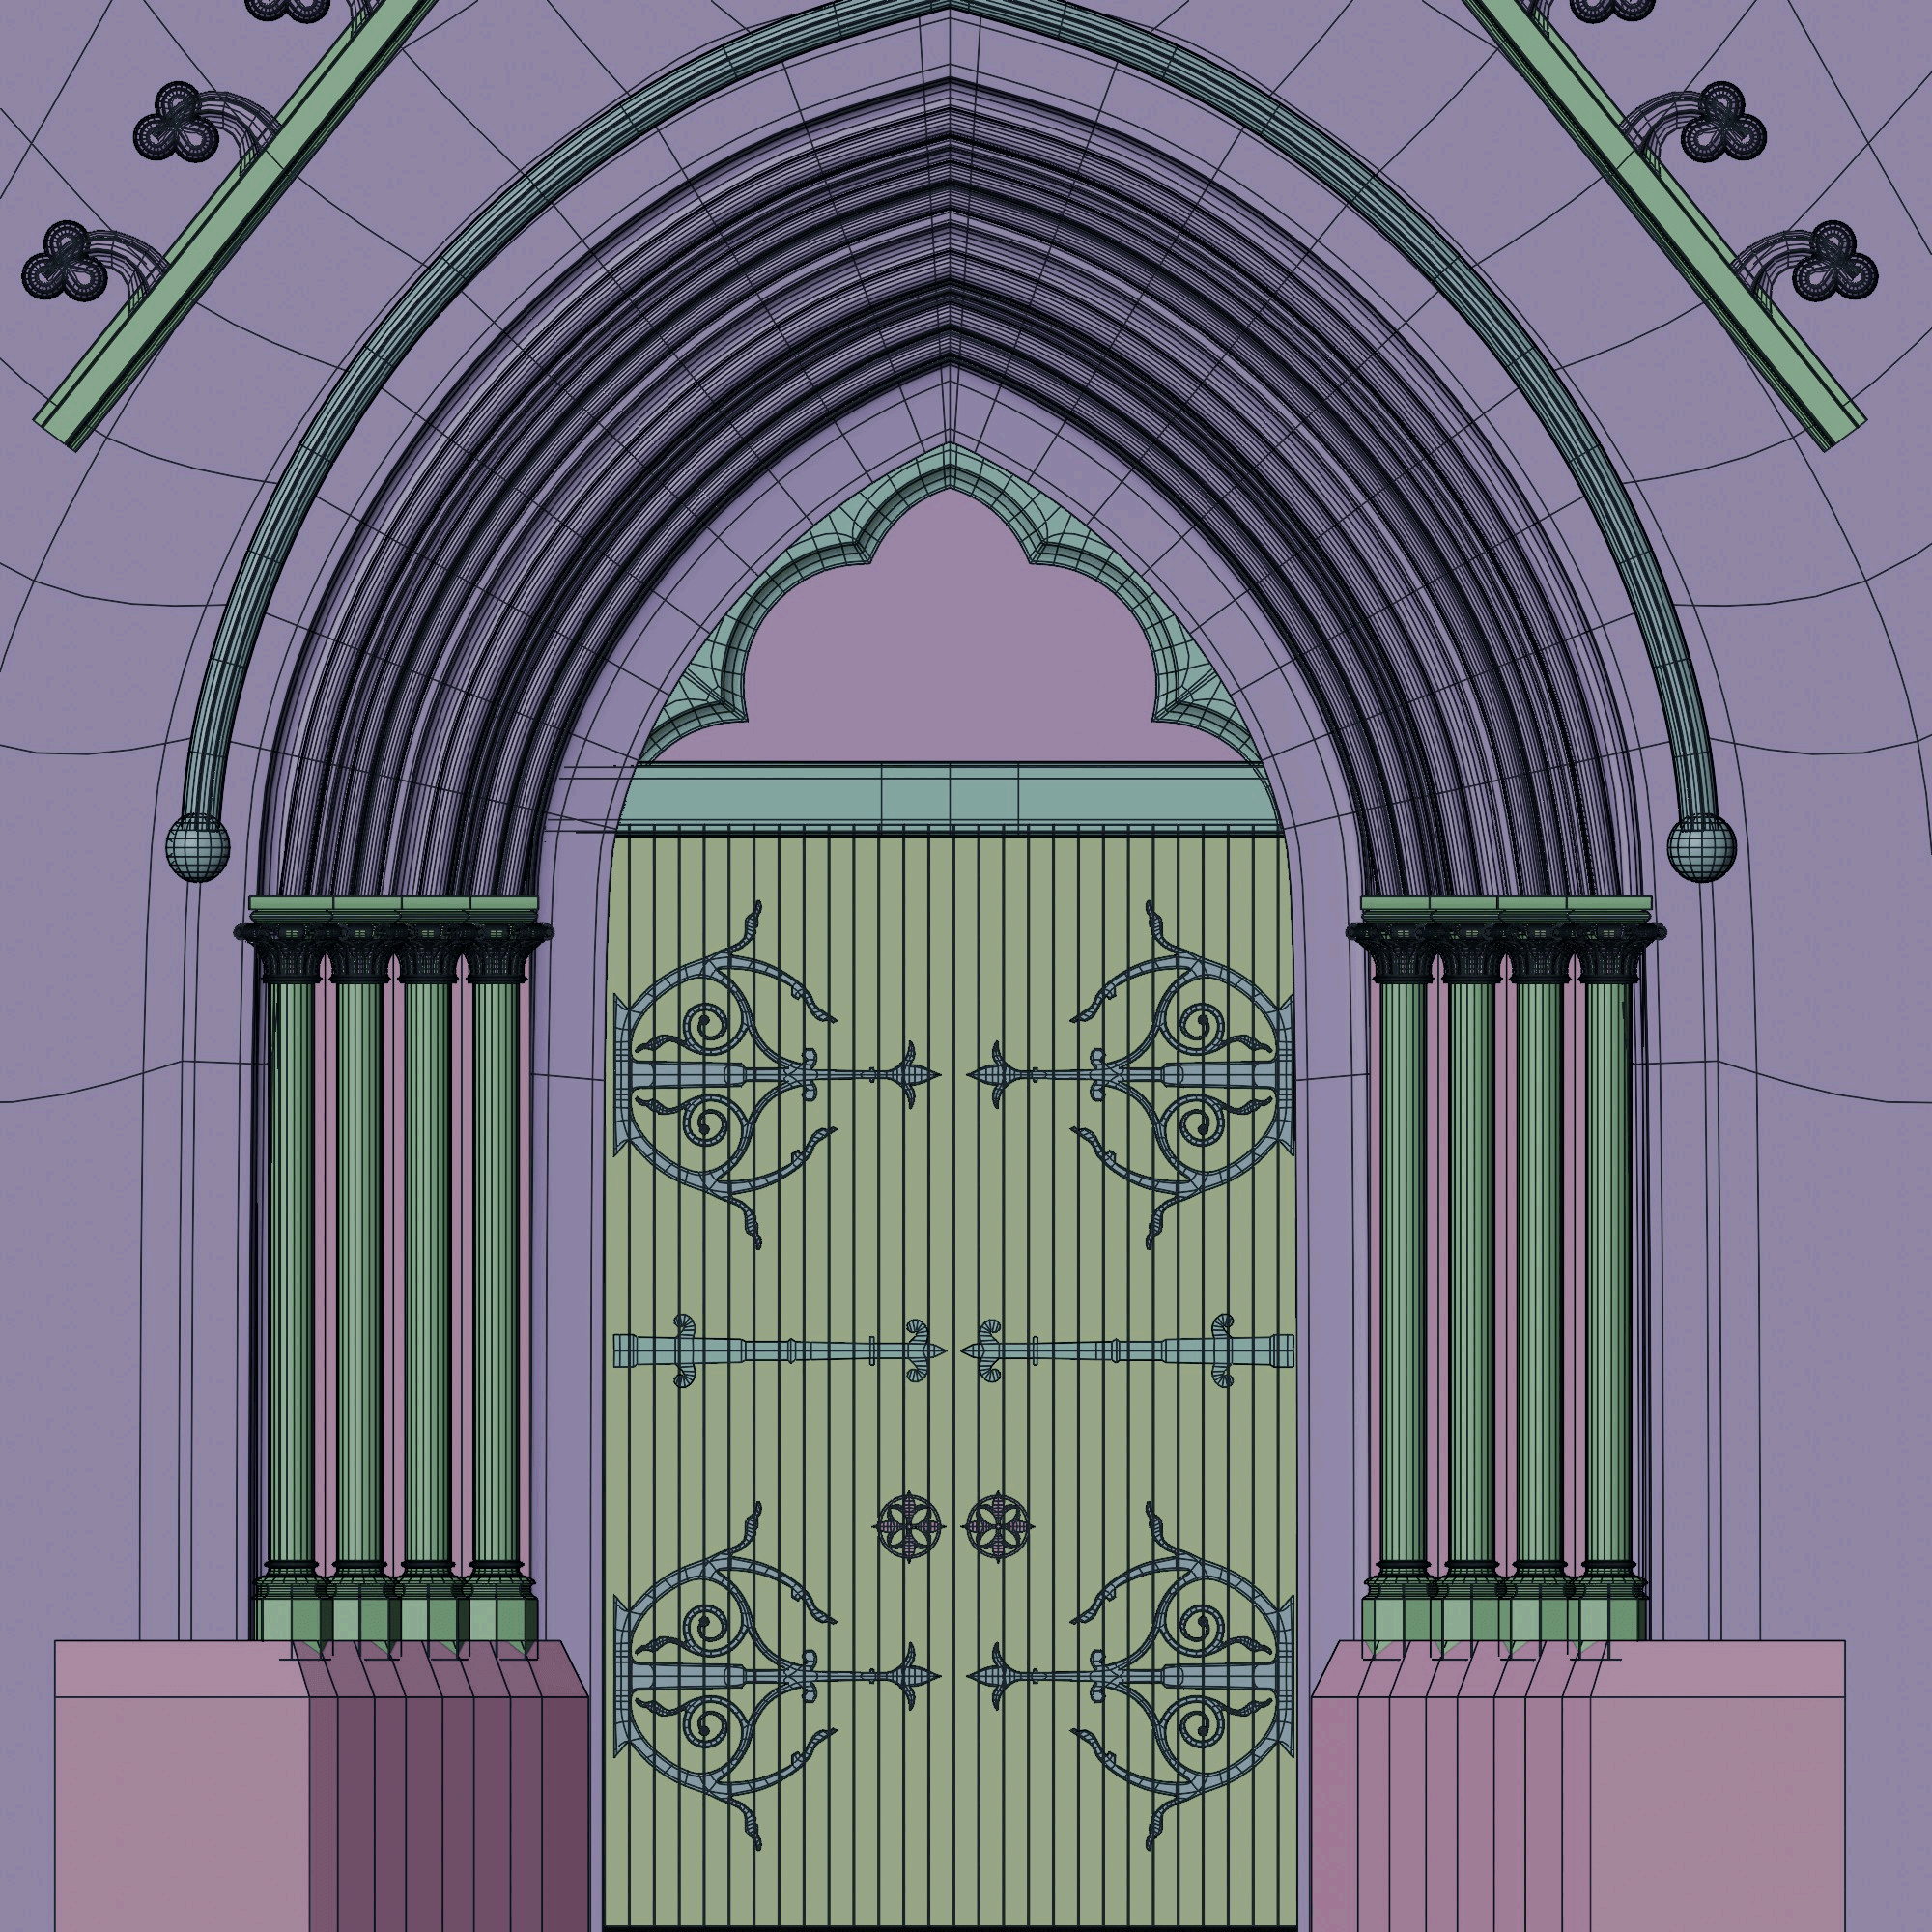
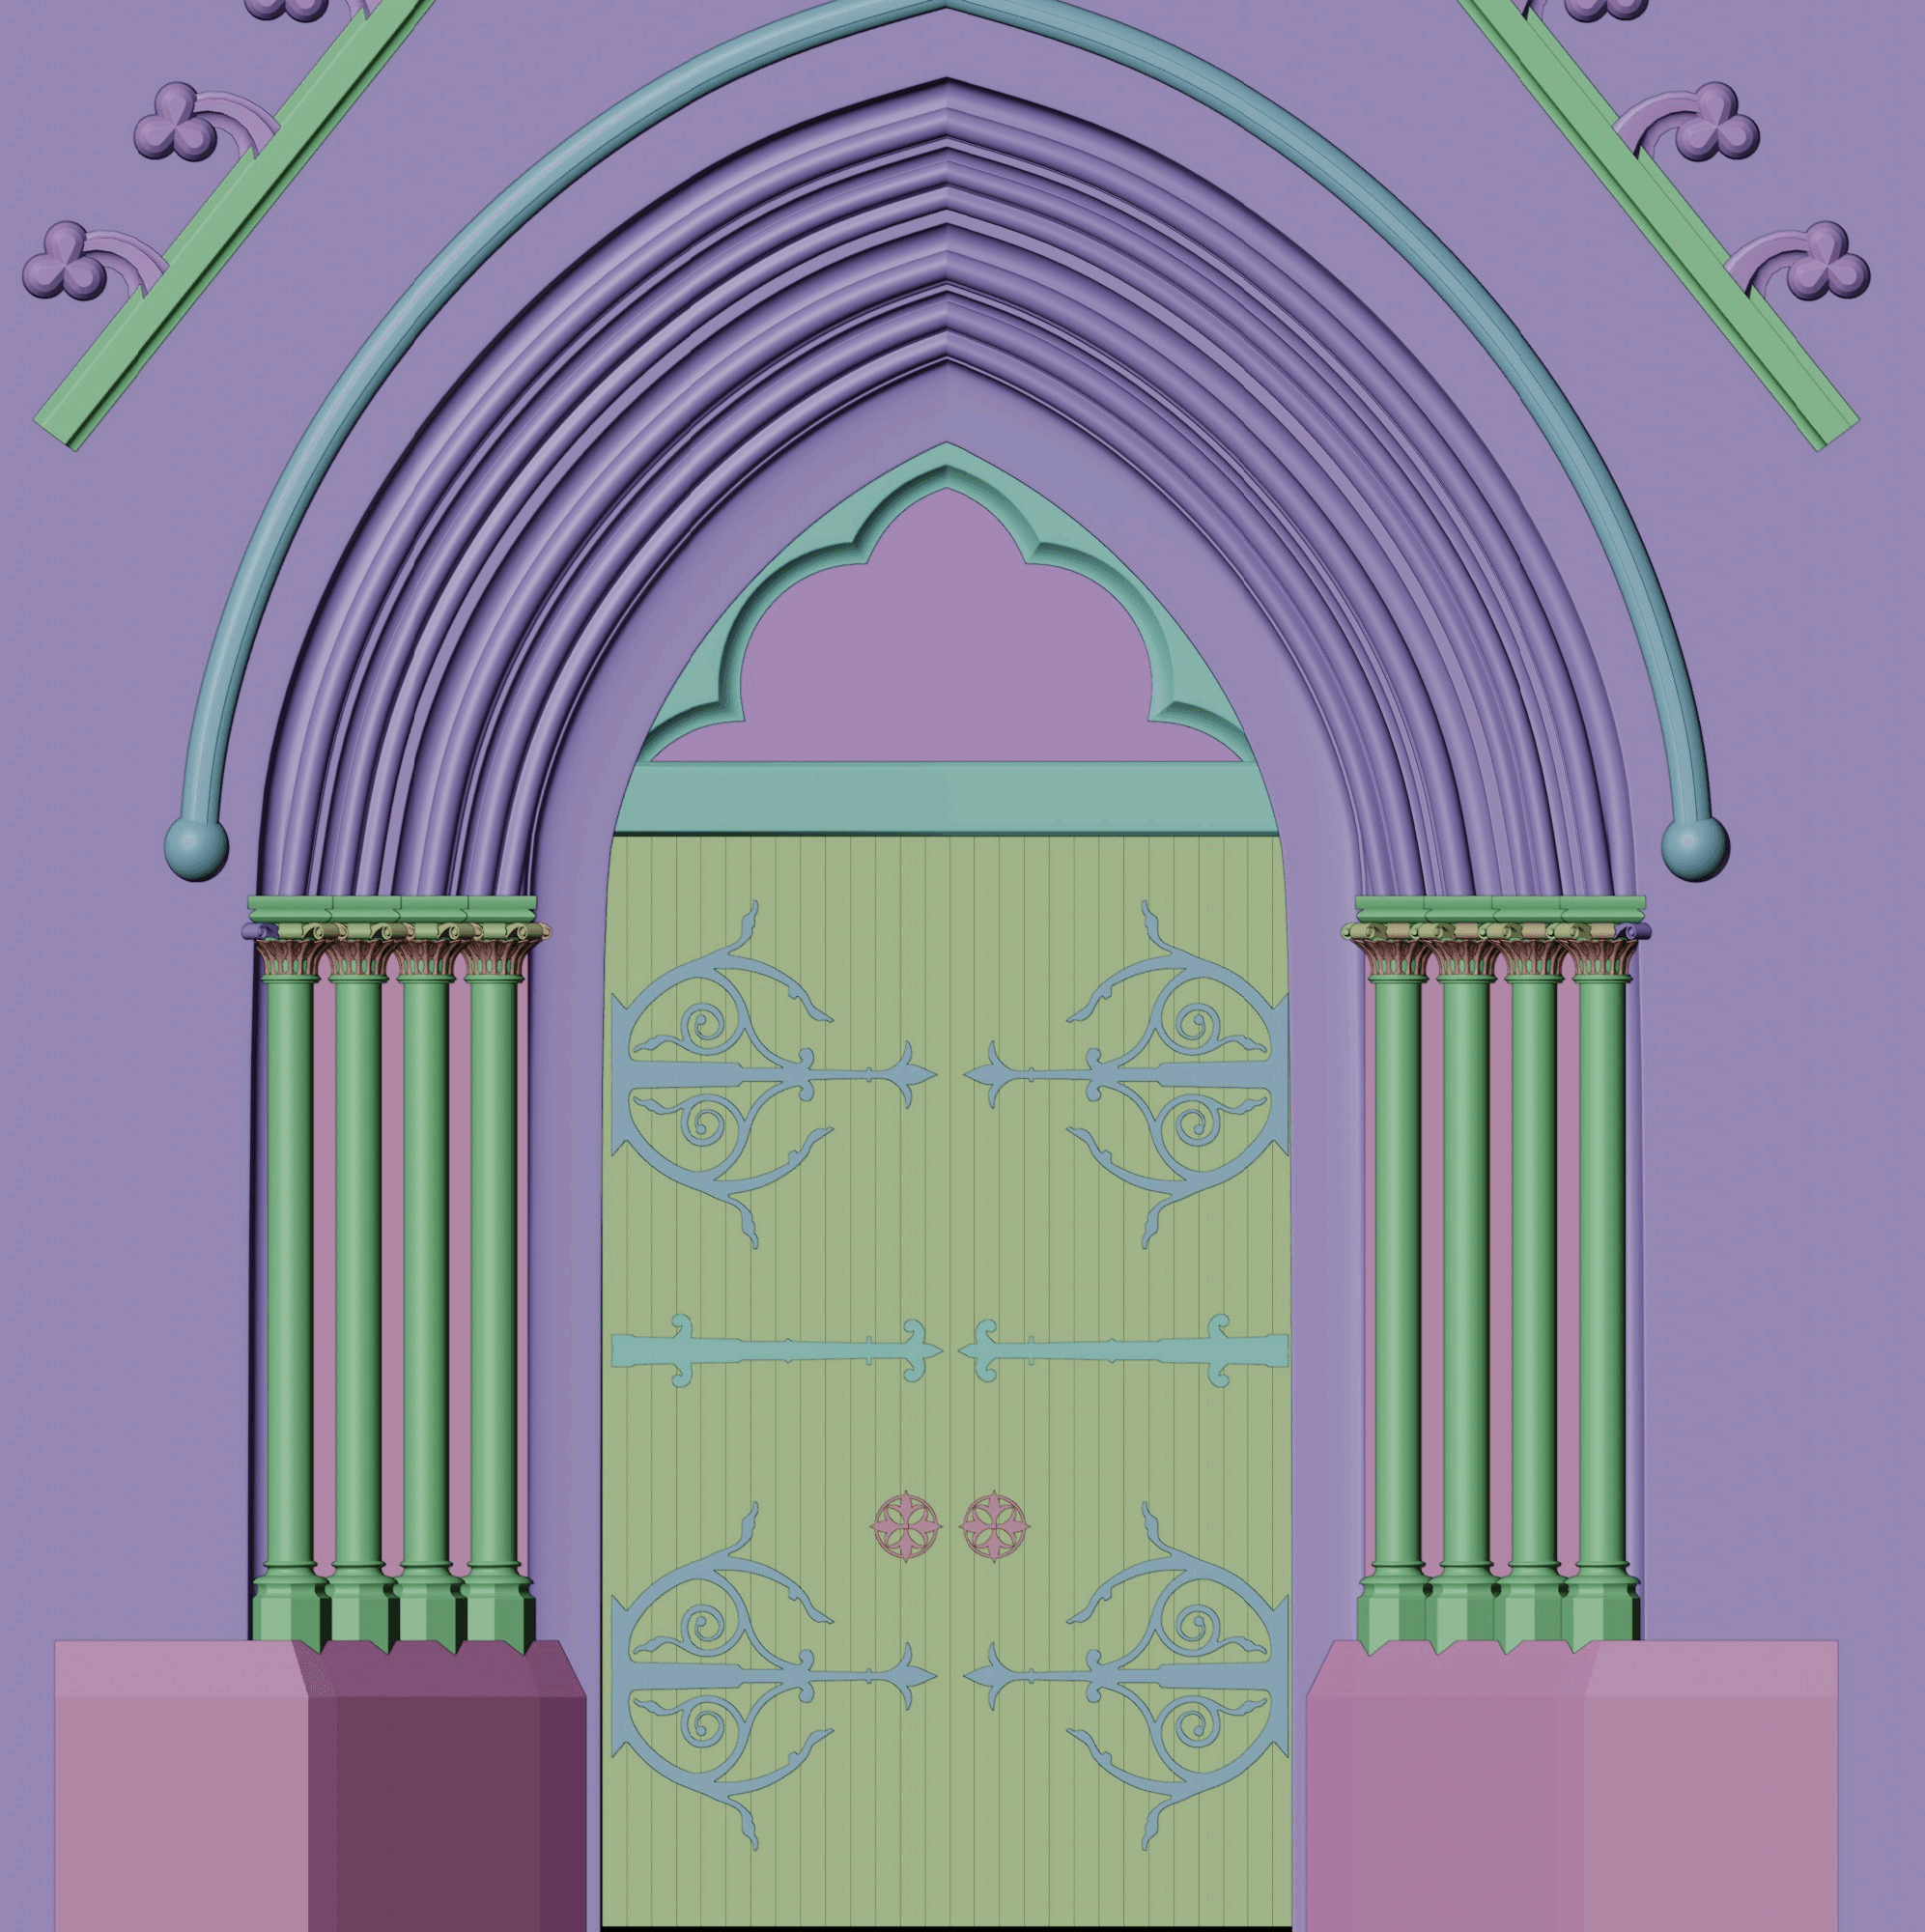
After blocking out, I picked each placeholder object and started modelling them elaborately. I tried to keep the topology as clean as possible, which will provide me with the flexibility to make any changes during the final stage, also it is easy to unwrap when models have good topology.
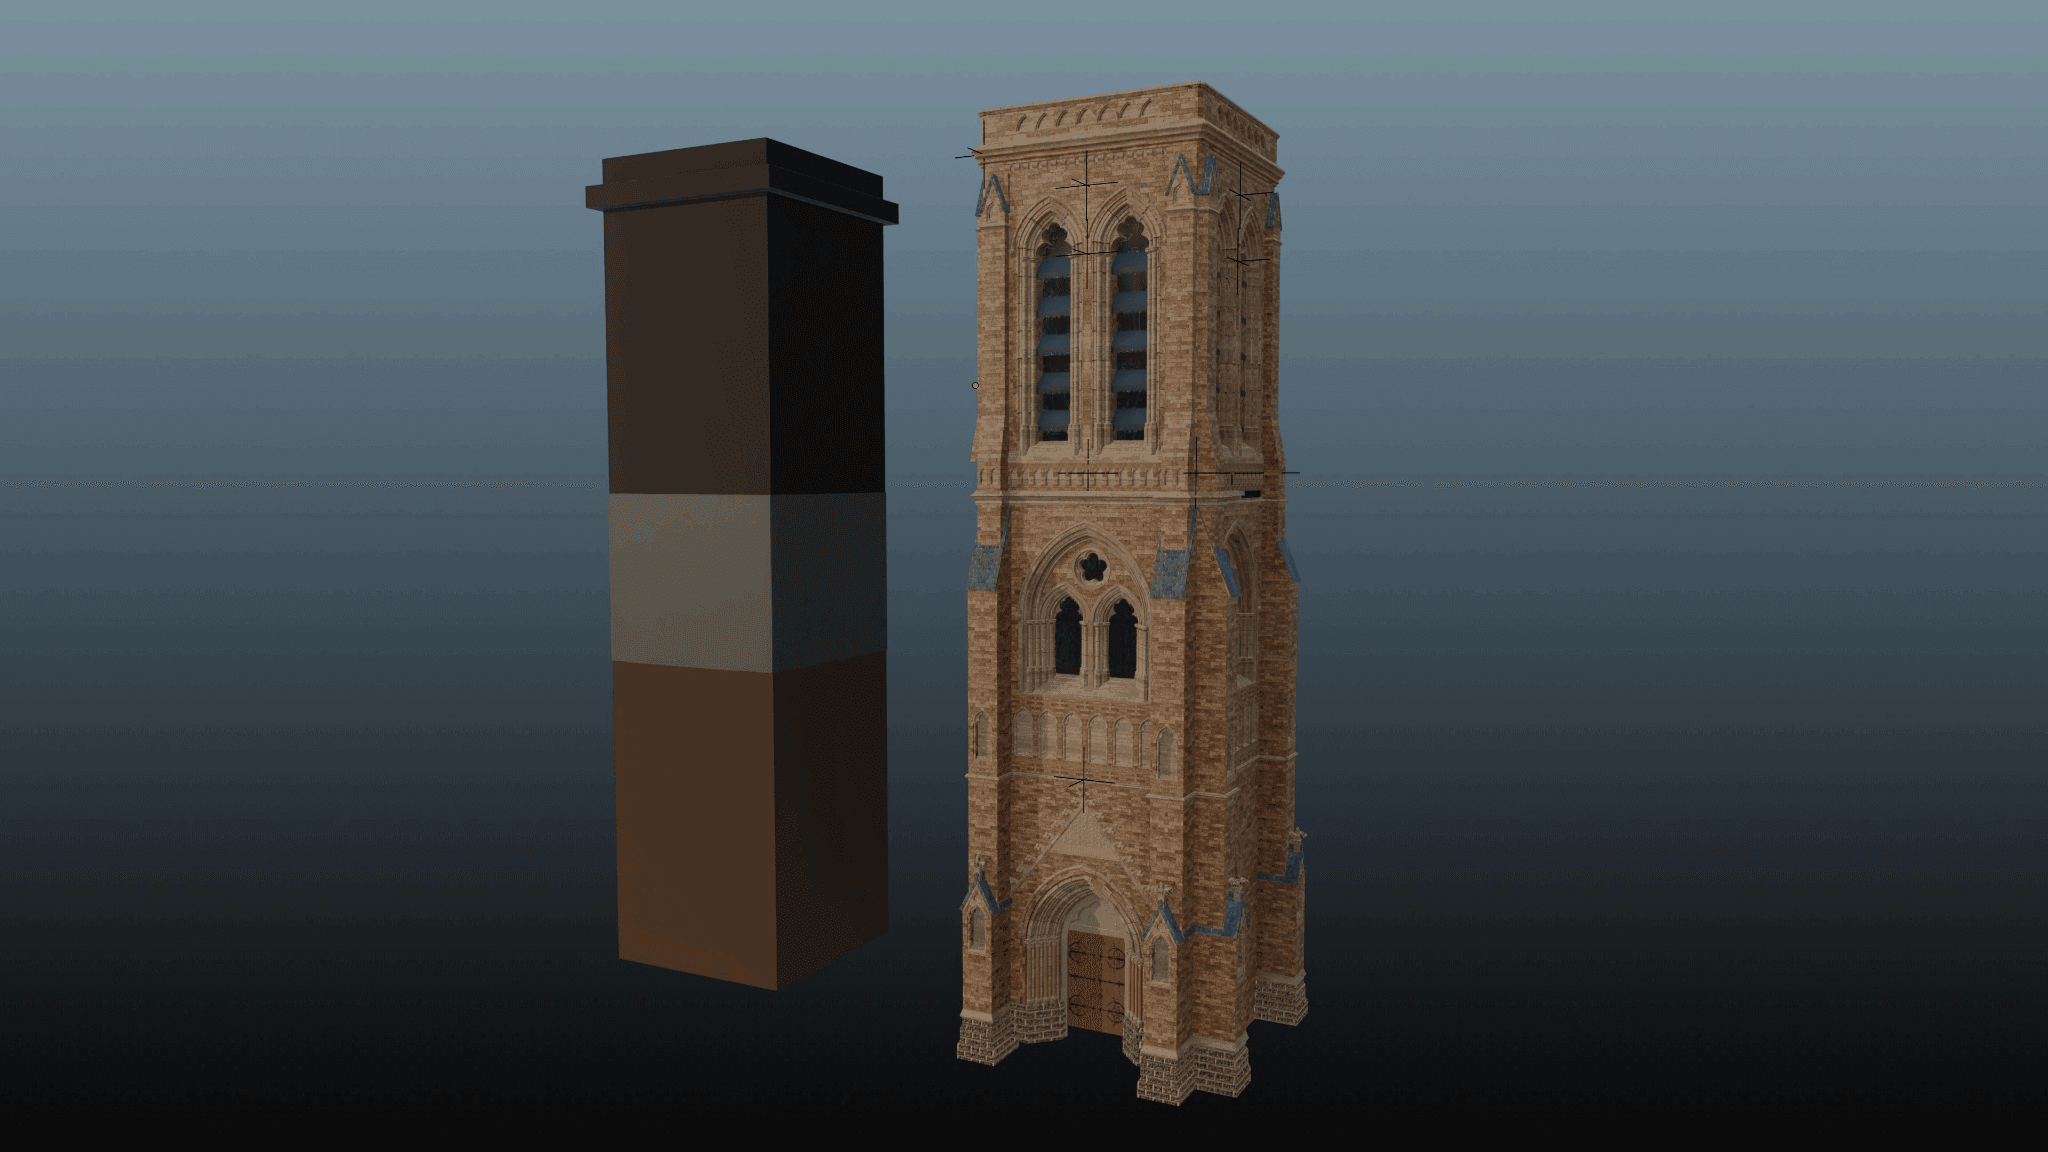
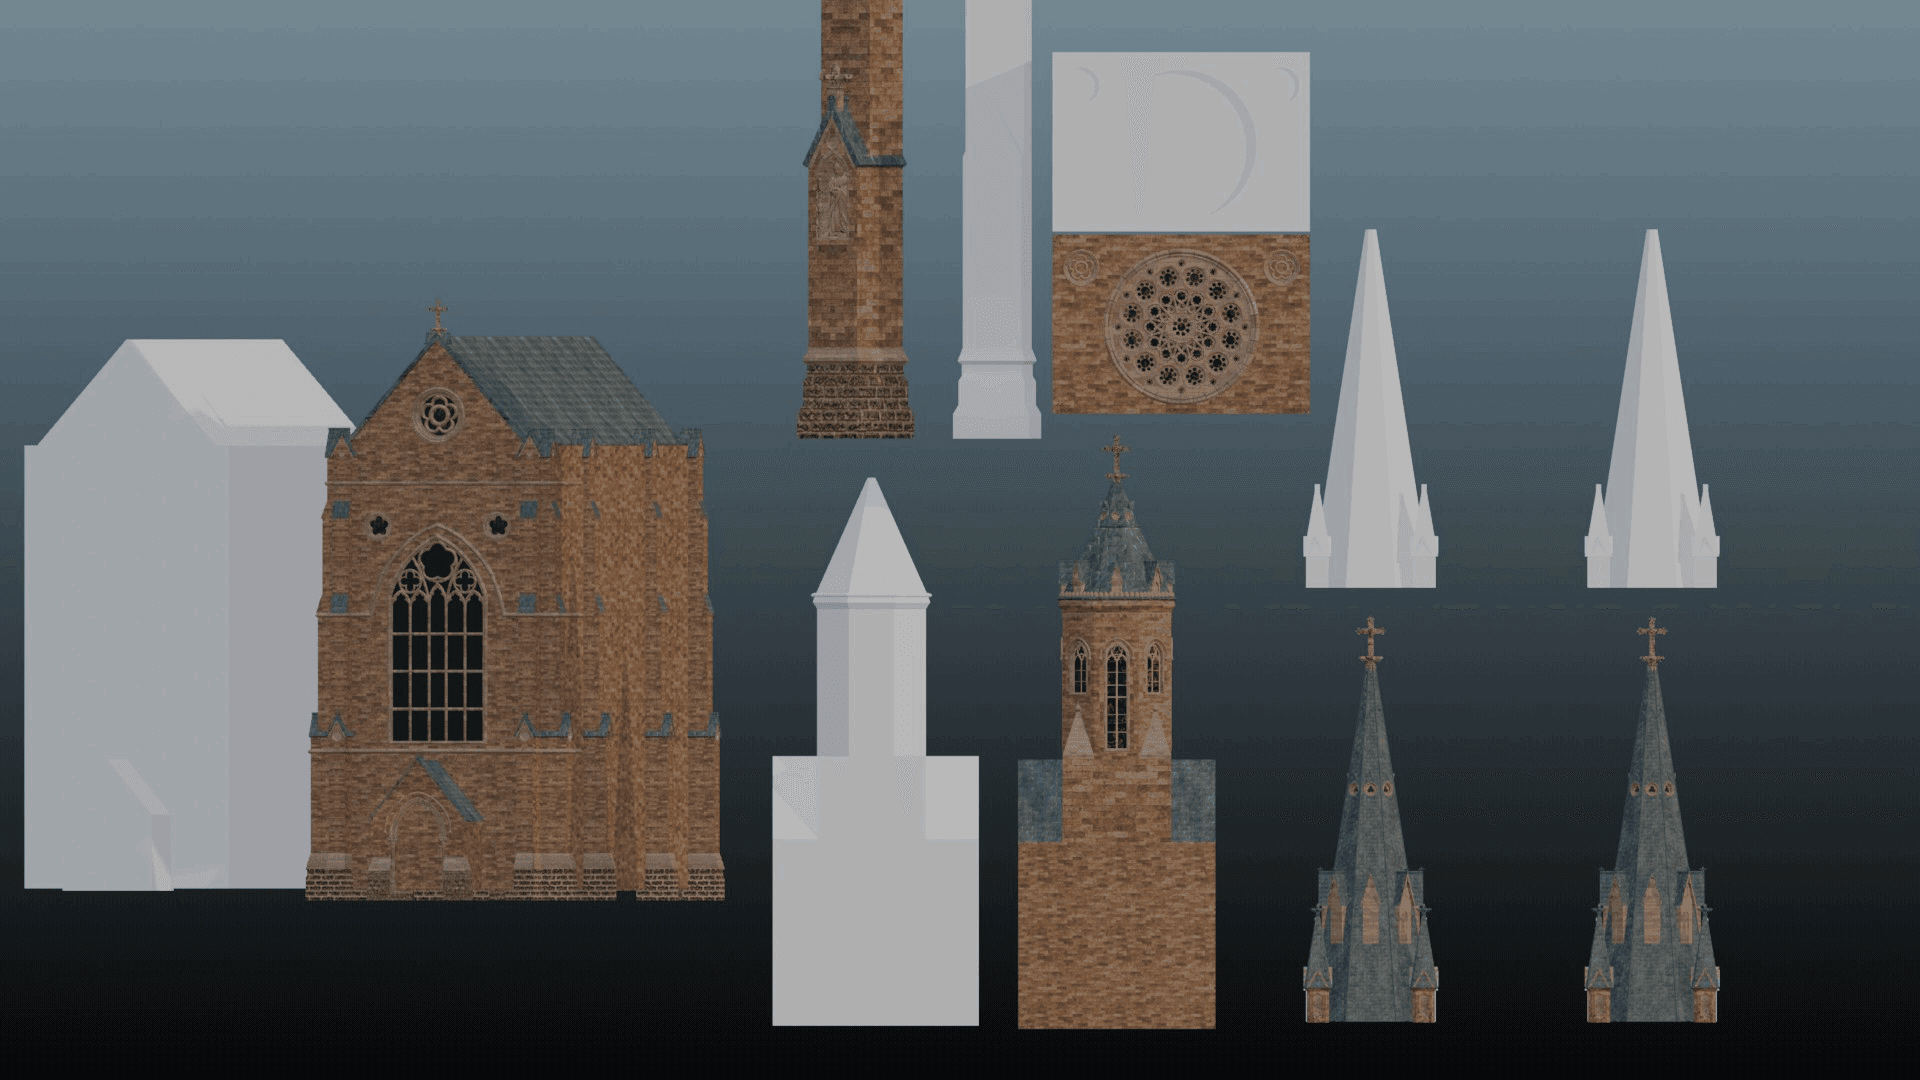
Modelling © MadCandy
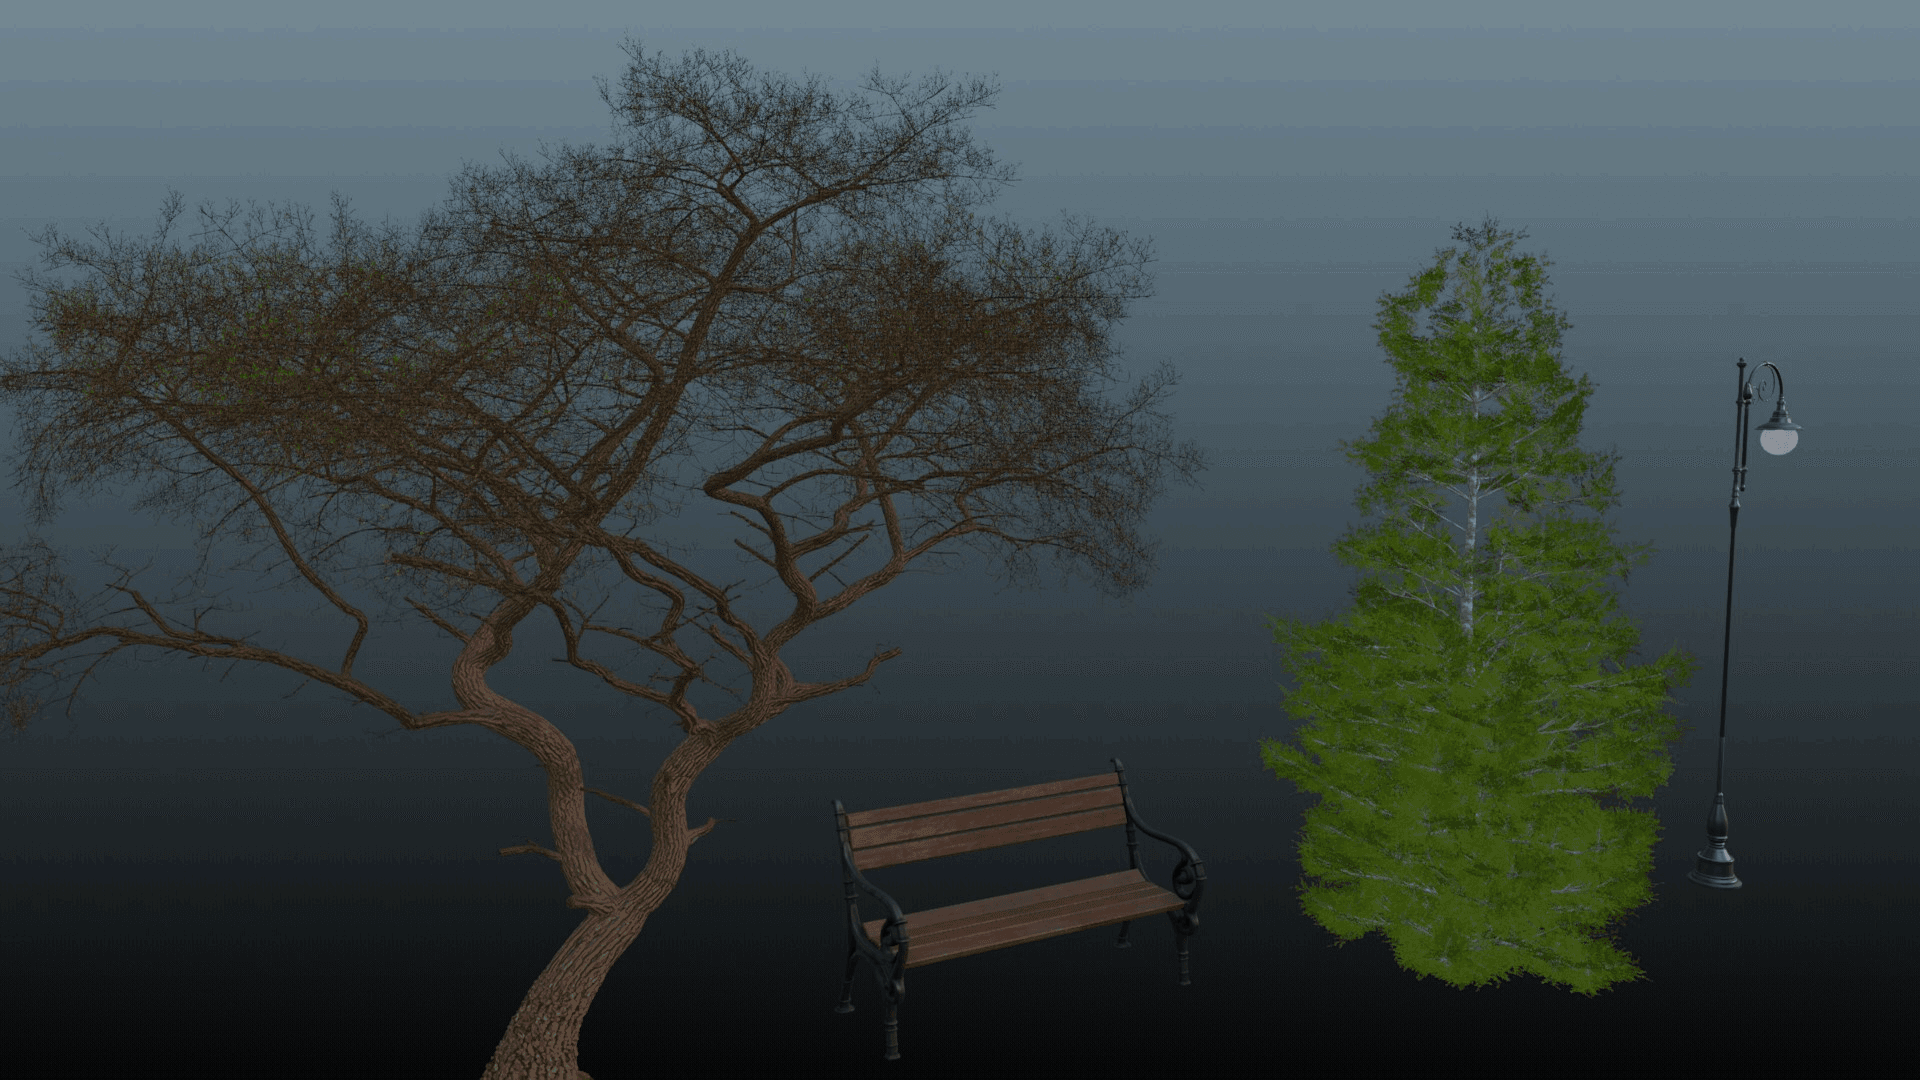
For this project, I modeled just the cathedral. The statues and ornamental models were sourced from Sketchfab, while the rest of the assets came from BlenderKit. I treated this as a personal challenge to model the core structure as elaborately as possible for a more refined finish, so the modeling process alone took me a little over a week. I skipped the highly intricate ornamental details and opted for a slightly simplified, stylized approach to complete the project within the given timeline. This is actually just one half of the cathedral—since the structure is fairly symmetrical, I reused and mirrored most of the elements on the other side. The rest of the process, from texturing to final compositing, took me a couple of days to complete.
Statue Models from Sketchfab (not a historically accurate design)
Ornaments from Sketchfab (not a historically accurate design)
Assets from Blender Kit
Once I was done with the Modelling, I did a basic lighting to examine the model for any issues with the mesh and placement of the objects.
Cathedral Model Clay Render with Basic Lighting © MadCandy
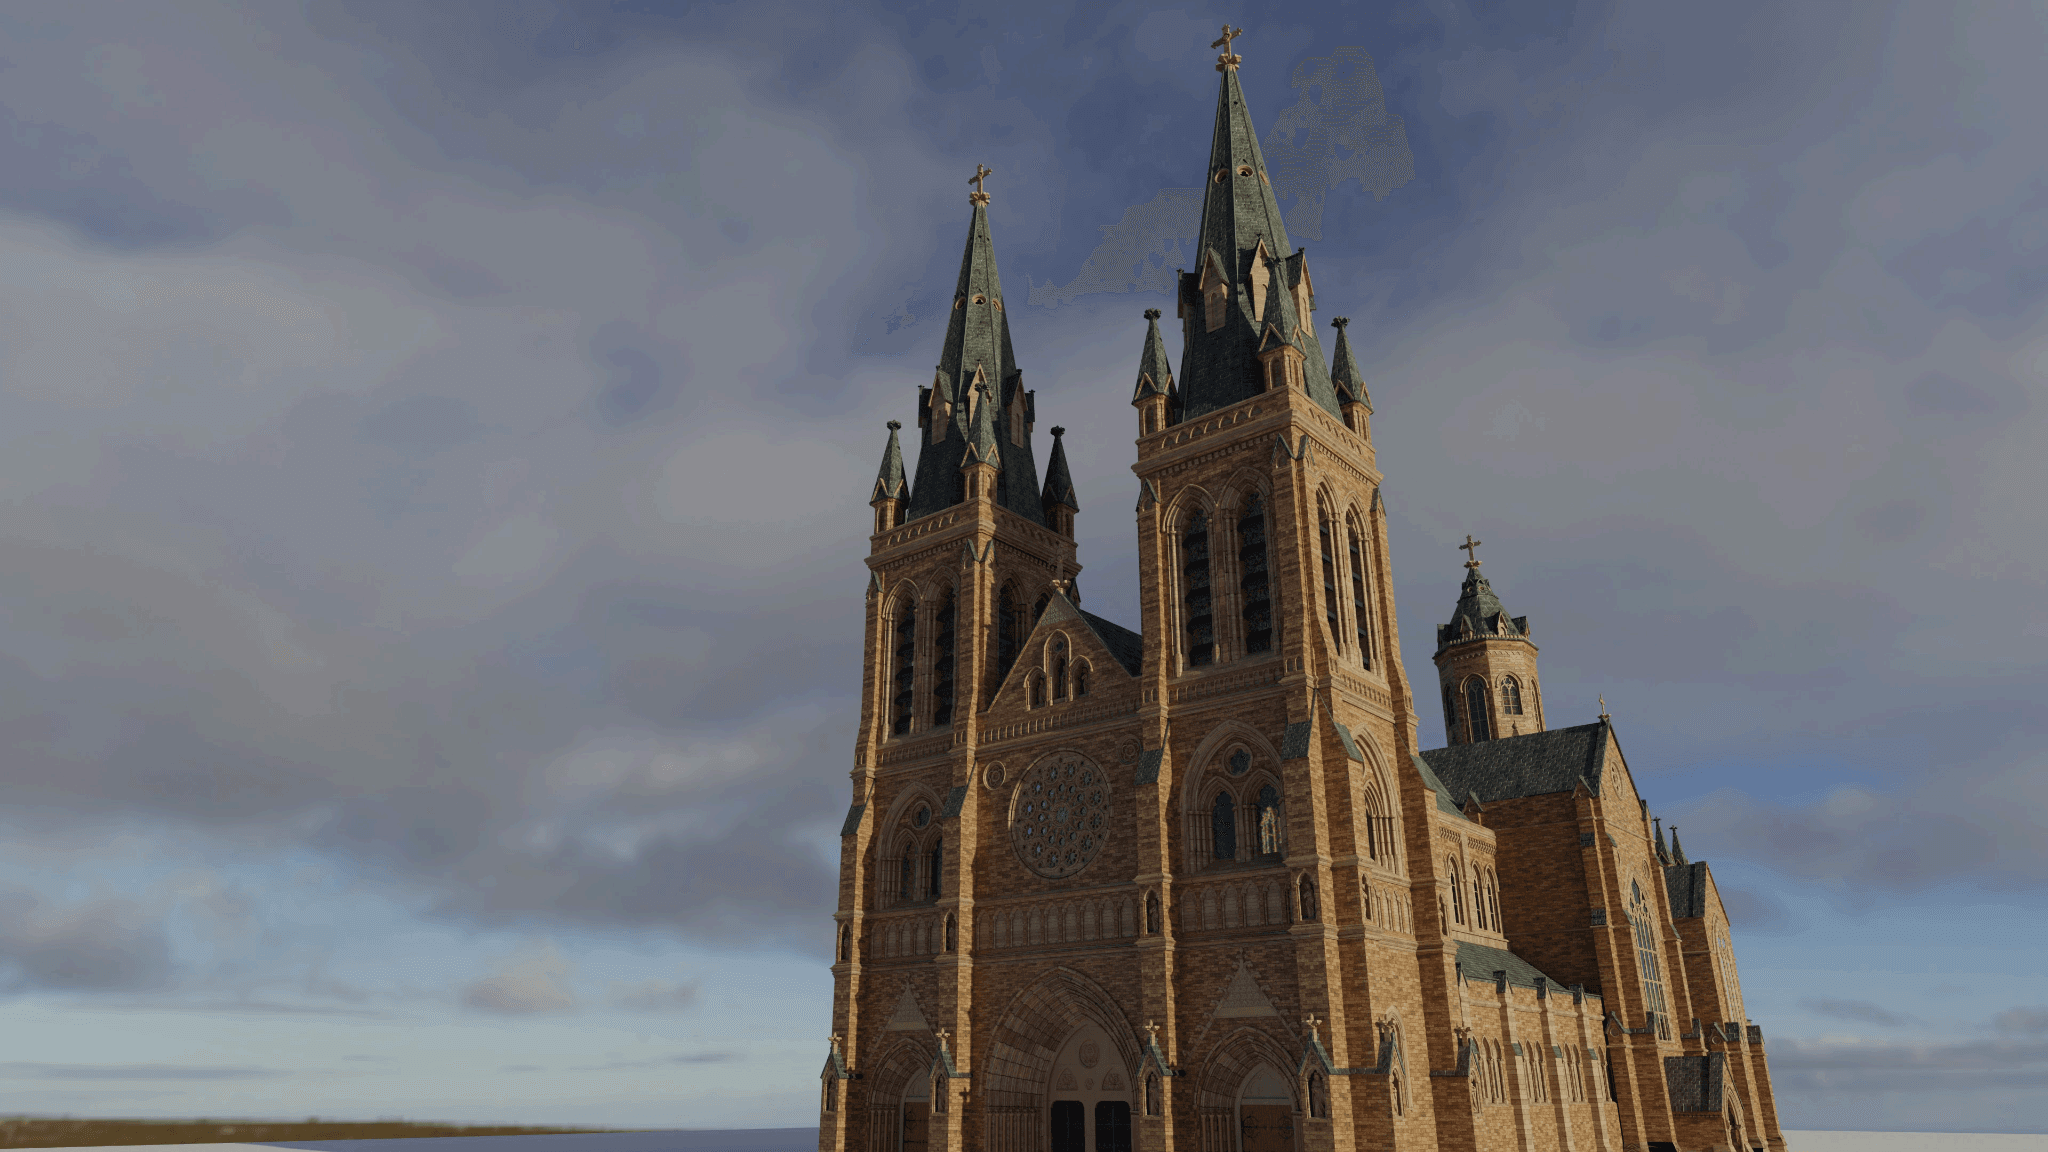
After finalizing the model, I started UV unwrapping and applied PBR textures for realistic results. They are from polyhaven.com and ambientcg.com. I used a brick texture for most of the cathedral and sandstone material for some portions, and finally a roof tile material for the roofs. Even though the cathedral is originally made of brown brick,s I tried to explore a different possibility. And the roofs of the towers were also made of bricks, but I decided to change them into roof tiles for a better contrast.

Cathedral White Brick Version © MadCandy

Cathedral Brown Brick Version © MadCandy
As for the final lighting, I didn’t have much time to think it through, as it was already the day of submission. When I began working on the lighting, it was 9:30 PM in my time zone. I explored a couple of lighting variations. Initially, I planned to go with broad daylight to showcase the intricacies of all the meticulously modeled elements. While that setup served well as a model showcase, it wasn’t dramatic enough to stand out. So I opted for a sunset version instead, which worked out much better.
Fortunately, I had previously worked on a sunset lighting setup while experimenting with different techniques and scenarios, so I reused that and made a few tweaks to better fit this scene.
Exterior scenes generally require less effort to light compared to interior scenes. With exteriors, there are usually fewer light sources—often just the sun. In many cases, a suitable HDRI with the right rotation does the job. However, HDRIs have limitations: while you can rotate the lighting horizontally, the elevation of the light source remains fixed. To overcome this, I’ve started using the Physical Starlight and Atmosphere (PSA) addon, which is far more flexible and packed with useful features. It’s essentially an advanced sky texture with multiple presets and parameters. I used the PSA addon to light the sunset version.
Once the world lighting was in place, I added a large spotlight in the front from the side to lift the shadows and ensure the focal object was sufficiently illuminated. That completed the lighting process.
Day Light (No Compositing) © MadCandy
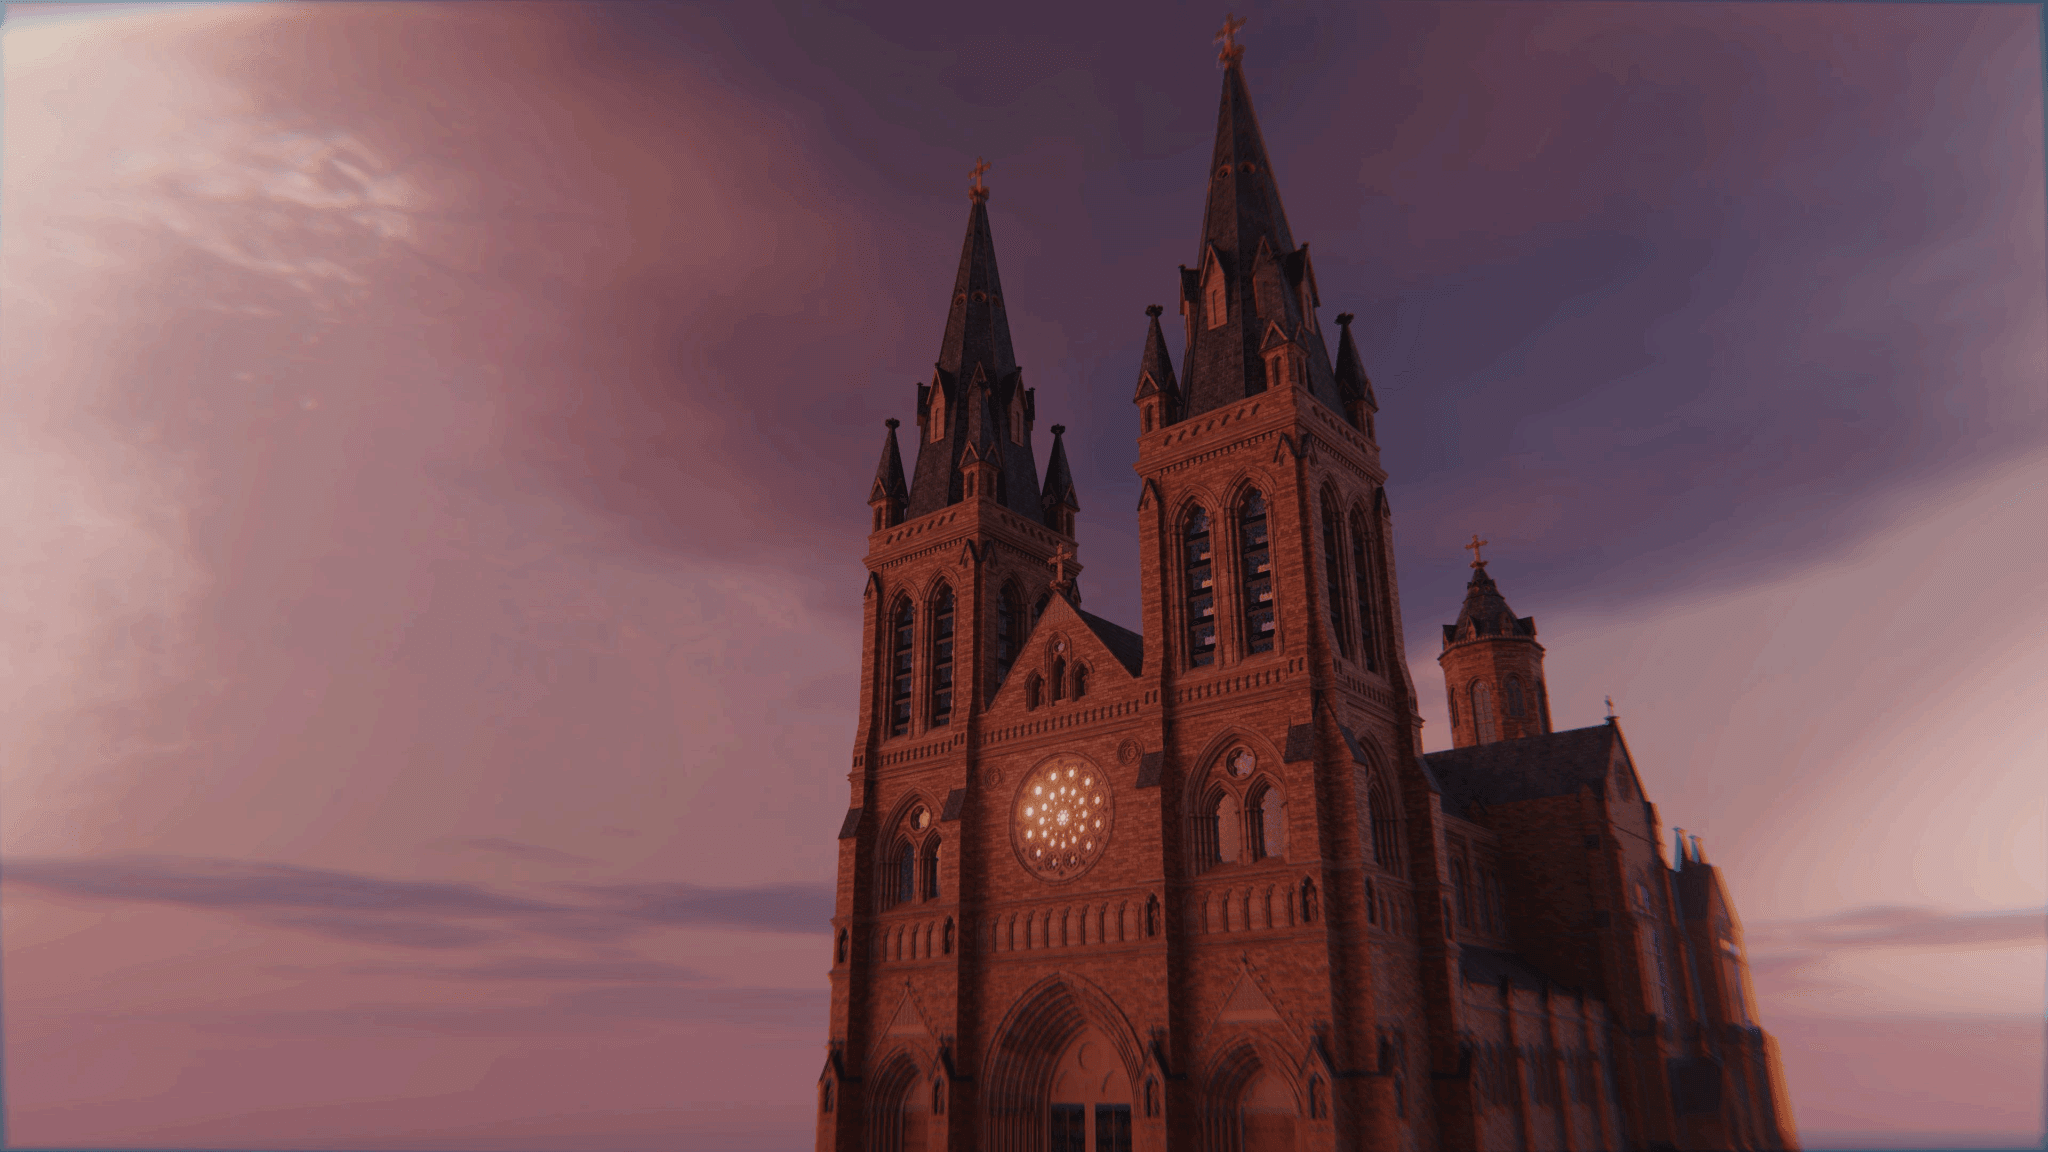
Sunset Composited (Colour Grade, Exposure Adjustments and Lens Distortion) © MadCandy
With the lighting complete, it was time to add the sky. A dramatic scene calls for a dramatic sky. While it would’ve been fun to create volumetric clouds from scratch, that approach demands a lot of computing power (which I don’t possess at the moment)—especially when experimenting and dialling things in. So for this project, I took a more efficient route. I used a dramatic sky image as a backdrop, which I sourced from Pexels.com. I simply imported it as an Image Plane and set it up with an Emission Shader.
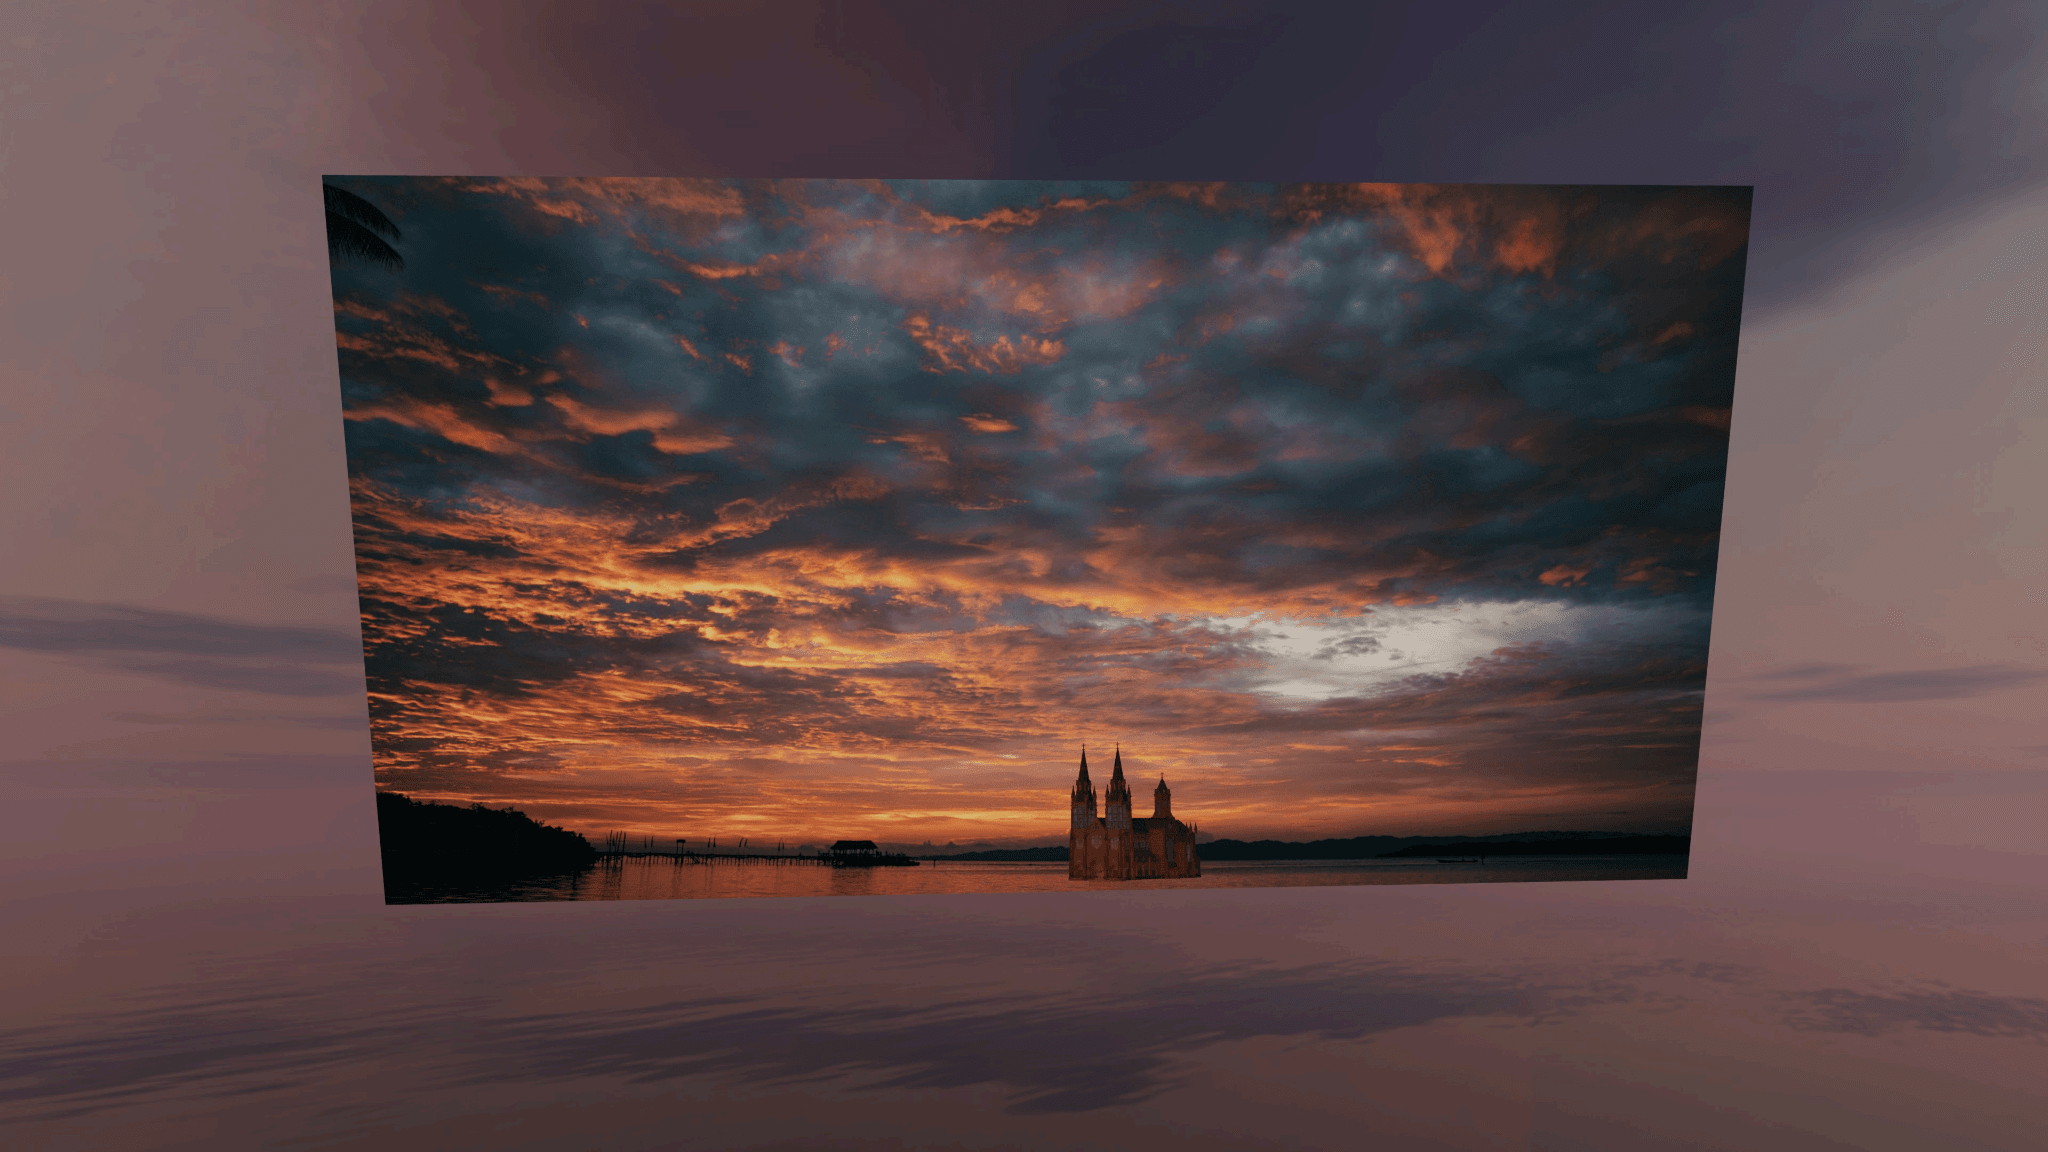
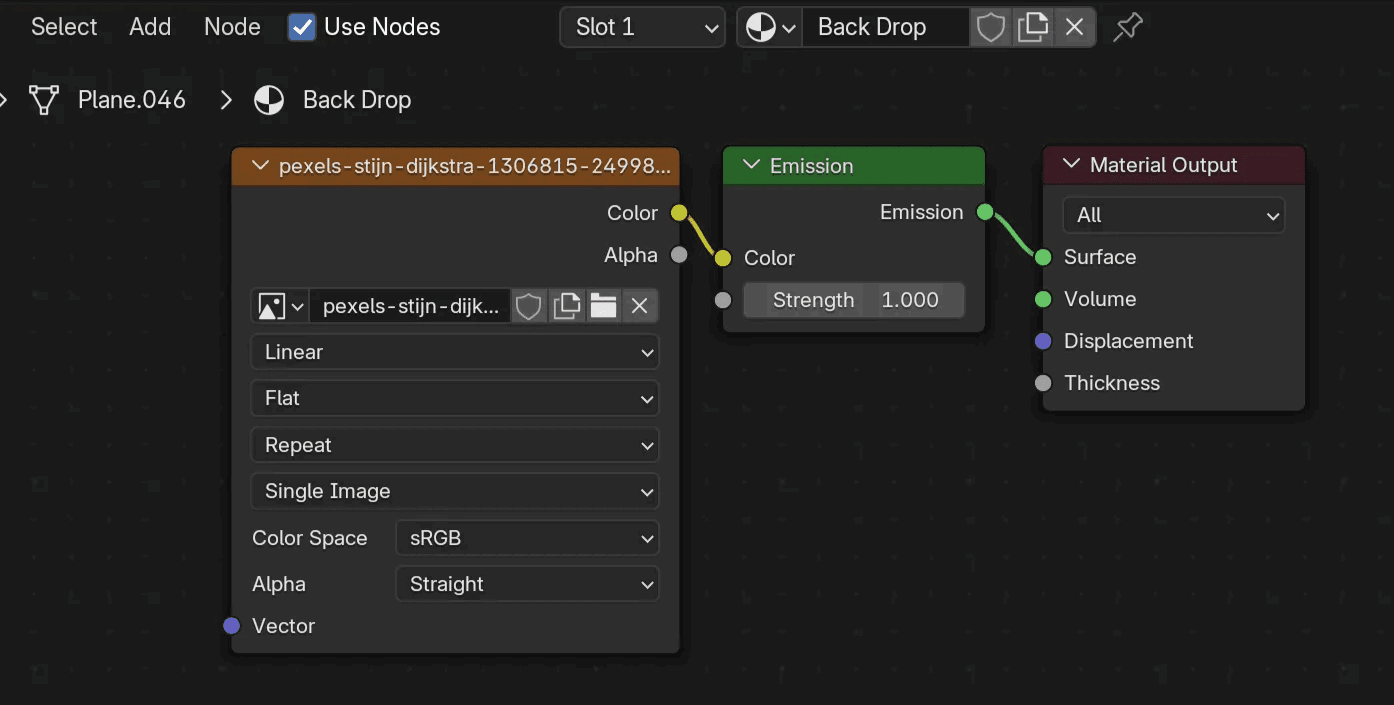
Dramatic Sky Process © MadCandy
- You need to make sure to get a few things right before placing a backdrop.
- This one’s a no-brainer: the sky backdrop should match the time of day. Use a sunset backdrop for a sunset scene.
- Make sure the sun’s elevation and direction in the image align with your world lighting. You can judge this by observing the placement of light and shadows in the backdrop. It doesn’t have to be perfectly accurate—just close enough to feel cohesive.
- Scale the backdrop up or down to fit the proportions of your scene.
- Finally, the higher the resolution of the backdrop, the better the final result. For this project, I used a 6K image, which worked perfectly for a 4K render.
Fox Renderfarm: Can you describe the technical process you used to create the assets within the scene?
MadCandy: Yes, there are a lot of techniques used in this process. Some important ones are listed below.
Weighted Bevels: When creating subdivision-ready models, it’s important to add supportive edge loops to control the shape of the subdivided mesh. The easiest way to do this is by using a Bevel Modifier, which adds supportive edge loops that help contain the mesh during subdivision.
However, when working with complex geometry and varied objects, using the Angle limit method in the Bevel Modifier can become unreliable. This is due to the wide range of edge angles, which may not always fall within the set threshold.
Instead, I prefer using the Bevel Weight method, which offers much more precise control over which edges get sharpened. Here’s how to do it:
- Select the edges you want to bevel.
- Under Edges data Increase their Mean Bevel Weight to 1 in the sidebar (shortcut: N → Item tab → Mean Bevel Weight).
- You’ll notice the selected edges turn blue, indicating bevel weight has been applied.
- In the Bevel Modifier, change the Limit Method from Angle to Weight. This will apply the bevel only to the weighted edges.
To maintain uniformity across different objects, use the same bevel width, number of segments, and profile shape settings throughout your model.
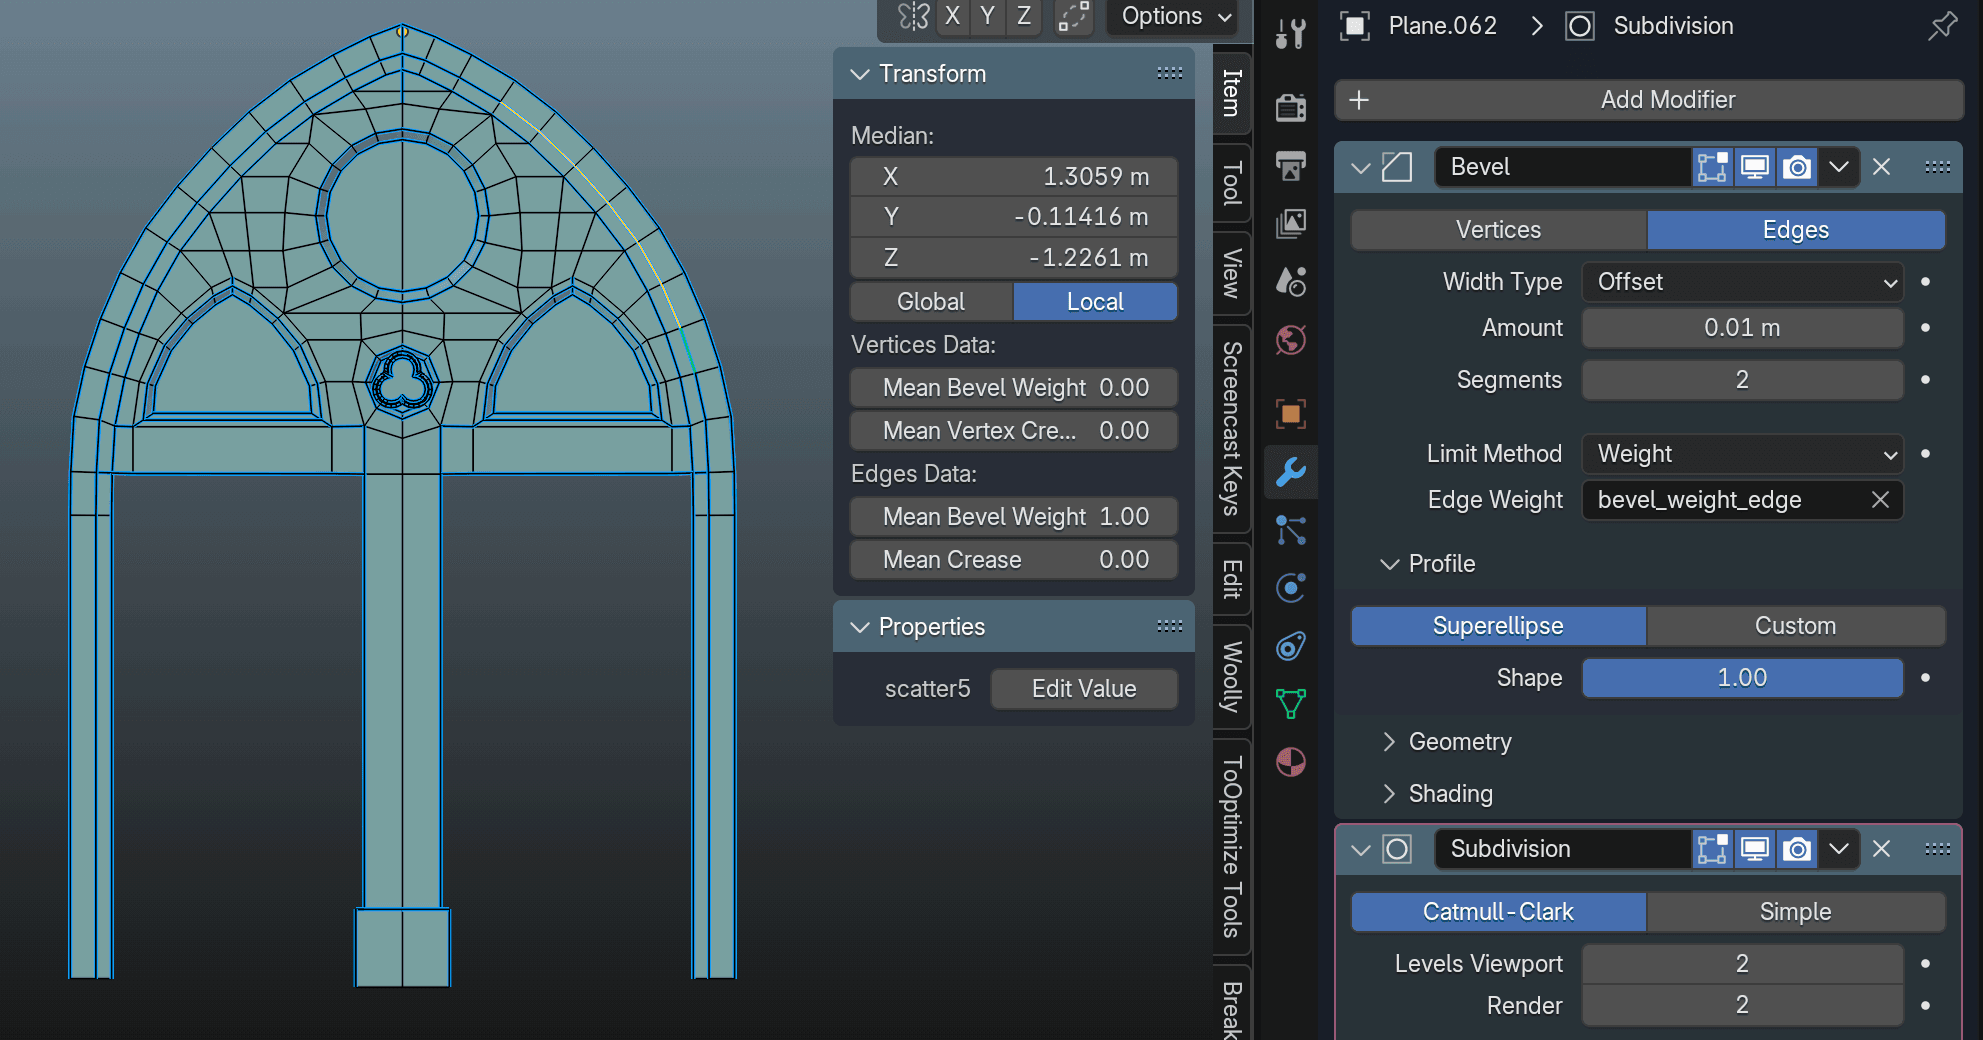
Weighted Bevels © MadCandy
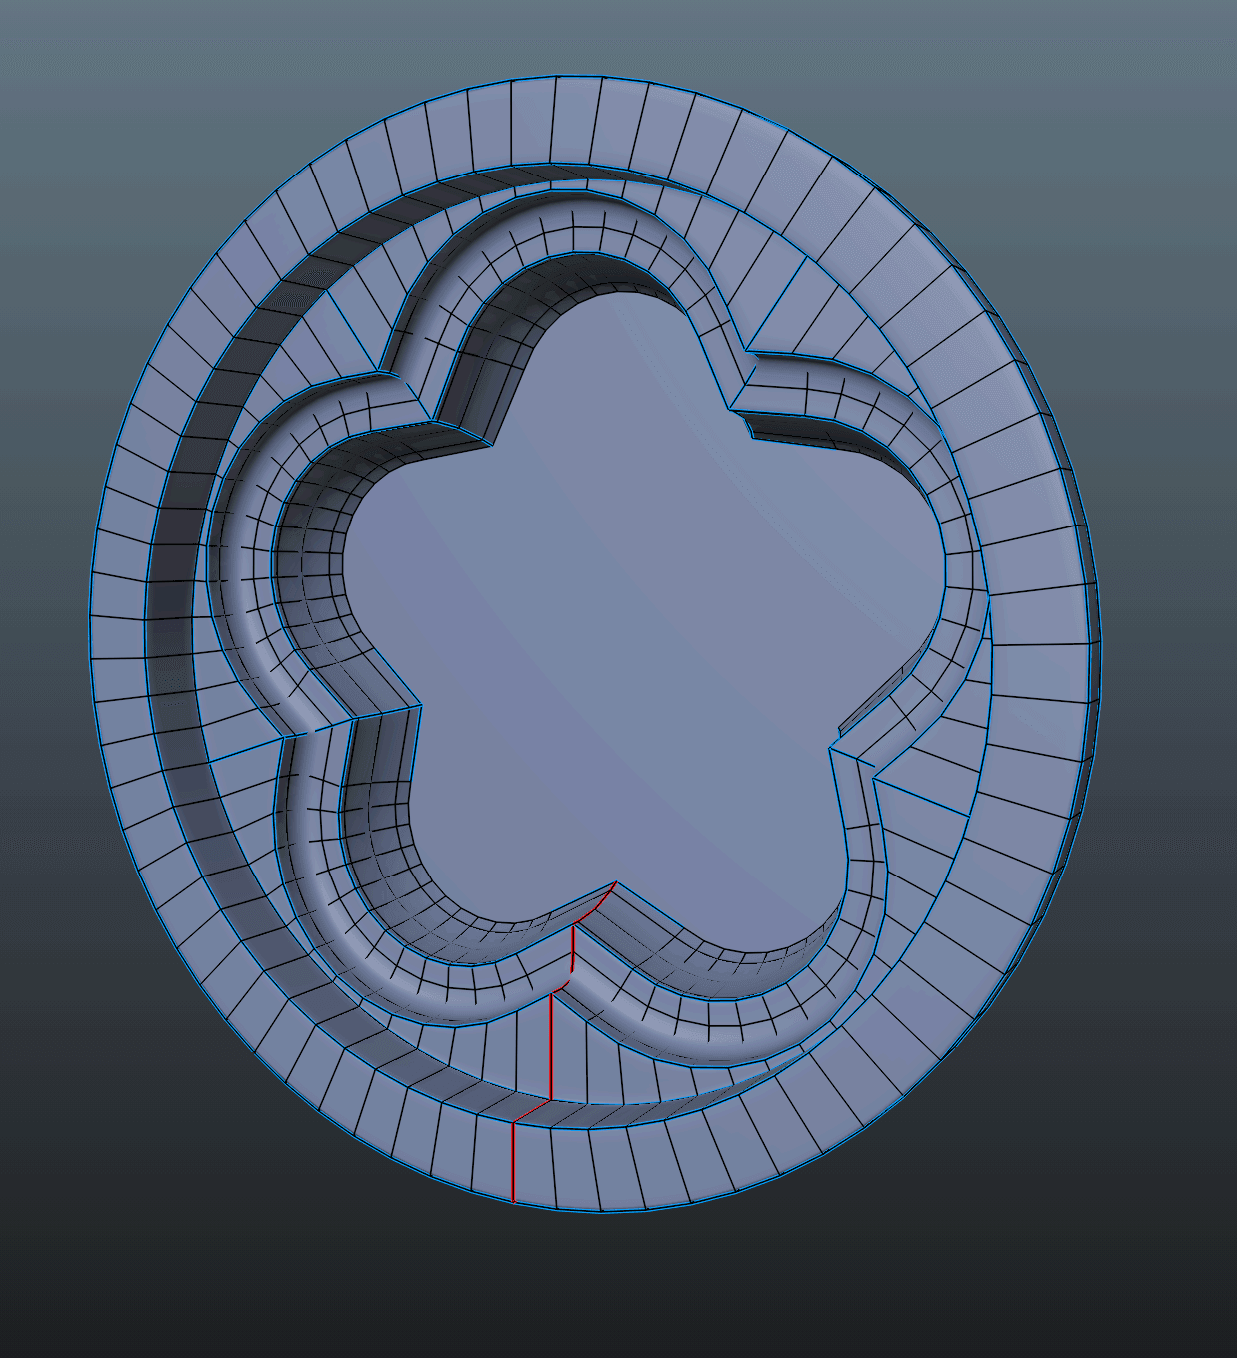
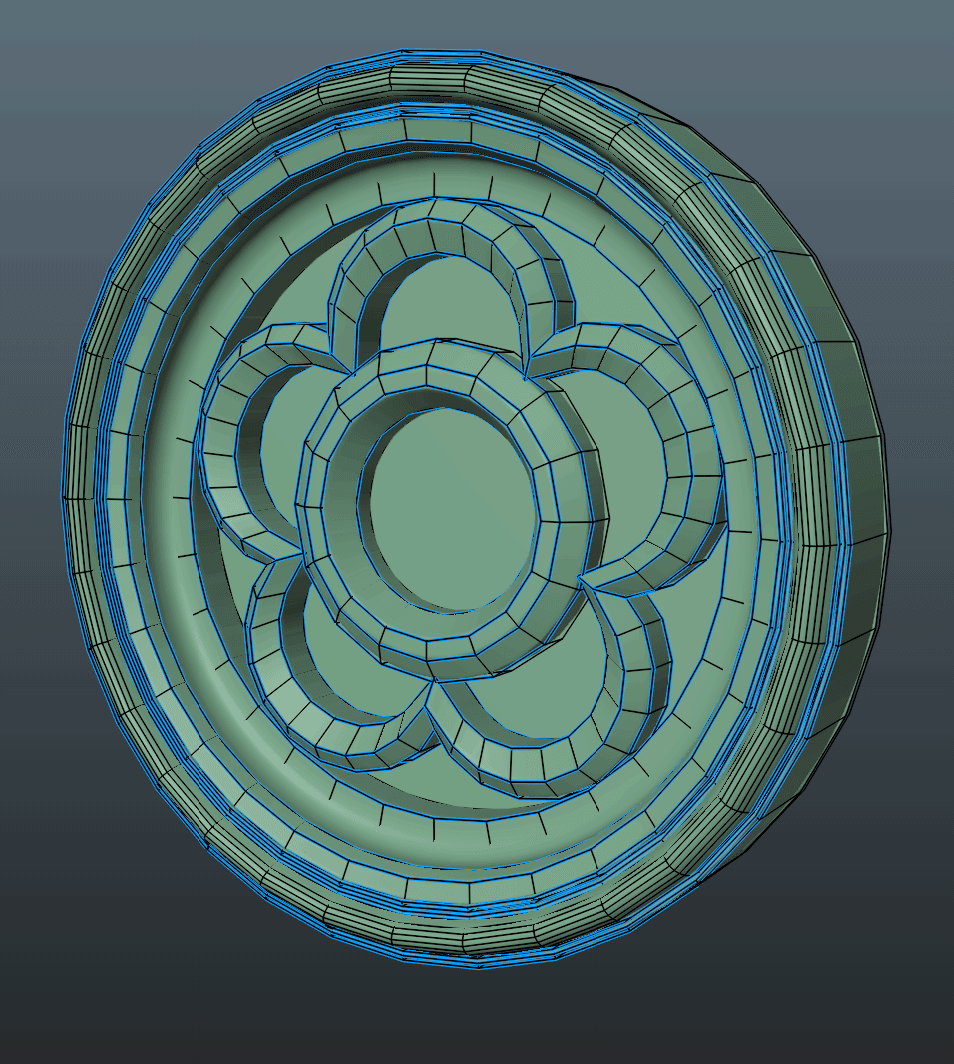
Creased Edges:
While edge bevel weights are useful for controlling smoothing along beveled edges, they don’t help much when it comes to maintaining sharpness on single-sided meshes—like a simple plane. That’s where Edge Crease comes into play.
- Select the edges you want to crease
- Under the edges data, increase the Mean Crease to 1 in the sidebar (shortcut: N → Item tab → Mean Crease).
This will "sharpen" the edge, forcing the Subdivision Surface modifier to preserve it more rigidly. Creased edges are displayed in pink colour, making them easy to identify in the viewport.
It’s important to understand how subdivision surface smoothing works in order to place creases effectively. Misplaced creases can create unwanted artifacts or pinching in the mesh. Below is a comparison showing the difference between a subdivided mesh without creases and with creases applied.
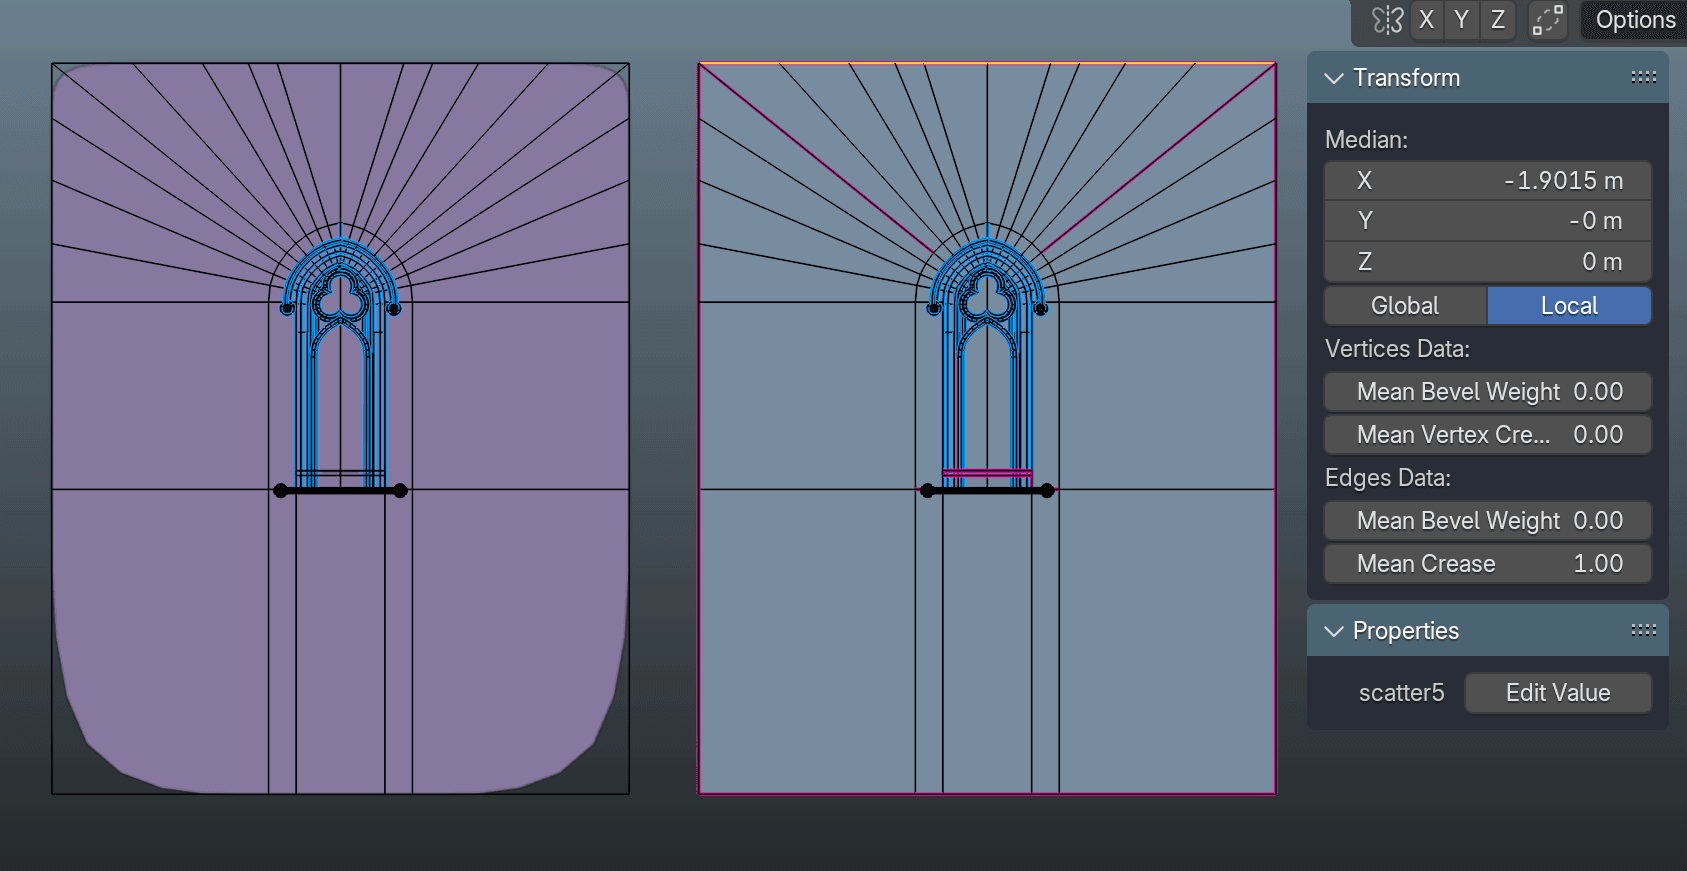
Creased Edges © MadCandy
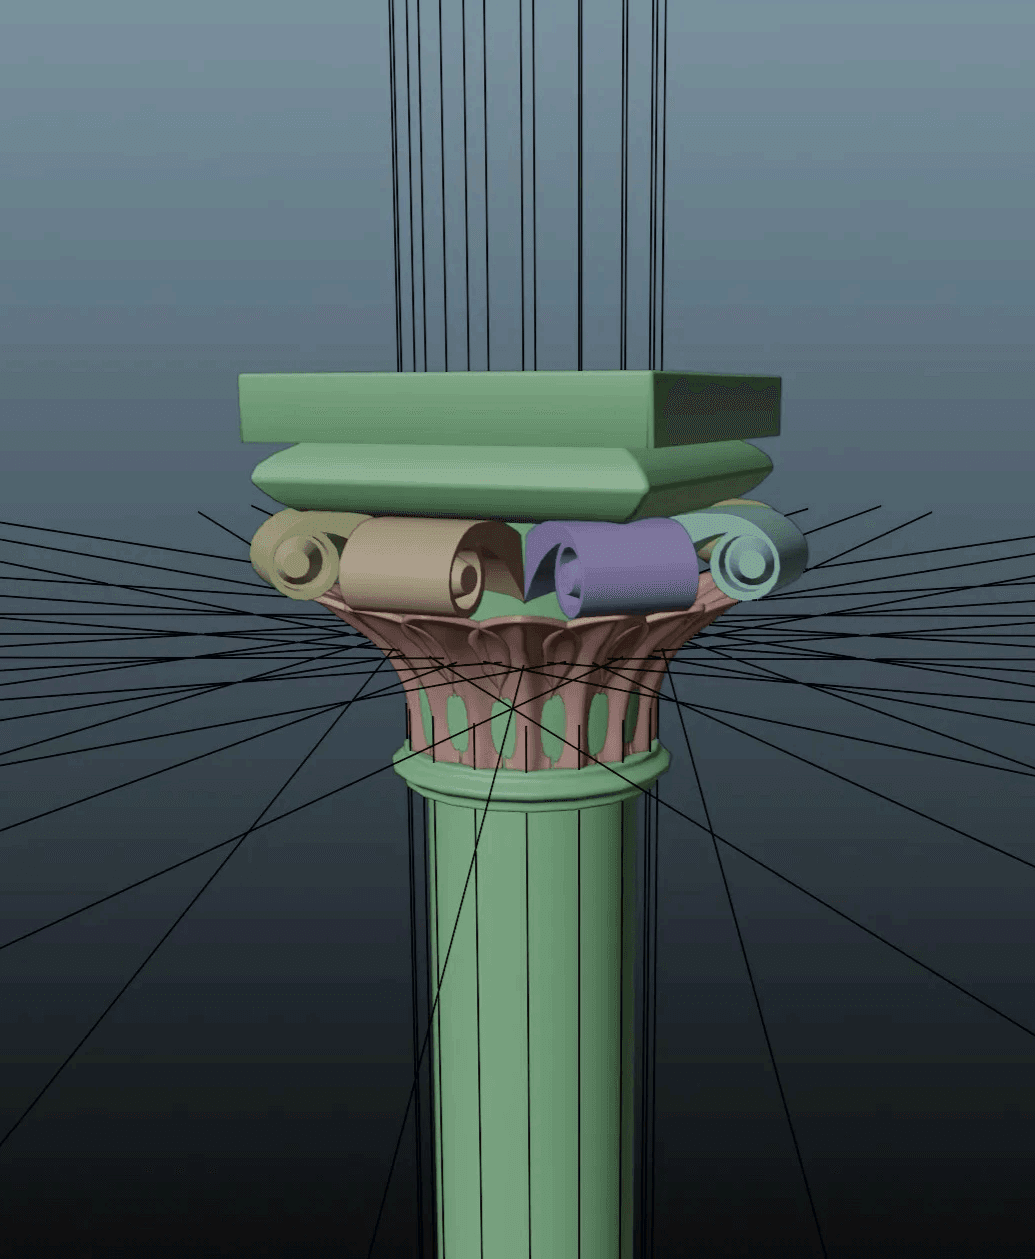
Object Mirroring:
I made extensive use of the Mirror Modifier throughout this project. Nearly every object in the scene leverages it in some way. As you can see in the image below, I modeled only one portion of this column and then used mirroring to create the rest.
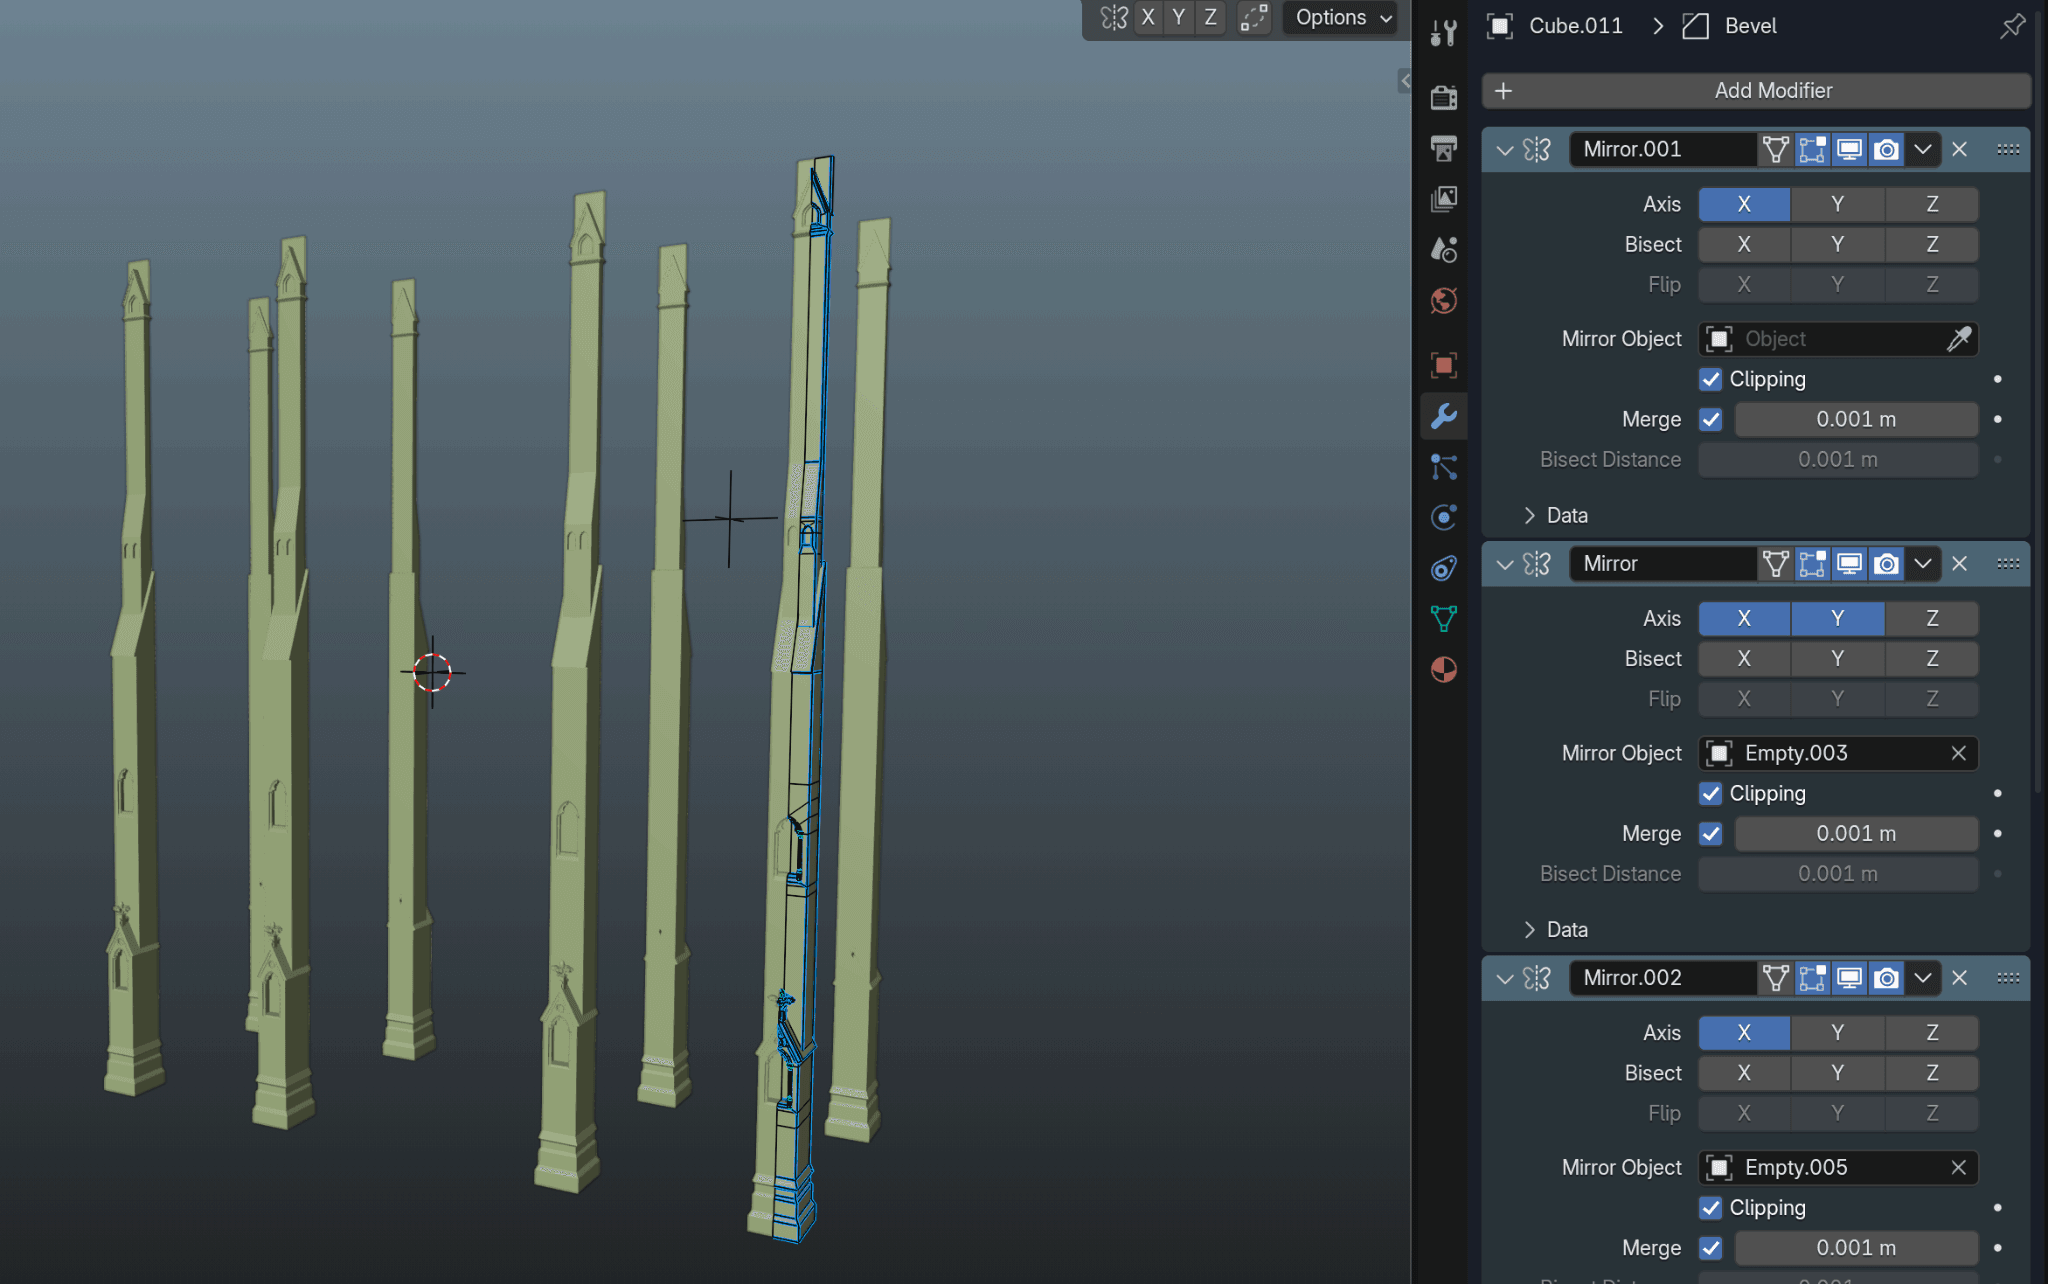
Object Mirroring © MadCandy
The first Mirror Modifier uses the object’s own origin point to generate its mirrored half. But for placing mirrored copies across different parts of the scene, I used a few Empty objects as custom mirror pivots. This allowed me to mirror geometry across various axes and positions precisely.
It's also important to pay attention to the modifier stack order—the placement of the Mirror Modifier in relation to other modifiers can affect the final result.
This setup allowed me to achieve perfect symmetry in the cathedral model. I applied this mirroring technique to every object where it made sense, ensuring both accuracy and efficiency in the scene. Below are some examples that demonstrate this approach in action.

Another Example for Extensive Mirror Modifier Usage © MadCandy
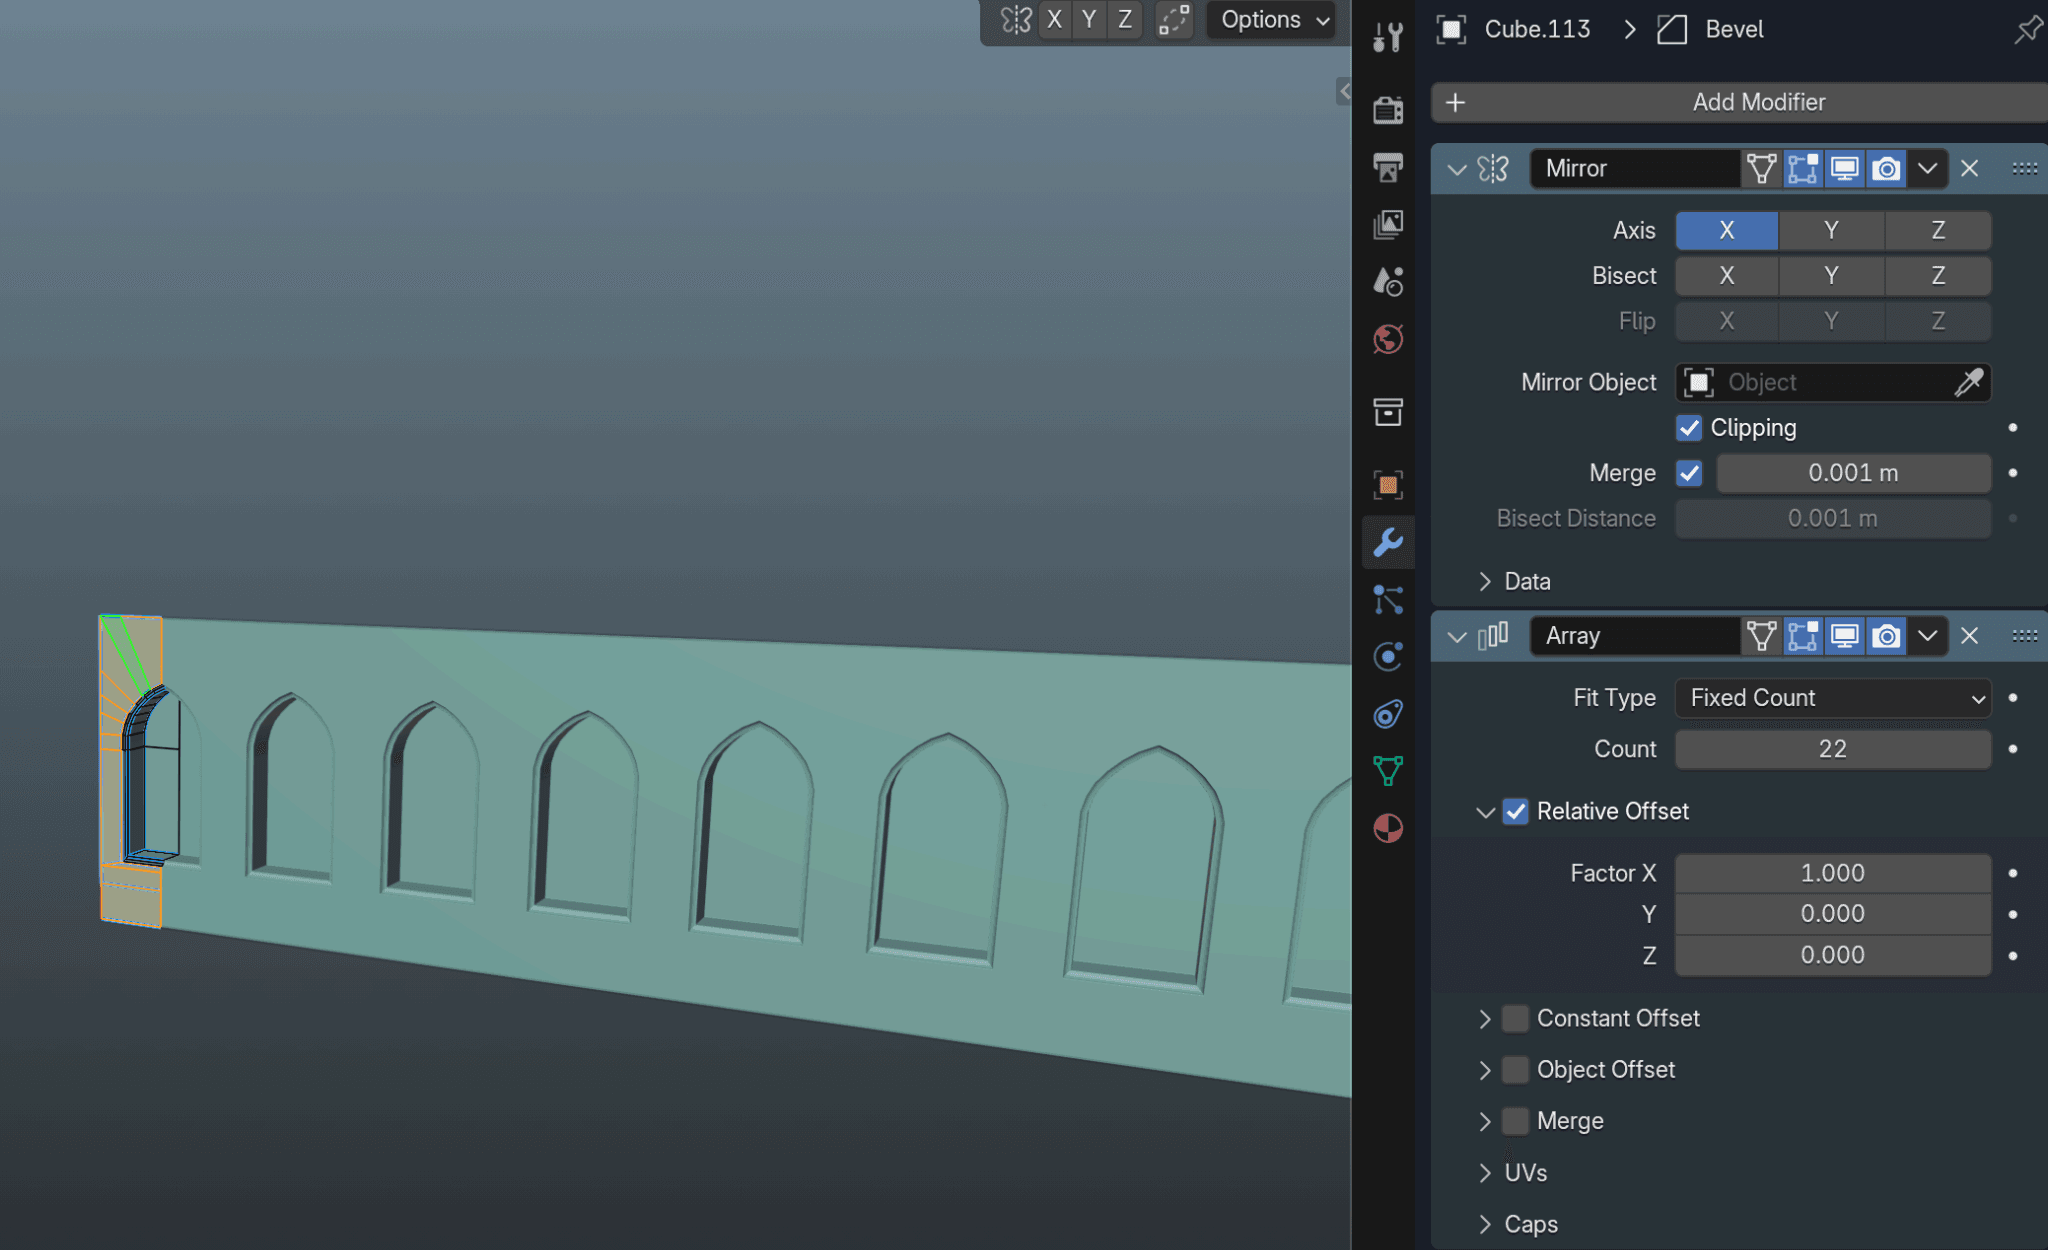
Mirror Modifier Combined with Array Modifier © MadCandy
Collection Instance:
Instancing is a crucial technique for handling heavy or elaborate projects like this one. It helps keep the project organized and significantly reduces memory usage. Instances are much lighter compared to traditionally duplicated objects.
When creating symmetrical structures, we often use the Mirror Modifier or duplicate objects using Shift + D (full duplicate) or Alt + D (linked duplicate). While these methods are fine for simple, lightweight meshes, they’re not ideal when you do them multiple times or need to duplicate complex, high-poly meshes—or mirror entire collections—without adding clutter with multiple mirror pivots or risking performance issues.
That’s where instancing comes in.
Instead of duplicating meshes, you can group one or more objects into a Collection and then turn that collection into an instance. This method allows you to reuse geometry across the scene without creating duplicates of the mesh data.
It keeps the viewport clean, memory usage low, and your Blender project stable —even when working with thousands of high-detail elements. This technique allowed me to populate the cathedral with repeated elements efficiently— without sacrificing performance or overwhelming the scene.
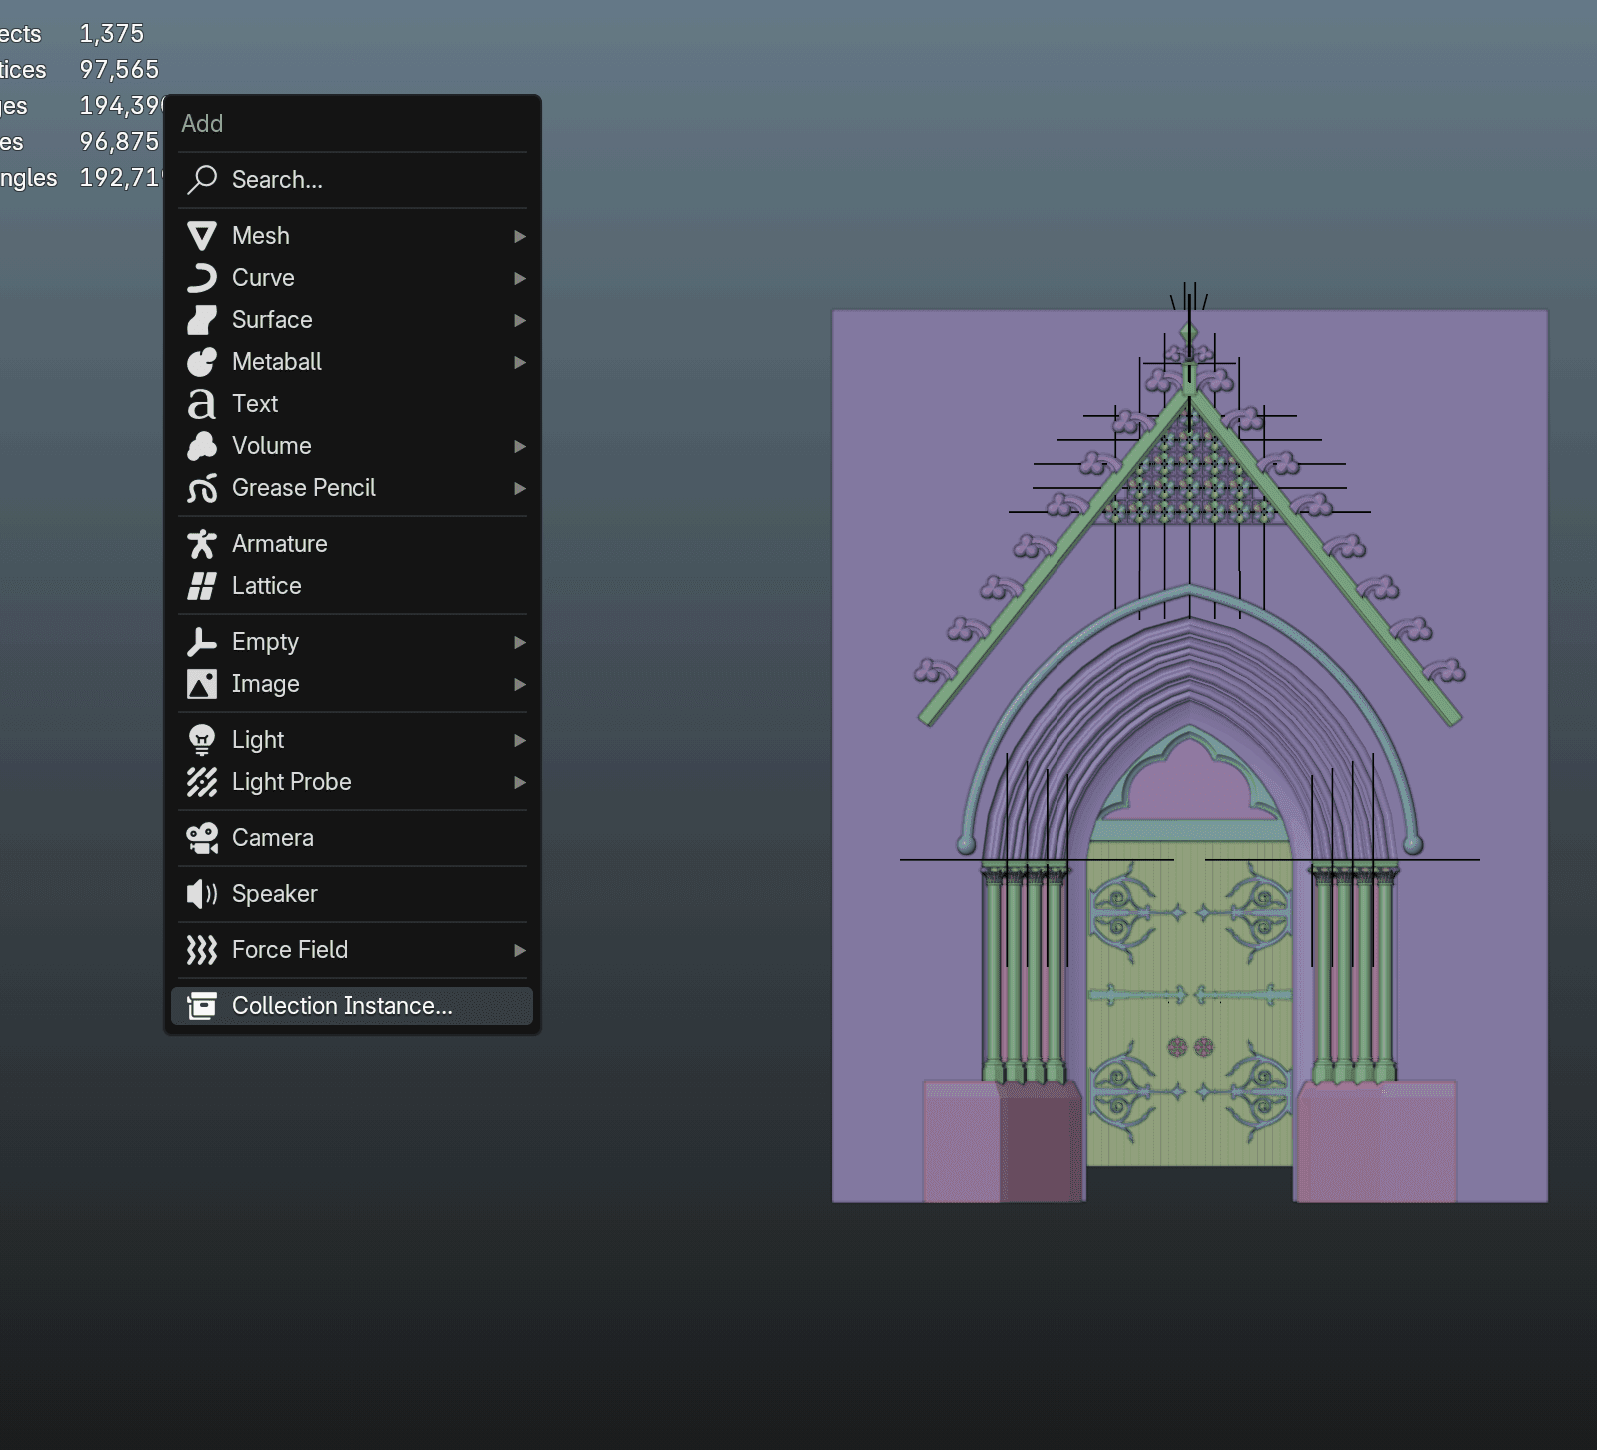

Collection Instance © MadCandy
Here’s how to create an instance from a collection:
- Create and group your objects into a collection.
- Use Shift + A → Collection Instance → select your collection.
- The entire collection will now appear as a single, lightweight instanced object.(Highlighted with orange outline)
After grouping your objects into a collection, go to the Outliner and hide that collection from the viewport by unchecking the checkbox icon (leave the viewport and render preview icons untouched). This hides the collection’s original objects from the viewport and the final render, but still allows you to create and see instances of it in both views.
The instance of the collection will be created at the location of the 3D cursor, and it behaves like a single, non-editable object, with an Empty object acting as its pivot or origin point. It will appear in the Outliner with an orange instance icon, indicating it’s a collection instance. You can reposition it and set its origin, but you won’t be able to edit its geometry directly.
Modifiers cannot be applied to instances; this is because they don’t have editable geometry—they’re lightweight references to the original collection.
If you want to make any changes—whether to the mesh or materials—you’ll need to:
- Re-enable the source collection in the Outliner.
- Make the necessary adjustments to the original objects,
- Then disable the source collection again to keep your scene tidy.
You can also nest instances by creating multiple collection instances, grouping them into a new collection, and then instantiating that new collection. This technique is useful for building large, modular environments while keeping the scene organized and performance-friendly.
A good example of instancing in this project is the Long window chambers, which are composed of a collection of small pillar/jamb instances (Which are made up of multiple instanced objects) combined with several other individual elements. I grouped them together and turned the entire assembly into a single instance unit.
Instances are incredibly useful for set dressing as well. Instead of manually moving a cluster of individual objects, you can group them into a collection, instantiate it, and move the entire set as a single, lightweight unit. And then I duplicated that single unit, placed it around to create a chamber, and then moved it into a new collection, making a collection instance out of the grouped instances.
This not only keeps the scene organized but also makes layout adjustments much faster and more efficient.

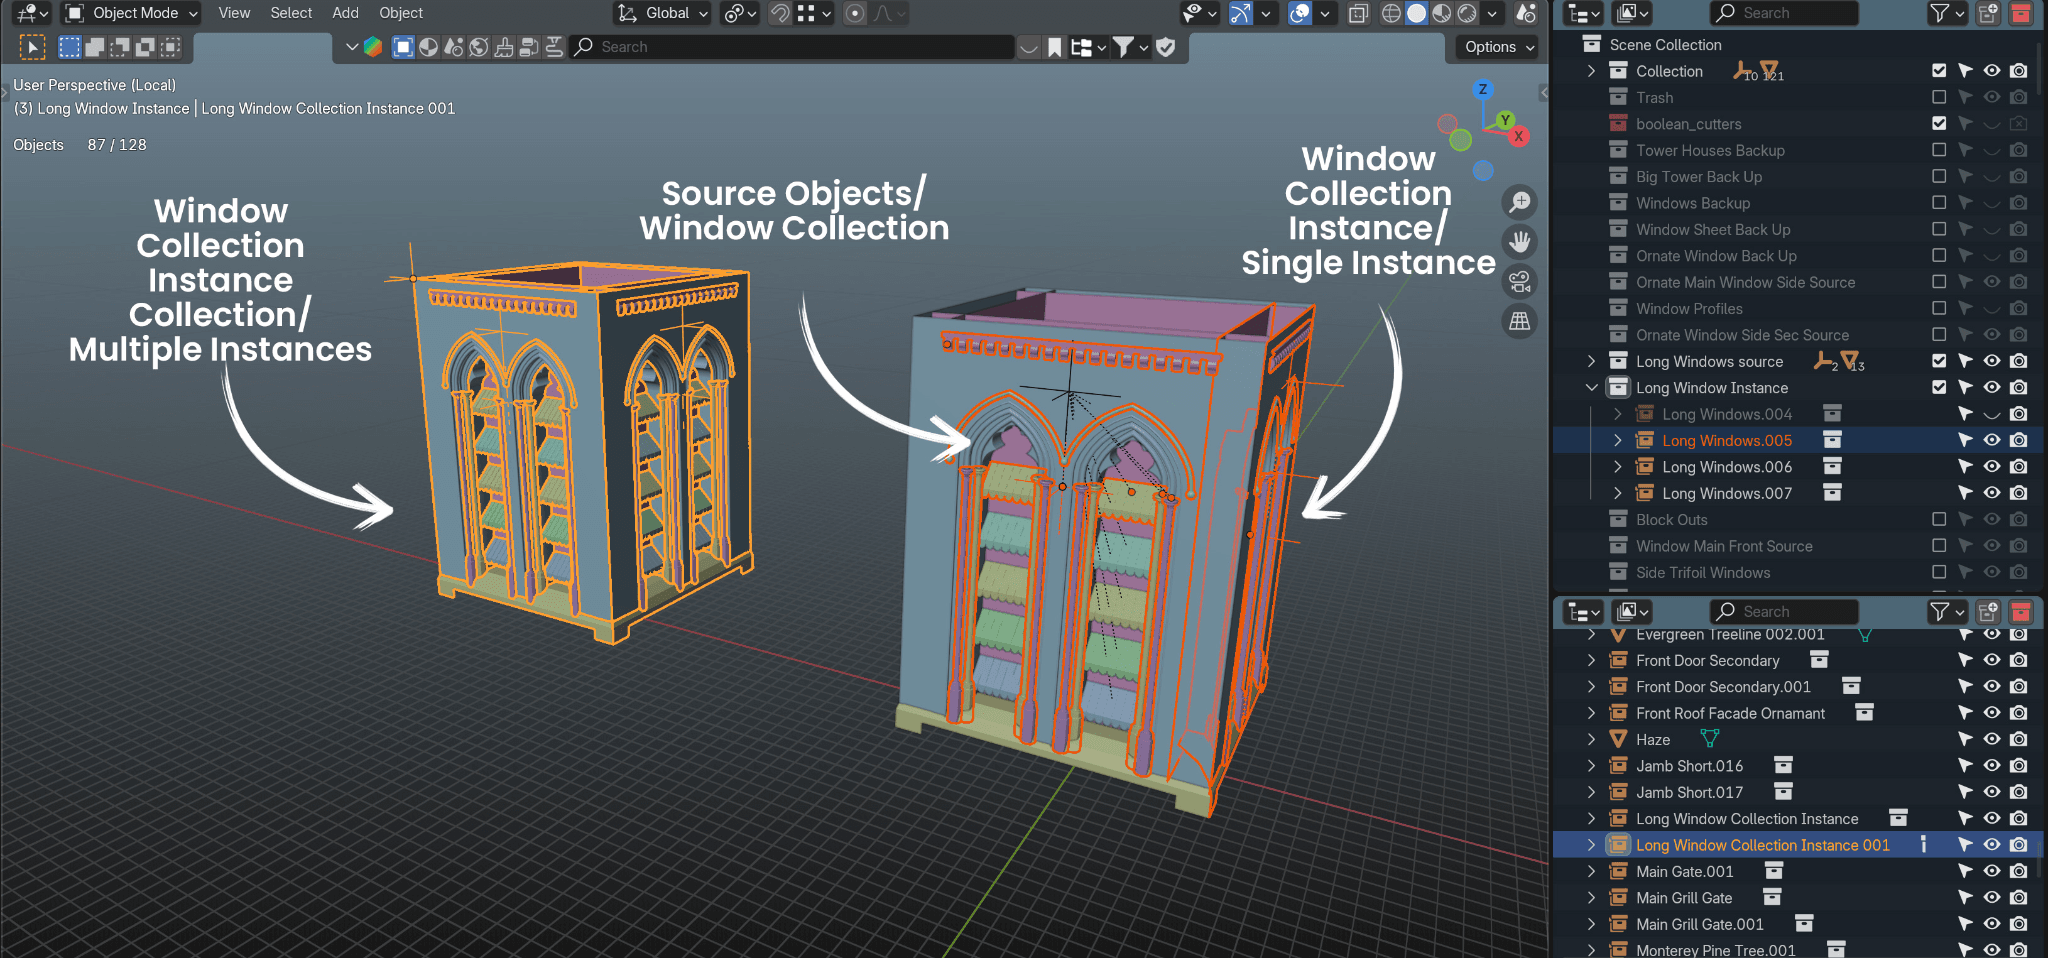
Collection Instance © MadCandy
Power of Curves:
Curves are your best friends when it comes to creating objects with complex bevel profiles. They offer both flexibility and precision, especially for architectural or ornamental detailing.
Step 1: Create a Path Curve and shape it however you like. This will serve as the backbone of your object. Step 2: Create another Path Curve to define the bevel profile. Then, assign this second curve as the Bevel Object for the first path. This allows you to extrude the profile along the shape of the main curve, giving you a smooth and controlled form.
Once you've finalized the basic or main shape of the curve object, you can convert it into a mesh (Right Click → Convert to Mesh). After conversion, you can add any necessary modifications—such as edge sharpening using the Bevel Modifier, and smoothing the surface with a Subdivision Surface Modifier —to complete the model.
Below are some examples:
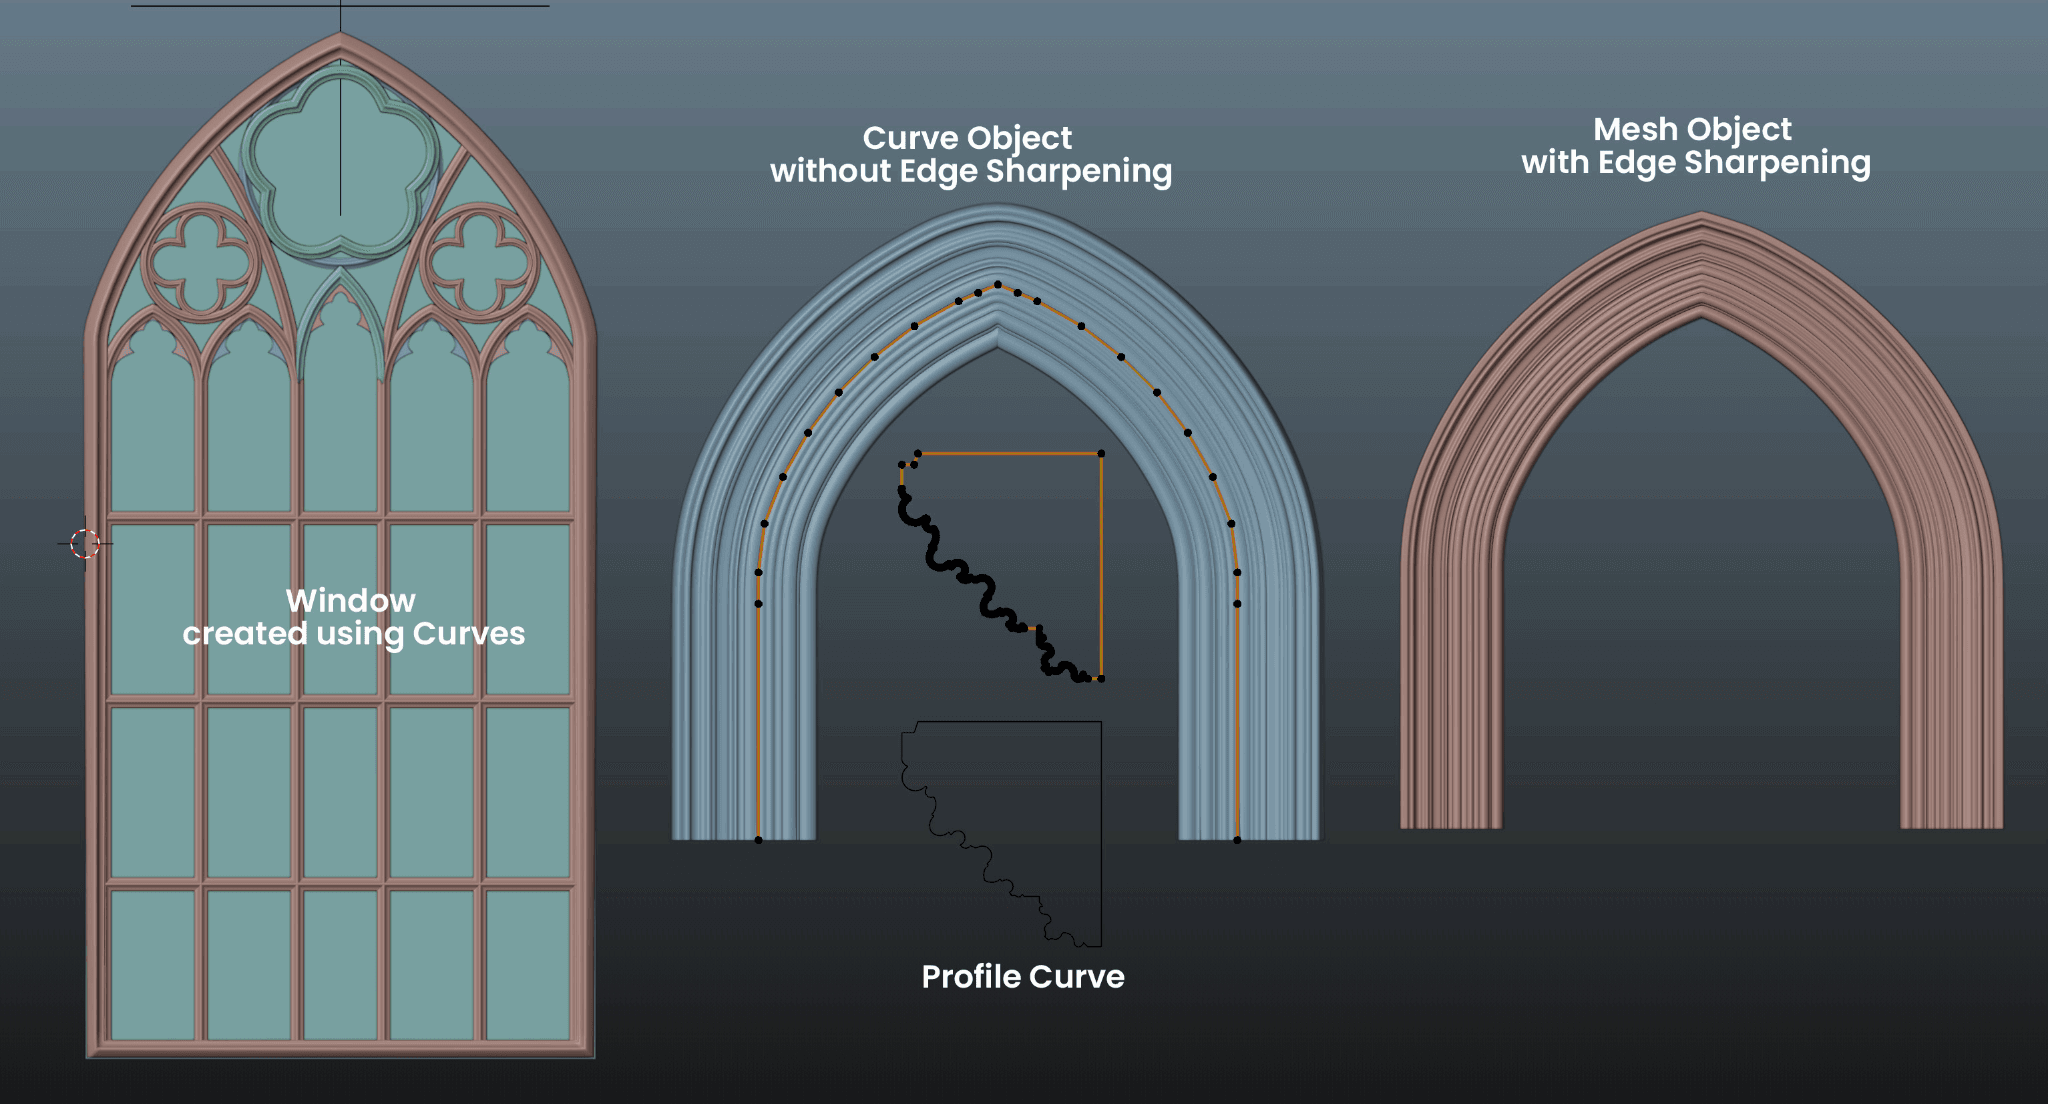
Curve Example © MadCandy
This is pretty much all the techniques I have used in this entire project.
Fox Renderfarm: Are there any challenges that you encountered during the process of creation?
MadCandy: Modeling was quite challenging—especially when working with Subdivision Surface smoothing. It’s crucial to keep the topology as clean as possible to achieve refined results. But seeing a perfectly smooth, subdivided mesh without any distortions makes all the effort completely worth it.
Modelling © MadCandy
Fox Renderfarm: Are there any moments you enjoyed during the creation process?
MadCandy: Doing a clay render with the finished model is my favourite moment in whatever project I’m working on. It’s like a ritual for me. Apart from that, naturally, I loved the moment when everything came together like I wanted.
Fox Renderfarm: Can you describe the most rewarding project you’ve worked on so far?
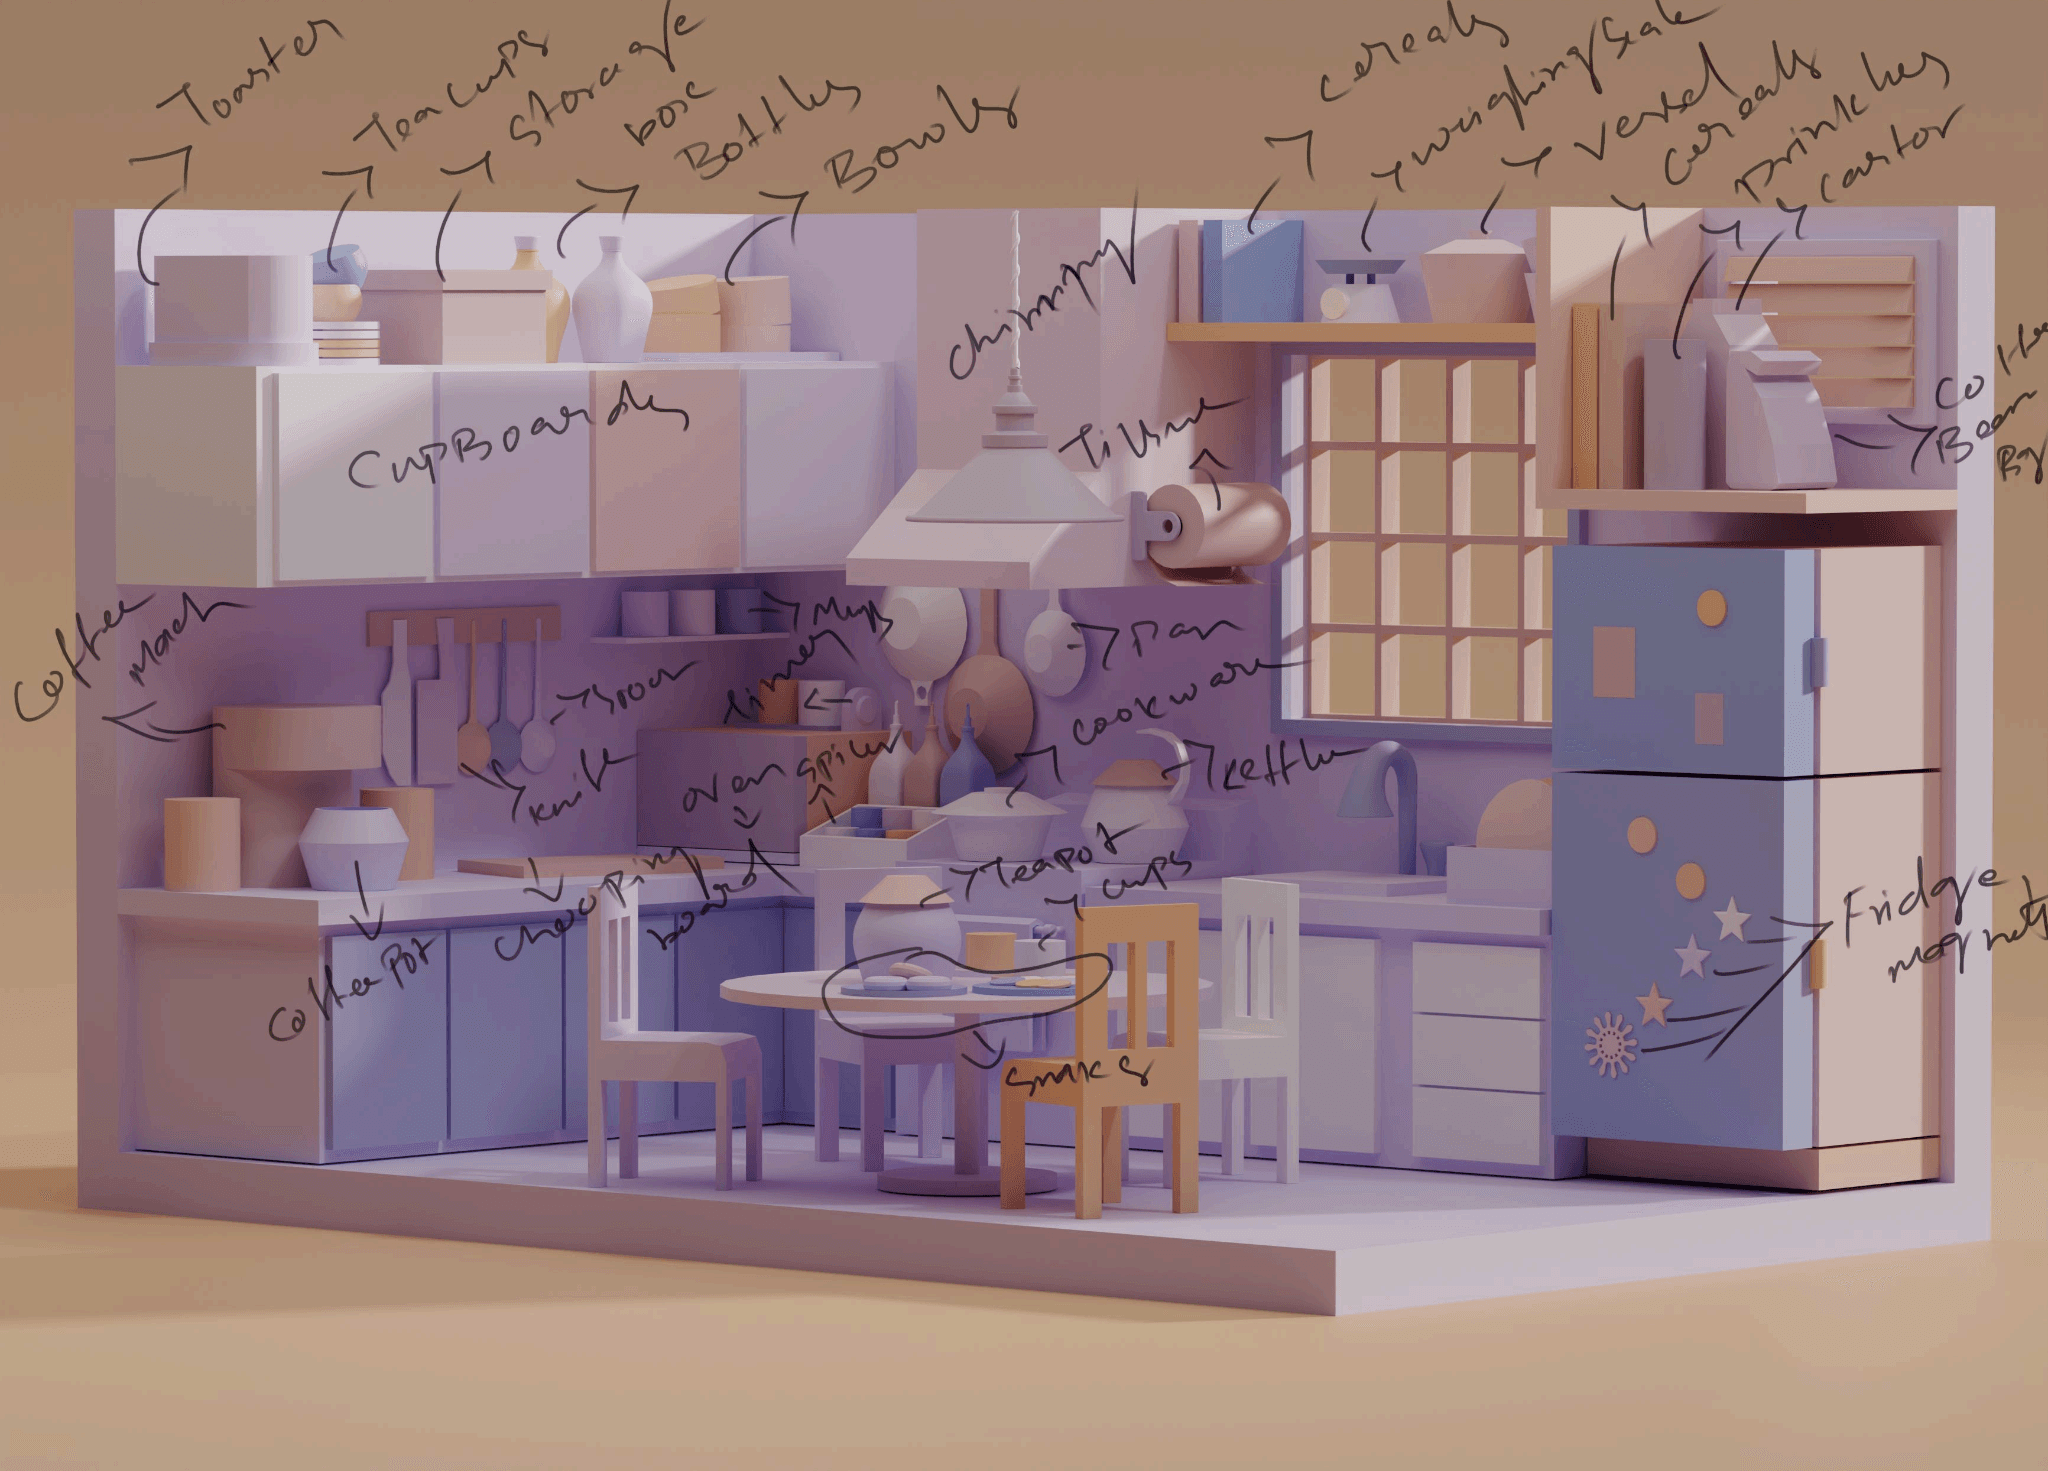
MadCandy: The Stylized Kitchen is the most rewarding project I’ve worked on so far. It’s a beginner-friendly Blender course that I created for aspiring 3D artists, and I’m genuinely proud of it. The feedback has been incredibly encouraging—many people have personally reached out to express their love for the course and the significant learning they’ve gained from it.
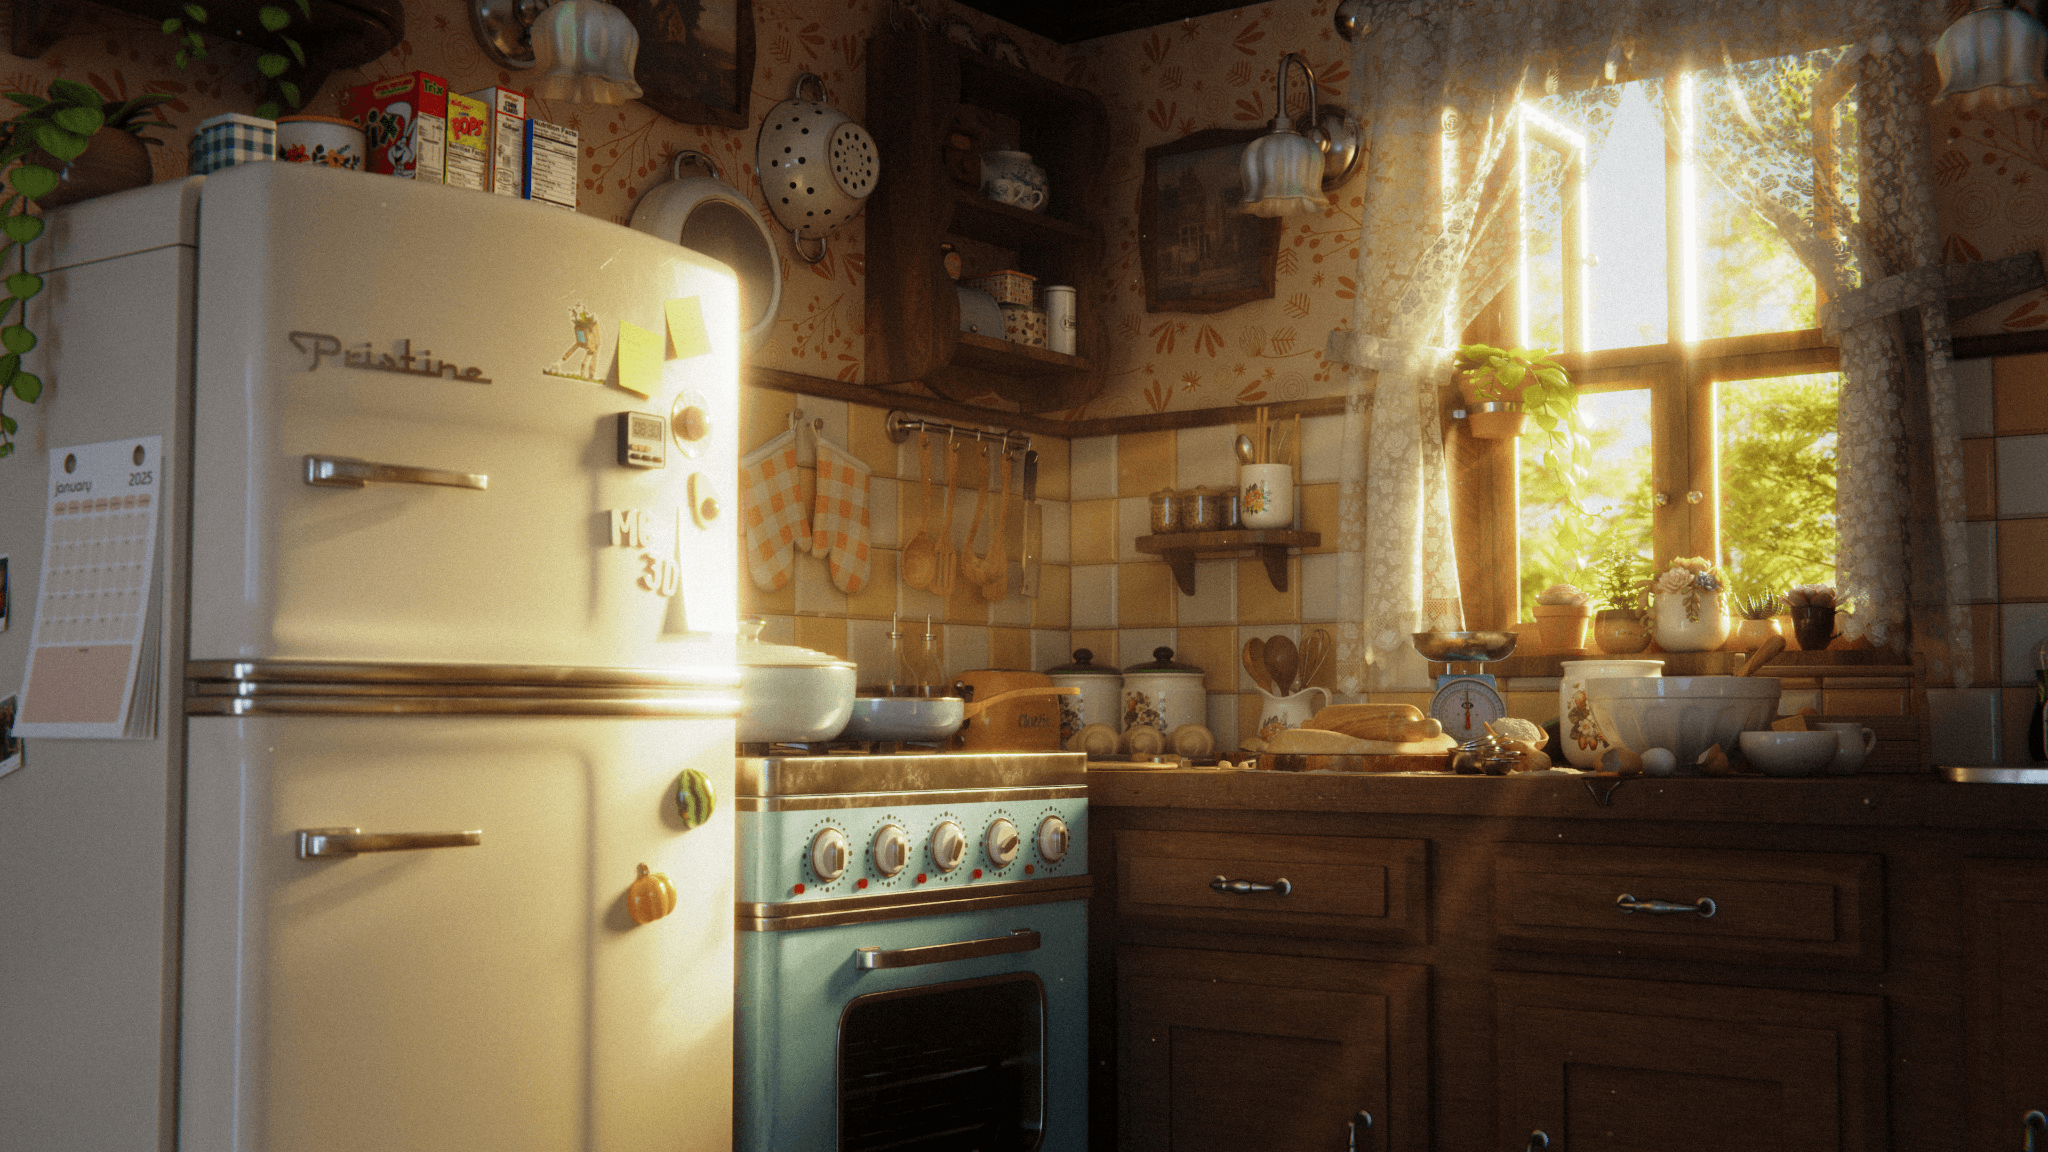
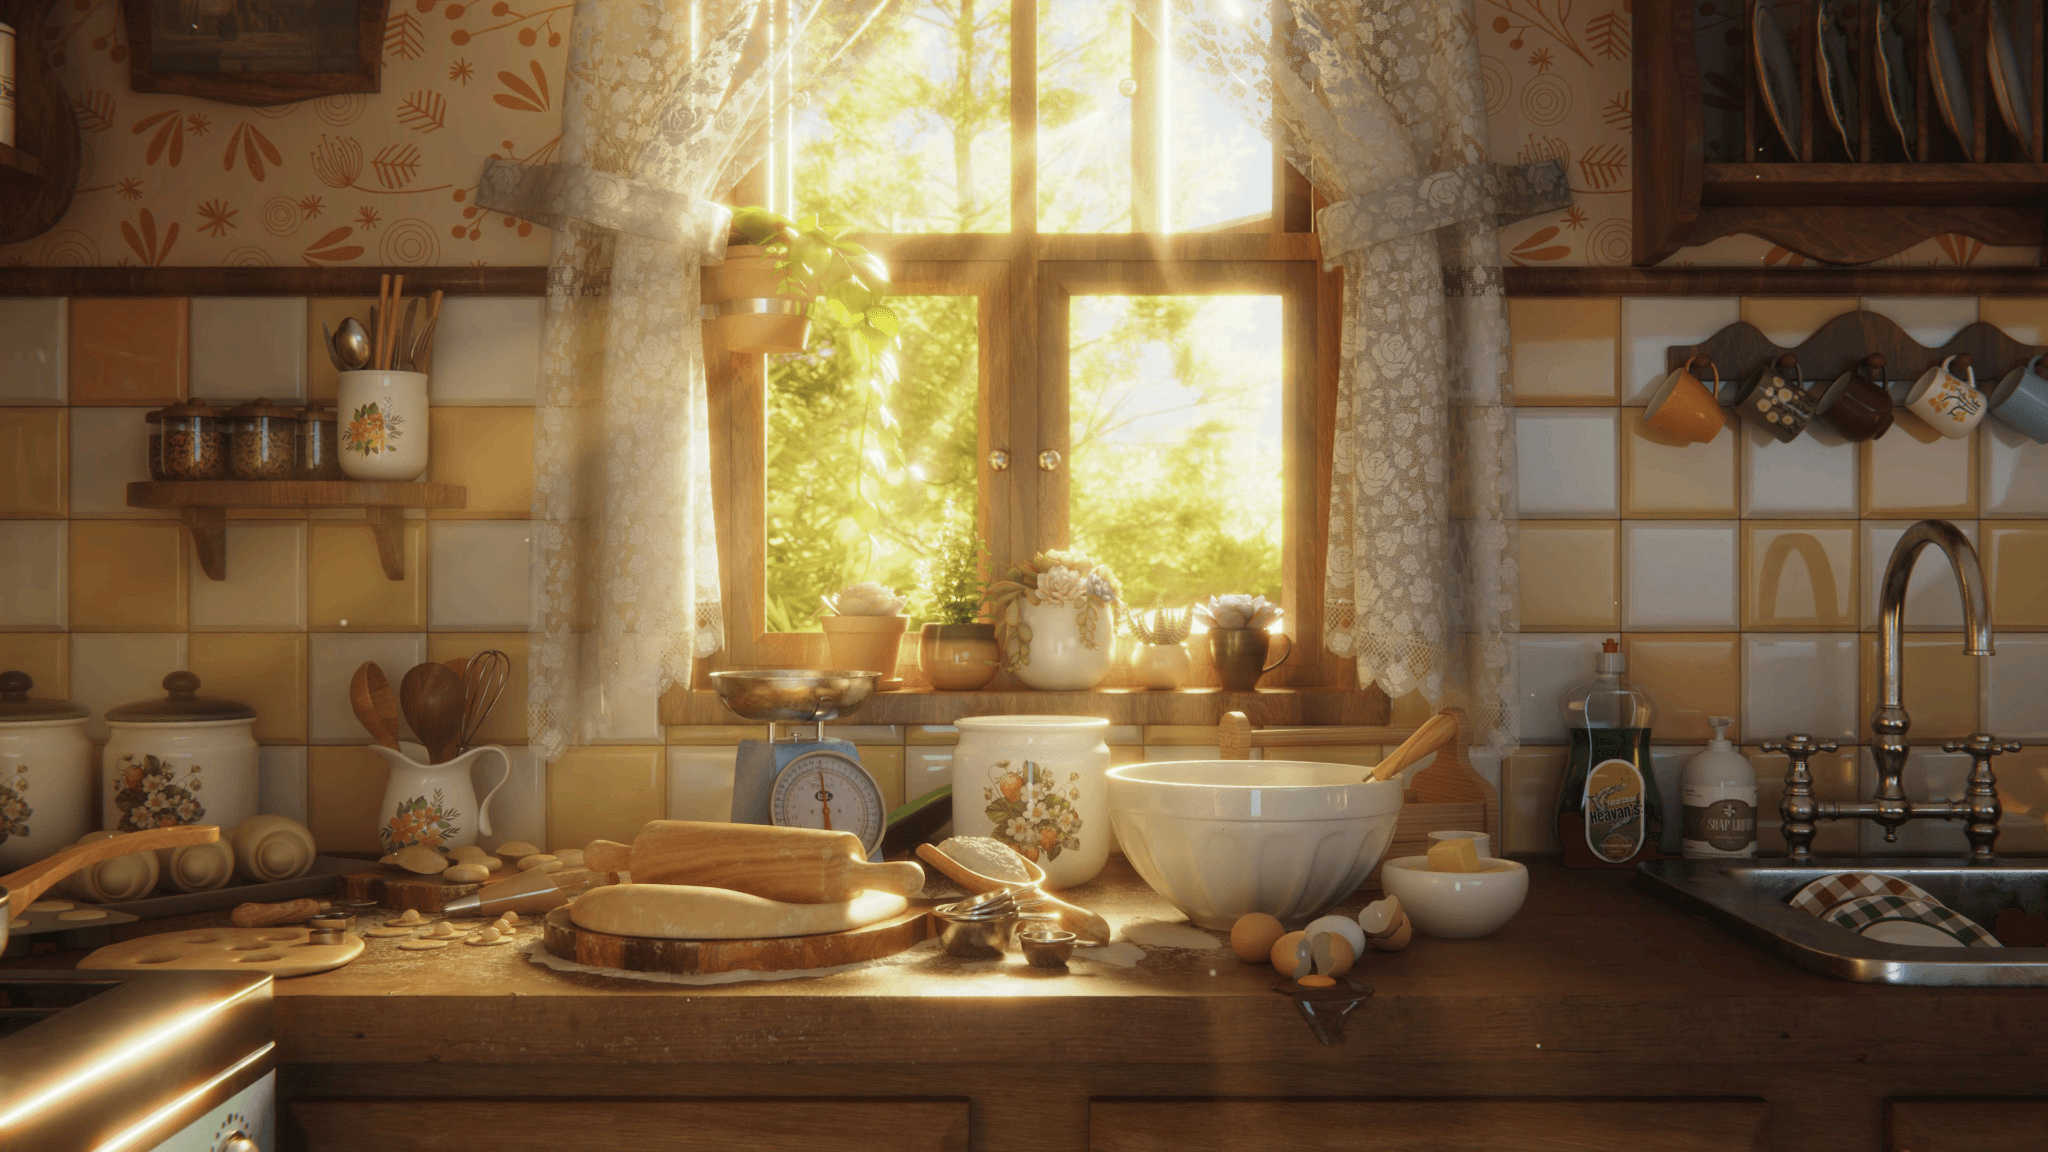
Stylized Kitchen © MadCandy
It took me eight full months to develop that, during which I spent countless hours experimenting with various aspects of modelling, cloth simulation, texturing, and lighting. The goal was to push the quality of my own work to a new standard while delivering a solid, well-structured learning experience for those looking to deepen their 3D skills.
Along the way, I became deeply familiar with Blender’s tools and capabilities— and this cathedral project is very much a result of the skills I developed during that journey.
Fox Renderfarm: Any artists or works that have influenced your style and approach?
MadCandy: I believe we are all the people that we ever come in touch with. We give a little piece of ourselves and receive a little piece of them. In that regard, any artwork that I have ever seen have some amount of influence on my work consciously or subconsciously.
And for this particular project, I took after Hbitproject and Max Hay, who are incredible artists that specialize in 3D architecture. Their works have quite a bit of influence on me in this project.
Fox Renderfarm: Have you tried Fox Renderfarm’s services before? If so, how do you feel about Fox Renderfarm’s cloud rendering services?
MadCandy: Yes, I have tried Fox Renderfarm before. It was quite convenient. I was able to render out my biggest project in a single day, which naturally would have taken me weeks to render with my machine. So I’m quite pleased with their services. Rendered Work
Fox Rendered Work:
Fox Renderfarm: Do you have any ongoing projects or future plans at the moment?
MadCandy:
Ongoing Projects: I’m taking it easy at the moment because I’ve been working on the Stylized Kitchen course for almost a year, and I just wrapped up all of that work. It turned out to be an incredibly exhaustive and demanding process. I’m also currently working on some client projects—mostly interior design related— though I’m not sure if I can share the details yet. So, I’m not actively working on any personal projects for now.
That said, I’ve been participating in the CGandWE challenges for the past few months consecutively, and that’s been a huge motivation for me to step out of my comfort zone to try and explore new genre of work and develop my artistic skills. So I’m grateful for that. Also, like every other 3D artist out there, I have a long list of pending personal projects—hopefully, I’ll get around to finishing them someday.
Future Plans: My future plan is quite simple: to keep creating 3D art and hopefully learn 2D art along the way. But I do have some long-term goals in mind. I’ve noticed that many 3D artists, once they become comfortable with their tools and reach a certain level in their craft, start thinking about making short films. And now, I understand why. There’s something incredibly powerful about being able to take a vague idea from your imagination and bring it to life—about turning a fleeting thought into a fully realized world. That power to tell stories visually becomes not just a technical skill, but a deeply fulfilling creative outlet. It allows us to share our inner world with others, evoke emotions, and connect with people in ways words sometimes can't. That’s a direction I’d love to explore in the future—using the skills I’ve built to tell meaningful stories and create experiences others can feel a part of. It’s like learning a language: at first, you're focused on grammar and vocabulary, but eventually, you want to write poems, tell stories, and have meaningful conversations.
To achieve that vision, I know I need to widen my horizons and continue learning. That means not only refining my technical abilities, but also honing my artistic eye—understanding composition, storytelling, lighting, and even exploring other mediums like 2D art. The more I grow creatively, the more tools I’ll have to express the ideas I see in my mind. It’s an ongoing journey, but that’s what makes it exciting. Thank you for providing me with an opportunity to express my thoughts.
MadCandy's Social Media:
Instagram: https://www.instagram.com/mad_candy_3d/
YouTube: https://www.youtube.com/@MadCandy3d