Whether creating an animation scene or 3D design, achieving perfect camera framing plays a crucial role and showcases your work from the most suitable angle. Therefore, Blender, a free and powerful 3D creation suit, brings flexible camera systems that copy real-world cinematography. However, many designers, especially beginners, struggled to align their cameras with the viewport perspective.
Their constant manual camera adjustment and rotation ultimately proved frustrating and time-consuming. Considering this, Blender launched a "Set Camera to View" feature that is designed to let users align their active camera to the current viewport perspective. Now, if this seems interesting and you want to delve deeper into Blender 3D camera view, read this guide that covers everything about it.
Part 1. Advantages of Setting the Camera to View in Blender
When 3D camera view is enabled in Blender, whatever you see in the 3D viewport becomes the camera’s new framing, eliminating manual adjustments and enabling dynamic composition. Anyhow, to know why Blender set camera to view matters, go through its following advantages:
- Intuitive Framing: Rather than manually adjusting rotation and camera location through transform values, it simply allows you to position your view in the 3D Viewport.
- Composition Control: When you move around a scene and find a pleasing angle, it lets you quickly convert that into the final camera view, enabling better creative control.
- Non-Destructive Workflow: Through it, you can test different camera angles without impacting other camera settings because when results don't turn out well, you can adjust the viewport again.
- Integration with Lock Camera to View: For cinematic shots, it can be combined with “Lock Camera to View,” letting you orbit or zoom while your camera moves in sync with the viewport.
- Quick in Complex Scenes: Since positioning the camera manually in complex scenes is daunting, this feature proves time-saving by avoiding transition between objects and camera constraints.
Part 2. Enabling the Blender Option to Set Camera to View
Many Blender users, especially beginners, question whether they have to enable anything first to "Set camera to view." Fortunately, the answer is no, and the camera to view Blender features doesn’t require any initial setup.
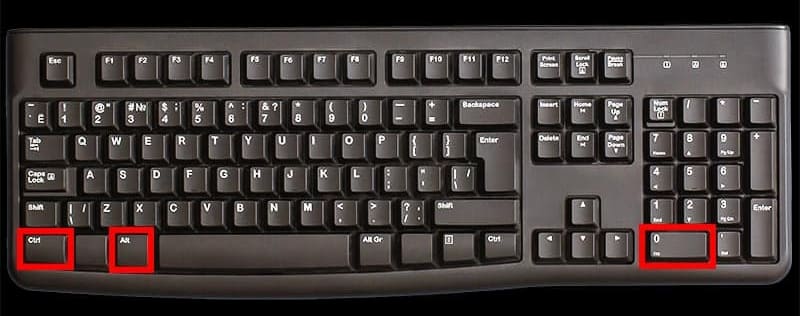
Instead, users can simply press the "Ctrl + Alt + Numpad 0" shortcut keys to activate the current 3D camera view. This one-time action is useful when you find the right angle and you want to set the camera there.
Part 3. Steps to Set Camera to Current View in Blender
If you want an instant one-time alignment of a camera to the viewport, you are advised to set the camera to the current view. This Blender's “move camera to view” settings instantly adjust and match the current viewport orientation. It is useful to quickly set up static shots and capture reference angles without manual positioning.
However, to keep the camera stuck to your viewport, you can enable the “Lock Camera to View” feature, especially when you need flexible camera positioning. It makes the camera follow your movements as you move around in the 3D viewport. Think of it as “lock the camera into my eyes” and follow the below instructions to enable it:
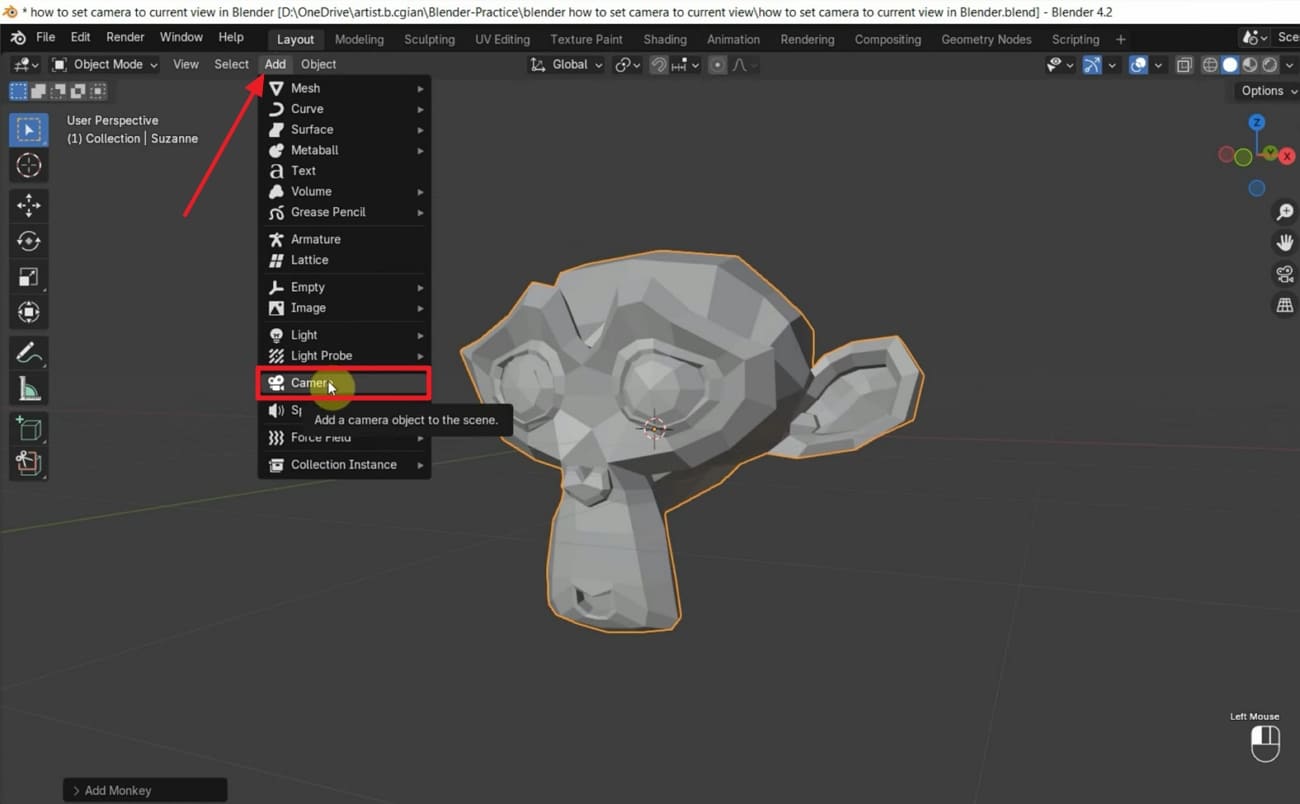
Step 1: To add a camera, access “Add” at the top toolbar and choose “Camera” from its menu.
Step 2: Make sure the camera object is added and selected before you access the “View” tab at the top toolbar. Then, expand it and choose “Align View” to get “Align Active Camera to View” from the expanded menu. Alternatively, you can use the “Ctrl + Alt + Numpad 0” shortcut keys to activate the Blender 3D camera view.

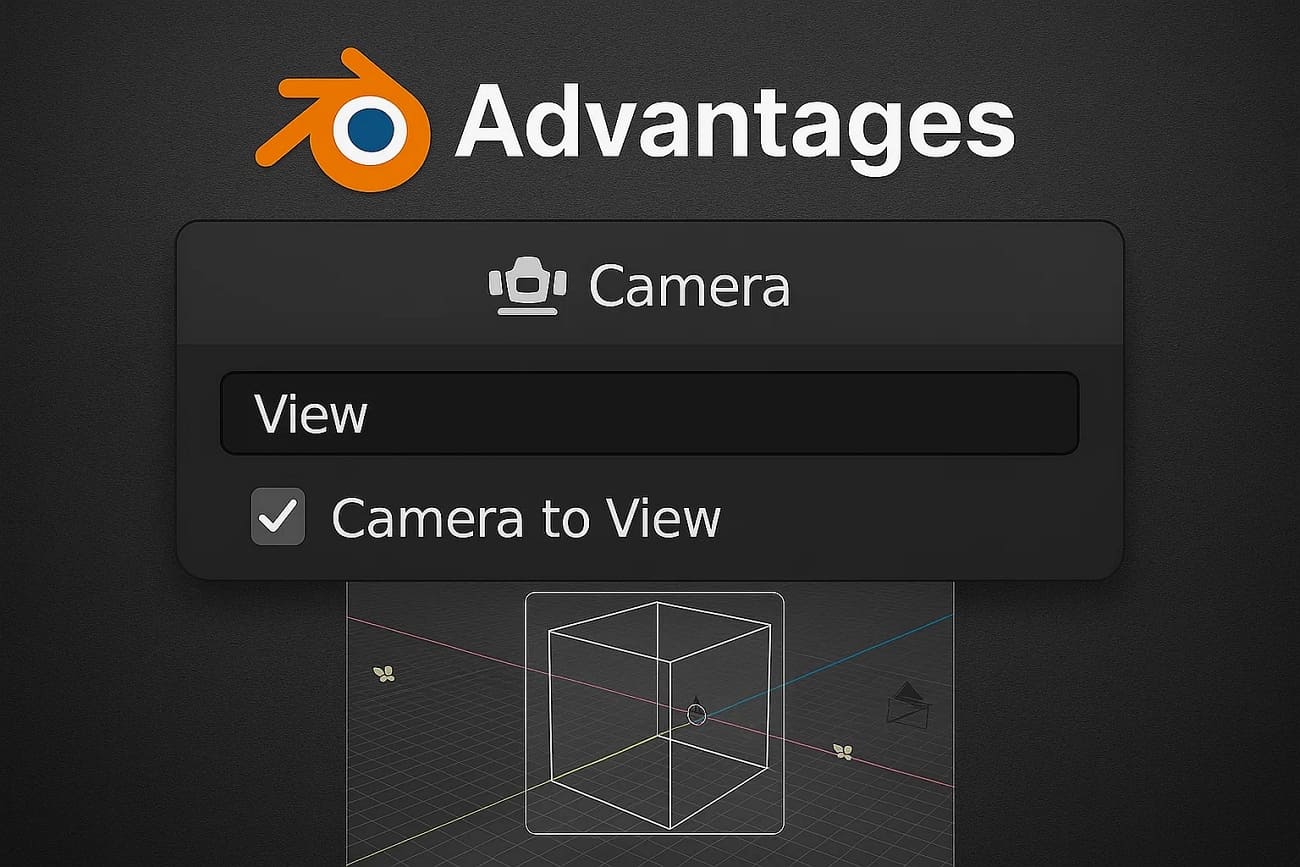
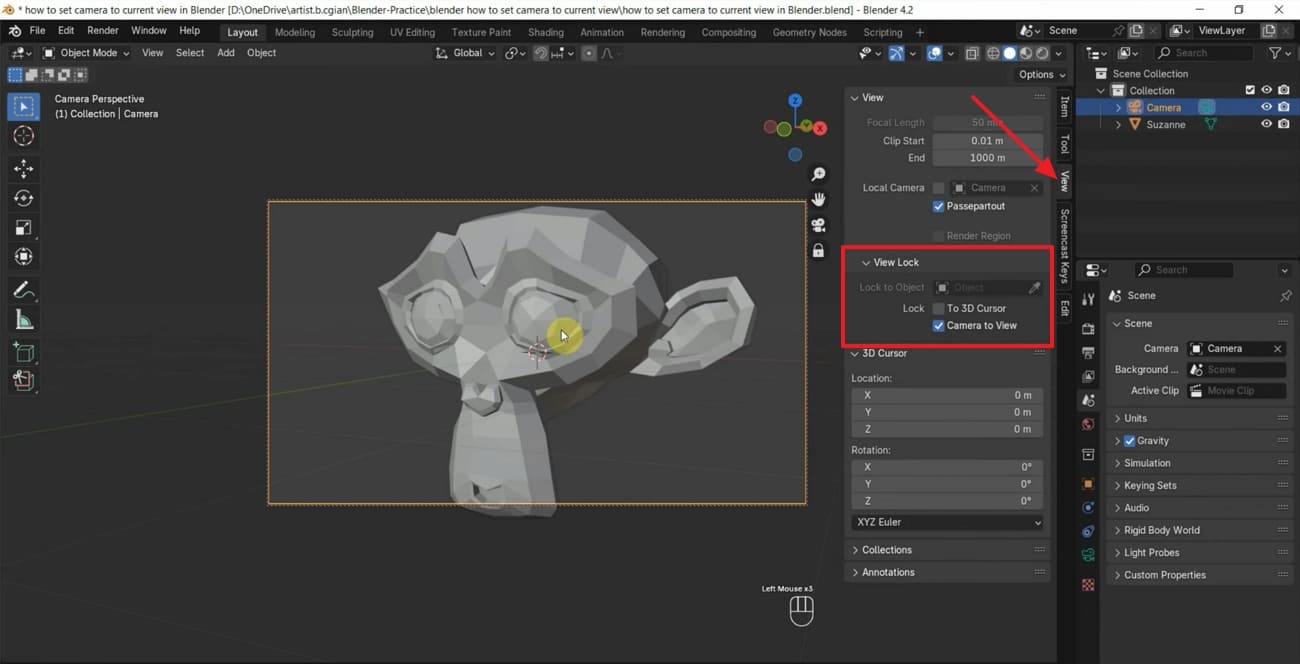
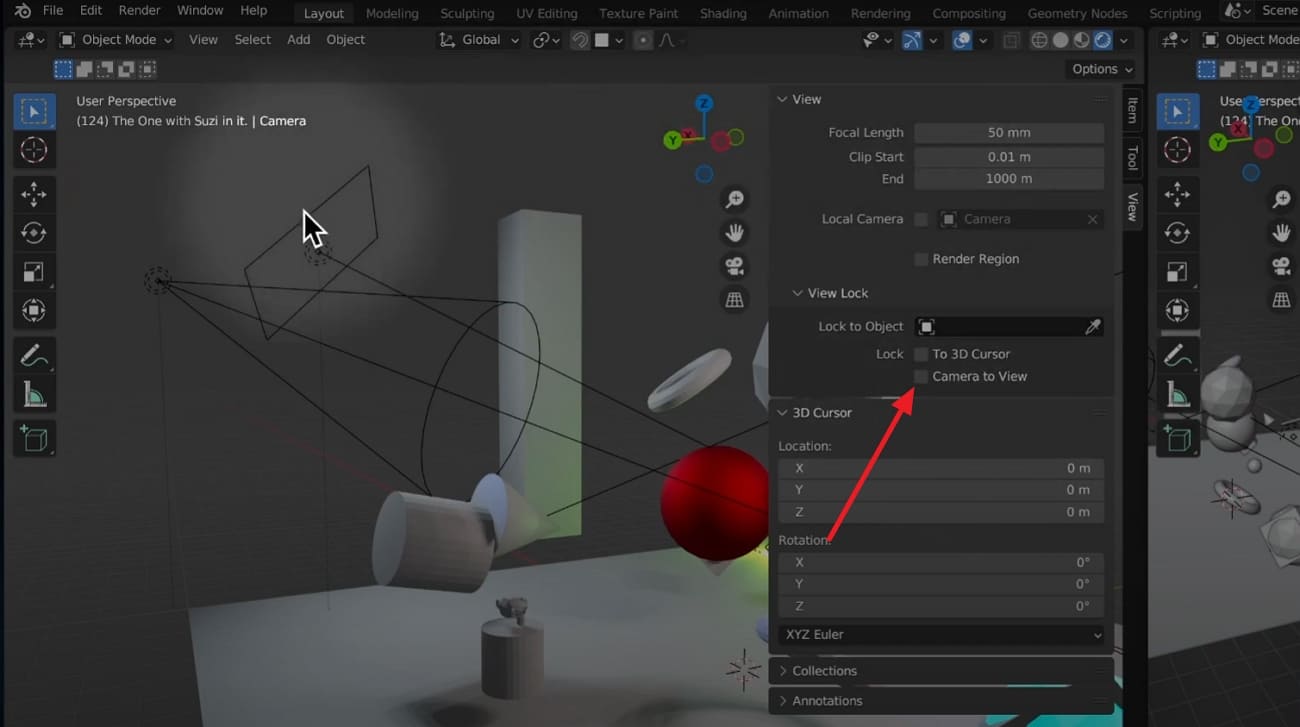
Step 3: Now, press "N" to open the sidebar, tap the "View" option, and enable the "Camera to View" under the "View Lock" section. It will keep the camera glued to the viewport navigation so that the camera can move directly on panning, zooming, and orbiting.
Pro Tip for Blender Artists: Improve 3D Animation Rendering Efficiency
Imagine being a 3D artist working on a project with Blender that contains complex scenes, including multiple characters, reflections, and motion blur. Here, your computer showing an "Estimated 18-hours hours" notification for rendering can cause severe frustration. That's where you need a cloud-based render farm service such as Fox Renderfarm to render your project faster without burning out your machine.
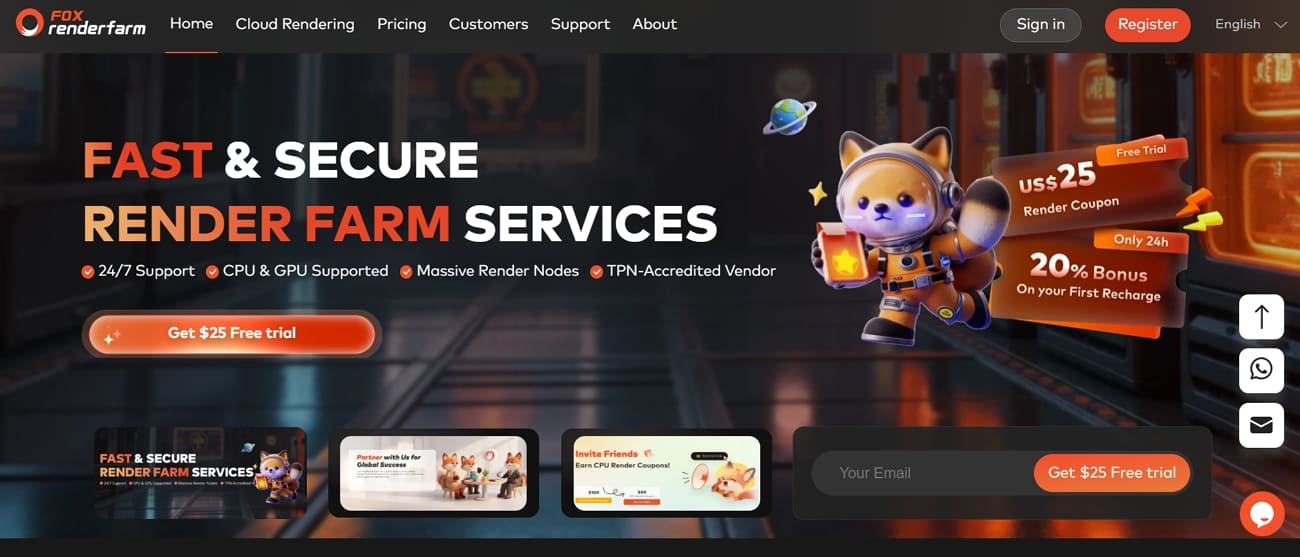
Without being limited to your local device performance, you can outsource your complex 3D animation project and leverage exceptional GPU & CPU resources for quick results. What's more, this cloud rendering service fires up thousands of rendering nodes and automatically detects your system's IT infrastructure to match cloud services, enabling effortless and quick results. Besides Blender, it supports more than 18 popular 3D software, renderers, and plugins across the globe.
Key Features
- High-Speed Transmission: This service includes Raysync's high-speed transmission to provide quick project upload and download for a lag-free experience. Besides, it is known for high rendering availability, no waiting in queues, and a responsive customer support team.
- Globally Recognized: Fox Renderfarm is an accredited service that has a record of rendering blockbuster 3D animation and film projects globally. Some popular names include Three Robots, Bahubali 2, Ne Zha, Donkey King, and Mr. Hublot.
- Flexible Pricing: Unlike other rendering services, you are not bound to pay a certain fee; instead, your project’s CPU and GPU needs will decide it. Surprisingly, it provides a $25 free render coupon upon your registration.
- Massive SSD Storage: Leveraging high-performance SSD, this service reduces project upload and access time while speeding up parsing time. Additionally, when working with heaving projects like multi-frame animations, it avoids I/O bottlenecks that slow down HDD-based systems.
- Secure & Confidential: Animation studios working on a confidential project can rely on this service since it has ISO27001 Certification that guarantees your asset’s security. In addition, it's a TPN-Accredited Vendor that provides non-disclosure agreement signing to keep customer’s rights intact.
Part 4. Common Issues and Troubleshooting
While enabling or using the “Blender Set Camera to View” feature, it's normal to encounter issues. However, to simply troubleshoot those issues, you are advised to approach the following points:
1. Camera Doesn’t Move with View: If the viewport doesn't move the camera, chances are you might have moved out of the camera view. To fix it, press "Number0" or ensure "Camera to View" is enabled under "View Lock."
2. Camera to View Option is Missing: In case you can't find the "Camera to View" checkbox, press "N" to bring up the right-side toolbar > View tab > View Lock section. When you still can't see it, ensure the 3D viewport is active rather than another editor type, such as Shader Editor.
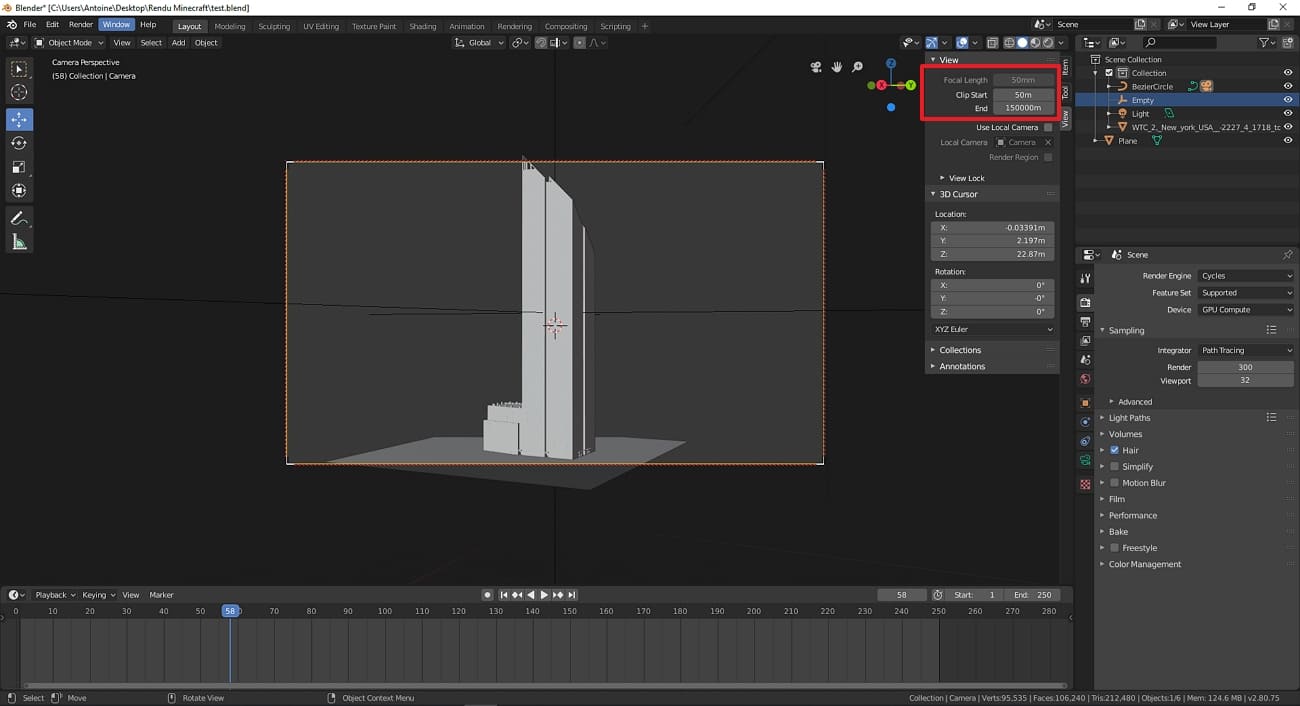
3. Camera View Looks Cropped: There are occasions when users do not see complete objects through the camera because the camera's clipping distance appears too short. To address it, access the “Camera Properties” panel and increase Clip Start and End values based on your needs.
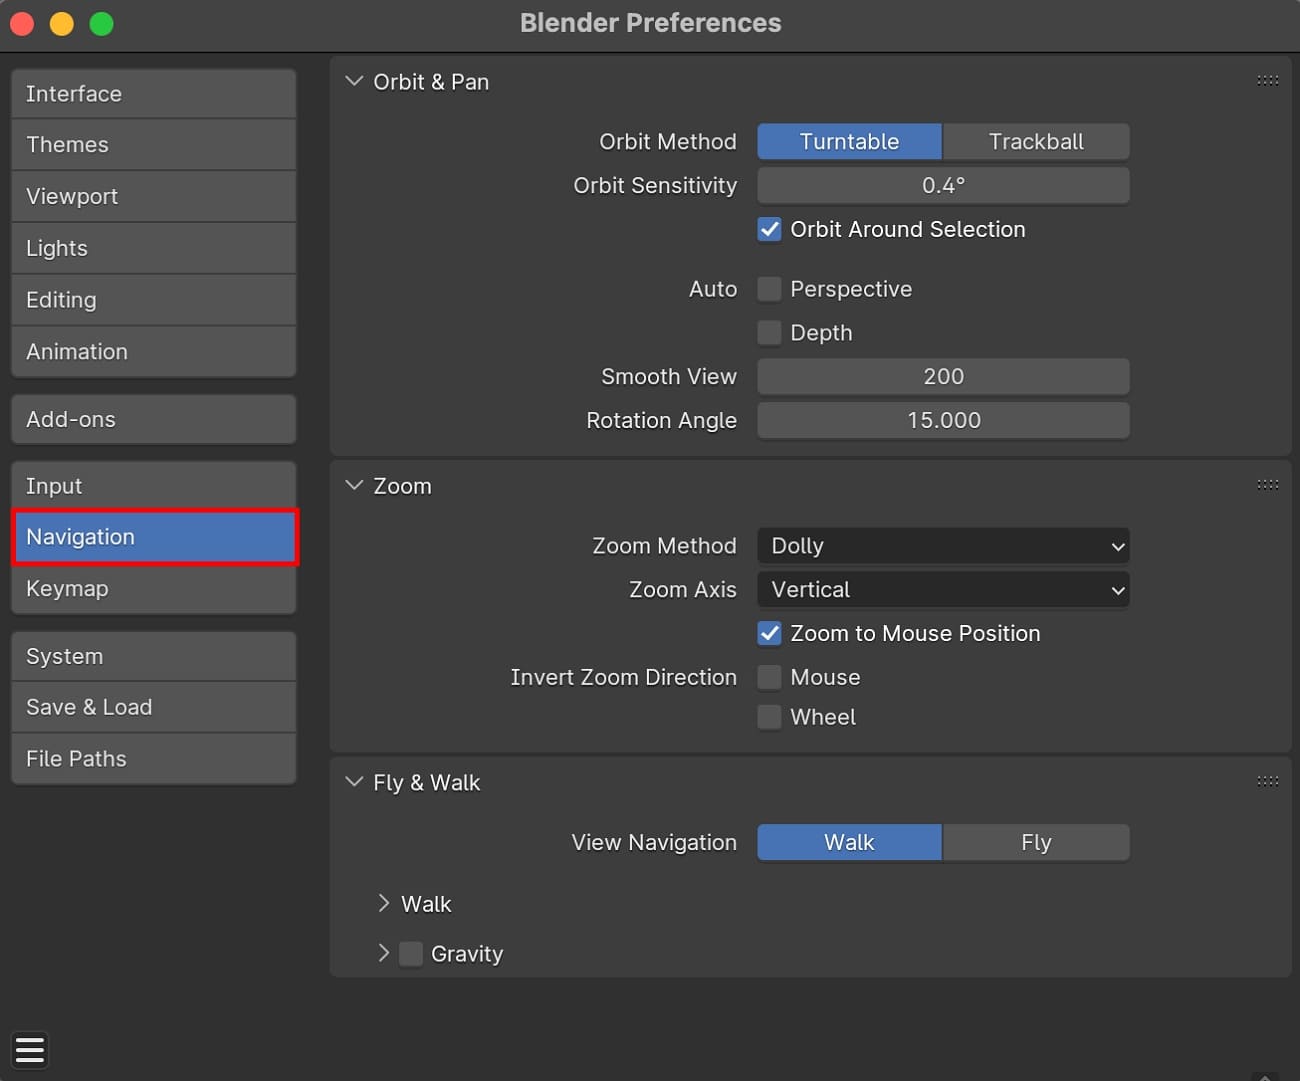
4. Camera Moves Too Fast or Too Slow: While using the "camera to View Blender" feature, you might face either being too sluggish or too sensitive orbiting and panning. If that happens, users can adjust navigation settings in "User Preferences" followed by "Navigation."
5. Camera Position Not Saved: If you exit the camera before disabling "Camera to View," all your settings and adjustments will be discarded. To save them, uncheck the "Camera to View" feature and lock the final position into the camera before you exit the camera view.
Conclusion
To summarize the framing discussion, Blender 3D camera view is a reliable tool for 3D animators and designers struggling to align their camera with the viewport. This guide highlighted the features in detail, from advantages to enabling and setting up the camera.
However, if you are stuck with your local machine for rendering a complex project, it's better to outsource rendering services from Fox Renderfarm, a leading cloud computing system.