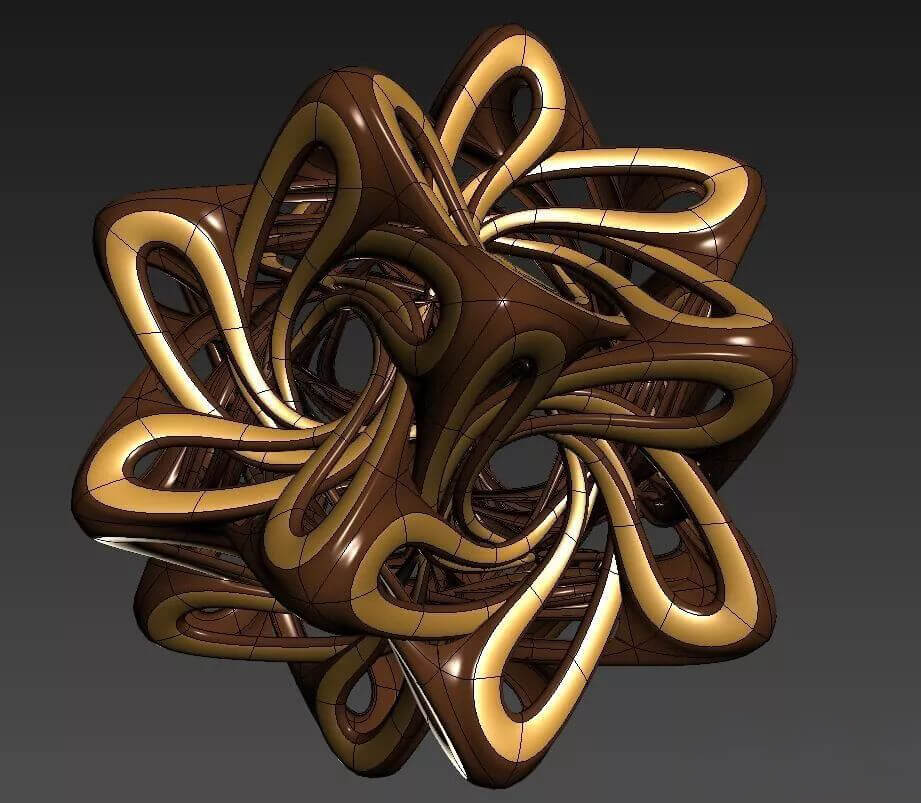
3ds Max Tutorial: How to Make a Beautiful Pattern

In this article, Fox Renderfarm, the best could rendering services provider, will share with you a 3ds Max tutorial about how to make a beautiful pattern. This tutorial is written by 3d Artist Sam, hope this article will help you in the 3ds Max learning.
This shape seems difficult, but it actually requires a higher level of logical thinking. And it is not difficult to make a card, it only has some requirements for the use of basic functions, especially the use of tools.
On the left is the original picture, and on the right is the remade image:

The effect after the final roundness:

Process
- First create a platonic, and then adjust the parameters to become a hexahedron.

- Create a plane as the alignment object. Switch to normal alignment. Align the plane with the inclined triangular face under the image.

- Switch to the left view, we can see two parallel lines. Use tape to measure the angle of inclination of parallel lines. Copy the measured angle to the angle capture.

- Create a pentagon in the front view. Convert the model to poly polygons. Then copy one and pull it aside, remember to use the reference, the parent-child relationship.

- Use scatter to align the sub-objects to the vertices of the target model. The parameters are shown in the figure. Change the angle capture parameter to 18.

- Enter the parent level, rotate the angle, and then align the model. At the child level, move the parent object forward, observe the model next to it, and align it slowly.

- Select all five sides of the parent object. Add line. Move the middle surface of the parent object backwards in the child level and shrink inward to get the effect as shown in the figure.

- Cut the corners and break the five edges.

- While the coordinate points of the pentagon are still correct, create a decagon to align it, and delete the selected faces in the figure.

- Lock the rotation angle to 7 degrees, rotate the copy, and associate.

- The effect after copying. Select any object and drag to create a new edge.

- Modify the model just now, remember that the top side and the left side of the object in the upper left corner cannot move, this is the side that has been determined. The middle line can be removed and adjusted downward.

- Continue to drag out new faces, continue to adjust the space, and become a spiral structure.

- The final rotation reproduces the circular structure in the middle, and the three-dimensional structure looks like this when viewed from the side.

Convert the middle decagon into a poly object, and combine the five related objects one by one. The purpose of this step is to use the correct coordinates of the decagon. Convert the middle decagon into a poly object, and combine the five related objects one by one. The purpose of this step is to use the correct coordinates of the decagon.

- Delete the original sub-objects and use the newly copied sub-objects to spread.

- Bridge the middle sides of these two objects. After rotating 180 degrees, align to the original parent object. Referring to the original decagonal structure, rotate and copy five related objects.

- Start the production of details. Select the face to insert, and then extrude the shape.

- Use the decagon again just now, combine these five objects with good details, and use the reference copy for the third time.

- Spread on the standard objects again, at the sub-level, move the face of the parent object so that the child objects on the left can be connected together.

- Initially completed. Not demanding, so that's good. Select all points for soldering. Enlarge the welding range and weld some misaligned points together.

- Select all, solder joints. Enlarge the welding range and weld some misaligned points together.

- Add shell and smooth effect, so we can see that the final model will look better.

- Add texture to get the model.

- Add smoothness to get the final effect.

Recommended reading
Top 9 Best And Free Blender Render Farms of 2025
2024-12-30
Revealing the Techniques Behind the Production of Jibaro "Love, Death & Robots", Which Took Two Years to Draw the Storyboard
2025-02-10
Top 10 Free And Best Cloud Rendering Services in 2025
2025-03-03
Top 8 After Effects Render Farm Recommended of 2025
2025-02-10
Top 5 Best and Free 3d Rendering Software 2025
2025-02-10
Shocked! The Secret Behind Using 3D to Make 2D Animation was Revealed!
2025-02-10
How to Render High-quality Images in Blender
2024-12-04
Easy Cel Shading Tutorial for Cartoon in Blender Within 2 Minutes
2025-02-10
Partners
Previous: Tutorial: How Does Pixar Create Great Characters (2)
Next: A Redshift Production Breakdown and Experience Sharing from Lighting/Rendering Artist Jiaxuan Wang
Interested


