Arnold Tutorial | Spider-Man: Into the Spider-Verse Cartoon Material Shadows Section

Arnold Tutorial  Spider-Man Into the Spider-Verse Cartoon Material Shadows Section cover

In this article, Fox Renderfarm, a renowned Arnold render farm and cloud rendering service provider in the computer graphics business, will present an Arnold tutorial for the Cartoon Material Shadows Section of Spider-Man: Into the Spider-Verse.

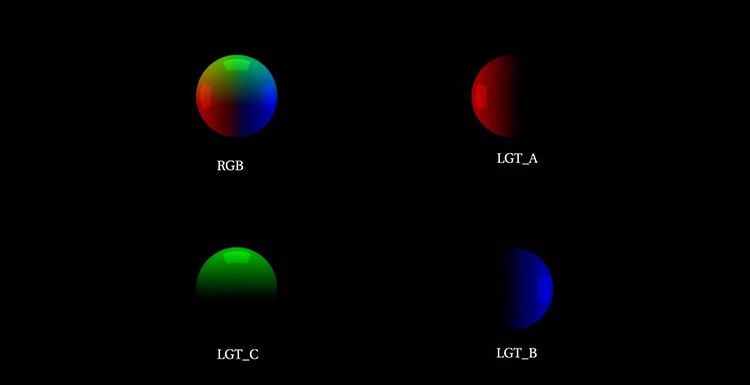
The Process and Effect of the Shadows Section

Duplicate the entire node network used for the MidTone.

Spider-Man Into the Spider-Verse Cartoon Material Shadows Section 1

Change the aiToon node from MidTones to Shadows and reapply it to render the model.

Spider-Man Into the Spider-Verse Cartoon Material Shadows Section 2

Click on the ramp node, then delete one of the three originally inside to make it two, and adjust the display position of the white area slightly.

Spider-Man Into the Spider-Verse Cartoon Material Shadows Section 3

Assign the final aiMixShader to the model and render.

Spider-Man Into the Spider-Verse Cartoon Material Shadows Section 4

Go back to the ramp4 node, and change the Type from Circular Ramp to V Ramp. You can see that the small dots have been stretched.

Spider-Man Into the Spider-Verse Cartoon Material Shadows Section 5

Click on the aiRange node again, change Output Min to 0, and Output Max to 0.621 (or any other value).

Spider-Man Into the Spider-Verse Cartoon Material Shadows Section 6

You can also change the orientation of this texture by adjusting the Rotate UV parameter in the place2dTexture node.

Spider-Man Into the Spider-Verse Cartoon Material Shadows Section 7

This concludes the main part of the tutorial. I hope you found it useful. To enhance the rendering performance of Arnold, you may consider using cloud rendering services, such as Fox Renderfarm, to accelerate the rendering of your project.

Source: Thepoly

Welcome to join us

render farm free trial

Recommended reading


Top 9 Best And Free Blender Render Farms of 2024

2023-05-06


Revealing the Techniques Behind the Production of Jibaro "Love, Death & Robots", Which Took Two Years to Draw the Storyboard

2023-01-13


Top 10 Free And Best Cloud Rendering Services in 2024

2023-09-26


Top 8 After Effects Render Farm Recommended of 2023

2023-02-02


Shocked! The Secret Behind Using 3D to Make 2D Animation was Revealed!

2022-05-11


How to Render High-quality Images in Blender

2023-01-13


Easy Cel Shading Tutorial for Cartoon in Blender Within 2 Minutes

2022-07-01


8 Best And Free Blender Cloud Rendering Services in 2023

2023-02-02


Partners

Interested

How to Use VFace and Make Effects in Arnold?
In this article, Fox Renderfarm, the CG industry's leading cloud rendering service provider and render farm, will share with you how to use VFace and how to restore effects in the Arnold renderer. The author is CaoJiajun.Firstly I purchased some VFace materials from the official website to get the following files.We will mainly use the above files for this sharing, they are our main materials to make high quality details of the face. VFace provides 2 types of facial models, one for the head with open eyes and one for the head with closed eyes, choose one of them according to your needs. If you are doing a model that needs to be animated with expressions in post, I would recommend choosing the model with closed eyes, as the open eyes model will cause the eyelids to stretch when you do the blink animation. You don't need to worry about this for still-frame work.Let's start with the production process. It's actually very simple, wrap your own model with a VFace model through Wrap or Zwrap, then pass the map and finally render it in Maya or other 3D software. The process is simple but there will be a lot of things that need to be taken care of in there otherwise the facial details will not be rendered correctly.1 Model CleaningFirst we need to load the model provided by VFace into ZBrush and match it to our sculpted model.Then you can head into Zwrap or Wrap for wrapping.Lastly, the wrapped model is imported into ZBrush to replace the VFace model.In ZBrush we use the Project brush to match the face of the wrapped model more precisely to our own sculpted model, once matched you will have a model that matches your sculpted model perfectly, at this point we can go into Mari for the map transfer.2 Using Mari to Transfer the MapIn Mari we first set up the project, import our own sculpted model or the wrapped and matched XYZ model, then remove the other channels in the Channels and keep only the Basecolor channel, and we can customize the channels as we wish.What we see now is how the model looks when imported into Mari. At this point we need to set the custom channels DIFF\DISP\UNITY\ to import the VFace map.Firstly, the DIFF channel is set at the original size of 16k and the Depth is set at 16bit (later on there can be more color depth control and of course it can be set to 8bit). The key point is that when the color depth is set to 16bit or 32bit, the color space needs to be set to linear and 8bit to srgb.Keep the size of displacement map at 16k. I recommend setting the Depth to 32bit, as you will get more detail of displacement, and keep the color space linear, with Scalar Data ticked (as the displacement map is a color map with 3 channels of RGB, you need to keep the greyscale data).The blend map settings are the same as the color map, but Scalar Data also needs to be ticked (this map is used as a color mask for toning or as a weighting mask).Next we can use the object panel to append our own model in preparation for the transfer of the map.Right-click on any channel and select the Transfer command in the pop-up menu to bring up the menu for transferring the map.In the transfer menu select the channel which needs to be transferred in the first step, set the transfer object in the second step, click on the arrow in the third step, set the size in the fourth step and finally click on the ok button.I generally recommend passing one channel at a time as it is very slow and takes a long time to wait. For size I usually choose 4k for color, 8k for displacement and 4k for mixing channels. This step requires a lot of patience!VFace original effectThe effect after transferAfter the transfer we can export the map. The export map settings are shown in the figure. We need to pay attention to the color space setting (in the red box). The color space of the color channel is set to linear and should also be set to linear when exporting. The export of displacement and hybrid maps is a bit more unusual, as we set the color space to linear when creating the channel, but the export needs to be set to srgb, as both the displacement and hybrid maps are a combination of the 3 channels R,G,B to form a color map. Finally click the export button and it's done.VFace original color effectColor effects after exportingVFace original displacementEffect after exportIn short, your output map needs to be the same color as the map provided by VFace, either too bright or too dark is an error.3 Arnold RenderingDefault settingsAt this point we can go to Maya and render the VFace map we have created (we won't go into the lighting environment and materials here, we will focus on the link to the replacement map). First we import the passed VFace map and render it by default to see what we get. Obviously we get an ugly result, so how to set it to get it right?Here we add an aisubtract node (which you can interpret as a subtraction or exclusion node), because the default median value of VFace is 0.5 and arnold prefers a replacement map with a median value of 0. So we enter the VFace color into input1 and change the color of input2 to a luminance value of 0.5. This is equivalent to subtracting the 0.5 luminance info from the default 0.5 median luminance of VFace, and we get a displacement with a median value of 0.Median value 0.5Median value 0After setting the median we can add an aimultply node. This node can be interpreted as a multiplyDivide node, which has the same function as Maya's own multiplyDivide node and controls the overall strength of the VFace displacement. We can output the color of the aisubract node to the input1 node of aimultply and adjust the overall strength of the detail displacement of VFace by using the black, grey and white of input2 (any value multiplied by 1 equals 1, any value multiplied by 0 equals 0, all the colors we can see in the computer are actually numbers to the computer. We can change the value and thus the strength of the map by simple mathematical calculations, once we know this we can see why we use the multiplyDivide node to control the strength of the displacement).Next we add an ailayerRgba node. The R, G and B channels of the aimultipy are connected to the R channels of input1, 2 and 3 of ailayerRgba, and through the mix attribute of this node we can control the intensity of the displacement of each of the three VFace channels (R, G and B), and after a series of settings we can get a correct and controlled rendering of the VFace displacement.VFace-dispZBrush-dispVFace+ZBrush dispZBrush Export Displacement SettingsAlthough we have a correct and controlled VFace displacement result, it does not combine with the displacement we sculpted in Zbrush and we need to find a way to combine the two to get our final displacement effect.Here I used the aiAdd node to add the two displacement maps together to get our VFace displacement + ZBrush displacement effect (of course you can also use Maya's plusMinus node).It doesn't matter how many displacement map elements you have (such as the scar on the face, etc.), you can structure them through the aiAdd node to get a composite displacement effect. The advantage of making it this way is that you can adjust the strength and weakness of each displacement channel at any time, without having to import and export them in different software. It is a very standard linear process approach.Default effectAfter color correctionFinally we apply the passed color to the subsurface color, and by default we get a very dark color mapping, which is not wrong. The VFace default model will be the same color. We can correct the skin color by using the hue, saturation and lightness of the colourCorrect node. This is why I choose 16bit colors to bake with, so I can get more control over the colors and get a correct result after color correction (of course the current result is just a rough mapping, we can still do deeper work on the map to get a better result).As a powerful render farm offering arnold cloud rendering services, Fox Renderfarm hopes this article can give you some help.Source: Thepoly
More
2023-07-19
The Best Arnold Render Farm | Fox Renderfarm
Fox Renderfarm is a global technology company specialized in cloud computing services for rendering in entertainment industry. We supports most popular 3D software, renderers and plugins all over the world, like 3ds Max, Maya, Cinema 4D, SketchUp, Blender, V-Ray, Redshift, Corona, and more. Supported internal and external plugins for 3ds Max, Maya, or Cinema 4D are integrated to our Arnold support. GPU &x26; CPU rendering are both available in arnold render farm. Fox Renderfarm fire up thousands of rendering nodes instantly, high availability, no waiting necessary, easy to use, refers to MPAA security standards, also a flexible render farm pricing for you. The more reason you choose us in arnold render farm are below:The partner of Oscar winning production teams.With Hollywood level production experience for years.24/7 Live customer care &x26; technical support.Response time: 10-15 mins.Contact available via Skype/Email .As low as $0.036 per core hour.Volume discounts available up to 50%. Fox Renderfarm has an outstanding team with over 20 years’ experience in CG industry. Team members are from Disney, Lucasfilm, Dreamworks, Sony, etc. With professional services and industry-leading innovations, they serve leading special effects companies and animation studios from over 50 countries and regions, including two Oscar winners. In 2015, Fox Renderfarm formed a global strategic partnership with Aliyun (Alibaba Cloud Computing) to provide global visual cloud computing services. Get $25 free trial to register and rendering your artwork online with the best cloud rendering farm now!
More
2023-02-10
The Method to Make LightGroup of Arnold 5.1
A friend asked me before, how to make LightGroup in Arnold 5.1 version, because with LightGroup, we do not need to divide the Light Render Layer.The method of Arnold 5.1's LightGroup is not the same as the previous version. I remember that the LightGroup property was added to the light at the beginning. This method only works for the alshader's shader, and then the light property bar is added in the AOV Light Group column, add LightGroup1 by ourselves in the AOV attribute, and apply theL.'LightGroup' command. After the Arnold 5.1 version, it was found that this method has failed. Even if you add the L.'LightGroup command to AOV, still not working. Next, let me talk about how Arnold 5.1 makes LightGroup.The first step is to create a light. In the AOV Light Group property column of the light, give it a name that you want of this LightGroup, I name it LGT_A here. The second step is to add the RGBA (cloud rendering note that, it is must in uppercase) channel to the AOV channel. Why should we add the RGBA channel? Because I found that only the RGBA channel has its Light Group List property bar showing its effect. If you add a LightGroup channel, you will find that this property is in the closed state, and this RGBA must be uppercase, quite fucking. Then enter the RGBA channel properties and select the LightGroup you added to the Light Group List option. My scene made 3lights, so there are three. LightGroup appears after the rendering below.Here is the rendering of render farm test:
More
2022-07-01
Business Consulting

Global Agent Contact:Gordon Shaw

Email: gordon@foxrenderfarm.com

Marketing Contact: Rachel Chen

Email: rachel@foxrenderfarm.com

Message Us:
Newsletter
Keep up with our latest software updates, special offers and events!
Copyright © 2024 FoxRenderfarm.com. All Rights Reserved.