C4D Tutorial of Making 3D Abstract Art Materials

Today the leading cloud rendering service provider,__ Fox Renderfarm__, is here to share a 3D artist's process of making 3D abstract art materials using Cinema 4D.
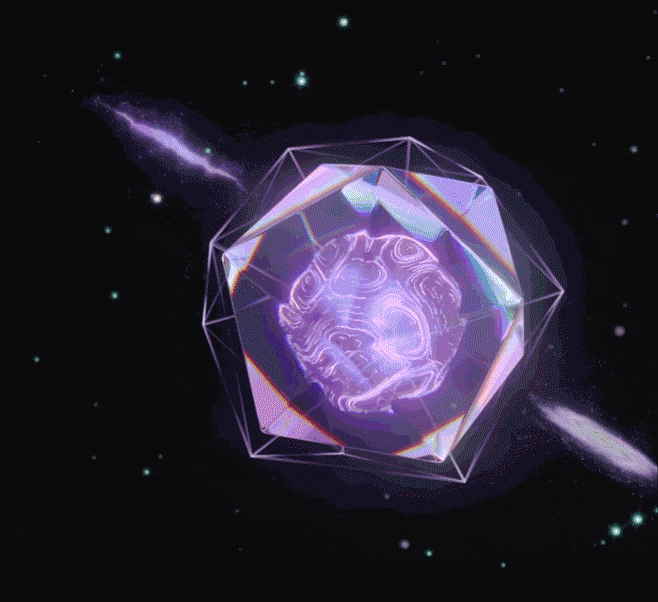
Here is a set of pictures of 3D abstract art:

This set of images of 3D abstract art may seem like a lot, but in fact they all evolved from one way of making them, so here Fox Renderfarm shares a way in which you can flexibly change many forms for the 3D abstract art. So where does this richness of color come from? The code used in this piece is the OSLshader, which is open source on GitHub (https://github.com/redshift3d/RedshiftOSLShaders).

In today's tutorial we will use the first image as a basis for a series of explanations from modeling to materials of 3D abstract art, including the use of OSL in this respect.
Final Result:

Part 1. Modeling
Step 01 Spline Pen
We start by using the Spline Pen tool to draw the shape of the Spline we want, which will relate to the shape of our final result.

This section needs to be made as best as possible to avoid changes later on (as there is a risk that the later changes will make it look worse).

Step 02 Cloner
Now we add a Cloner Effector and add the objects we want to clone to its sub-levels.

Then we change the mode of the Cloner to Object and put in the spline we just drew.

Adjust the number up so that our subject looks smoother later on.

Step 03 Adding Displacer
We now add a Displacer effect to the spline to break up the too-similarity between them.

Of course, this needs to be put into a sub-level of the sample bar to have any effect. Next, we add a Noise to the Displacer so that we can control the extent of this break.

Then we move on to Noise Shader, where we make a suitable adjustment to both the scale and the ratio of the texture. Of course you can also adjust the seed number to suit your own purposes.

Step 04 Adding Random
Let's now add a Random effect to the cloner so that the objects we clone have a random transformation effect and are not so uniform.

Step 05 Adding Plain
Now let's add a Plain effect to the cloner, also to break up the too uniform situation.

Then we adjust one of his scale, here the value is adjusted according to your actual situation, the figure is just a reference.

We then use a Shader Field to control the extent of this scale. Of course, here we also add a Noise for control.

At this point, our main form of 3D abstract art is basically complete and we need to process it later.

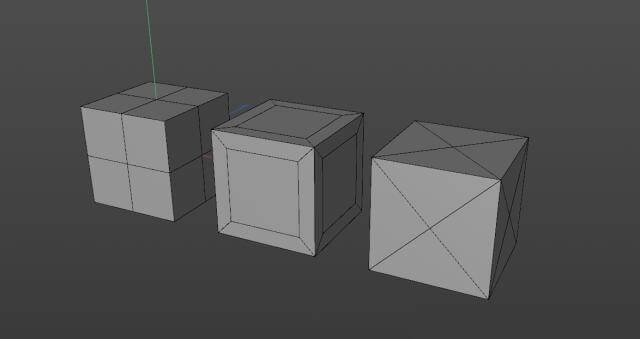
Step 06 Creating Volume Builder and Volume Mesher
Now that we have the basic form, we need to smooth it out and make it look more like that. Here we can use the Volume Builder to do the latter.
First create the Volume Builder and Volume Mesher all at once. Then place our cloner under the volume builder and we are done with our initial processing.

Next, is a tweak to the details. We change the voxel size to a smaller size and add an SDF Smooth. This gives us a very smooth model. This is the effect we want.

Of course, if you are not happy with the shape you can go back to the beginning and make a tweak, but remember to turn off Volume Mesher and Volume Builder or your computer will get stuck and explode.
Then if you want to cut the bottom of the form flat, we can just create a cube and put it into the Volume Builder. Then change the mode to minus. (Remember to turn off Volume Builder when you do this, as it will reduce the computational load.)

When we have finished adjusting all of them, we are ready to proceed to the next step. Select the volume grid directly for Right click > Current state to object.

Step 07 Topology Model
Now we have a good model, but the number of faces is too much, so we need to give it a final touch. Open the topology plugin QuadRemesher and do the topology.

Once the topology is complete, you've got a nice model that you can happily render.

Well, here ends the modeling section, and summarize a few points that can control the form:
- The Spline itself
- Noise inside the Displacer of Spline
- Random values and different objects of Cloner
- Noise in the Plain effector
Part 2. Material Rendering
Step 01 Building a Scene
We create a background, camera for a simple scene build.

In this case the camera is pointed squarely at the subject of the model, and then the focal length is adjusted to 135 MM, as this focal length does not have much deformation.

Step 02 Adding a Light
Now you need to give the scene a light, in the Redshift Renderer you can choose HDR (Dome Light) for the lighting. Then add an HDR map, change the saturation to 0 if you don't want to use HDR colors, then go to the coordinates and adjust the ambient coordinates so we can adjust the lighting to the angle we want. If you don't think it's bright enough you can increase the exposure. Now that the initial build of the scene is complete, let's move on to the materials.

Step 03 Adding Material
Create two default material spheres and rename them: body and background, then apply them to our background and body respectively.

Step 04 Turn Off Reflection
We double-click on the material sphere to open the one called Background and turn off Reflection, because as a background, no reflections should appear.

Changing Color to black and Weight to 0 here is one way to turn off Reflection. Now you can see that the reflection is no longer there.

Step 05 Adding Gradient
Now add a gradient layer on top of the diffuse channel, here you need to use the Ramp (gradient node). Simply open the node editor and press Shift plus C to bring up the search. Then output Ramp and double click to create the node. Then link it to the diffuse color of the material.

In this way a black and white gradient is obtained.

Now just change the color of the black and white gradient. If it is reversed, you can adjust the position and the distance adjustment can change the strength of the gradient color.

Step 06 Making Colors
Now it's time to start making the materials for the main body by copying the OSL code to be used: RedshiftOSLShaders/TurbulentColor.osl at main · redshift3d/RedshiftOSLShaders · GitHub
Then find the OSLShader node in the Nodes panel, copy the code in and compile it.

The properties menu is then available.

The final adjustment looks like this. You can adjust it to suit your model. The color is now done, and the next problem is the bump.

Step 07 Making Bump
Now to tackle the bump, you can find the black and white texture you want for the bump, we have found a black and white texture of a fingerprint here.

Then put it into the Node panel and make a link using the Bump node.

However, in order to fit the model better, a Triplanar is used here. This way the mapping will fit the model better without the sub-UV.

Here we have changed one of the scale of the map to be smaller, and this you can adjust according to the actual situation.

Well, here the color and bump of the main material has been solved, so let's tackle the little dots next.
Step 08 Making Dots on the Surface
Again, for these dots we have used an OSL code, still copying this OSL code first: RedshiftOSLShaders/Dots.osl at main · redshift3d/RedshiftOSLShaders · GitHub
Then make a copy of the default material node, create a new OSLShader node, copy the code in and compile it. Then, after making the appropriate adjustments, you get a result like the one shown below.

At this point, you can add a gradient to it to make it black and white, so that it can be used as a bump map. Then you can also give it a color correction so that you can change the color (or you can use the gradient to change the color).

Step 09 Mix of Materials
Now make a merge of the two materials, here using the material blending node.

Then give the very first color into the layer of the base color, and then give the material Dot to layer 1.

Now you can see that there is no effect, because you still need to make a mask, just like the PS mask. Here you can use the bump of the dotted material as a mask.

The effect is now complete and it is finally time to render the output.
Step 10 Rendering and Output
You can take a look at the following settings as a reference. You can use C4D's own renderer for this, but of course this will be a little slower. Alternatively you can use a render farm to help with the rendering process. The advantage of using a render farm is that it reduces the load on your computer and speeds up the rendering.


Final Result:
Fox Renderfarm hopes it will be of some help to you on making 3D abstract art materials with C4D. As you know, Fox Renderfarm is an excellent cloud rendering farm in the CG world, so if you need to find a render farm, why not try Fox Renderfarm, which is offering a free $25 trial for new users? Thanks for reading!