Top 9 meilleures fermes de rendu Blender gratuites
2026-03-26

Top 5 Cinema 4D Render Farm for Fast Rendering
C4D Render Farm
Compare the fastest and most trusted Cinema 4D render farm options in 2026. Find reliable services, pricing, and features for smooth, efficient rendering.

Comment accélérer le rendu Cinema 4D ?
Cinema 4D
Vous créez des scènes 3D dans Cinema 4D ? Le rendu Cinema 4D peut être lent lorsque la scène est complexe, mais il existe des moyens d'accélérer le rendu C4D, explorons-les.

Wie beschleunigt man das Cinema 4D Rendering?
C4D
Erstellen Sie 3D-Szenen in Cinema 4D? Cinema 4D Rendering kann langsam sein, wenn die Szene komplex ist, aber es gibt Möglichkeiten, das C4D-Rendering zu beschleunigen, lassen Sie uns diese erkunden.
Is There Any Good Service for Cinema 4D Cloud Rendering?
C4D
Cinema 4D is a very good tool for animation, modeling, and rendering, but sometimes the rendering is very slow. There are many factors that affect C4D rendering speed. This article tells you how to improve Cinema 4D rendering and introduce the best C4D cloud rendering service to you.
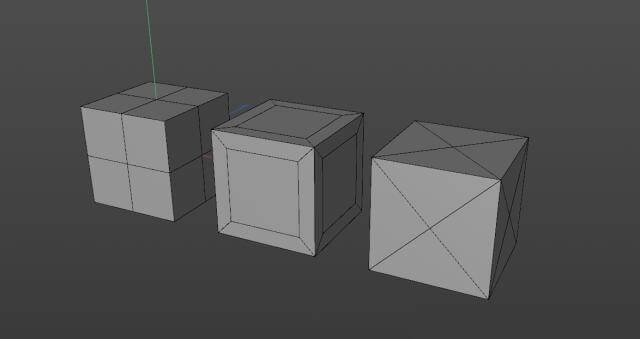
What are topology and retopology of 3D models?
C4D Render Farm
How to use 3D software to make a good model is related to topology and retopology of the model. Now let's learn what are topology and retopology of 3D models and how to retopologize a model in C4D.

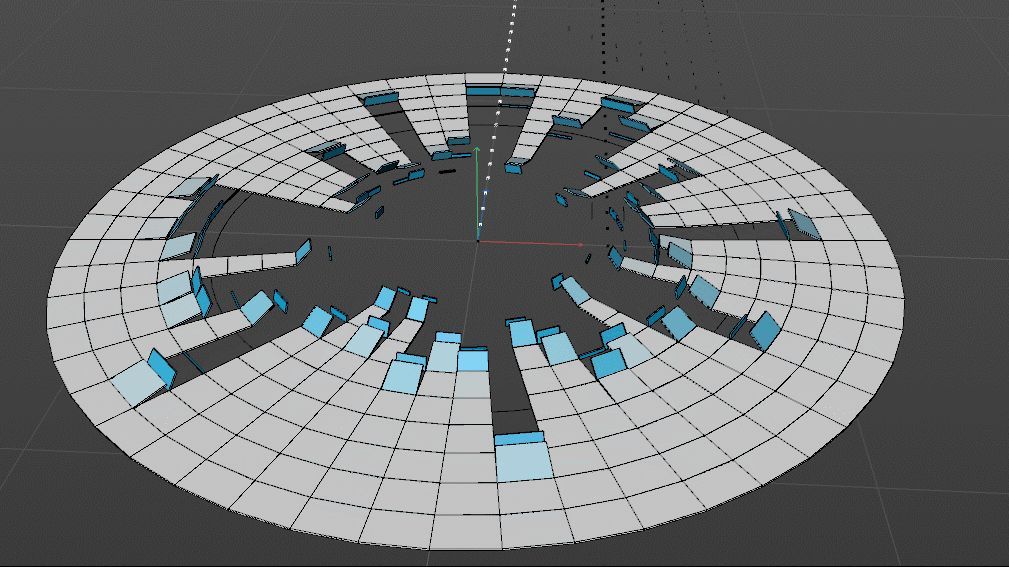
C4D Tutorial: Using Field Forces to Create Diamond Dispersion Effect with Particle Motion on the Surface
C4D
The leading cloud renderingservices provider and GPU & CPU render farm, Fox Renderfarm will share with you a C4D tutorial. In this project, will learn how to use field forces to create a diamond dispersion effect with particle motion on the surface.
C4D Tutorial: How to Animate a Square Collapse
C4D
The best cloud rendering service provider, Fox Renderfarm, will share with you a C4D tutorial from 3d artist Flynn. This tutorial uses the C4D R20 version, if using the previous version, you need to adjust some relevant parameters.

The C4D R21 Version Was Officially Released On September 3
C4D Render Farm
On September 3, 2019, the C4D R21 version was officially released. Here, as the leading cloud rendering service provider, Fox Renderfarm will show you what new features C4D R21 version has updated.

C4D Tutorial of Making 3D Abstract Art Materials
C4D
Are you a user of Cinema 4D? If so, take a look at this tutorial for C4D put together by Fox Renderfarm, the best cloud rendering service provider. Here you will be taught how to make 3D abstract art materials.

Interview with MAXON About the Cooperation with Fox Renderfarm
MAXON
Fox Renderfarm is so glad to have the precious opportunity to have an interview with Friederike Bruckert from MAXON about their product Cinema 4D and how the cooperation could benefit both MAXON and Fox Renderfarm, please check the detail interview as below.Fox Renderfarm: Hi, would you please give a brief introduction about Maxon and your product C4D?MAXON: MAXON is a company founded more than 3

Cinema 4D Tutorial: Making a Ring Full of Small Balls
C4D
Fox Renderfarm, the best cloud rendering service, will introduce how to use C4D to make some shapes full of rings in this tutorial. The reference work was originally made by a 3d artist from Behance.

C4D Tips - Set Your Own Custom Preset
C4D Render Farm
This article is organized from the leading cloud rendering services provider in the CG industry, Fox Renderfarm. This is a Cinema 4D tips, I hope it can help you.