Top 9 Best And Free Blender Render Farms of 2025
2023-05-06


Maya Tutorial丨Practical UV Techniques
Maya
In this article, we join forces with Fox Renderfarm, the top cloud rendering service provider and render farm in the industry, to bring you an in-depth exploration of Maya's powerful UV unwrapping and UV layout planning features. Prepare to unlock new realms of efficiency as we unveil techniques that will streamline your 3D modeling workflow, empowering you to harness the full potential of UV mapp

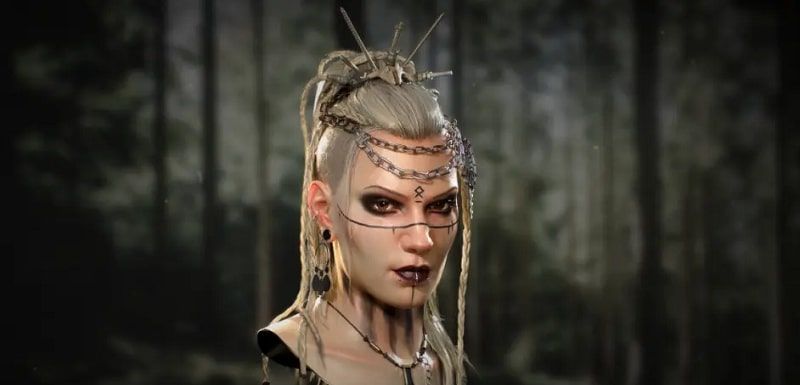
Insights and Sharing on Creating the Next-Gen Scene 'Sacred Relic Box’
3D Tutorial
In this article, the leading cloud rendering service provider and render farm, Fox Renderfarm will introduce you to the imitation work of a personal prototype designer, old Xia, “Sacred Relic Box” production process.This is the author's first attempt at creating a PBR workflow. Next, let me introduce the creative process, the challenges encountered during the creation of this scene, an

How to Create the Animated Water Material with Maya
Maya
As a leading cloud rendering service provider and render farm in the CG industry, Fox Renderfarm has organized a Maya tutorial article for you. Next, let's see how to use Maya to create the animated water material.The animated water will look like the following image:Image from the InternetMaking ProcessFirst, create a plane and assign it Ai Standard Surface.Add a Noise node to Color.Replace Noise

Learn How to Make a Henry Cavill Superman in 3D
Maya
If you're a 3D learner and love the Superman movie, it's time to make a 3D Superman just for you. Now, follow the industry's best cloud rendering service provider and render farm, Fox Renderfarm, to see how CG artist H cheng made his Superman.Final results of 3D Henry Cavill Superman:The tools used in making 3D Henry Cavill superman are as follows:High-poly: ZBrush, Marvelous DesignerTopology: Wra
How To Rebuild Avatar With Arnold For Maya
Arnold for Maya
In 2009, a sci-fi film Avatar swept the world. This film won a lot of honors, but as a CG enthusiast, the greater fun is still exploring the production process of this film. In Avatar, many characters and scenes are made using Maya. As the leading cloud rendering services provider and render farm, Fox Renderfarm will introduce the Avatar as a case by Arnold and Maya to introduce the software.Part
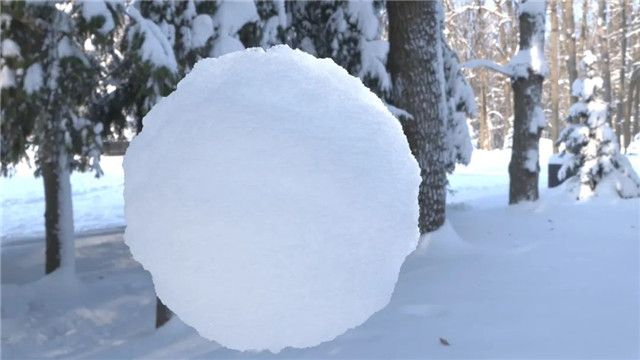
How to Create Snow Material in Maya?
Maya
In this article, Fox Renderfarm, the industry's leading cloud rendering service provider and render farm, will bring you a Maya tutorial about how to create snow material in Maya.Step 1. Create an aistandsurface material.Step 2. Add two parallel lights and render.Step 3. Connect a displacementShader.Step 4. Connect a Fractal node to the displacementShader and give Displacement a value (here 0.2).S

Maya Tutorial: The Making of Rocket Flame
Maya
In this article, the best cloud rendering service provider and render farm in the CG industry, Fox Renderfarm will share with you a Maya tutorial on how to make a rocket flame without particles. This method is easy, fast and doesn't take up much rendering time. It is a good choice when dealing with some long distance or unimportant shots.ProcessCreate a cylinder and delete the bottom round face.As

Create Non-Interactive Hair Mapping Using XGEN | Maya Tutorial
Maya
When creating animal hair with XGEN, if we want to use a mapping to make the color of the animal hair, it is very easy to achieve with interactive hair. But once we use non-interactive hairs it's a bit more of a toss-up. In this article, the leading cloud rendering service provider and render farm in the CG industry, Fox Renderfarm will share with you how to use a mapping to generate hair color un
Which is Better, Maya or Blender?
Blender
If you want to learn about 3D, then you must have heard of Maya and Blender, both are commonly used 3D software, but which one is better? Here's an article about the difference between Maya and Blender from the best cloud rendering provider and render farm, Fox Renderfarm.What is Maya and what is Blender?Maya is a 3D computer graphics application developed by Alias Systems Corporation and currentl

3D Tutorial: How to Make a 3D Gorilla?
ZBrush Tutorials
Do you want to know how to make a 3D gorilla? In this article, the leading cloud rendering service provider and render farm in the CG industry, Fox Renderfarm shares with you a tutorial from H cheng on how to make a 3D gorilla.© H chengH cheng's ArtstationThe software and tools used for the production of each process in this tutorial are as follows:High poly:ZBrush,MD(Marvelous Designer)Topology:W

How to Quickly Realize Holographic Projection Effect in Maya
Maya
Fox Renderfarm, a leading cloud rendering service provider and render farm in the CG industry, shares here a quick way to create holographic effects, which is very simple and uses only 3 nodes.Realize Holographic Projection Effect in Maya Step by StepPrepare a model (complex model structure is relatively easy to be checked out).Create 3 core nodes: AiStandardSurface,aiMultiply,aiFacingRatio.Connec

Can Maya Be Used to Make Games?
Maya Render Farm
What is Maya?Autodesk's Maya is the renowned 3D modeling and animation software that integrates the world's most advanced modeling, animation, visual effects and rendering technologies into a complete solution.Maya's CG functionality is very comprehensive, including modeling, particle systems, hair generation, plant creation, costume simulation and more. It can greatly improve the efficiency of de