close

Using Arnold For Maya To Make A Work "Empress"

Using Arnold for Maya to make a work Empress

This work was invited by 3D Artist Magazine, and then according to a portrait of a Chinese ancient queen, the following will explain the whole process of production, using the Maya, Arnold renderer, ZBrush, Photoshop, Nuke and so on.

1. Collect reference pictures

Finding reference pictures is a very important part, and this part has cost a lot of time.

Using Arnold for Maya to make a work Empress-1

2. Making Model

The model is first built in Maya and then placed in ZBrush for engraving. Except for the more complicated models (such as decorations on the hair, chairs, etc.), the other ones are first carved in DynaMesh in ZBrush, and then Decimation is used. Master reduces the number of faces and then exports.

Using Arnold for Maya to make a work Empress-2

Using Arnold for Maya to make a work Empress-4

Using Arnold for Maya to make a work Empress-6

Using Arnold for Maya to make a work Empress-7

3. Making maps

All textures are done in Mari. Face skin first finds a female face projection, simply remove the pores, because the pores wrinkles are carved in ZBrush, so you can export the ZBrush displacement map to Photoshop and turn it into a High Pass image as the skin texture is superimposed on the skin.

Using Arnold for Maya to make a work Empress-8

The hardest part of the clothes is to look for references to the above patterns. Once it is determined that the production is very simple, first put the shading and then cast the pattern. Remember to divide the layers among Mari, so it is very convenient to adjust later.

4. Making materials

Here we use the gray mold to adjust the displacement and bump, then adjust the highlight, and finally the color and SSS.

Using Arnold for Maya to make a work Empress-9

5. Making hair

The hair uses the Xgen that comes with Maya. After combing the hair, comb it with a comb and adjust it with several different tools.

Using Arnold for Maya to make a work Empress-10

Eyelashes use another method of creating Xgen, creating a guideline and then generating eyelashes.

Using Arnold for Maya to make a work Empress-11

6. The final rendering

This work uses the Arnold renderer, set as follows,

Using Arnold for Maya to make a work Empress-12

The rendering output format is EXR, and finally, the Nuke compositing is imported. First add all the colors, highlights, and sss together, then use Mask and various condition layers to adjust the brightness, color, saturation, gamma and add atmosphere.

Using Arnold for Maya to make a work Empress-14

Using Arnold for Maya to make a work Empress-15

Using Arnold for Maya to make a work Empress-16

Using Arnold for Maya to make a work Empress-17

Translated from an article written by 3D artist, Lu Ang

Welcome to join us

render farm free trialCHRISTMAS SUPER SALE

Recommended reading


Top 9 Best And Free Blender Render Farms of 2024

2024-08-30


Revealing the Techniques Behind the Production of Jibaro "Love, Death & Robots", Which Took Two Years to Draw the Storyboard

2024-08-30


Top 10 Free And Best Cloud Rendering Services in 2024

2024-11-08


Top 8 After Effects Render Farm Recommended of 2023

2024-08-30


Shocked! The Secret Behind Using 3D to Make 2D Animation was Revealed!

2022-05-11


How to Render High-quality Images in Blender

2024-12-04


Easy Cel Shading Tutorial for Cartoon in Blender Within 2 Minutes

2022-07-01


Top 5 Best and Free 3d Rendering Software 2024

2024-01-19


Partners

Interested

How To Rebuild Avatar With Arnold For Maya
In 2009, a sci-fi film Avatar swept the world. This film won a lot of honors, but as a CG enthusiast, the greater fun is still exploring the production process of this film. In Avatar, many characters and scenes are made using Maya. As the leading cloud rendering services provider and render farm, Fox Renderfarm will introduce the Avatar as a case by Arnold and Maya to introduce the software.Part 1. Collection of materialsMaterial collection is an important step, and the more time you spend collecting material, the less late errors will be. When making the Avatar model, I used the web to collect a lot of real material and video reference. You can add some of your own understanding during the production process. You can also try different brush strokes when post-production in ZBrush, and finally unify the whole character. Here are some of the materials I collected. Part 2. Maya basic modelUse Maya's own box as the basic model, first adjust the general proportion, and then start from the large-sized model parts, so that you can grasp the overall feeling of the character in a relatively short time, and easily modify the scale. As far as possible, the wiring should be as clean as possible. It is not necessary to describe too much detail. In particular, pay attention to the structural turning of the head to facilitate engraving later.Step 1: This role, gives me the feeling is a combination of feline and human face, the upper part of the face is a lion, the lower part is a human. I decided to put more effort into her lower half of the face and tried to understand the upper half of the cat's face. After analyzing these things, we can grab some of her characteristics to start modeling.I made a simple model, this time there are very few lines, it is very convenient for you to adjust the feeling. At this time, the proportion and position of the character's lower jaw and facial features were fixed. Step 2: Add one line while adjusting and perform local detail processing.Eye, eyebrow and cheekbones, here are the low mold and final wiring diagram. Part 3. Adding ZBrush DetailsAccording to the previous reference to determine some of the details of the role structure, subdivision in ZBrush, improve the number of faces of the model to add some details to the model. For example, pores, texture of the lips, etc.Step 1: First perform Maya's cleanup to check if there are more than four sides. Export the obj model without problems. Step 2: Import ZBrush to add details. Use a few skin brushes. Detail breakdown and detail addition. Part 4. Mapping the TextureBecause there is already a film and television as a reference, the texture is closer to the content of the film. Here are some of the material I collected.You need to make sure the uv is correct before drawing the texture. I am using the UVLayout plugin to split the model UV. Pay attention to the position of the tangent at the time of splitting, try to put it in the place where it can't be seen, so as to avoid the seam problem. The mapping of the texture here is made by combining Mari and ps. In order to quickly grasp the process of drawing textures using mudbox here. These are the uv splits using plugins. It's worth noting that sometimes splitting out is not ideal and needs to be re-edited in the Mayauv editor.The overlapping parts in the red part of the figure can be adjusted in the uv editor. The final result is as follows. After the UV editing is done, it is necessary to draw the texture and draw it here using the mudbox.Firstly, subdivide the model and then export obj. The second is to open the mudbox and import the model. Select a brush. The shader looks at your personal habits and can switch between viewing highlights and non-highlights. Select the brush and click New Layer on the model to select the map size and format as needed.I am here to choose 4096*4096 size for clarity. And named as the background color, in order to put the background color on the model, to prevent the back when painting the map. The new layer adds the pattern, which can be adjusted in conjunction with the layer blending mode. To achieve the right results. Generate textures and export them after making multiple adjustments. And add textures in ps. And the root layer is created to generate the corresponding 3s highlights and bumps.Part 5. RenderingLight setting: The first step, we basically use the most basic three-point lighting principle to first adjust the intensity of light to achieve the required intensity. Note that this is the arnold renderer that is utilized, so the default light is attenuated with light. The lighting test of the advanced model (the model without the map) pays attention to the contrast of the cool and warm of the light.The three-point lighting is generally the primary light source auxiliary light and contour light, pay attention to the contrast between the main light source and the contour light. There is also an application with skydemo light to simulate the surrounding environment.Setting of the shader ball: In order to better express its texture and skin characteristics, we will use the corresponding skin material.The first step: Since the texture has been drawn before, the respective skin layers whose inherent color is blue are also adjusted according to the inherent color. Connect all the textures to the corresponding properties of the shader and adjust the parameters.Here, five textures are connected to the skin's three-layer highlight and normal map. Then adjust and test the lights.Render channel output: Render the corresponding channel, which is more convenient to adjust later.They are id, normal, highlight, ao, sss, etc.Channel synthesis: The rendered layer is synthesized in ps, the ao channel is synthesized by the method of the film stacking, and the highlight channel is synthesized by the screen method. The normal channel can be synthesized in nuke to re-adjust the light. It is possible to directly adjust the eyelashes and adjust the background lighting effects and color in the ps.Adjust the desired effect with the final adjustment. That's all there is to explain about the making of Avatar, we hope you've been inspired. If you are looking for a render farm, why not try the fast and TPN-accredited render farm, Fox Renderfarm, who offers a $25 trial.
More
2023-04-25
Arnold for Maya Tutorial: How to Render Wireframe
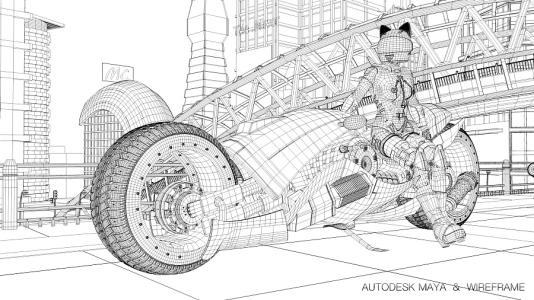
When making some work, we need to render some special effects, such as only showing the wireframe of the model. In this article, Fox Renderfarm, your best cloud rendering service provider, will show you how to use Arnold for Maya to render the mesh, show the model in wireframe or show the individual wireframe alone.Arnold rendererFirst, you need to modify the settings in the Arnold renderer, and then open the Hypershade to select the shader aiWireframe, the shader that implements the wireframe.aiWireframeLet's look at the properties of the aiWireframe shader, the detailed values: Edge Type is divided into Polygons, Triangles, Patches; Fill Color: This is the colour of the entity of the model itself. After testing, this node is connected to SurfaceMaterial for transparency and masking, but it has no effect, so, the node should be able to accept RGB information. About the LineColor the LineWidth, shown as below,Settings of aiWriteframeThe setting of this material is used as backup content for later use. We use this node as transparency information, to link the rendered material transparency node. We add the basic Arnold shader aiStandarSurface to the model to be rendered, and we can choose to adjust the colour in the basic shader.The key step is to connect the aiWriteframe shader we made earlier to the Opacity node of the basic shader.aiWriteframe link transparent nodeNext, we need to remove the Opaque node from the basic attributes of the model. A model can easily adjust the Opaque node in Arnold. But if there are many models, it will waste a lot of energy and time to adjust each model in turn.In Maya, you can adjust multiple model attributes at the same time through the attribute bar.Remove Opaque in the attributeThe method of batch adjustment of model attributes is in the AttributeSpreadSheet of GeneralEditors under windows. The detailed selection of the attributes of the model is to render the first AIOpaque in the Arnold window, and then click to enter 0. 0 is off and 1 is on here.Modify model properties in bulkLet's take a look at the test results. The picture on the left is the rendered reb colour effect, and the one on the right is the effect with channels.So, regarding the grid now that it can be displayed transparently, how to achieve a mask effect that blends transparency and opacity?First, use the same method to make the first shader, and then use Maya’s most primitive basic shader: surfacesShader, this can control the masking effect very well, we use the made aiWireframe to link the Out Color of the surface shader so that we can achieve the transparency effect of the mask.You can see the masked transparency effect below,Basically, this is how it is made. Of course, you can also use this method to make other effects. Fox Renderfarm hopes it will be of some help to you. As you know, Fox Renderfarm is an excellent cloud rendering farm in the CG world, so if you need to find a render farm that can help you render Arnold or Maya faster, you can try Fox Renderfarm, which is offering a free $25 trial for new users who sign up!
More
2024-08-30
Animated Short Film "Survival" Scene Production Analysis
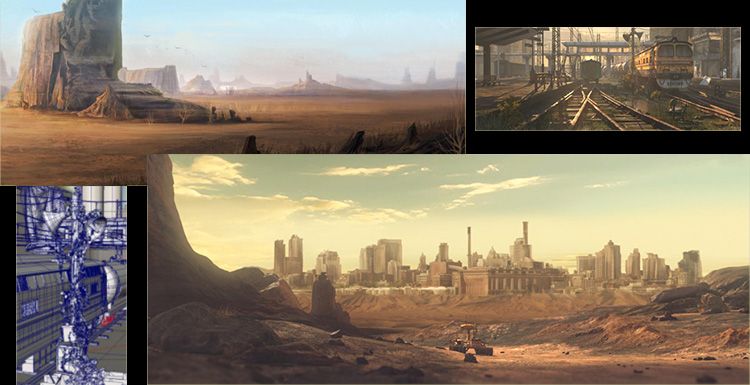
This time, our render farm brings you an analysis of the animated short film "Survival" scene production. As the leading cloud render farm in the CG industry, Fox Renderfarm has always been committed to providing artists with affordable, reliable and secure cloud rendering services. It also encourages outstanding artists to make good works and promote the production of their works, and let more people know them and their excellent works.This article brings about the production and analysis of the animated short film "Servival" produced by CG artists Li Yicong, Sun Ningning, Xing Luyue, Shi Tao and Li Yongcong. The software used is Maya, Arnold, AE, Nuke and so on.A brief introduction to the short filmThe short film tells that in a city where energy is exhausted after the end of the world, a lonely little robot relies on finding a waste battery in the city every day to live alone, until he finds that the city has no more disposable batteries to use, but he has no choice but to go home. Packing up the luggage, reluctantly pulling his own stroller, leaving the city, embarked on the road to find new energy.The specific production processPrevious periodThe script is written by members and then determined through multiple discussions based on the technical level and conditions that can be achieved, and then the character design and scene design by the pre-art.MemoriesModelingI found a lot of references during modeling, and I used to make up for a mechanical principle for a while. However, the animated character and mechanical design are not exactly the same. Consider the functions of action binding, emotional expression, and plot. Figure 1 is a partial reference of the character. The mapping is mainly used for Ddo and Mari.Role modelLight renderingScene oneOne of the scenes is the home of the robot, which lives in an abandoned train station. This lens acts as an empty mirror to ease the rhythm and explain the living environment.The robot looked for a day's battery, and the harvest was not much. Because it was far away, it almost lost a life on the way home. The lighting is set in the evening, except that it feels very dull, and it also implies that the small robot has lived in this city for a long time. On the other hand, the evening light effect, the light ratio is strong, the angle between the light, the camera and the object is relatively small, and the surface of the object will produce a beautiful Fresnel reflection. The figure below shows the material properties of the railway.Here you can use three or more textures to represent an object, color map, reflection map, and normal map or bump map. If it is close-up, you need to add a roughness map to make the object produce more rich changes.Backlighting also works well for translucent objects, such as the dirty old glass on the bridge, the grass on the ground, and the semi-transparent effect of all the plant leaves on the vine. In addition, the grass adjusts the wind output in SpeedTree and then imports it into Maya for material adjustment. Special plants need to be created in SpeedTree. Add force field to shape the plant into the shape and growth trend that you want, and then export. Creating plants in SpeedTree allows you to export wind animations to Maya, and plants can move to increase the authenticity of the scene.&x3C;p class=‘img-source’>SpeedTree SoftwarePlants imported into MayaCreate a render layer in Maya, put all the objects into the new render layer, and then add the Arnold base material for layer coverage so that the entire scene is the same material and the texture is ignored. Benefits are,First, when lighting, it can be not affected by the texture of the surface of the object. It can observe and adjust the position of the light and shadow well, and use light and shadow to compose and shape the volume of the object.Second, remove the texture, refraction, etc., the test rendering speed is fast, the adjustment can get feedback quickly. Here you can see that this picture is not completely retrograde, the light source is to the left. At the time, when lighting in the scene, I hope that one side of the locomotive can produce a bright surface, and the lower left corner is too bright, so that the light of the whole scene is too average.Adjust the lights and start making material adjustments and renderings. If you find that many places need to be adjusted after rendering, you can reduce the sampling of all aspects, in order to save rendering time, after many adjustments to the screen you want, if you want the work more realistic and reduce the rendering time, you can use a Maya render farm.In Arnold, it is generally necessary to separate several layers,Scene 2In the home of the small robot, this is a parting scene, where the warm shades of light are used to make a warm and sad feeling, so use the Maya spotlight to simulate the sun's rays, let it produces a light fog to simulate the atmosphere, which can increase the drama and authenticity of the scene.Scene 3Post-production and composite editingThe short film uses Arnold to render a multi-channel synthesis scheme with a total of 13 layers, which is finally synthesized in Nuke and AE.
More
2022-07-01
Business Consulting

Global Agent Contact:Gordon Shaw

Email: gordon@foxrenderfarm.com

Marketing Contact: Rachel Chen

Email: rachel@foxrenderfarm.com

Message Us:
Newsletter
Keep up with our latest software updates, special offers and events!
Copyright © 2024 FoxRenderfarm.com. All Rights Reserved.