Maya 2018 Arnold's Method of Making Motion Vector Blur in AOV Channel
Yesterday, I found that the Arnold of Maya 2018 has a directional error for the motion vector blur method made in the AOV channel. The motion blur method I wrote earlier applies to Maya 2016 and earlier versions, so I spent a little time studying it today. The problem has been solved now, and cloud rendering will use a small case to explain the production steps.
Step 1: Creating the ball as a simple animated scene.

Step 2: Turn on motion blur: Render a reference to motion blur.

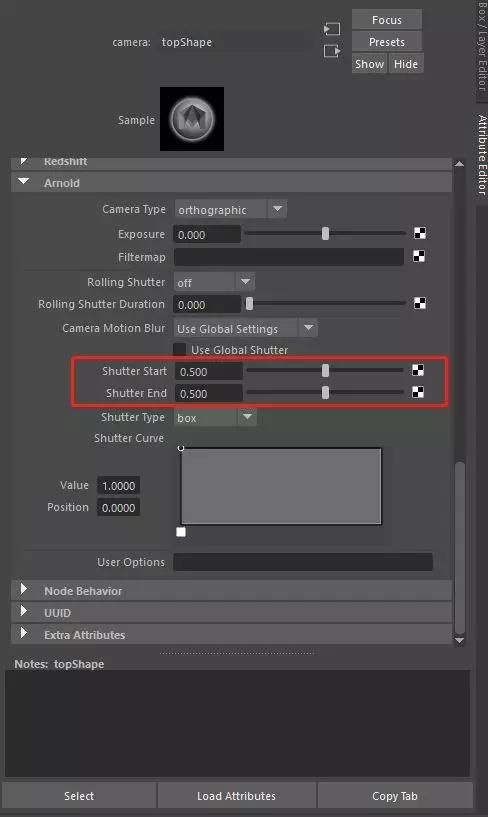
Step 3: Follow the method given in the official Arnold documentation: Change the camera's Shutter Start and Shutter End to 0.5 (why changed to 0.5 because my motion blur type is Center On Frame).
Step 4: Create a channel for AOV motion blur:
Here I will create two motion blur channels:
The first is the motionvector channel that comes with Arnold.
The second is to use the custom motion vector AOV of motion vector shader (giving the aiMotionVector material in the AOV channel).
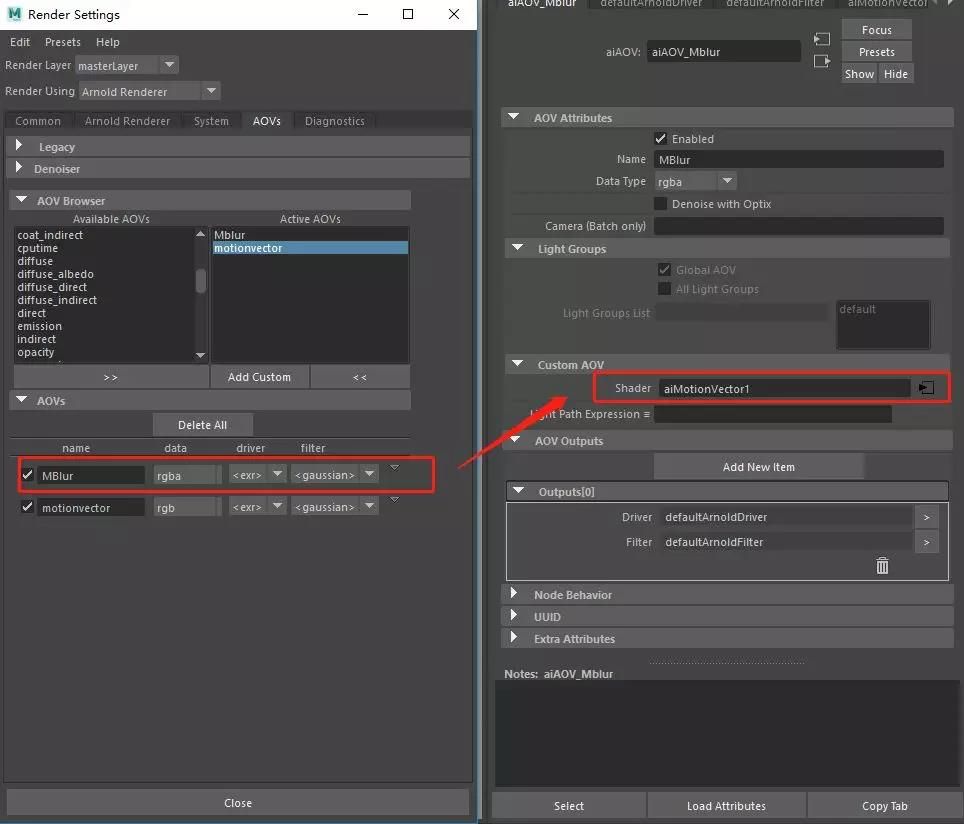
Cloud rendering note: MBlur is named according to your preference. The setting of aiMotionVector was wrote in the previous article.
Step 5: Render this image to see two motion blur conditions.

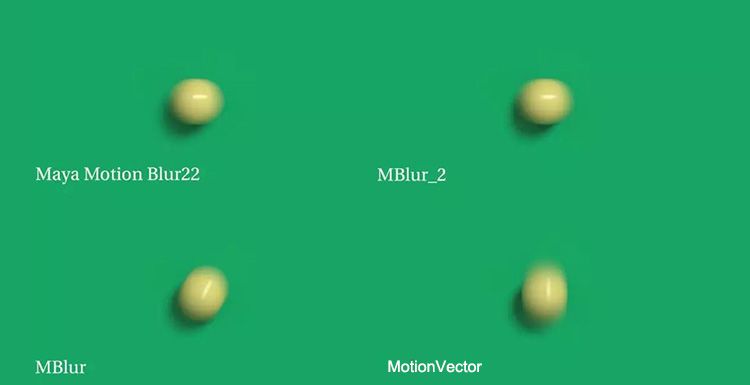
It can be seen that both the motionvector and MBlur motion blur channels in our AOV channel are in the wrong direction.
Step 6: Next I will officially explain how to solve this problem: From the beginning.
A: Turn on the Motion Blur button in the render settings: I chose the Center On Frame mode here.
B: Change the Shutter Start and Shutter End in the camera Arnold attribute to 0.5, respectively, corresponding to the Center On Frame mode.
(Note: When rendering the motion vector AOV, the camera Shutter Start and Shutter End should be the same value.)
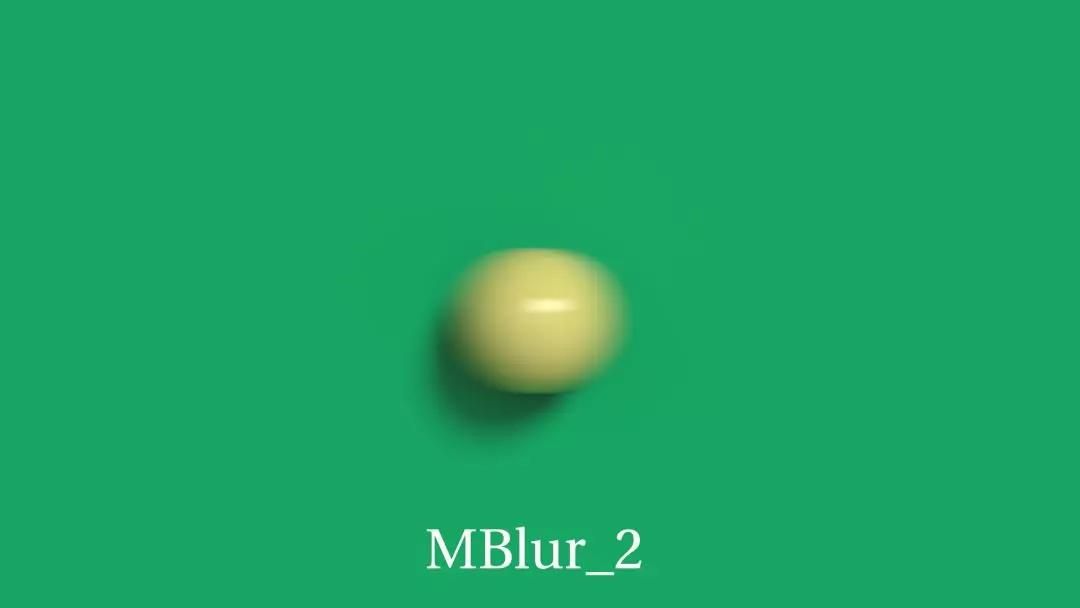
C: Create a new MBlur_2 channel in AOV (to compare with the previous MBlur.)
D: Open the material editor and find the two nodes aiMotionVector and aiVectorMap under Arnold's material panel.
- Connect the outColor of the aiMotionVector node to the input of the aiVectorMap node.
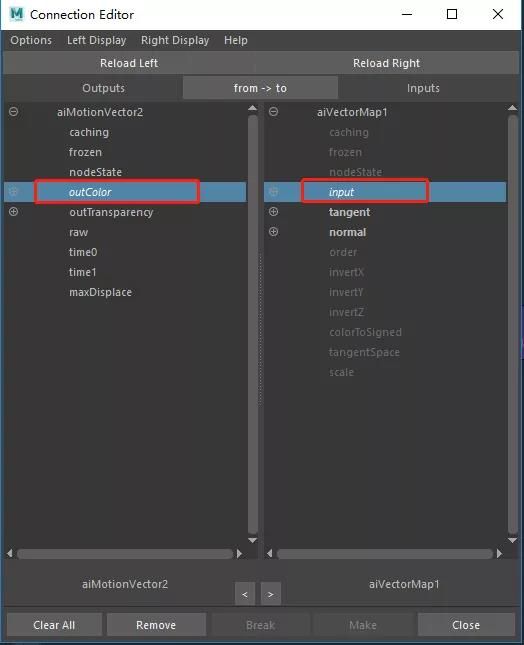
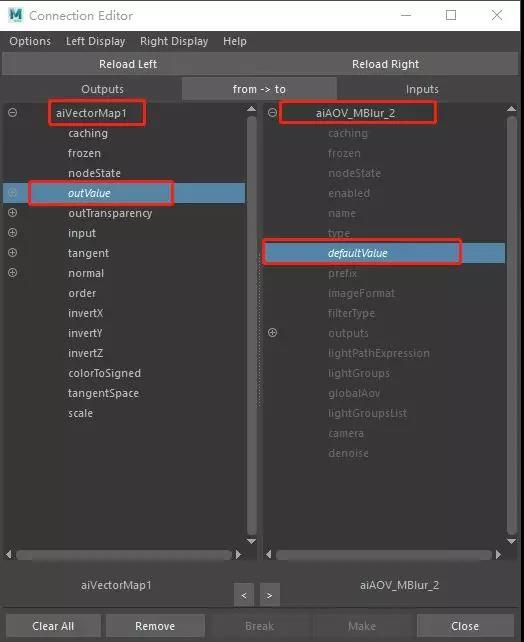
- Then connect the outValue in the aiVectorMap node to the DefaultValue in the Shader property of the MBlur channel in AOV.
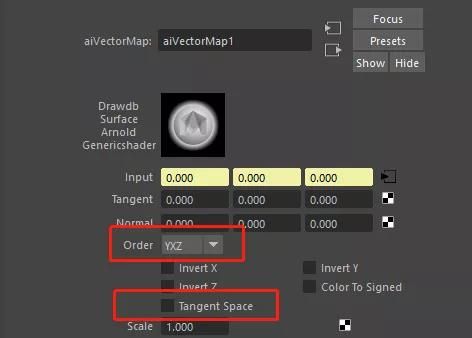
Change the XYZ mode of the Order in the aiVectorMap node to YZX mode and remove the hook of the tangentSpace.
- In the aiMotionVector node, enable Encoding Raw Vector.
E. After the above steps are completed, start rendering the image and view it in Nuke.
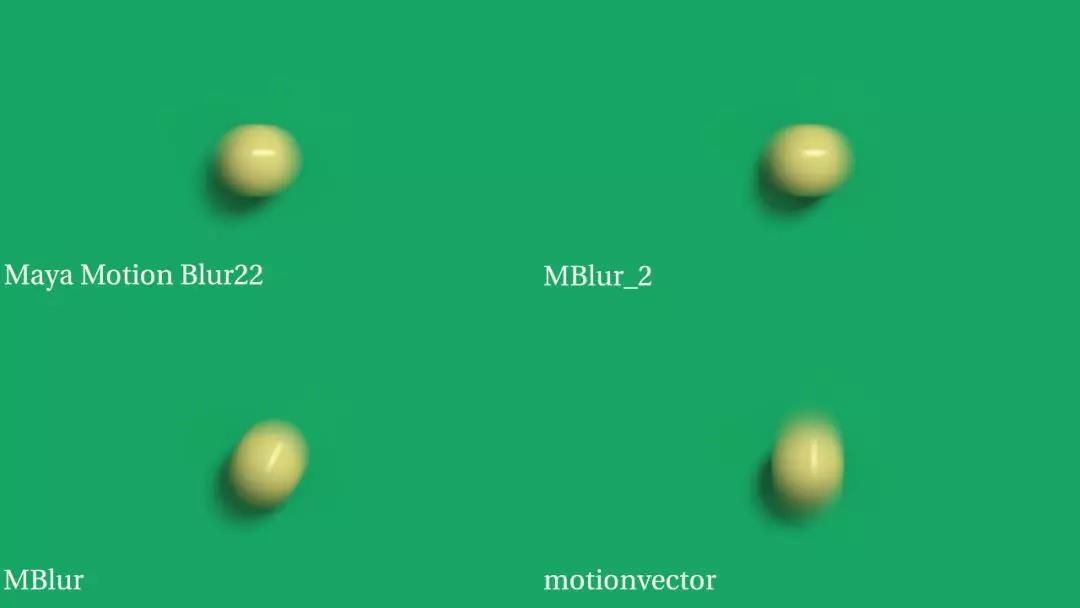
As shown in the figure: Maya's default motion blur is basically the same as the MBlur_2 channel we made in AOV, and the motion blur adjusted by Nuke is basically the same. Of course, I also found a bug in the Arnold renderer, its motion blur channel does not solve the shadow of motion blur, there can be seen in a big picture that cloud rendering attached below.
Fox Renderfarm hopes it will be of some help to you. It is well known that Fox Renderfarm is an excellent CPU&GPU cloud render farm in the CG world, so if you need to find a render farm, why not try Fox Renderfarm, which is offering a free $25 trial for new users? Thanks for reading!
Recommended reading
Top 9 Best And Free Blender Render Farms of 2025
2024-12-30
Revealing the Techniques Behind the Production of Jibaro "Love, Death & Robots", Which Took Two Years to Draw the Storyboard
2025-02-10
Top 10 Free And Best Cloud Rendering Services in 2025
2025-03-03
Top 5 Best and Free 3d Rendering Software 2025
2025-02-10
Top 8 After Effects Render Farm Recommended of 2025
2025-02-10
Shocked! The Secret Behind Using 3D to Make 2D Animation was Revealed!
2025-02-10
Easy Cel Shading Tutorial for Cartoon in Blender Within 2 Minutes
2025-02-10
How to Render High-quality Images in Blender
2024-12-04
Partners
Previous: 3D Tutorial: How to Make a Stylized Character with 3ds Max (2)
Next: Redshift Tutorial: What is Redshift Round Corners?
Interested
