Top 9 meilleures fermes de rendu Blender gratuites
2026-03-26


Top 5 Cinema 4D Render Farm for Fast Rendering
C4D Render Farm
Compare the fastest and most trusted Cinema 4D render farm options in 2026. Find reliable services, pricing, and features for smooth, efficient rendering.

Any Free Render Farm for Cinema 4d, Maya, 3ds Max?
Maya Cloud Rendering
I think you always search for a free render farm for Cinema 4d, Maya, 3ds Max, but you will find that a completely free render farm does not exist, to be honest, most of the platforms needs to charge due to the reasons below.

Is There Any Good Service for Cinema 4D Cloud Rendering?
C4D
Cinema 4D is a very good tool for animation, modeling, and rendering, but sometimes the rendering is very slow. There are many factors that affect C4D rendering speed. This article tells you how to improve Cinema 4D rendering and introduce the best C4D cloud rendering service to you.
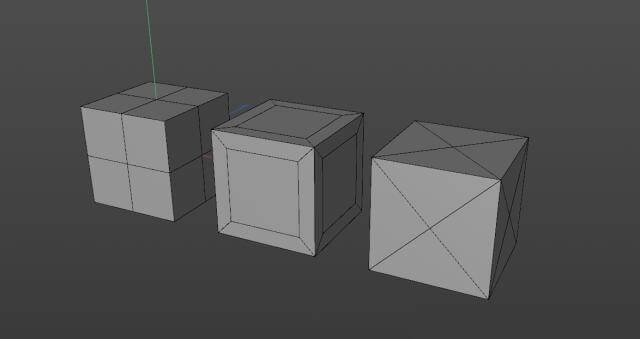
What are topology and retopology of 3D models?
C4D Render Farm
How to use 3D software to make a good model is related to topology and retopology of the model. Now let's learn what are topology and retopology of 3D models and how to retopologize a model in C4D.
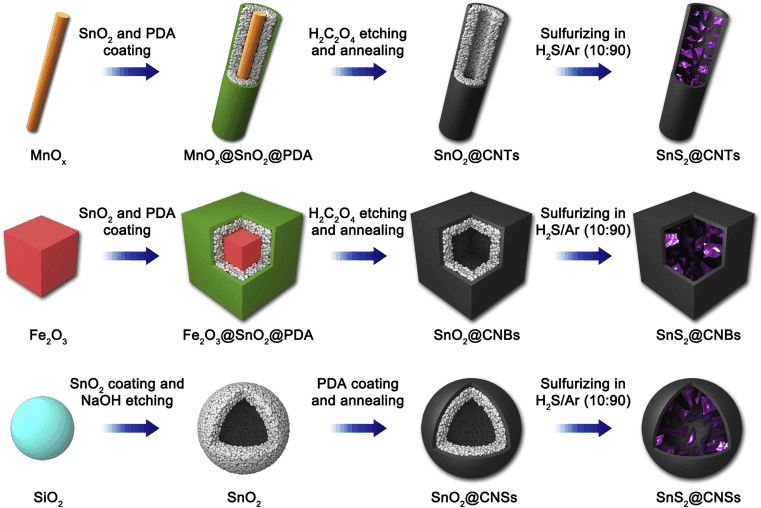
How to Make a Core-shell Structure in Cinema 4D
C4D Render Farm
Fox Renderfarm, the best could rendering service provider, will share with you a Cinema 4D tutorial about how to make a core-shell structure. This tutorial is written by 3d Artist Yuan Liu. Now let’s introduce a modeling method for stacking model of small balls of any shape in C4D software.
C4D Tutorial: How to Animate a Square Collapse
C4D
The best cloud rendering service provider, Fox Renderfarm, will share with you a C4D tutorial from 3d artist Flynn. This tutorial uses the C4D R20 version, if using the previous version, you need to adjust some relevant parameters.

The C4D R21 Version Was Officially Released On September 3
C4D Render Farm
On September 3, 2019, the C4D R21 version was officially released. Here, as the leading cloud rendering service provider, Fox Renderfarm will show you what new features C4D R21 version has updated.

Cinema 4D Tutotial: How to Create Ripple Animation With Field?
C4D Render Farm
Fox Renderfarm, the best cloud rendering service provider and Cinema 4D render farm**, will bring you a sharing about how to create Ripple Animation with the field in Cinema 4D, let’s look over it.

How to Make Pipe Models Quickly in Cinema 4D
Cinema 4D
The best cloud rendering services provider, Fox Renderfarm will share with you a tutorial about how to make pipe models quickly in Cinema 4D.

Cinema 4D Tutorial: How To Make A Nut Chocolate Fluid Ad
C4D Render Farm
This time the best render farm in the CG industry, Fox Render****farm, will bring you a Cinema 4D tutorial on how to use C4D to make nut chocolate fluid ads.

A Tutorial Of Night Illuminator Scene Production By Octane For C4D
Octane for C4D
Octane for C4D is really powerful, especially in addition to the easy-to-use and high-quality rendering of the Octane renderer. Another important reason is speed.

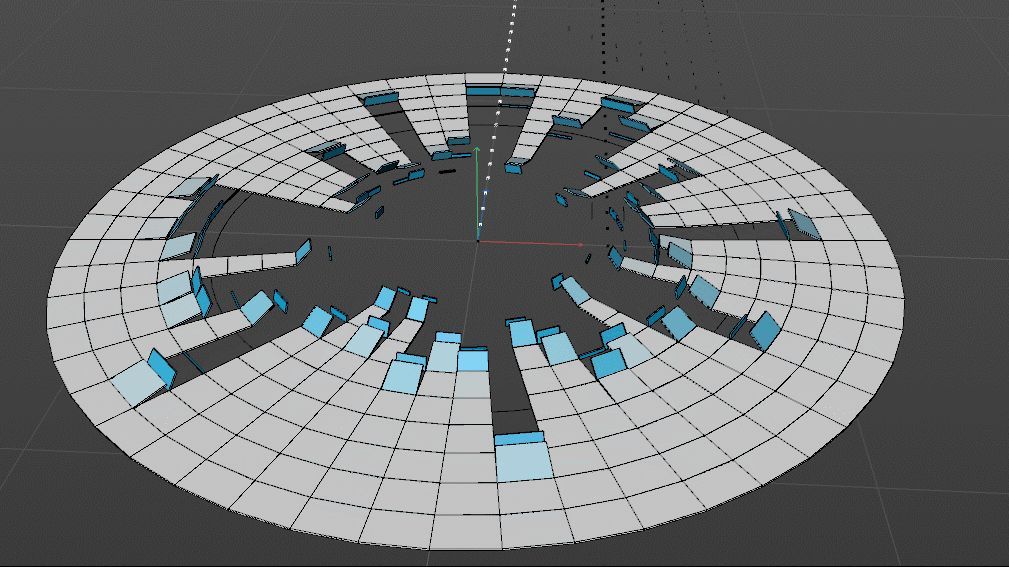
Cinema 4D Tutorial: Making a Ring Full of Small Balls
C4D
Fox Renderfarm, the best cloud rendering service, will introduce how to use C4D to make some shapes full of rings in this tutorial. The reference work was originally made by a 3d artist from Behance.