
 Blender
 Cinema 4D
 Arnold
 3ds Max
 Houdini
 V-Ray
 Maya
 Unreal Engine
 Nuke
 Pricing
 New User Bonus
 Cost Estimator
 Christmas Sale


Your first render job
Follow the four steps below to run the full flow — upload, submit, render, download — using a small scene. This walkthrough uses 3ds Max as the example, but the same flow applies to other supported software.
The flow at a glance
Upload Assets → Submit Job → Analyze & Configure → Render & Download
Get your files to the cloud · Tell the platform how to render · Confirm settings and start · Download the result when done
Note: In the steps below, Assets means the complete set of files you want to render in the cloud (your scene, textures, scripts, plugins, and so on); a Job is a single render task you submit on the platform.
Before you start
1、An activated account (not activated yet? Complete account activation following the on-screen prompts first).
2、Install and sign in to the Raysync transfer tool — it moves your files from your computer to the cloud and brings the rendered results back; both uploading and downloading rely on it. On a new account, the Assets page shows a download prompt automatically the first time you upload.
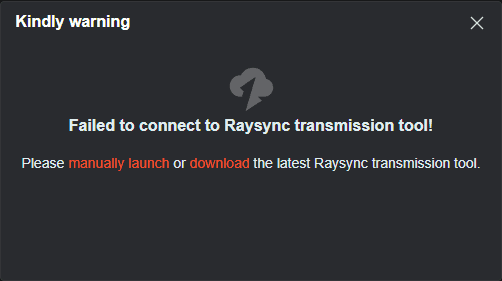
3、Prepare a simple, small scene to practice with: troubleshooting on a large production scene is slow and costly, so run the whole flow on a small scene first.
4、Save your render settings in your 3D software: camera angle, output path, and renderer options are all set (the platform renders according to the settings you saved).
5、Using the desktop client instead? The same steps apply — you submit from disk rather than uploading first.
1、 Upload Assets
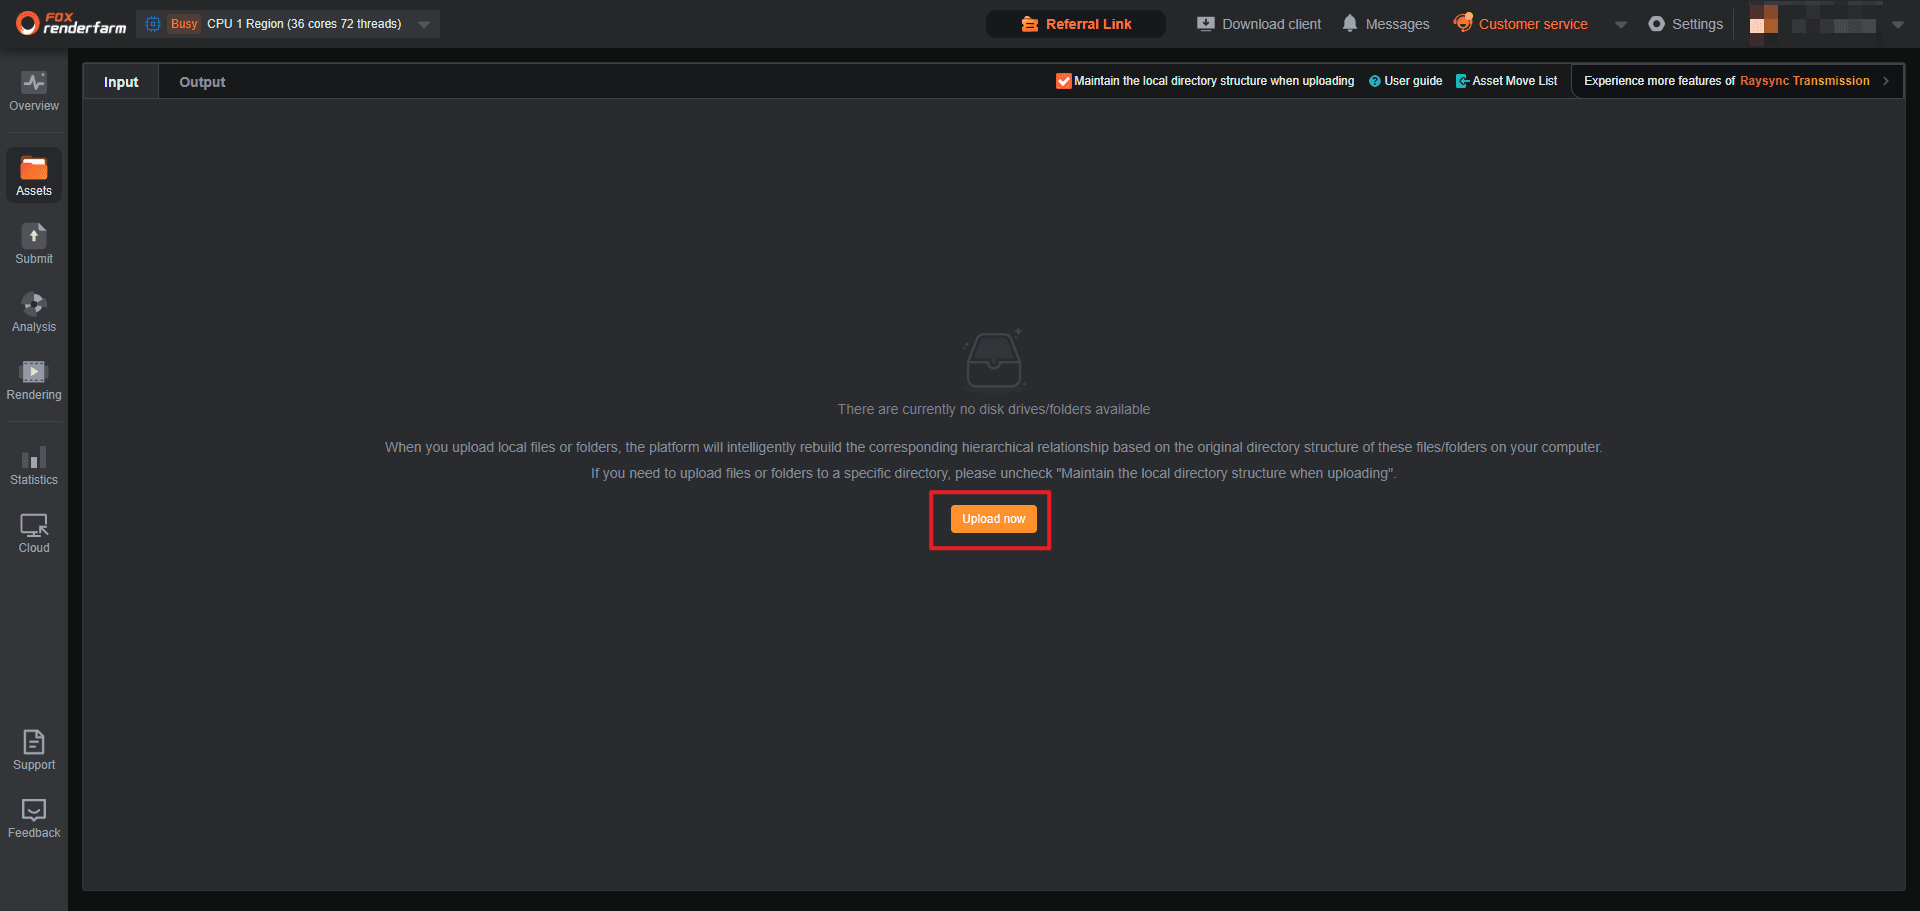
1、Open the Assets page and click Upload.
2、Select your local entire project folder (the folder, not a single project file — textures, scripts, and plugins often live inside the original folder, and missing any one of them will make the cloud render come out wrong).
3、Wait for the progress bar to finish; the upload is complete.
2、 Submit the Job
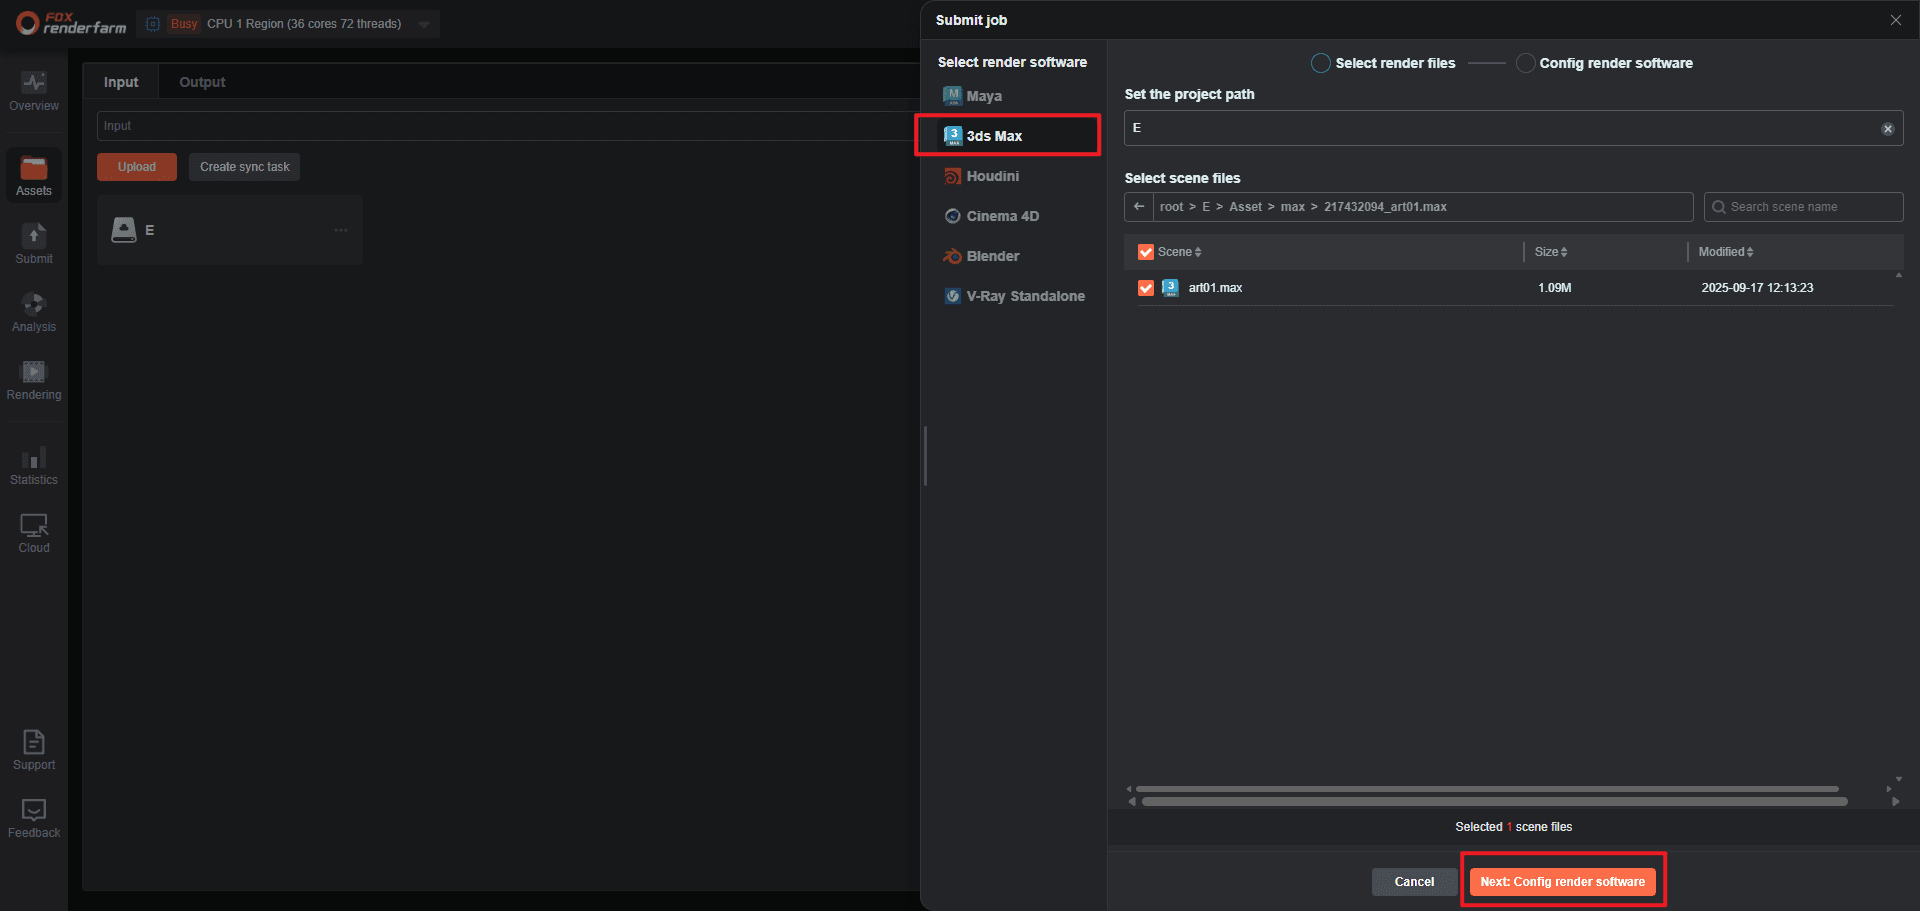
1、First choose the Software (the outer level — this picks the product line you use).
2、Select the file path and check the scene you want to render.
3、Click Next: Config render software to enter configuration.
4、Click Add Config, fill in the four items below, then click Save:
- Name: anything easy to recognize
- Rendering software / Plugin version (inner level): choose the renderer and version your scene actually uses; the wrong choice will fail to render
- Render system: choose Windows or Linux based on the system you used to build the scene — the platform schedules machines of that system to process the job
- Plugin: the plugins your scene uses; if the one you need is not in the list, contact online customer service
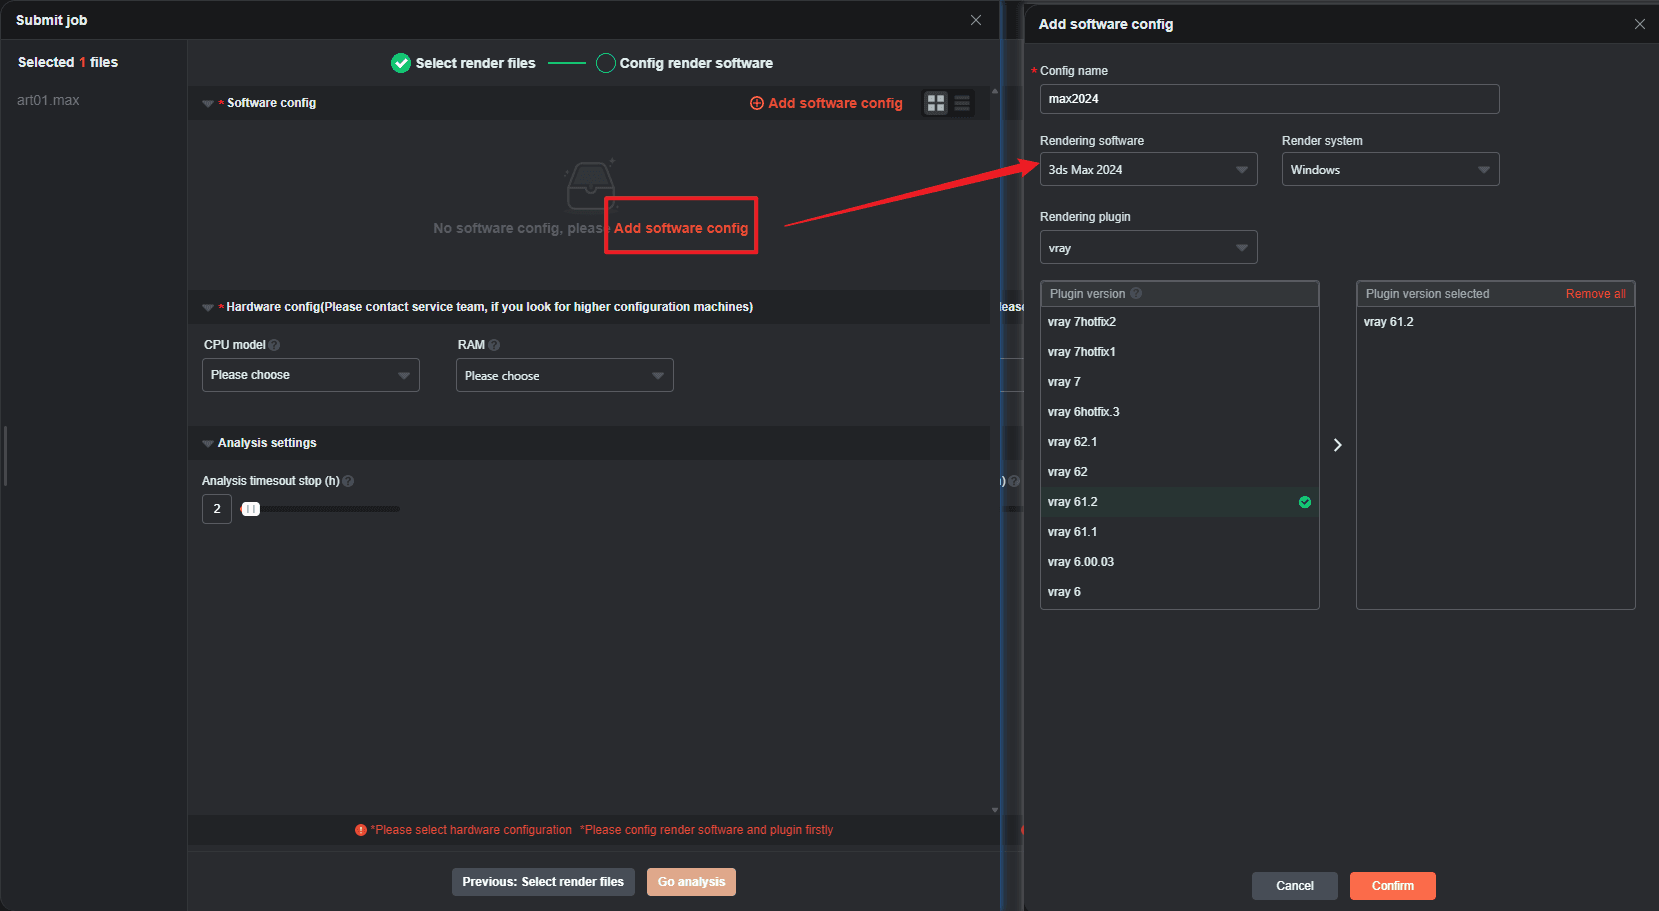
5、Then choose the Software config and Hardware config (hardware configuration: node type and count — this decides how fast it renders).
6、Click Go analysis to start analysis.
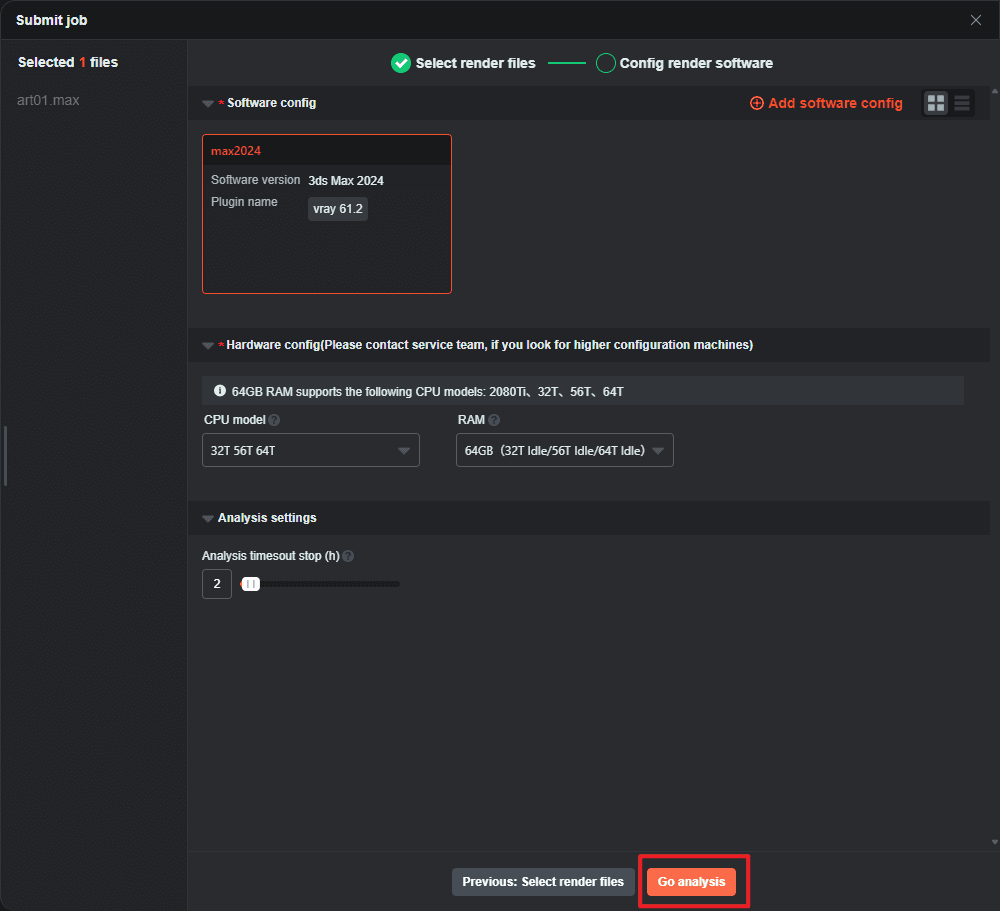
3、 Analyze & Configure
1、When analysis finishes, click Next to go on to the render settings.
2、On the parameters page, confirm three things: camera, output, and format.
3、For the frame range, fill in only one frame at first (render one frame to verify, then batch-render once you are sure — the most time- and cost-efficient approach).
4、Click Submit to Render to submit officially.
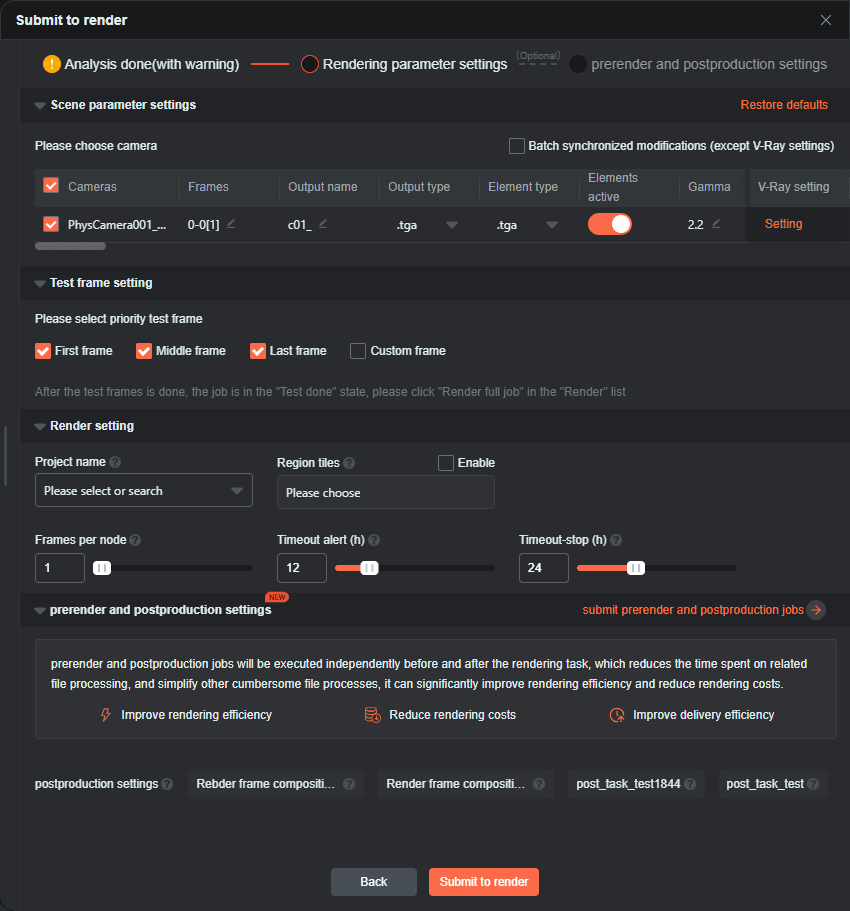
4、 Render & Download
1、Switch to the Rendering page and wait until the job status becomes Done (render complete).
2、Check the job and click Download to bring the result back to your local machine.
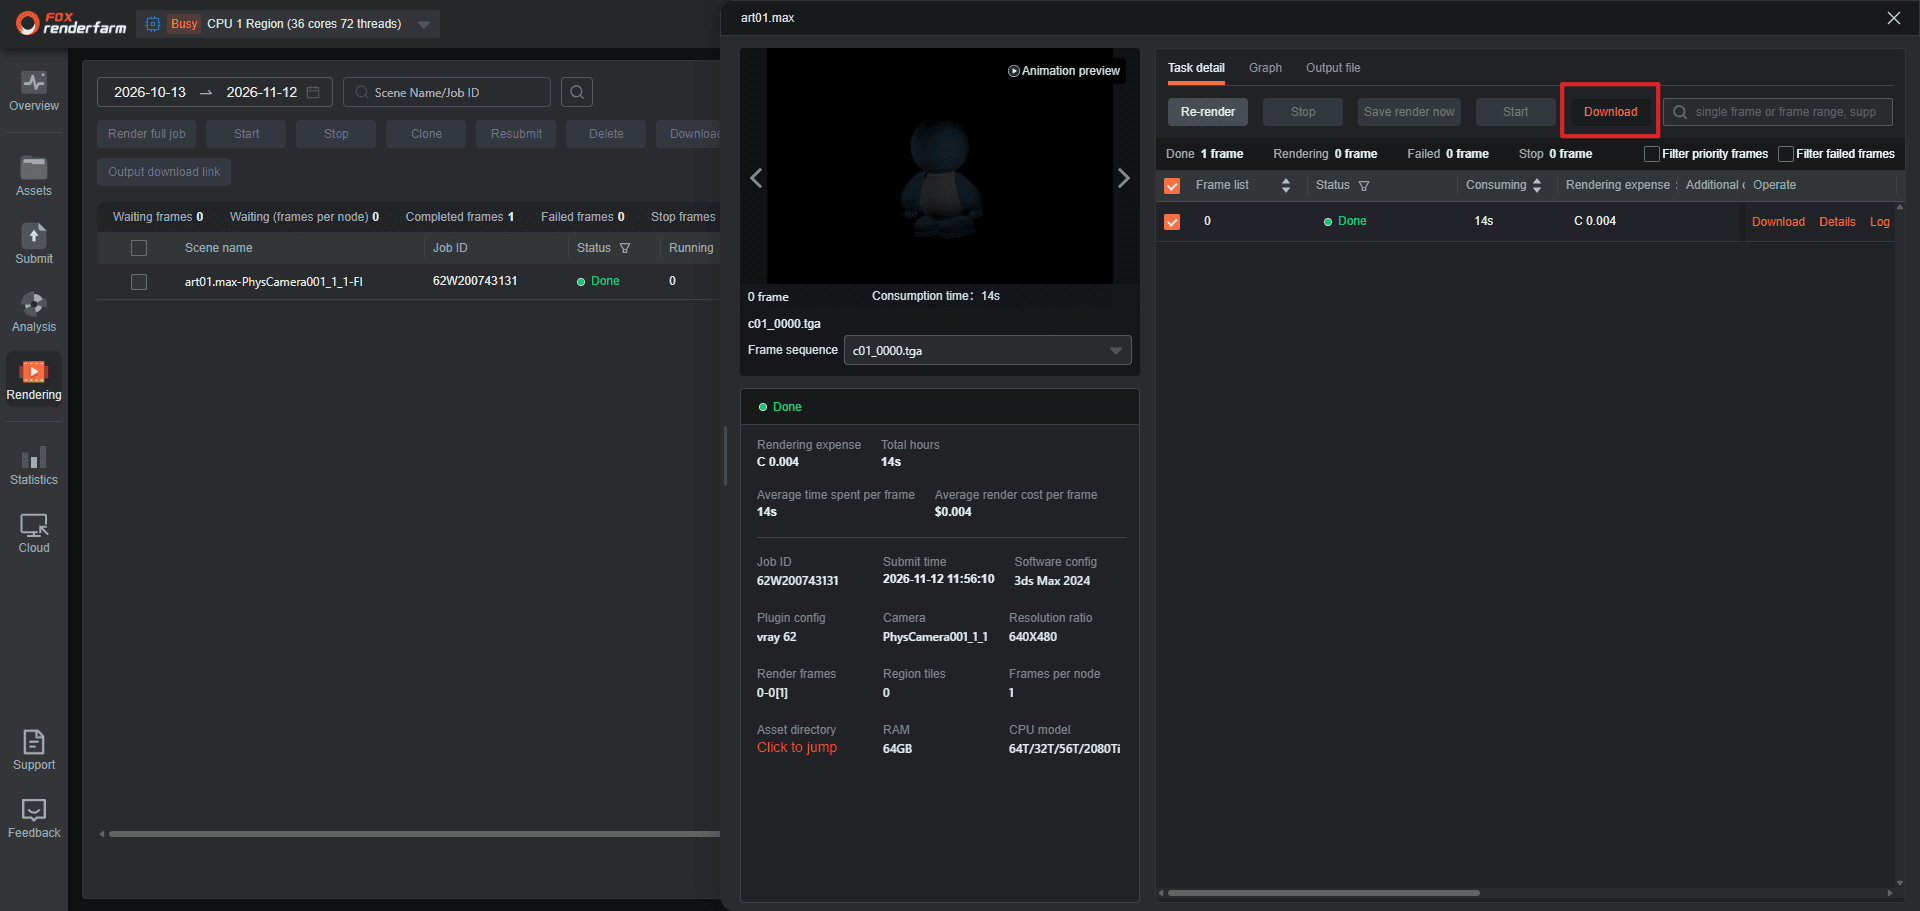
If something goes wrong or gets stuck along the way, contact online customer service at any time, or check the Submit a job section in the user manual for details.


