
 Blender
 Cinema 4D
 Arnold
 3ds Max
 Houdini
 V-Ray
V-Ray Maya
Maya Unreal Engine
 Nuke
NukeDepth of Field in 3D Rendering: Shallow vs. Deep DOF
 Ryan Thompson
Depth of field in 3D rendering can make a scene feel cinematic. Get it wrong, and your hero character may wander into the blurry part of the shot. Used well, it guides your eye, separates subjects from busy backgrounds, and adds believable depth. The effect depends on aperture, focal length, focus distance, and the choice between shallow depth of field and deep depth of field. In this guide, you’ll learn how 3D depth of field works, when to use it, and how to avoid settings that turn bokeh into distracting blur.
What Is Depth of Field in 3D Rendering?
Depth of field in 3D rendering is the range of a scene that appears acceptably sharp around the camera’s focus point. Objects on or near that plane stay clear, while objects closer to or farther from the camera gradually fall out of focus. The soft areas are not simply random blur. They are created by a virtual camera that imitates how a real lens handles light, or by a post-processing effect designed to produce a similar look.
3D depth of field helps you control where the viewer looks. Shallow depth of field can separate a character, product, or prop from a busy background. Deep depth of field keeps more of the scene clear, which often works better for environments and architectural renders. Used with care, depth of field adds scale, mood, and a more natural camera feel. Used too heavily, it can hide details you spent hours building. The goal is not to blur more, but to focus attention with purpose.
What Controls Depth of Field?
Depth of field in 3D rendering is controlled mainly by aperture, focus distance, focal length, and sensor size. These settings work together, so it helps to change one at a time while keeping your camera framing consistent.
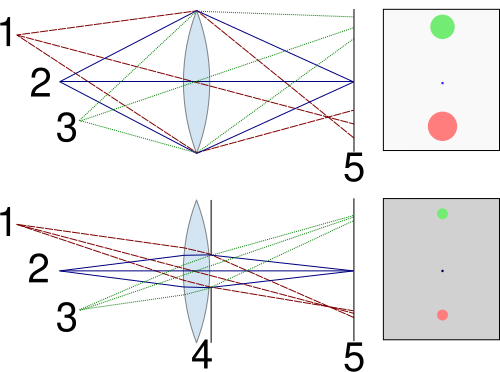
©️BenFrantzDale, licensed under CC BY-SA 3.0 via Wikimedia Commons.
Aperture
The relationship between aperture and depth of field is the easiest to notice. A low f-stop, such as f/1.8, creates a wider virtual lens opening and a shallow depth of field. A higher f-stop, such as f/11, gives you a deep depth of field and keeps more of the scene sharp. Some renderers also connect aperture to exposure.
Focus Distance
Focus distance sets the point that appears sharpest. Focusing on a nearby object usually creates a thinner area of sharpness, while focusing farther away gives you more usable focus. Using an object as the focus target is often easier and more reliable than typing in a distance.
Focal Length
Focal length affects framing, perspective, and the character of the blur. Longer lenses often create stronger subject separation and a more compressed background. Wider lenses usually keep the environment easier to read. Compare focal lengths with the same composition, since moving the camera also changes the final result.
Sensor Size
Sensor size changes the camera’s field of view. It can also affect the focal length or camera position needed to match a real camera. This can change the final 3D depth of field, even when the aperture stays the same.
For a steady workflow, set your composition and focus point first. Choose the focal length next, then fine-tune the aperture. This keeps the controls predictable and saves you from chasing several moving settings.
For a visual breakdown of how aperture, focus distance, and focal length change depth of field, this short guide uses clear real-world examples:
Shallow vs. Deep Depth of Field
Shallow vs. deep depth of field is about choosing what the shot needs, not picking the option that looks more cinematic. Both can feel realistic, and both can weaken a composition when used without a clear purpose.
Shallow Depth of Field
A shallow depth of field keeps a narrow area sharp while the foreground and background fall into blur. It works well for character close-ups, product renders, small props, and focus pulls. You can use it to separate your subject from a busy set and guide attention to a specific detail. Keep the blur believable, especially around faces and product edges.
Deep Depth of Field
A deep depth of field keeps a wider part of the scene in focus. It often works better for architectural visualization, landscapes, environment shots, and technical images. Viewers can study the whole frame without losing important details. Strong lighting and composition can still create a clear focal point.


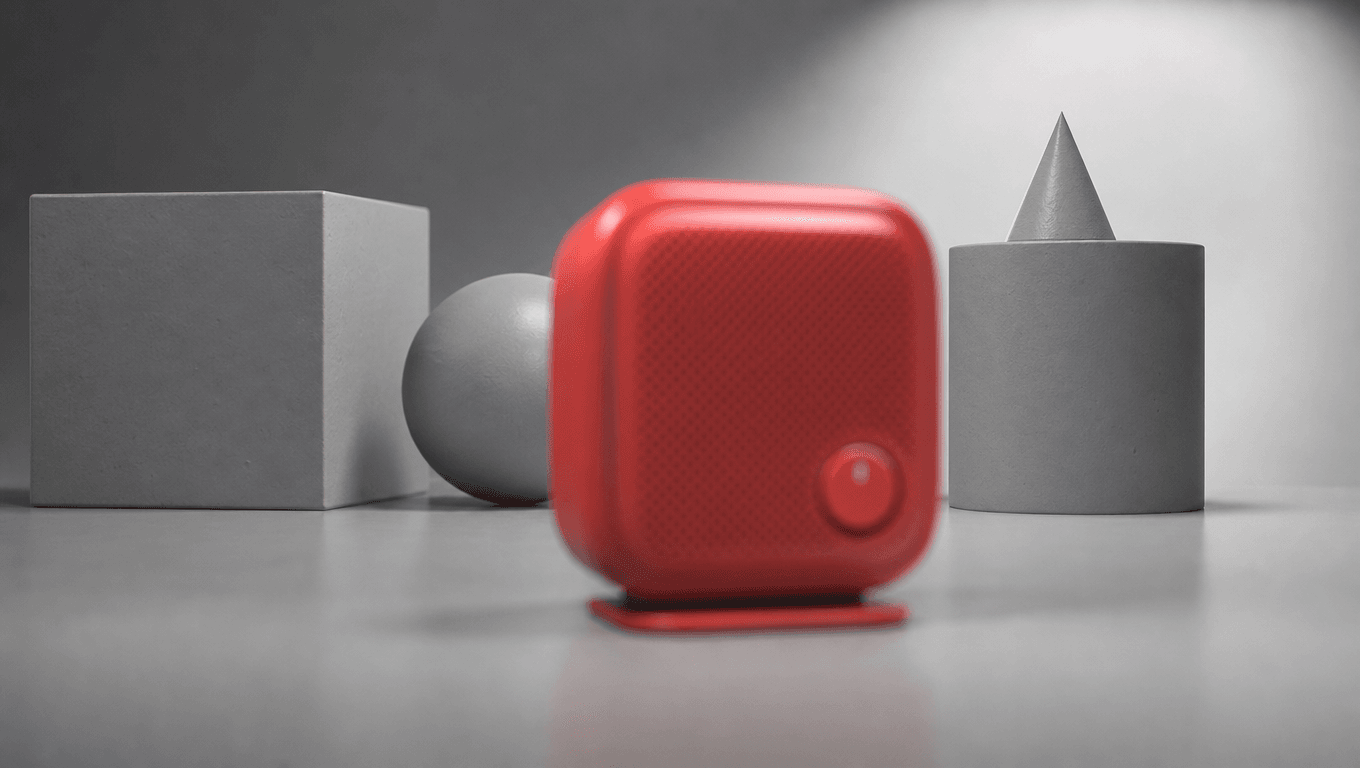
©️NightWolf1223, licensed under CC BY-SA 4.0
Shallow depth of field at f/1.8 compared with deep depth of field at f/22
|
Feature |
Shallow Depth of Field |
Deep Depth of Field |
|
Best for |
Close-ups, products, focus pulls |
Architecture, environments, technical images |
|
Visual result |
Strong subject separation |
More of the scene stays clear |
|
Main risk |
Important details become soft |
The frame may feel busy or flat |
When setting depth of field in 3D rendering, begin with the purpose of the shot. Use shallow focus to isolate your subject and deep focus to explain the space. It’s recommended to have a simple test render of each option than guessing from the viewport.
How to Use Depth of Field in a 3D Production Workflow
Depth of field in 3D rendering is easier to manage when it grows out of the shot, not out of a last-minute setting change. The following workflow keeps things simple.
Step 1: Start With the Shot, Not the Settings
Look at the frame and decide where you want the eye to land. A close-up or product shot may benefit from shallow depth of field. A room or wide landscape often needs deep depth of field so the space remains easy to read. Keep the story in charge. A dramatic blur is not automatically cinematic depth of field.
Step 2: Finish the Camera Move
Set your framing, focal length, and camera position before polishing the blur. Check that the scene scale makes sense too. Moving the camera later can shift the focus and change the feel of the shot. Locking these basics now saves a lot of fiddling later.
Step 3: Put the Focus Where It Matters
Place the focus on the detail that carries the shot, such as the eyes, a logo, or the main architectural feature. If your software supports a focus object, use one. It is quicker than typing distances and much easier to manage when either the camera or subject moves.
For a practical 3D example, this Blender tutorial shows how to set up the camera, adjust the f-stop, and use an object as the focus target:
Step 4: Pick the Right DOF Method
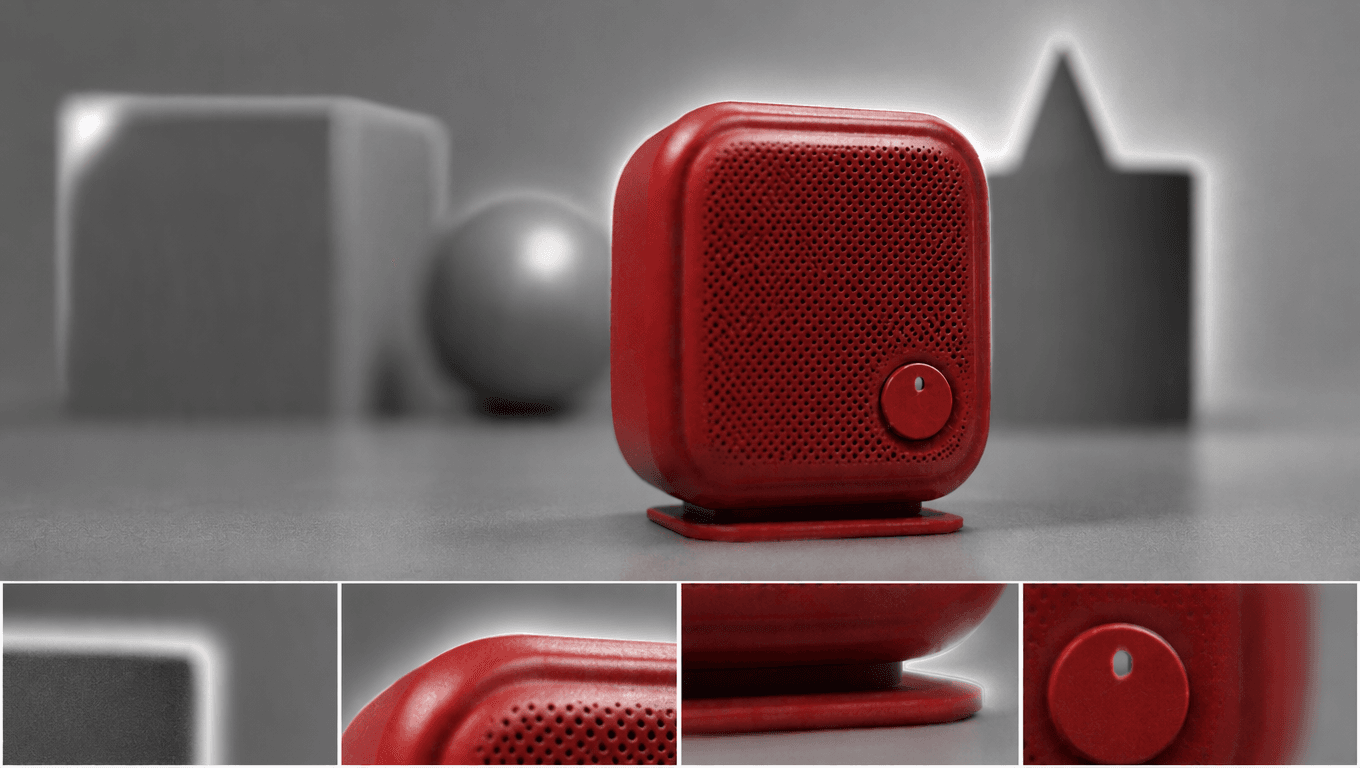
Use ray-traced depth of field when natural bokeh, reflections, and transparent objects matter. Use a Z-depth pass when you expect lots of client notes or want more freedom in compositing. For depth of field in games, check the effect during actual movement. A still frame can hide flicker, edge halos, and distracting focus changes.

©️Blender Manual by the Blender Documentation Team, licensed under CC BY-SA 4.0.
Step 5: Test a Few Frames
Render a small preview before launching the full job. Check the focus, aperture, highlights, transparent edges, and noise. For animation, test the beginning, middle, and end of the shot. Nobody wants to discover on frame 400 that the hero’s face has been soft the whole time.
Once everything looks right, save the approved camera and render settings with the shot. That small habit keeps 3D depth of field consistent when files move between artists or machines.
Common DOF Problems and How to Fix Them
Even a good camera setup can go sideways once you hit render. Most depth of field problems come from focus, scene scale, sampling, or using the wrong method for the shot.
The Subject is Out of Focus
Check the focus target first. Place it on the detail that must stay sharp, such as a character’s eyes or a product logo. For moving shots, make sure the target follows the subject and does not lag behind it.
The Blur Feels Too Strong
Raise the f-stop to bring more of the scene into focus. Check the scene scale as well, since an incorrectly scaled scene can create extreme blur. A little background detail often looks more natural than a wall of softness.

Bright Bokeh Looks Noisy
Ray-traced depth of field can produce noise around small, bright highlights. Increase camera or DOF samples if your renderer provides separate controls. Better light sampling can also help. Use denoising carefully, since aggressive settings may smear the shape of the bokeh.

Z-Depth Creates Edge Halos
A Z-depth pass can struggle around hair, glass, smoke, and object edges. Separate the foreground and background during compositing, or use masks for tricky areas. Directly rendered DOF may be the cleaner option when transparency is important.
Focus Flickers in Animation
Preview several frames across the shot instead of checking only the first one. Smooth the focus target animation and remove sudden distance changes. Test motion blur and DOF together before the final render.
Depth of field in 3D rendering is easier to fix when you test small. A few low-resolution previews can save hours of rendering and catch problems before they spread across a full sequence.
FAQs about Depth of Field
What is depth of field in 3D rendering?
Depth of field in 3D rendering is the part of a scene that appears acceptably sharp around the camera’s focus point. Objects closer to or farther from that point become blurred. You can use the effect to guide attention, create depth, and imitate the behavior of a real camera.
What is the difference between shallow and deep depth of field?
A shallow depth of field keeps a narrow area sharp and creates stronger foreground or background blur. It works well for close-ups and product shots. A deep depth of field keeps more of the scene clear, making it useful for architecture, landscapes, and wide environment shots.
How does aperture affect depth of field?
Aperture controls the size of the virtual lens opening. A low f-stop creates a wider opening and shallower depth of field. A high f-stop creates a smaller opening and deeper depth of field. In some renderers, changing the aperture can also affect exposure.
Should I render depth of field or use a Z-depth pass?
Render DOF directly when natural bokeh, reflections, and transparent objects matter. Use a Z-depth pass when you need more freedom during compositing or expect several revisions. Since Z-depth blur can create halos around edges and transparent materials, test the result before choosing it for the whole shot.
Does depth of field increase render time?
Physically rendered depth of field can increase render time because the renderer may need more samples to clean up noise. Bright bokeh and animation can make the difference more noticeable. The exact cost depends on the renderer, scene, and settings, so run a small test before the final render.
Conclusion
This article has covered how depth of field in 3D rendering works, what controls it, and when to use shallow or deep depth of field. You can render DOF directly for natural bokeh or use a Z-depth pass for more flexibility in post. Whichever method you choose, small tests will help you catch soft subjects, noisy highlights, edge halos, and focus flicker before the final render.



 Ryan Thompson