Top 9 Best And Free Blender Render Farms of 2025
2023-05-06


9 Best & Free 3D Rendering Software for Architects & Designers
3D Rendering
Have you ever felt limited by your current 3D rendering software? Whether you've just started exploring render engines like V-Ray, or you're an experienced artist looking for alternatives better suited to product rendering, architectural visualization, interior design, or something else, you’re not alone. Many users reach a point where they are tired of their existing 3D rendering software a

How to Create Stylized Rainbow Effect in Arnold
3D Tutorial
In this article, Fox Renderfarm, a renowned render farm, and cloud rendering provider in the computer graphics business, will present an Arnold tutorial for the stylized rainbow effect.Process of Creating Stylized Rainbow Effect in ArnoldLoading any model and applying an AiStandardSurface material.Create a DomeLight and add an HDR image.Go back to AiStandardSurface and adjust the Metalness to 1, t

Arnold Tutorial | Spider-Man: Into the Spider-Verse Cartoon Material Highlight Section
3D Tutorial
In this article, Fox Renderfarm, a leading render farm and cloud rendering service provider in the computer graphics industry, will present an Arnold tutorial for the cartoon material highlight section of Spider-Man: Into the Spider-Verse.The Process and Effect of the Highlight SectionCreate a directional light.Create an aiToon node as the base node for the Highlight section. Also, create a ramp n

Arnold Tutorial | 'Spider-Man: Into the Spider-Verse' Cartoon Material MidTones Section
3D Tutorial
In this article, Fox Renderfarm, a renowned render farm and cloud rendering service provider in the computer graphics industry, will present an Arnold tutorial for the cartoon material midTones section of Spider-Man: Into the Spider-Verse.The Process and Effect of the MidTones SectionThe change in the Output Max value on the aiRange node can alter the size of the dots, making them more prominent o

Arnold Tutorial | Spider-Man: Into the Spider-Verse Cartoon Material Shadows Section
Arnold
In this article, Fox Renderfarm, a renowned Arnold render farm and cloud rendering service provider in the computer graphics business, will present an Arnold tutorial for the Cartoon Material Shadows Section of Spider-Man: Into the Spider-Verse.The Process and Effect of the Shadows SectionDuplicate the entire node network used for the MidTone.Change the aiToon node from MidTones to Shadows and rea

How to Use VFace and Make Effects in Arnold?
Arnold
In this article, Fox Renderfarm, the CG industry's leading cloud rendering service provider and render farm, will share with you how to use VFace and how to restore effects in the Arnold renderer. The author is CaoJiajun.Firstly I purchased some VFace materials from the official website to get the following files.We will mainly use the above files for this sharing, they are our main materials to m

The Best Arnold Render Farm | Fox Renderfarm
Arnold
Fox Renderfarm is a global technology company specialized in cloud computing services for rendering in entertainment industry. We supports most popular 3D software, renderers and plugins all over the world, like 3ds Max, Maya, Cinema 4D, SketchUp, Blender, V-Ray, Redshift, Corona, and more. Supported internal and external plugins for 3ds Max, Maya, or Cinema 4D are integrated to our Arnold support
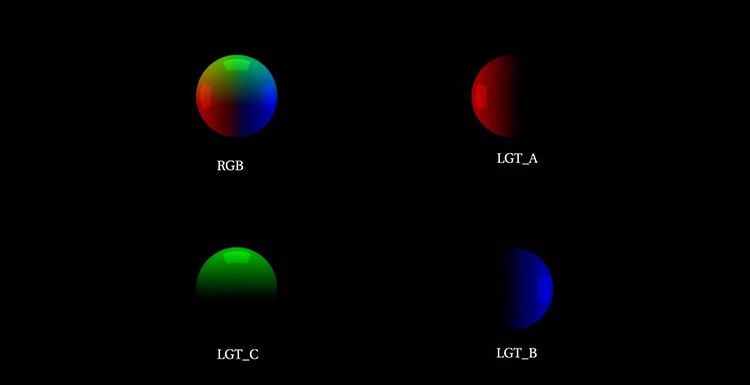
The Method to Make LightGroup of Arnold 5.1
cloud rendering
A friend asked me before, how to make LightGroup in Arnold 5.1 version, because with LightGroup, we do not need to divide the Light Render Layer.The method of Arnold 5.1's LightGroup is not the same as the previous version. I remember that the LightGroup property was added to the light at the beginning. This method only works for the alshader's shader, and then the light property bar is added in t
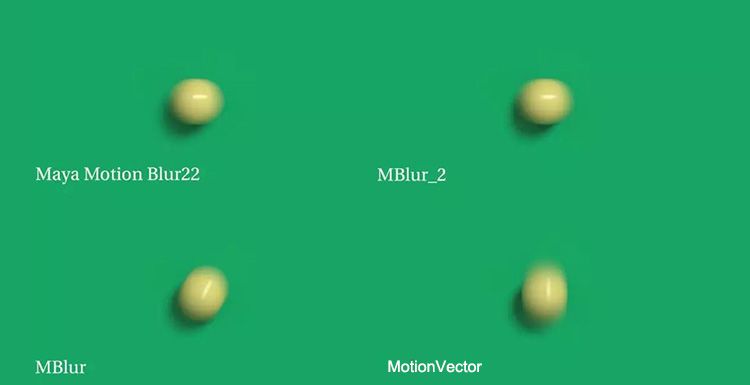
Maya 2018 Arnold's Method of Making Motion Vector Blur in AOV Channel
cloud rendering
Yesterday, I found that the Arnold of Maya 2018 has a directional error for the motion vector blur method made in the AOV channel. The motion blur method I wrote earlier applies to Maya 2016 and earlier versions, so I spent a little time studying it today. The problem has been solved now, and cloud rendering will use a small case to explain the production steps.Step 1: Creating the ball as a simpl

How to Quickly Create an Object ID For Arnold in Maya
Maya
When a friend is working on a project in the company, he has a problem. There are four or five characters of the same material in the scene. In order to facilitate adjustment, each character needs to be distinguished by a different ID. Each of the characters has its own materials and displacements, so let Fox Renderfarm, the best CPU &x26; GPU cloud rendering service provider, tell us how to quick
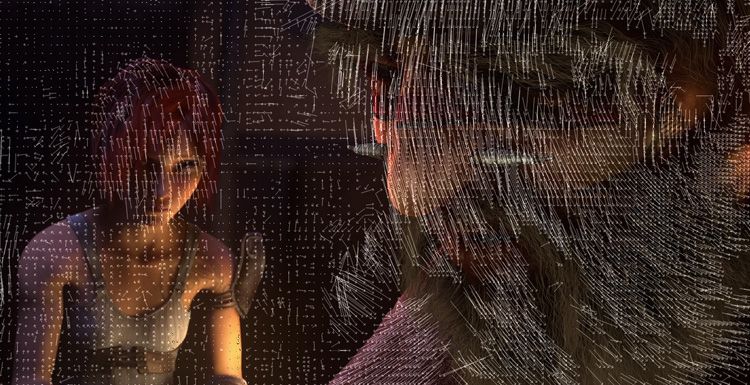
Arnold Renders Motion Vector Channel
MotionVector
Arnold's motion vector channel has always been a bug.Today the best render farm are talking about another way to implement the correct Arnold motion vector channel.Step 1: Turn on Motion Blur Step 2: Manually create an MBlur channel (named according to your preferences)Step 3: Create two nodes aiUtility and aiMotionVector respectivelyTick aiMotion Vector's Encode Raw Vector Assign aiMotionVector