
 Blender
 Cinema 4D
 Arnold
 3ds Max
 Houdini
 V-Ray
 Maya
 Unreal Engine
 Nuke
 Pricing
 New User Bonus
 Cost Estimator
 Christmas Sale


Authorization
Overview
Authorization lets Fox Renderfarm staff log in to your account, or a sub-account of it, with a temporary key — for as long as the validity period you set, and only for the permissions you tick. It exists for one purpose: troubleshooting a problem or providing assistance without asking you to hand over a password.
Two platforms can be authorized: Web portal, the browser console, and Desktop client, the app. They share one permission table — you set it once, and the same selection applies to whichever platforms you tick. Everything starts ticked, so untick what the staff does not need.
Notes
- This is not sub-account management. A sub-account is a login your studio creates for a colleague; an authorization is a temporary key for Fox Renderfarm staff.
- Validity period offers one day, three days, seven days and a custom range. When it runs out the authorization stops working on its own.
- More than one account can be authorized in the same pass, including sub-accounts.
- While an authorization is active, every action taken under it shows Temporary authorization in the Operator column of Operation Record.
- API access is separate: an AccessID and AccessKey are issued after your account manager grants API permission. The banner on the authorization page points at that; it is not something you set here.
Before you start
-
Signed in, able to open User center → Authorization.
-
Knowing which account needs help — the master account itself, or one specific sub-account.
-
Roughly knowing what the staff will need to look at, so the permissions can be kept narrow and the validity short.
Steps
Start an authorization
-
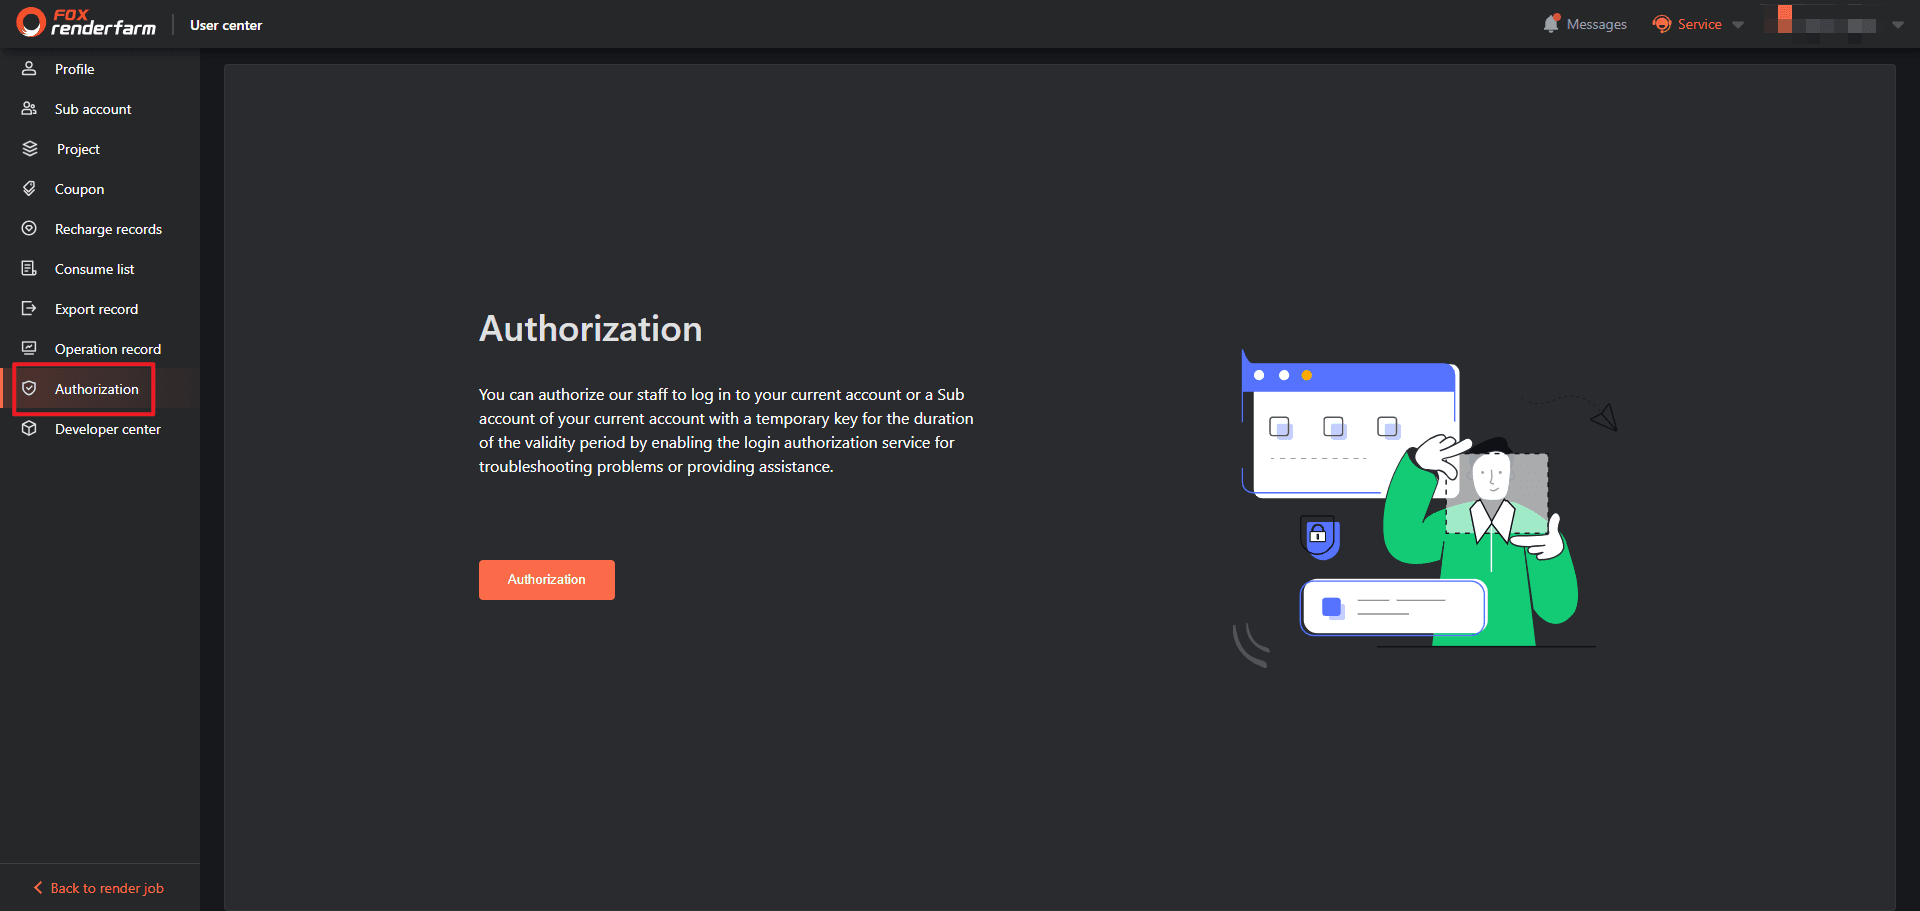
Open User center → Authorization. Before any authorization exists, the page only explains what the service does.
-
Select Authorization to open the configuration window.
Accept the service statement
An Authorization instructions dialog appears the first time. It is a legal statement: operations made under your authorization count as yours, and everything is logged.
-
Read the statement.
-
Tick I have agreed to and acknowledge the above service statement.
-
Select Confirm.
Set the scope
-
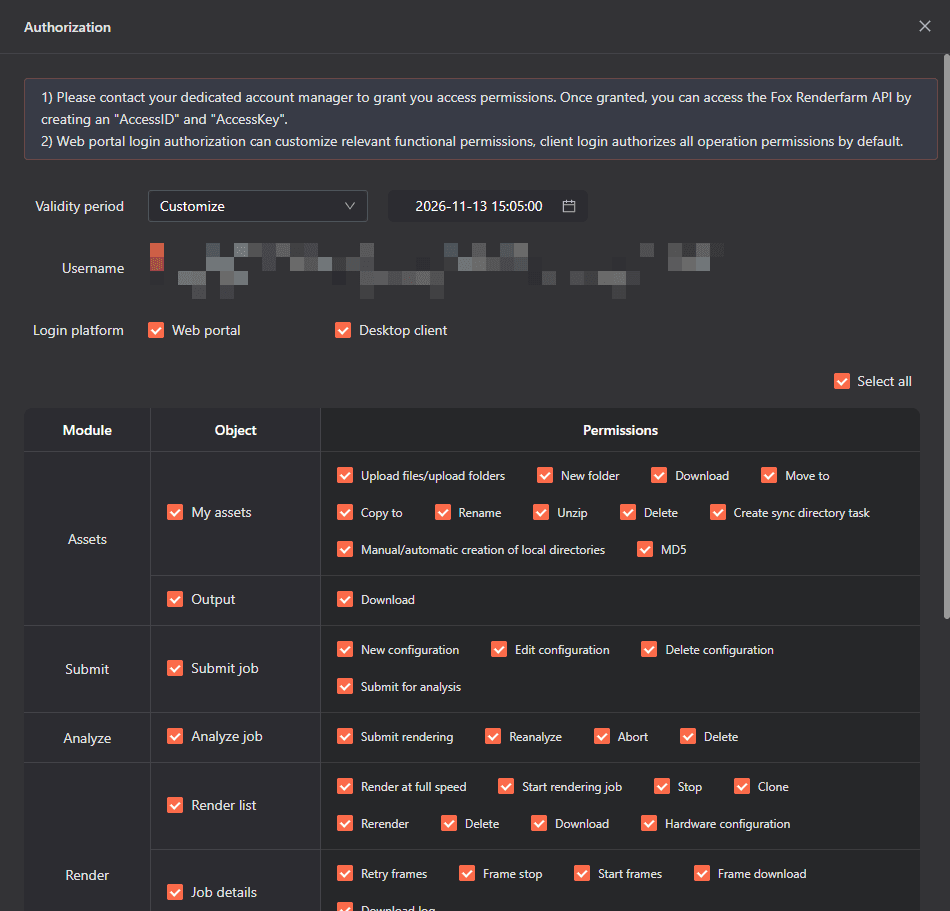
Validity period — Seven days, Three days, One day or Customize.
-
Username — tick the account the staff may log in to. The current account and its sub-accounts are all listed, so help can be limited to one sub-account rather than the whole account.
-
Login platform — tick Web portal, Desktop client, or both: it decides where the staff can sign in, the browser console or the app. The permission table below is shared, so one set of permissions covers whichever platforms you tick.
-
Permissions — the table runs Module → Object → individual permissions, and Select all ticks everything at once; ticking a module or an object selects the group under it. The five modules decide how far the staff can reach: Assets (input and output files), Submit (submit configurations), Analyze (analysis actions), Render (the render list, job details and output files) and Settings (render defaults and account security — login restrictions, IP rules, sub-account sync).
- Select Enable.
Read an active authorization
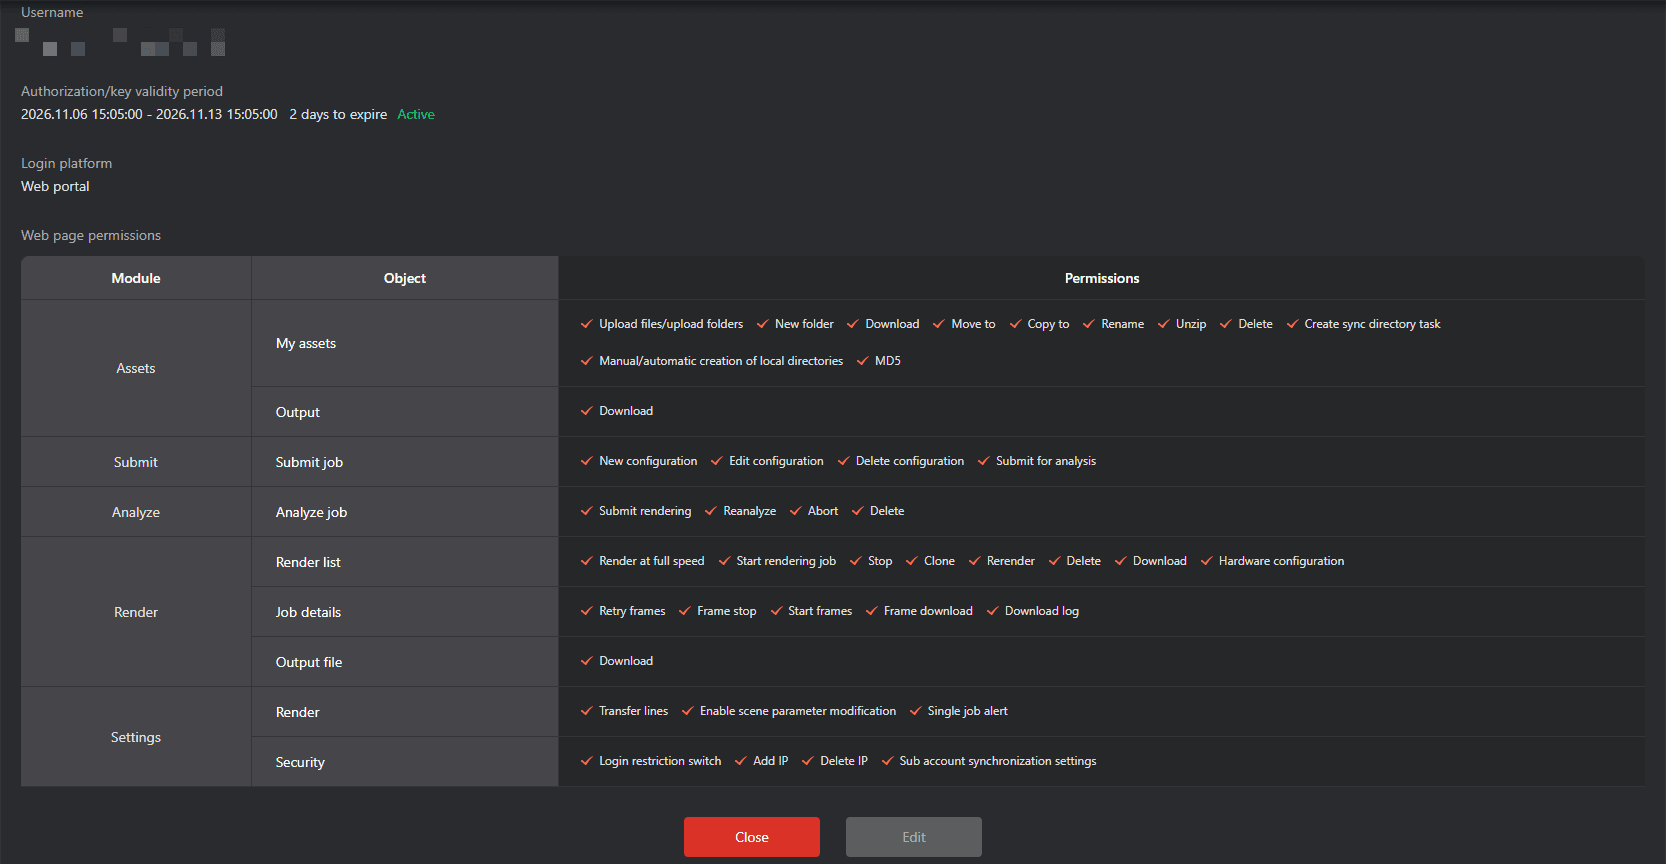
Once enabled, the page becomes a record of the grant: the account, the exact start and end of the key with a countdown such as 7 days to expire, which platform or platforms were authorized, and the permissions table — the same one you filled in, now read-only.
To widen or narrow it, select Edit and repeat the configuration.
Close an authorization
-
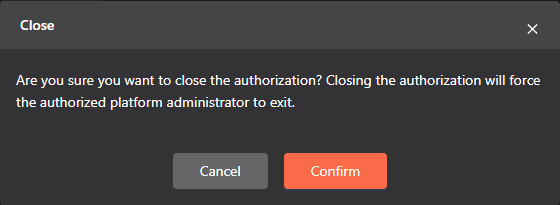
Select Close at the bottom of an active authorization.
-
Confirm in the dialog: closing signs the authorized staff member out at once.
The account is back to how it was before the authorization.
FAQ
Q:Who sees this authorization?
A:Fox Renderfarm staff you are already working with — support or technical staff handling your case. It is not a public link and it is not a sub-account.
Q:What is the difference between authorizing the Web portal and the Desktop client?
A:Only where the staff can sign in — the browser console or the app. The permission table is shared by both, and every permission is ticked to begin with, so untick what the staff does not need.
Q:How long does an authorization last?
A:One day, three days, seven days, or a custom range. It expires on its own at the end of the period; the page shows a countdown while it is active.
Q:Can I authorize only one sub-account?
A:Yes. Username lists the current account and its sub-accounts, so the grant can be limited to the single account that needs help.
Q:How do I know what staff actually did?
A:Operation Record: filter by Operator and choose Temporary authorization, or filter by Module and date. Every action is logged there.
Q:What happens when I close an authorization?
A:Access stops immediately and the authorized staff member is signed out. Nothing they did is undone.
Q:Can I get API access through this page?
A:No. The banner mentions AccessID and AccessKey, but those are issued after your account manager grants API permission. This page only covers temporary login authorization.


