 Blender
 Cinema 4D
 Arnold
 3ds Max
 Houdini
 V-Ray
V-Ray Maya
Maya Unreal Engine
 Nuke
NukeHow to Composite 2D Animation in Blender
 Ryan Thompson
Compositing 2D animation in Blender means combining your Grease Pencil or hand-drawn animation with a video clip, background image, 3D scene, or transparent render output. It is useful when you want to place 2D characters over footage, add animated line art to a 3D render, or export animation with a clean alpha channel.
In this guide, we will show you how to composite 2D animation in Blender, including how to prepare your scene, use Alpha Over, work with transparent backgrounds, combine 2D animation with video or 3D layers, choose export settings, and fix common compositing problems.
What Does Compositing 2D Animation in Blender Mean?
Compositing 2D animation in Blender means combining separate visual elements into one final image or animation. These elements can include Grease Pencil drawings, background images, video footage, 3D render layers, shadows, lighting effects, and transparent overlays.
For example, you might animate a 2D character with Grease Pencil, render it with a transparent background, and place it over a video or 3D environment. You can also use compositing to add glow, blur, color correction, masks, or other finishing effects without leaving Blender.
In short, compositing is the stage where your 2D animation becomes part of the final scene. This is one reason Blender remains a flexible option for artists exploring free 3D animation software for both 2D and 3D workflows.
When Should You Use Blender's Compositor for 2D Animation?
Use Blender's Compositor when your 2D animation needs to be combined with other visual elements in a controlled way. This includes placing Grease Pencil animation over video footage, compositing 2D effects into a 3D scene, adjusting transparency, combining render layers, or adding final post-processing effects.
The Compositor is best when you need node-based control. You can use nodes such as Render Layers, Movie Clip, Image, Alpha Over, Viewer, and Composite to build the final image without changing the original animation.
For simple editing tasks, Blender's Video Sequencer may be enough. If you only need to trim clips, arrange shots, add audio, or export a quick video, the Video Sequencer is faster. But if you need transparency, masks, render layers, or visual effects, use the Compositor.
Prepare Grease Pencil Animation Before Compositing
Before compositing, make sure your 2D animation is ready to render. Check that your Grease Pencil strokes and fills are visible from the active camera, your frame range includes the full animation, and your resolution and frame rate are set correctly.
If you are using a reference image or video in the viewport, remember that it may not appear in the final render automatically. Viewport background images are often only guides for drawing or animation. If you want a background image, video clip, or 3D scene to appear in the final composite, add it as part of the scene, the Video Sequencer, or the Compositor node setup.
Before building the full composite, render one test frame. This helps you catch hidden Grease Pencil layers, incorrect camera framing, missing transparency, or an incomplete frame range.
How to Render 2D Animation with a Transparent Background
If you want to composite your 2D animation over another image, video, or 3D scene, render it with a transparent background first. This keeps only the visible Grease Pencil strokes and fills while removing the world background from the output.
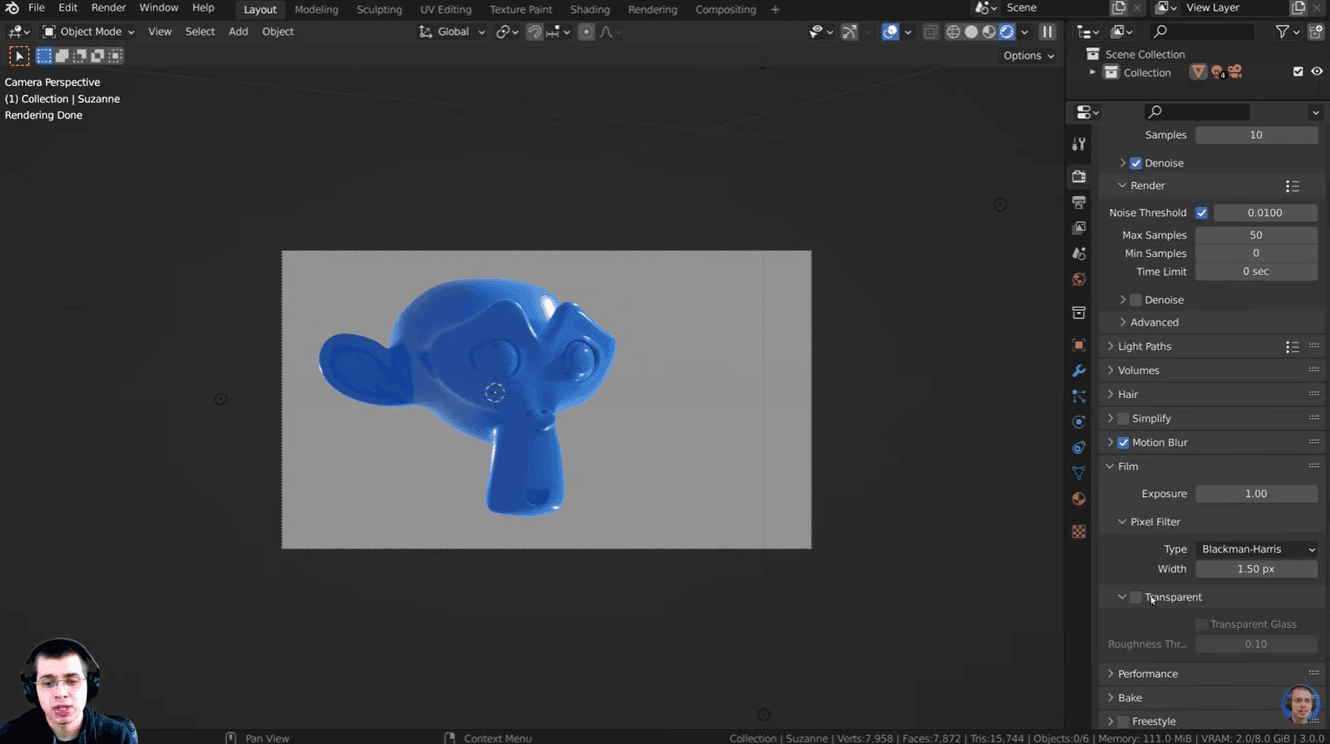
To render 2D animation with transparency in Blender:
- Go to the Render Properties panel.
- Open the Film section.
- Enable Transparent.
- Go to Output Properties.
- Choose a file format that supports alpha, such as PNG or OpenEXR.
- If you choose PNG, set the color mode to RGBA, not RGB.
©️Ryan King Art
For most 2D animation workflows, a PNG image sequence is safer than exporting directly to a video file. It preserves transparency, makes it easier to replace problem frames, and can be imported into Blender, After Effects, Premiere Pro, DaVinci Resolve, or another compositing tool.
Before rendering the full animation, render one test frame and place it over a dark or colored background. If the background appears as black, white, or another solid color, check Film Transparent, the file format, and the RGBA setting.
How to Composite 2D Animation Over Video in Blender
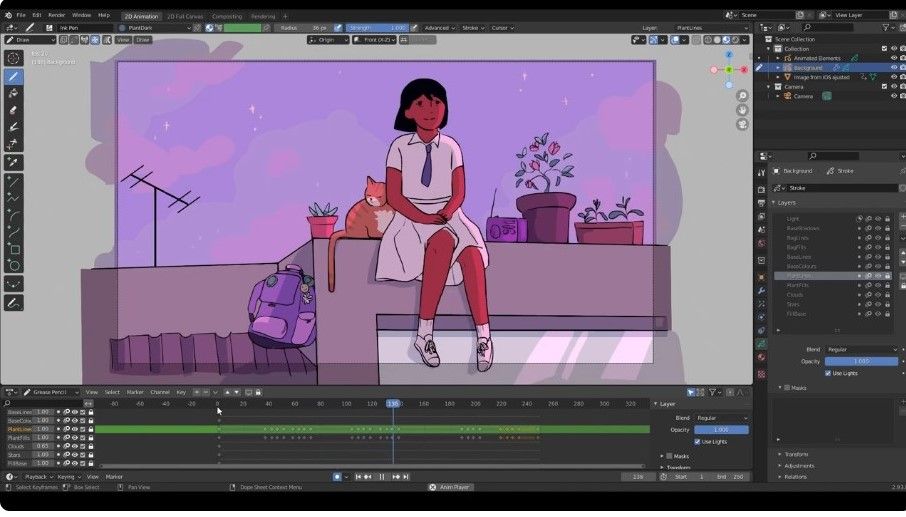
Once your 2D animation is ready, you can composite it over a video clip in Blender's Compositor. This workflow is useful for placing a Grease Pencil character over live-action footage, adding hand-drawn effects to a shot, or combining a transparent 2D animation layer with a background video.
©️ Yelzkizi
Step 1: Prepare the 2D Animation Layer
Make sure your 2D animation can render with transparency. In Render Properties, open the Film section and enable Transparent. Then go to Output Properties and choose a format that supports alpha, such as PNG or OpenEXR.
If you use PNG, set the color mode to RGBA. This keeps the transparent areas around your Grease Pencil strokes instead of rendering them as a solid background.
Step 2: Open the Compositor and Enable Nodes
Switch to the Compositing workspace and enable Use Nodes. Blender will usually create a basic setup with Render Layers connected to Composite.
The Render Layers node represents your rendered 2D animation. The Composite node is the final output Blender uses when rendering the animation.
Step 3: Add the Video Clip
Next, add the video you want to use as the background:
- Press Shift + A in the Compositor.
- Choose Input > Movie Clip.
- Select or open your video file.
- Make sure the video matches your scene's frame rate and resolution as closely as possible.
If the background is a still image instead of footage, use an Image node instead of a Movie Clip node.
Step 4: Add an Alpha Over Node
To place the 2D animation on top of the video, add an Alpha Over node:
- Press Shift + A.
- Choose Color > Alpha Over.
- Connect the video clip to the background input.
- Connect the Render Layers output to the foreground input.
- Connect the Alpha Over output to the Composite node.
The layer order matters. The video should act as the background, while the Grease Pencil or transparent animation layer should sit above it. If the inputs are reversed, the video may cover the animation.
Step 5: Preview and Test the Composite
Add a Viewer node if you want to preview the result before rendering. Connect the Alpha Over output to the Viewer node, then enable the backdrop view if needed.
Before rendering the full animation, render one test frame. Check that the 2D animation appears over the video, the transparent areas work correctly, the frame range is right, and the final node chain is connected to the Composite node.
How to Composite 2D Animation into a 3D Scene
You can also composite 2D animation into a 3D scene when you want Grease Pencil characters, hand-drawn effects, motion graphics, or 2D overlays to interact with 3D objects. This is useful for hybrid animation, stylized VFX, animated annotations, and scenes where 2D line art needs to appear inside a 3D camera view.
Match the 2D Animation to the Camera
Start by checking how your 2D animation appears through the active camera. In Blender, Grease Pencil objects exist in 3D space, so their position, scale, rotation, and depth can affect how they render.
Before compositing, make sure:
- The 2D animation is visible from the active camera.
- The animation is placed at the correct depth.
- The scale matches nearby 3D objects.
- The camera framing does not crop important strokes or fills.
- The frame range matches the full animation.
If the 2D animation should sit flat over the final image, keep it aligned to the camera view. If it should feel like part of the 3D environment, place it in the scene and check the perspective from the camera.
Render Together or Use Separate Layers
For simple scenes, you can render the 2D animation and 3D scene together. This is easier to set up and works well for stylized shots or quick previews.
For more control, render the 2D animation and 3D scene as separate layers. Place the 3D scene in one collection, the Grease Pencil animation in another, create separate view layers, and combine them in the Compositor with Alpha Over or another mix node. This makes it easier to adjust color, opacity, blur, glow, timing, or layer order without re-rendering everything.
Check Depth, Shadows, and Occlusion
If the 2D animation needs to feel like it belongs inside the 3D scene, pay attention to depth and lighting. A flat 2D layer can look disconnected if it ignores foreground objects, shadows, or camera movement.
Check whether any 3D object should appear in front of the 2D animation, whether the 2D layer needs blur or glow to match the scene, whether the animation stays aligned when the camera moves, and whether the line thickness still looks right at the final resolution.
Compositor vs Video Sequencer: Which Workflow Should You Use?
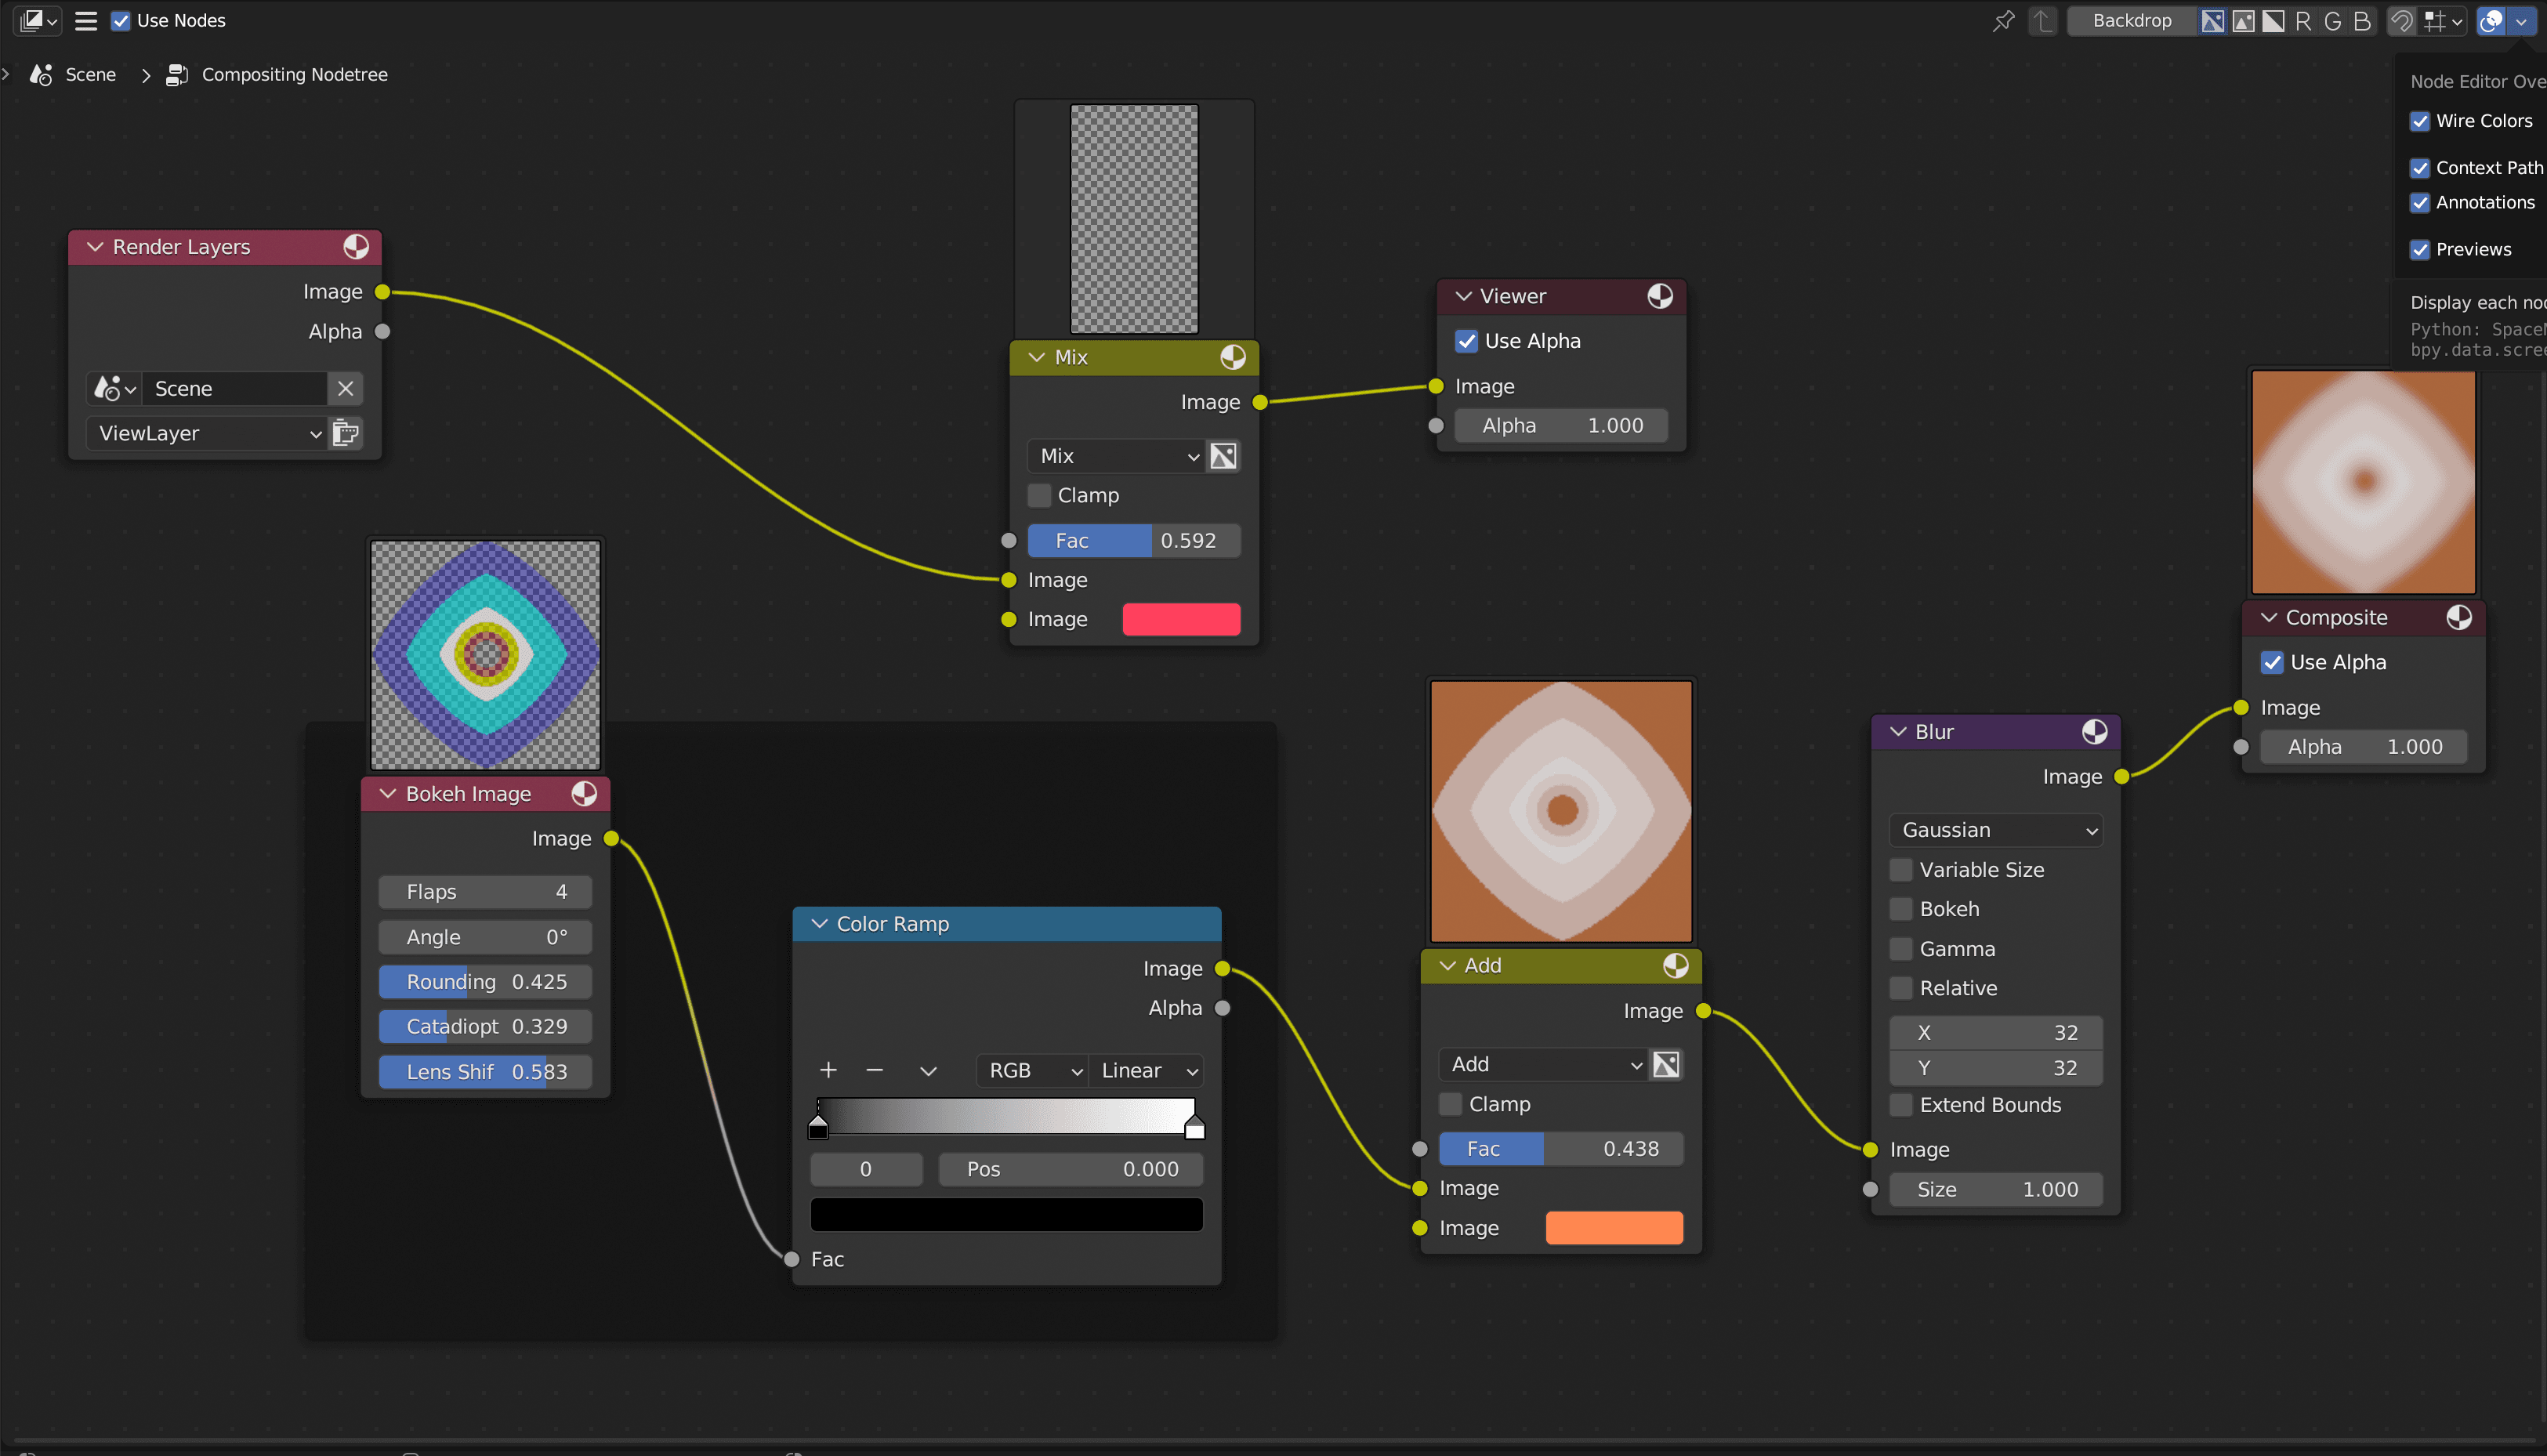
Blender gives you two main places to combine 2D animation with other media: the Compositor and the Video Sequencer.
Use the Compositor when you are still building the final image. It is better for transparency, render layers, masks, alpha control, color correction, and effects. Use the Video Sequencer when the image is already finished and you mainly need to arrange clips, trim shots, add audio, or export a simple edited video.
A simple rule: if you need visual layering or effects, use the Compositor. If you need timeline editing, use the Video Sequencer. In many Blender animation projects, you may use both: composite the 2D animation and 3D elements first, then bring the finished shots into the Video Sequencer for editing and final assembly.
©️ Blender developer
Best Export Settings for Blender 2D Animation Compositing
The best export settings depend on what you want to do after rendering. If you need transparency, choose an image sequence format that supports alpha. If you only need a finished video for preview or upload, export to a video format after the composite is complete.
For most compositing workflows, avoid rendering directly to a compressed video file too early. An image sequence gives you more control, preserves quality, and makes it easier to replace individual frames.
Use these formats as a general guide:
- PNG sequence: Best for 2D animation with transparency and simple compositing. Use RGBA.
- OpenEXR sequence: Best for high-quality compositing, VFX, render passes, and color grading.
- MP4: Good for final previews and playback, but not ideal for transparency.
- MOV/ProRes: Useful for editing and delivery workflows, depending on codec support.
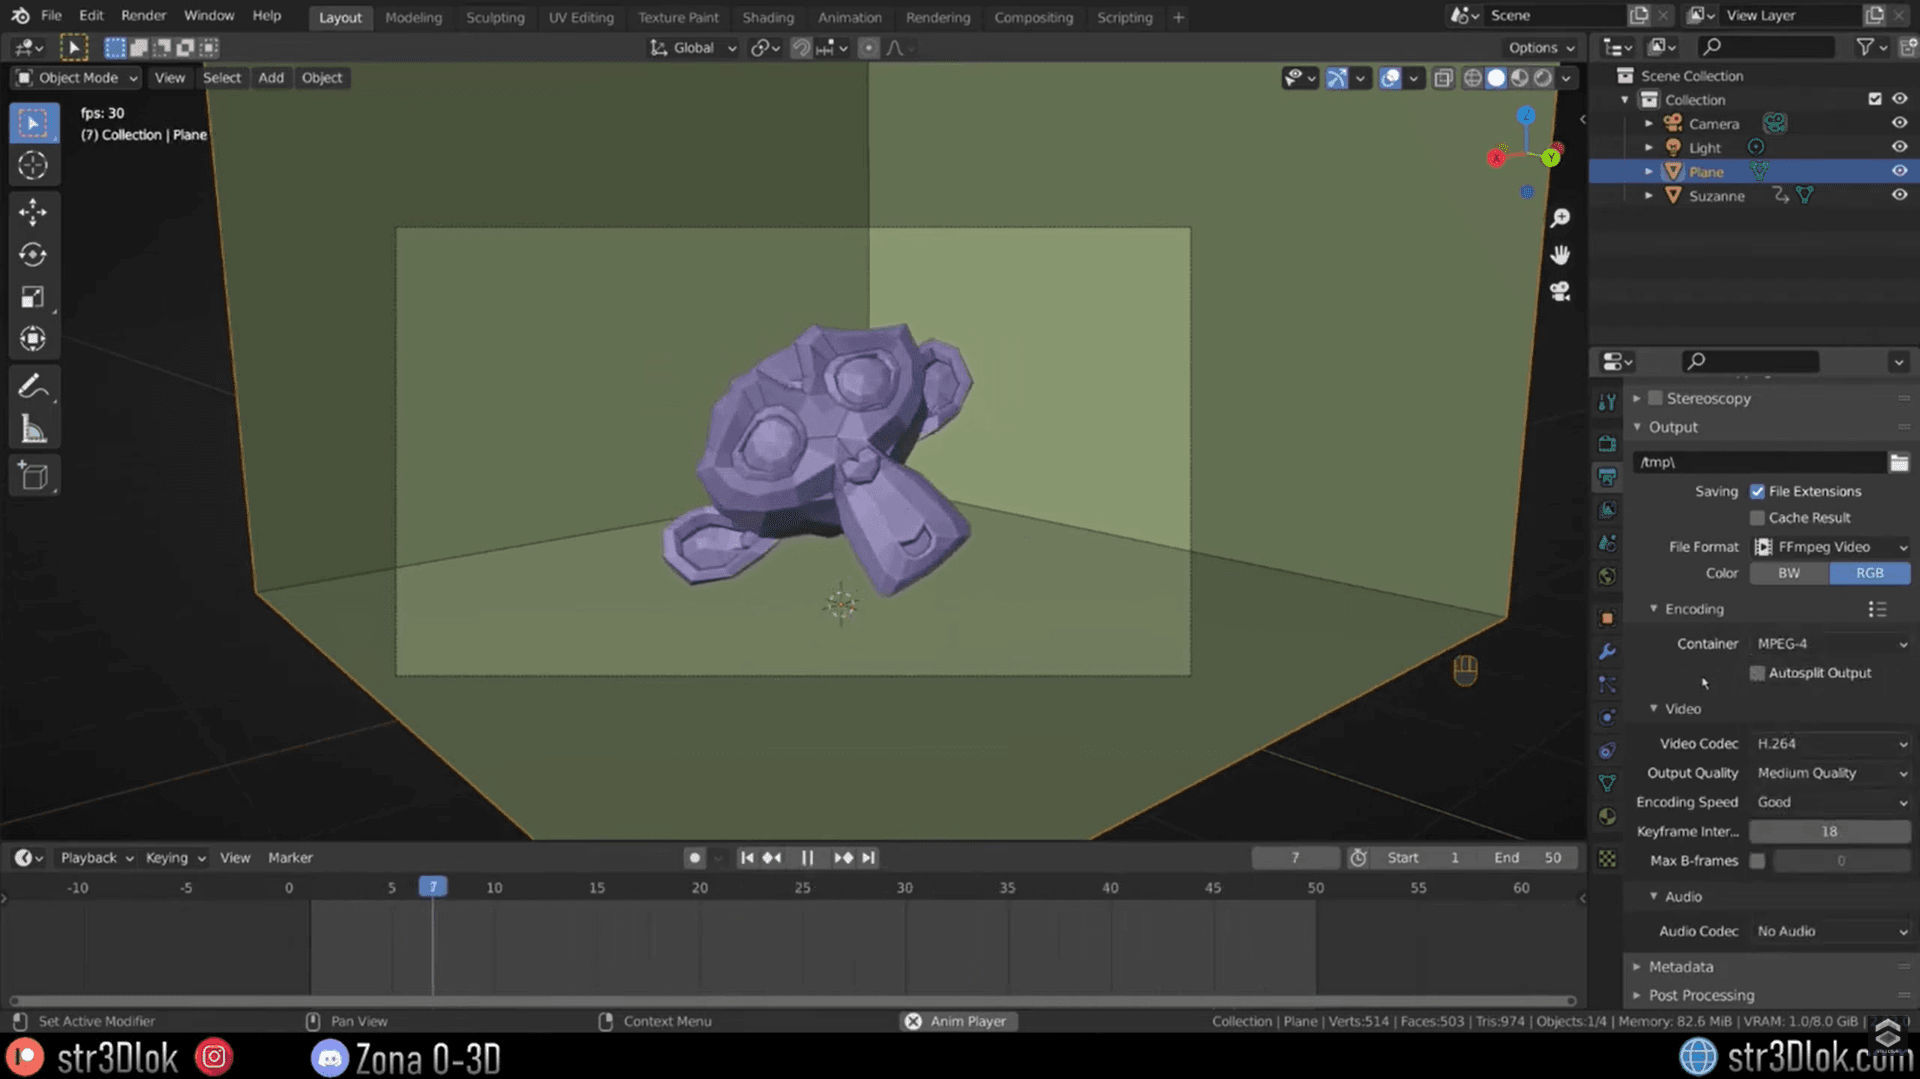
For transparent 2D animation, go to Output Properties, choose PNG, set Color to RGBA, match the resolution and frame rate to your project, and enable Transparent under Render Properties > Film.
For final video output, use FFmpeg Video and choose MPEG-4 with a suitable codec such as H.264. Use this only when the composite is finished and you no longer need a transparent background.
Before exporting, check the resolution, frame rate, frame range, output path, color mode, and one test render. These checks can prevent missing alpha channels, timing issues, blurry output, or unwanted cropping.
©️ Alex Baeza (Str3Dlok)
Common Problems and Fixes
Even when the node setup looks correct, Blender compositing can fail because of a small render setting, layer visibility issue, or output format mismatch. If your 2D animation does not appear correctly in the final render, check the problems below.
The Background Renders Black Instead of Transparent
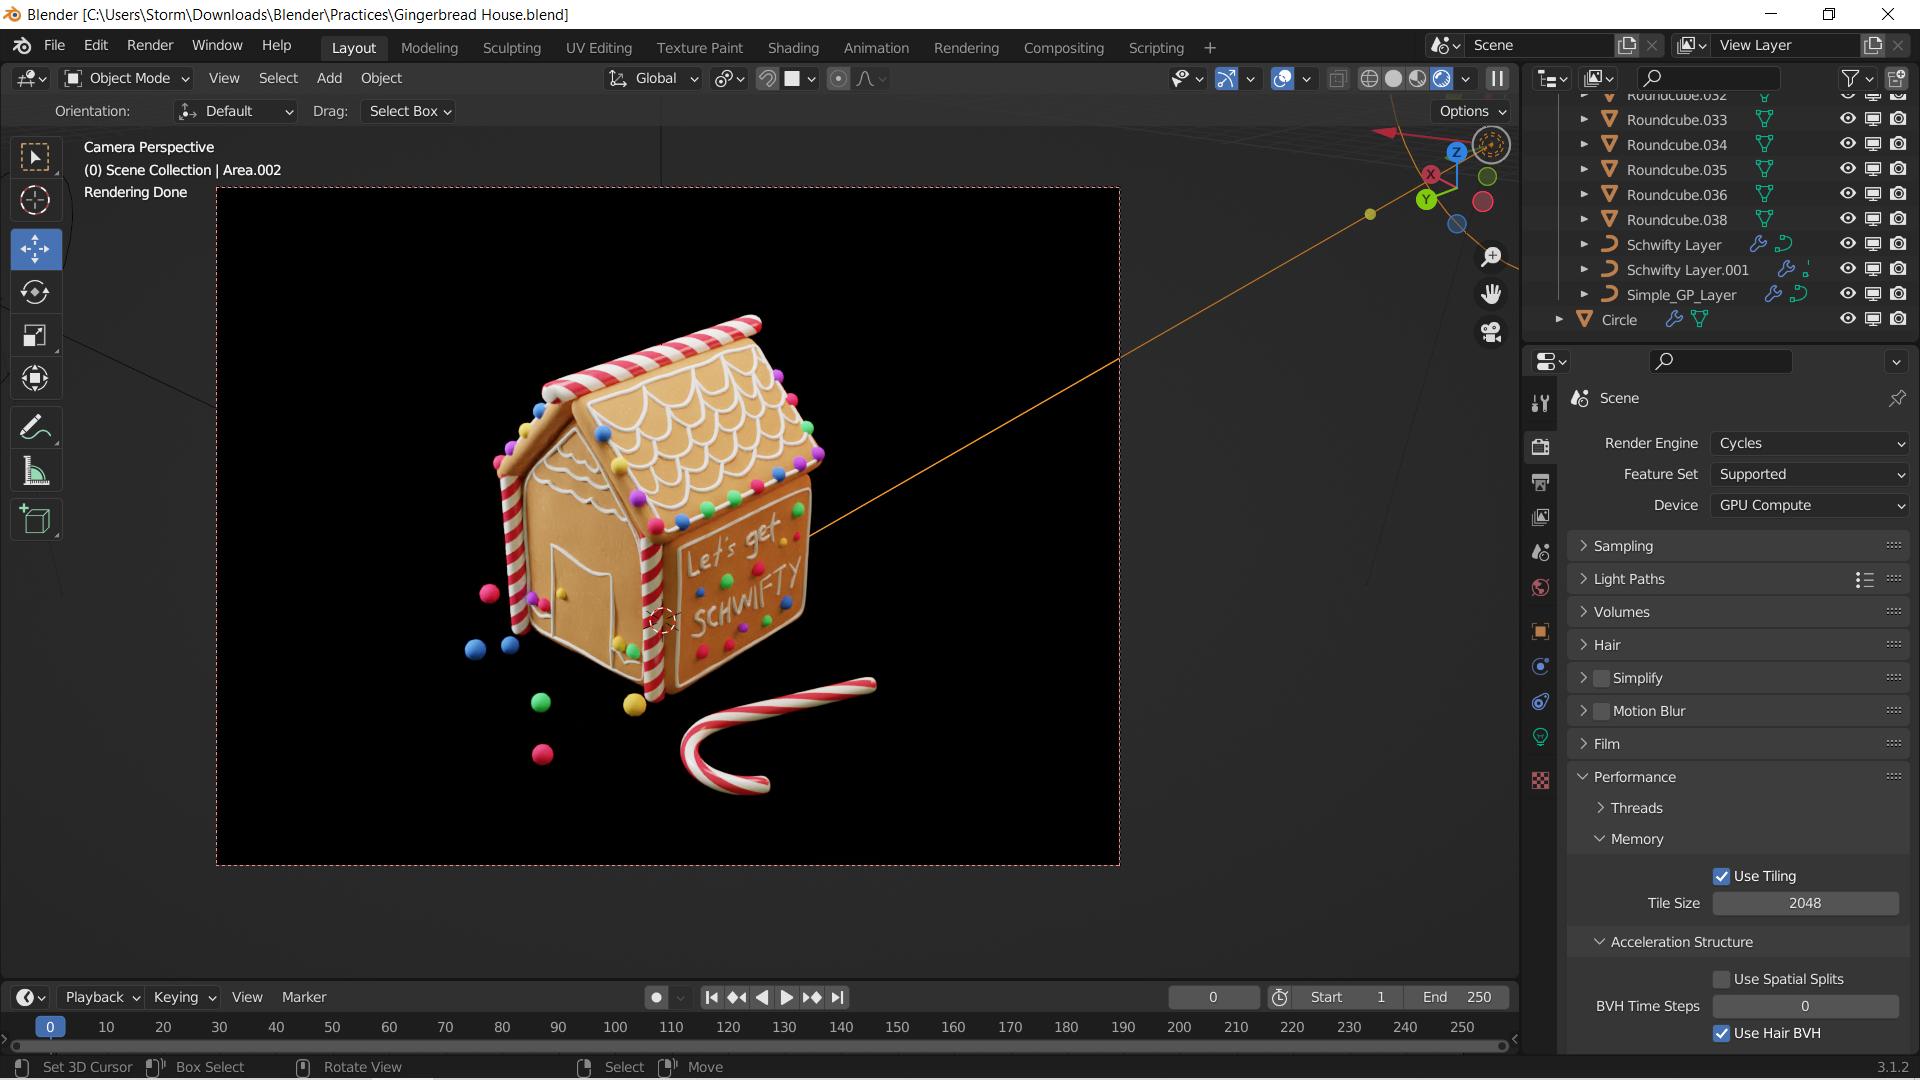
This usually happens when transparency is not enabled or the output format does not include an alpha channel. Go to Render Properties > Film and enable Transparent. Then choose a format that supports alpha, such as PNG or OpenEXR. If you use PNG, set the color mode to RGBA, not RGB.
©️ Blender Stack Exchange
The Grease Pencil Animation Does Not Appear in the Render
If your Grease Pencil animation is visible in the viewport but missing from the final render, the object may be hidden from render, outside the camera view, or excluded from the active view layer. Check render visibility, camera framing, view layers, and collection settings.
The Video Does Not Show in the Final Composite
If the video appears in the preview but not in the final render, the node setup may not be connected to the final output. The Viewer node only previews the result; Blender renders the output connected to the Composite node. Make sure your Movie Clip or Image node is connected through the node chain and that the final result goes into Composite.
The 2D Animation Appears Behind the Video
This usually means the inputs on the Alpha Over node are reversed. In a typical setup, the video or background image should be the bottom layer, and the 2D animation should be placed on top. Reconnect the Alpha Over node so the video acts as the background and the Grease Pencil or transparent animation layer acts as the foreground.
The Alpha Channel Does Not Work
If transparent areas render as black, white, or solid color, the animation may have been exported without alpha. Render the 2D animation as a PNG or OpenEXR sequence with RGBA enabled. Avoid using MP4 as an intermediate compositing format because it does not reliably preserve transparency.
The Timing Does Not Match the Video
Timing problems usually come from mismatched frame rates or an incorrect frame range. Check the scene frame rate, source video frame rate, start frame, and end frame before rendering. If needed, adjust the timing in the Video Sequencer or make sure the Movie Clip starts on the correct frame.
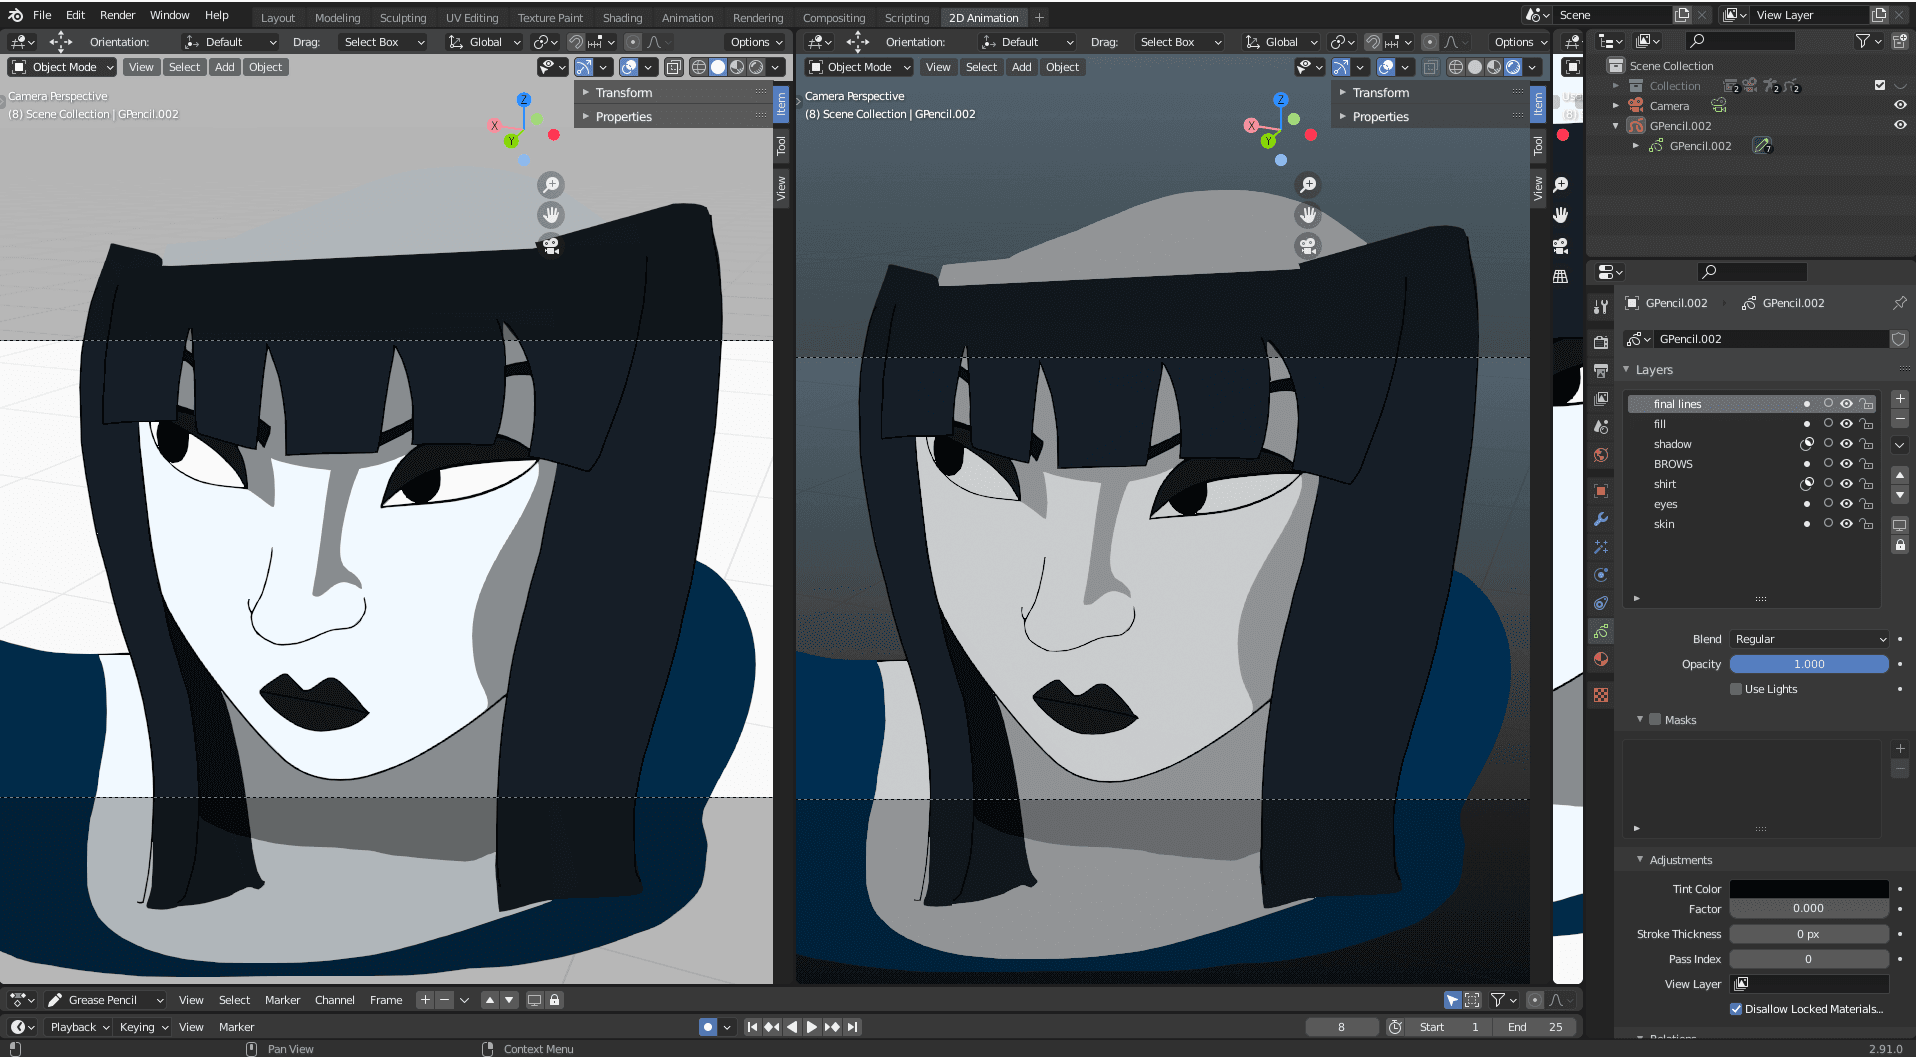
The Final Render Looks Different from the Preview
If the Viewer node looks correct but the rendered file looks different, the final output may not be using the same node chain. Connect the final result to the Composite node, then render a single frame to confirm the output. If the image still looks different, check color management, resolution, and output format settings.
©️ Blender Stack Exchange
How to Render Final Blender Animation Faster
After the composite looks correct, the next challenge is rendering the full Blender animation efficiently. Even a simple 2D animation can take longer than expected if it includes high-resolution output, 3D layers, lighting effects, motion blur, depth of field, or heavy compositor nodes.
Before rendering every frame, test a few important frames from different parts of the animation. Choose frames where the 2D animation overlaps the video or 3D scene, where effects are strongest, and where transparency is most noticeable.
For final animation rendering, an image sequence is usually safer than a single video file. If the render stops halfway, you can continue from the missing frame instead of starting again. It also makes it easier to replace problem frames after fixing a compositing or lighting issue.
If the render is too slow, reduce unnecessary effects, disable unused objects, simplify backgrounds, bake simulations, or separate the 2D and 3D elements into different passes.
If your Blender scene includes complex 3D environments, long frame ranges, high resolution, or tight deadlines, local rendering can become a bottleneck. In that case, a Blender render farm can help render the final animation faster by distributing frames across cloud machines.
Before sending a project to a render farm, test the composite locally first. Check one still frame, a short frame range, file paths, linked assets, output format, and transparency settings. Once the setup is correct, cloud rendering is most useful for the final production render.

FAQs About Compositing 2D Animation in Blender
Can you composite 2D animation in Blender?
Yes. Blender can composite 2D animation using the Compositor, especially when the animation is made with Grease Pencil or exported as a transparent image sequence.
How do I put Grease Pencil animation over a video in Blender?
Use the Compositor with a Movie Clip node, Render Layers node, and Alpha Over node. Use the video as the background layer, place the Grease Pencil animation above it, and connect the result to the Composite node.
Why is my transparent background black in Blender?
A black background usually means the render does not include a working alpha channel. Enable Render Properties > Film > Transparent, then export with PNG or OpenEXR. If you use PNG, set the color mode to RGBA.
Should I use the Compositor or Video Sequencer for 2D animation?
Use the Compositor for transparency, render layers, masks, alpha control, and visual effects. Use the Video Sequencer for trimming clips, arranging shots, adding audio, and exporting a simple edited video.
What is the best format for exporting 2D animation with transparency?
PNG sequence is the best general choice for 2D animation with transparency. It supports alpha when exported as RGBA and works well in most editing and compositing tools. OpenEXR is better for high-end compositing and VFX workflows.
Is MP4 good for compositing 2D animation?
MP4 is useful for final playback and sharing, but it is not ideal as an intermediate compositing format because it does not reliably preserve transparency. If you need alpha, render a PNG or OpenEXR sequence first.
Conclusion
Compositing 2D animation in Blender is easier once you understand how Grease Pencil layers, transparent output, Alpha Over, render layers, the Compositor, and export settings work together. The most important step is to test your setup before rendering the full animation, especially when working with video backgrounds, 3D scenes, or alpha transparency.
For a clean workflow, prepare your 2D animation first, render with transparency when needed, use the Compositor for layered visual control, and export as an image sequence if you plan to keep editing. Once the composite looks right, you can render the final animation locally or use cloud rendering for heavier Blender scenes and longer frame ranges.