How to Make High-precision Models For Motorcycle Tire Patterns And Wheels in 3ds Max and Zbrush(1)
In this tutorial, Fox Renderfarm, your TPN-Accredited cloud rendering service provider and render farm, will bring a set of vehicle model making skills. This article mainly explains how to use 3ds Max and Zbrush to make high-precision models for motorcycle tire patterns and wheels to help you improve the quality and efficiency of the vehicle model.
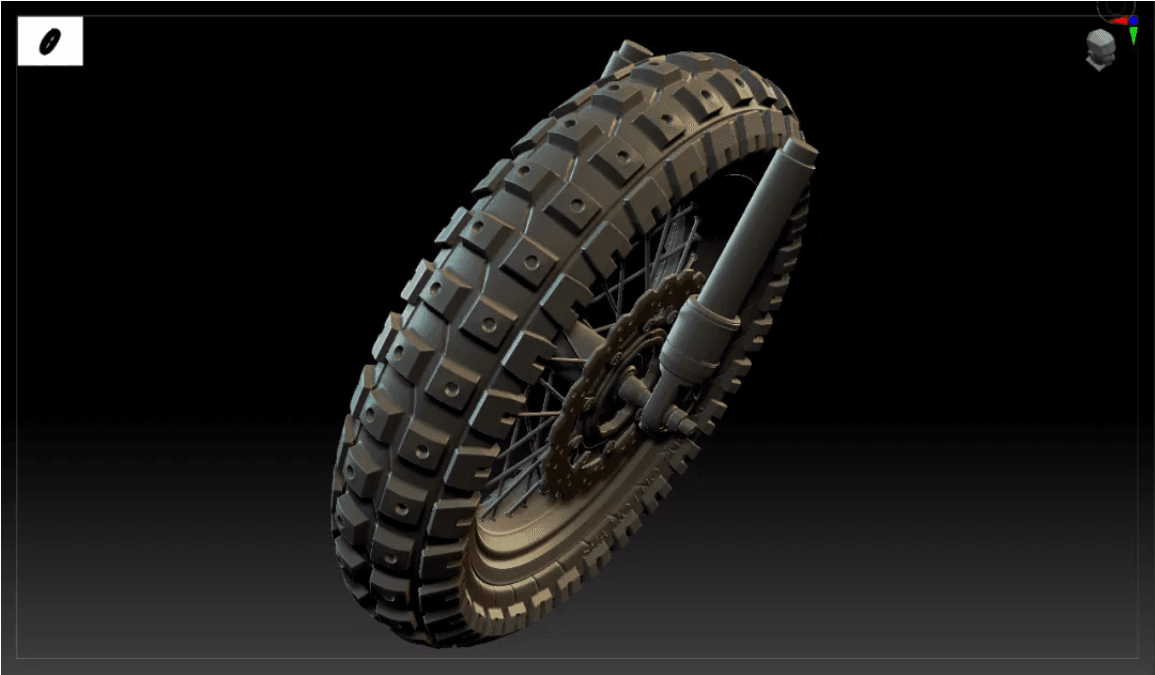
High Poly Effect


The overall process of the case:
This case is a series of motorcycle production tutorials. In this tutorial, only the high poly parts of the tires and wheels are included.
The outline of this tutorial is as follows:
Outline
- preliminary preparation in 3ds Max and mid poly manufacturing of tire
- Introduction and installation of the plug-in Radial Symmetry
- Production of tire patterns and brake pads
- Boolean operation tire pattern in Zbrush
Production process
Preparation

- Collect reference pictures;

- Create a 1:1 background board of reference picture in 3ds Max, and put the center point of the tire on the origin (0.0.0), which is convenient for model symmetry;


- Start to build the mid poly of the tire base. The production starts from the basic ring, adjust the inner and outer radius of the ring and the appropriate number of segments (Segments: 36, Sides16);

- Process decomposition:
Trous \ Edit poly \ Symmetry \ Edit poly card line \ Turbo smooth 2

- The final effect
3ds Max Plug-in, Radial Symmetry

-
Introduction: Radial Symmetry is a 3ds MAX modifier plug-in, which can do circular symmetry replication effect, make circular model symmetry, and the quantity adjustment is very convenient;
-
Installation instructions:
(A) Close 3ds MAX
(B) Copy the corresponding version of RadialSymmetry.dlm to the plug-in folder of 3ds Max. The default example is C:\Program Files\Autodesk\3ds Max xxxx\plugins
(C) Open 3ds MAX, you can see Radial Symmetry in the modifier list
- Functions:
(A) Radial Axis: XYZ rotation axis, this function is very important, most of the effects are adjusted here;
(B) Radial Count: Number of copies
(C) Smooth Seams: smooth seams
(D) Quad Seams: Four-sided seams, less used
(E) Mirror: double mirror
- Production of tire patterns, wheels and brake pads
A. Tire 1 pattern
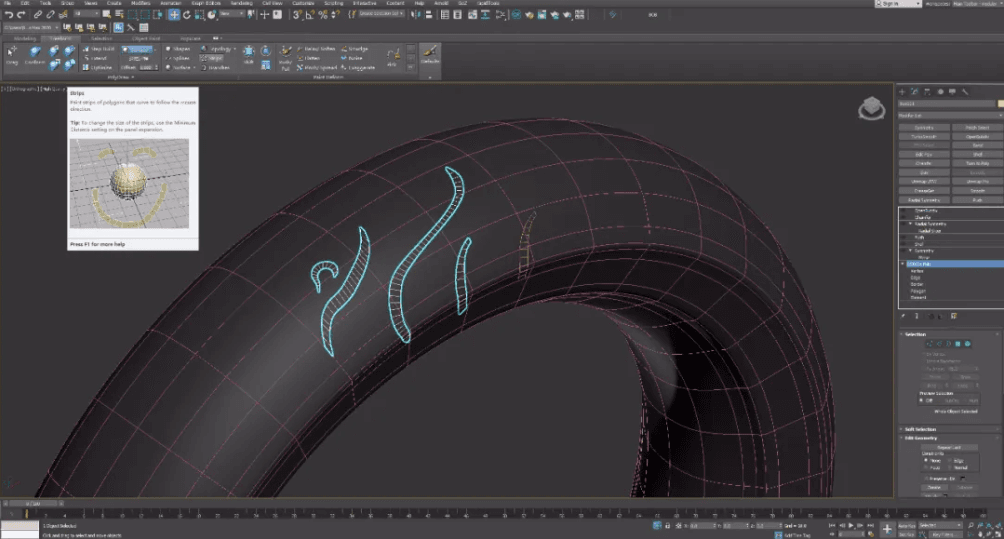
- Use the topology tool to draw the pattern model, pick the tire high poly , use the Strips tool to draw the model based on the surface; the pattern is based on the reference picture;

-
Draw pattern graphics \ shell \ pull \ symmetry \ turbo smooth \ ring symmetry;
-
Circular symmetry: z-axis direction, Radial count: 10 pieces.
B. Tire 2 pattern

-
Extract two models from the tire model and edit to the shape above;
-
Add shell\ Edit polygon, add grooves and holes \ symmetry \ Turbo smooth \ Circular symmetry (replicate 32 times)

- Circular symmetry: z-axis direction, Radial count: 32 pieces

Zbrush effect
Note: At this step, the model has not been finalized, and it needs to be imported into Zbrush for details adjustment. It is necessary to merge the pattern and the tire into one model, and the edges do a soft transition to make the model appear more realistic;


