 Blender
 Cinema 4D
 Arnold
 3ds Max
 Houdini
 V-Ray
V-Ray Maya
Maya Unreal Engine
 Nuke
NukeRender Farm Pricing Guide: Cost Factors and Calculator
 Ryan Thompson
Render farm pricing can feel confusing when you just want to finish a shot, meet a deadline, and avoid a surprise bill. Is the price based on frames, hours, CPUs, GPUs, or some secret math nobody warned you about? The good news: render farm pricing is easier to understand once you know what actually affects render farm cost.
In this guide, we’ll break down cloud rendering pricing, compare CPU render farm pricing with GPU render farm pricing, and show how a render farm cost calculator can help you estimate your budget before you hit submit.
What Is Render Farm Pricing?
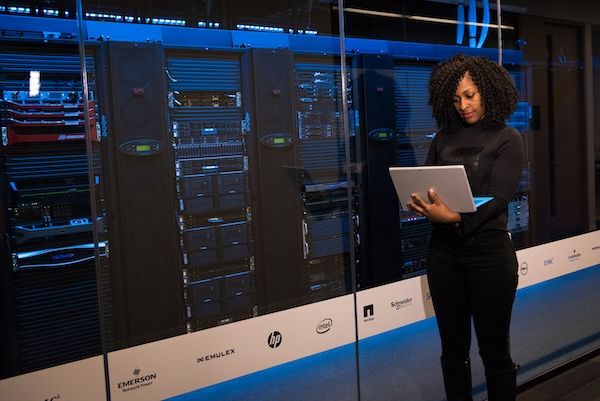
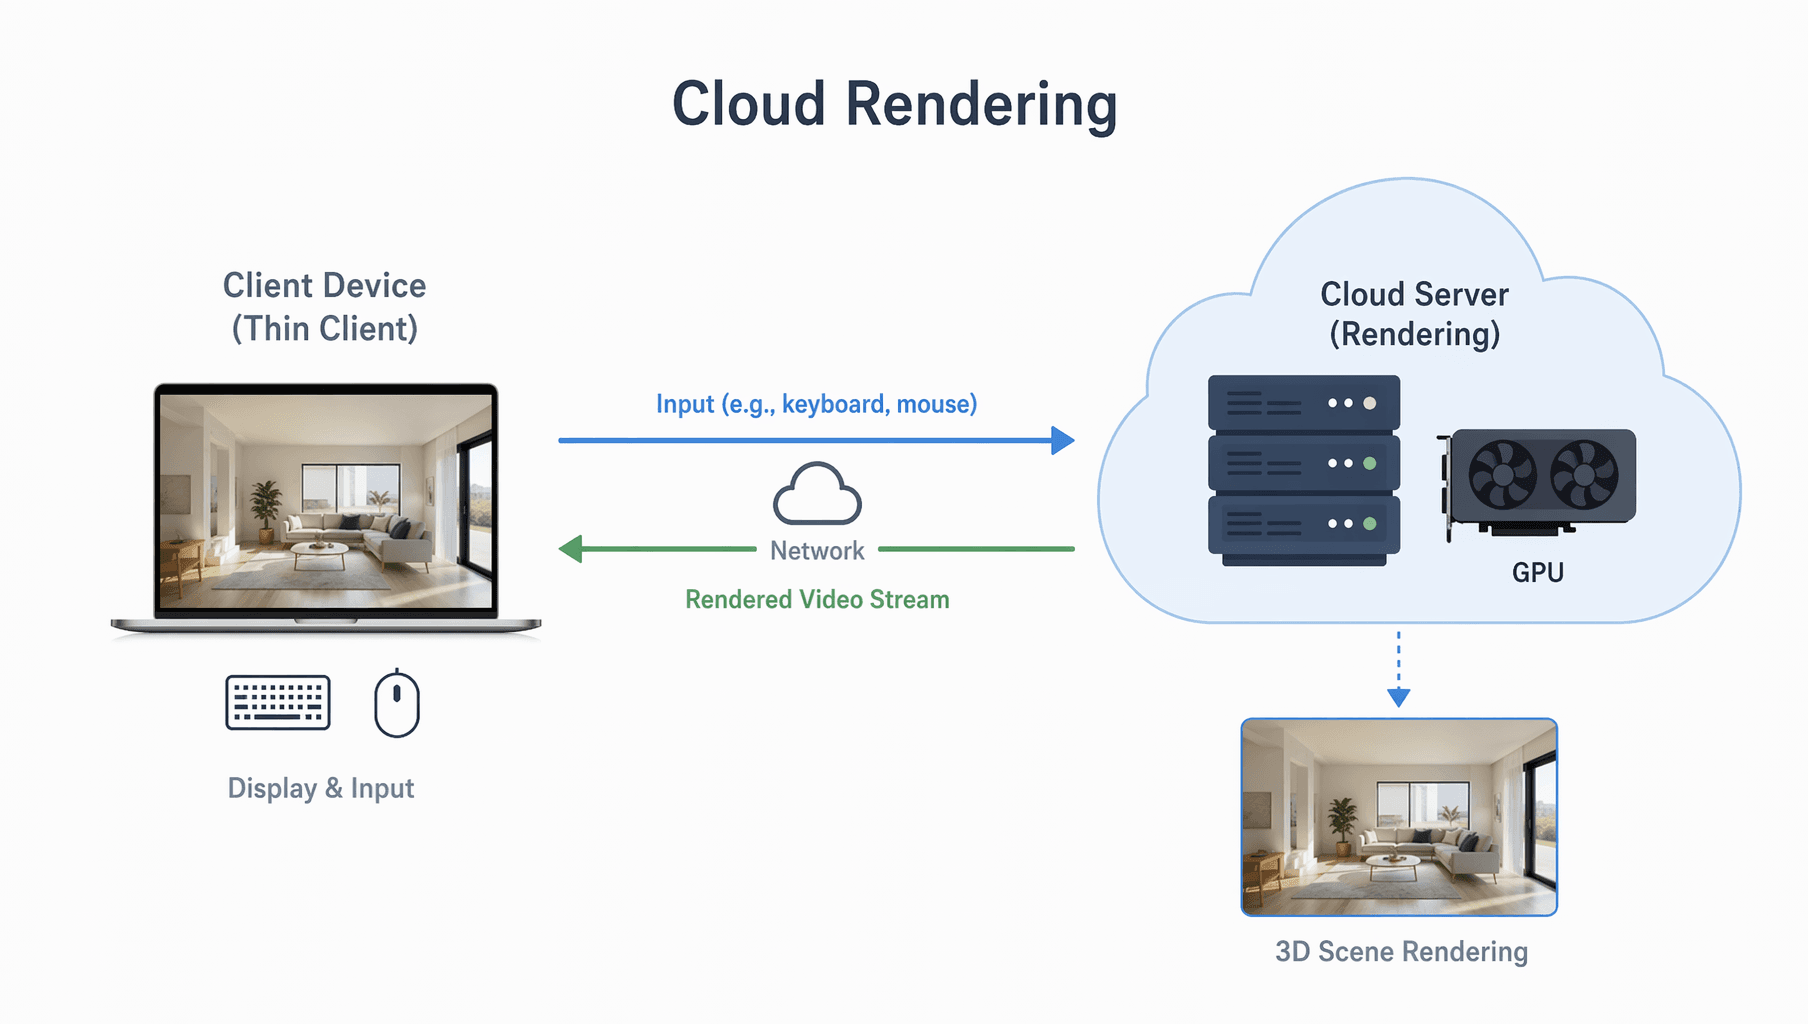
Render farm pricing is the way a cloud render farm charges you for using its rendering power. Instead of buying and maintaining your own machines, you send your project to a render farm and pay for the computing resources used to finish the job.
That sounds simple enough, but render farm pricing can change from project to project. A lightweight product render may cost very little, while a heavy animation with complex lighting, high samples, large textures, simulations, and hundreds of frames will naturally need more render power. In other words, render farm cost is usually tied to how much work your scene asks the machines to do.
Common pricing models in cloud rendering
Cloud rendering pricing can vary from one render farm to another, but most services use a few common models.
The most flexible one is pay-as-you-go, where you pay for the rendering resources your project actually uses. Fox Renderfarm uses this model, which is handy if your workload changes from week to week. You can render a few still images now, then a full animation later, without paying for machines you do not always need.
Some platforms use prepaid credits, where you buy credits first and spend them on render jobs. Others offer subscription plans, which can work for teams with steady monthly rendering needs. There is also priority-based pricing, where faster queues may cost more, and custom enterprise pricing for studios with large or long-term production pipelines.
The best render farm pricing model depends on your project size, deadline, and how often you render.
Render farm pricing vs per-frame pricing
Per-frame pricing sounds simple: if you have 1,000 frames, just multiply by a fixed price per frame. Nice idea, but rendering is rarely that neat.
Most render farms do not charge one fixed price per frame because each frame can require very different computing power. A simple frame with basic lighting may render quickly, while another frame in the same animation might include glass, smoke, hair, motion blur, particles, or complex global illumination. Same project, very different render farm cost.
That is why cloud rendering pricing usually depends on resource usage, such as CPU or GPU time, memory, render engine, scene complexity, and priority level. A fixed per-frame price would either overcharge simple frames or undercharge heavy ones.
A better approach is to use a render farm cost calculator and render a few test frames first. Frame count matters, but the real question is how much computing power each frame needs.
What Affects Render Farm Cost?
Render farm pricing depends on how much computing power your project needs. A simple still image, a 10-second animation, and a heavy VFX shot will not create the same render farm cost.

© Pexels
Frame count
Frame count is one of the biggest factors in render farm cost, especially for animation. A single still image may only need one final render, while an animation may need hundreds or thousands of frames.
If each frame is quick, the total cost can stay manageable. If each frame takes a long time, the final price grows fast. This is why render farm pricing for animation is usually estimated with both frame count and render time, not frame count alone.
Render time per frame
Render time per frame matters just as much as the number of frames. A 1,000-frame animation with 30-second frames is very different from a 1,000-frame animation with 30-minute frames.
Your local render time can give you a rough starting point, but cloud rendering may run faster depending on the hardware. A render farm cost calculator can help turn that test result into a more realistic estimate before you submit the full job.
Scene complexity
A clean product render with simple lighting is usually cheaper to render than a shot full of glass, smoke, particles, fur, water, or detailed environments. Complex scenes ask the render farm to do more calculations, which increases render time and cost. Heavy global illumination, reflections, refractions, motion blur, depth of field, and volumetric effects can all push render farm pricing higher.
Resolution and output quality
Higher resolution usually means higher render farm cost. A 4K image needs more pixels than a 1080p image, and every extra pixel takes time to calculate.
The same goes for quality settings. Higher samples, cleaner shadows, stronger anti-aliasing, and noise-free output can all increase render time. Good quality is worth it, especially for final delivery, but test renders should usually stay lighter until the scene is approved.
CPU or GPU rendering
CPU and GPU rendering can follow different pricing logic. CPU render farm pricing is often tied to CPU time, cores, or server usage. GPU render farm pricing may depend on GPU time, GPU model, VRAM, or benchmark-based units.
The cheaper option depends on your project and render engine. Redshift, Octane, and some Blender workflows may benefit from GPU rendering. Arnold, V-Ray, Corona, and other engines may use CPU, GPU, or both depending on your setup. The best choice is the one that renders your scene reliably and efficiently.
Textures, assets, and caches
Large textures, huge geometry files, simulations, and caches can make a project heavier to upload, check, and render. This is common in VFX, animation, architecture, and product visualization projects.
Before uploading, it helps to clean unused assets, pack textures correctly, and make sure caches are complete. A tidy project can help avoid failed frames, repeated submissions, and extra cost.
Priority level and deadline
Many render farms offer different priority levels. A faster queue may cost more, while a standard queue may be more budget-friendly. If your deadline is relaxed, standard priority can help control render farm pricing. If the client needs final frames tomorrow morning, a higher priority level may be worth it.
Failed frames and revisions
Failed frames can quietly increase render farm cost if you need to fix and resubmit the same job. Common causes include missing textures, wrong plugin versions, broken caches, unsupported settings, or scenes that were not tested before full submission.
This is why test frames are so useful. Before sending the entire project, render a few key frames through the cloud render farm. Fox Renderfarm, for example, lets you estimate and test before committing to the full job, which helps make render farm pricing easier to control.
CPU vs GPU Render Farm Pricing
CPU and GPU rendering can both affect render farm pricing, but they are not priced or used in exactly the same way. The better choice depends on your render engine, scene type, deadline, and how much hardware your project needs.
How CPU render farm pricing works?
CPU render farm pricing is usually based on how long your job uses CPU resources. Some platforms calculate this by GHz-hour, core/hour, node-hour, or server-hour. The wording may change, but the idea is similar: the more CPU power and render time your scene needs, the higher the render farm cost.
CPU rendering is often used for engines and workflows that rely heavily on processor calculations. This can include V-Ray, Arnold, Corona, and many large production scenes in Maya, 3ds Max, Cinema 4D, and Houdini. CPU rendering is also useful for complex scenes with heavy geometry, large textures, simulations, or features that are not fully supported on GPU.
How GPU render farm pricing works?
GPU render farm pricing is usually based on GPU usage time. You may see pricing measured by GPU-hour, GPU node-hour, or benchmark-based units such as OctaneBench. Some render farms also factor in the GPU model, VRAM size, and the number of GPUs used for the job.
GPU rendering can be very fast when your render engine supports it well. Redshift, Octane, Blender Cycles, and V-Ray GPU are common examples. VRAM matters here. If your scene is too large for the available GPU memory, it may fail, slow down, or need a different setup.
Which is more cost-effective for your project?
There is no universal winner between CPU and GPU render farm pricing. GPU rendering can be faster, but not always cheaper if your scene needs high-end GPUs or lots of VRAM. CPU rendering may take longer, but it can be more stable for complex scenes, plugins, and large production files.
The most cost-effective choice depends on your software, render engine, scene complexity, and deadline. Use a render farm cost calculator and test frames to compare both options before the full job.
How to Estimate Render Farm Cost?
A simple way to estimate render farm cost is to start with a test frame. A test frame gives you real render time, which is much more useful than guessing from the full project file.
A simple formula looks like this:
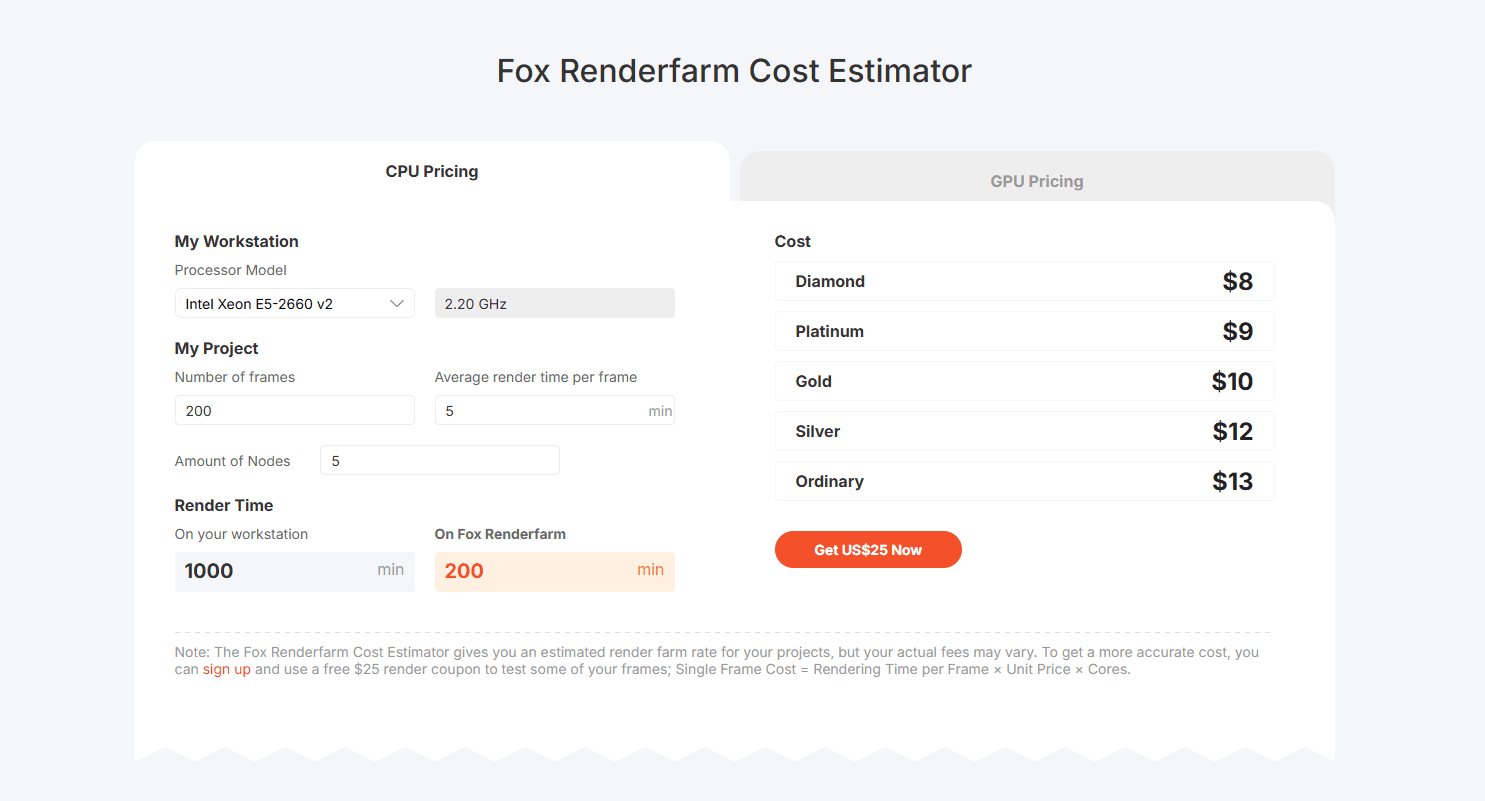
Estimated render farm cost = number of frames x average render time per frame x resource rate
This is only a rough guide. Real render farm pricing may also depend on CPU or GPU type, priority level, memory usage, and discounts. Still, this formula gives you a practical way to understand the basic cost structure before using a render farm cost calculator.
Example: single image
For a still image, the frame count is just one.
1 image x render time x resource rate = estimated cost
This works well for product renders, archviz images, and character stills. If the scene is heavy, test first so you do not guess wrong on the final render farm pricing.
Example: 100-frame animation
100 frames x average render time per frame x resource rate = estimated cost
A 100-frame job is easier to estimate if your frames are similar. Test a few key frames first, then use the average time to plan your budget.
Example: 1,000-frame animation
1,000 frames x average render time per frame x resource rate = estimated cost
For longer animations, small time differences add up fast. Test the beginning, middle, and heaviest shots before you submit the full job.
For a more accurate estimate, use the Fox Renderfarm cost estimator before rendering the full project. It can help you compare render farm pricing, CPU render farm pricing, and GPU render farm pricing in one place.
How to Reduce Cloud Rendering Costs
You do not need to make your scene ugly to lower cloud rendering costs. Most savings come from cleaning the project, choosing smart settings, and testing before the full job. A little prep can make render farm pricing much easier to control.
Optimize render settings before uploading
Check your render settings before you send the project out. Samples, resolution, light bounces, motion blur, depth of field, displacement, and denoising can all affect render farm cost.
Use lighter settings for previews and save the heavy settings for final delivery. If a small change cuts render time without hurting the image, that is real money saved.
Clean assets, caches, and plugins
Missing textures, broken caches, unused assets, and unsupported plugins can lead to failed frames or repeated submissions. That means wasted time and extra cost.
Before uploading, pack your textures, remove unused files, confirm simulation caches, and check plugin versions. A clean scene gives the render farm less drama to deal with, which is good for your budget and your sanity.
Choose the right priority level
Faster queues can help when a deadline is close, but they may increase cloud rendering pricing. If your schedule has some breathing room, a standard priority level may be enough.
Use higher priority for urgent shots, final delivery, or client deadlines. Use lower or standard priority when speed matters less than cost.
Render test frames before full submission
Test frames are one of the easiest ways to avoid surprise render farm cost. They show real render time, possible errors, missing assets, noise problems, and hardware fit before you submit everything.
For animation, test a few different frames instead of only frame one. Pick a simple frame, an average frame, and the heaviest frame. Then use those results with a render farm cost calculator to estimate the full project more accurately.
FAQs about Render Farm Pricing
How much does a render farm cost?
Render farm cost depends on frame count, render time, CPU or GPU usage, scene complexity, software, render engine, and priority level. A simple still image may cost very little, while a long animation or VFX shot can cost much more. The best way to estimate render farm pricing is to test a few frames and use a render farm cost calculator.
Is cloud rendering expensive?
Cloud rendering is not always expensive. It depends on how heavy your project is and how fast you need the result. For many artists and studios, cloud rendering pricing can be cheaper than buying extra hardware, paying for maintenance, and losing time on slow local renders. It is most valuable when you need more render power for a deadline.
How much does it cost to render 1,000 frames?
The cost to render 1,000 frames depends on the average render time per frame and the resource rate. A basic estimate is:
1,000 frames x average render time per frame x resource rate = estimated render farm cost
For better accuracy, test several frames first, including simple, average, and heavy frames. Then use those results in a render farm cost calculator.
Is GPU rendering cheaper than CPU rendering?
GPU rendering is not always cheaper than CPU rendering. GPU render farm pricing may be more cost-effective for engines like Redshift, Octane, Blender Cycles, or V-Ray GPU when the scene fits well in VRAM. CPU render farm pricing may be better for complex scenes, large production files, CPU-based plugins, or render engines that rely more on CPU processing.
Can I estimate render farm cost before submitting?
Yes. You can estimate render farm cost before submitting by checking your frame count, testing a few frames, and using a render farm cost calculator. Fox Renderfarm provides cost estimation tools that help you preview cloud rendering pricing before sending the full project. This helps reduce budget surprises and failed full-job submissions.
What is the cheapest way to use a render farm?
The cheapest way to use a render farm is to optimize your scene before uploading, lower unnecessary samples, clean unused assets, choose the right priority level, and render test frames first. For animation, test different parts of the sequence before submitting all frames. This helps you control render farm pricing without sacrificing final quality.


 Ryan Thompson