
 Blender
 Cinema 4D
 Arnold
 3ds Max
 Houdini
 V-Ray
V-Ray Maya
Maya Unreal Engine
 Nuke
NukeSquigglevision Explained: How the Wiggly Animation Style Works
 Ryan Thompson
Some animation tries to hide every rough edge. Squigglevision does the opposite. Its lines shake, wobble, and refuse to sit still, giving even a quiet scene a strange kind of energy. You may have seen the squigglevision effect in Dr. Katz or the first season of Home Movies without knowing what it was called.
In this guide, we will explain how squigglevision animation works, where this unusual style came from, and why artists still enjoy it today. You will also learn how to create a squiggle vision look yourself using simple 2D techniques, After Effects, or Blender, with practical examples.
What Is Squigglevision?
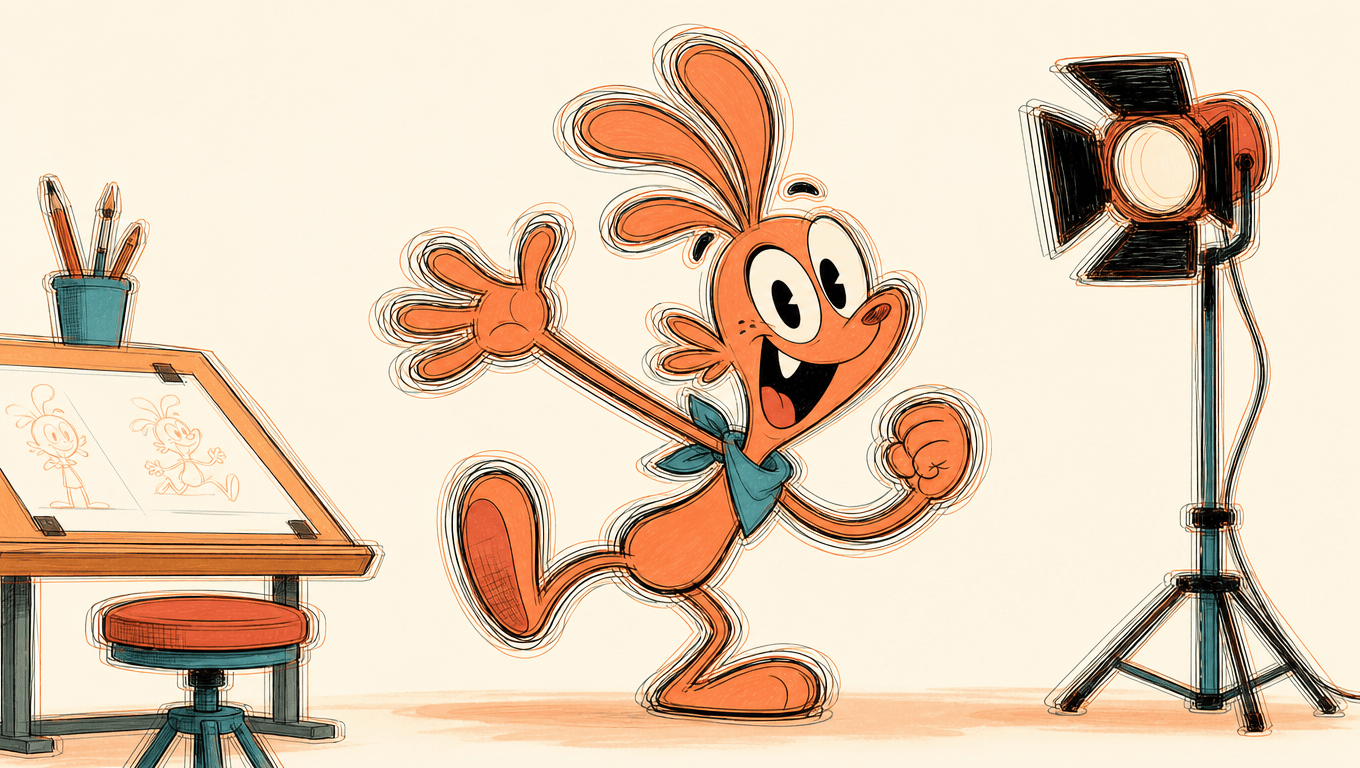
Squigglevision is an animation technique in which outlines constantly wiggle and shift, even when the characters or objects are standing still. Instead of holding one clean drawing on screen, animators cycle through several slightly different versions of the same image. These changing lines create a lively, restless look often known as line boil.
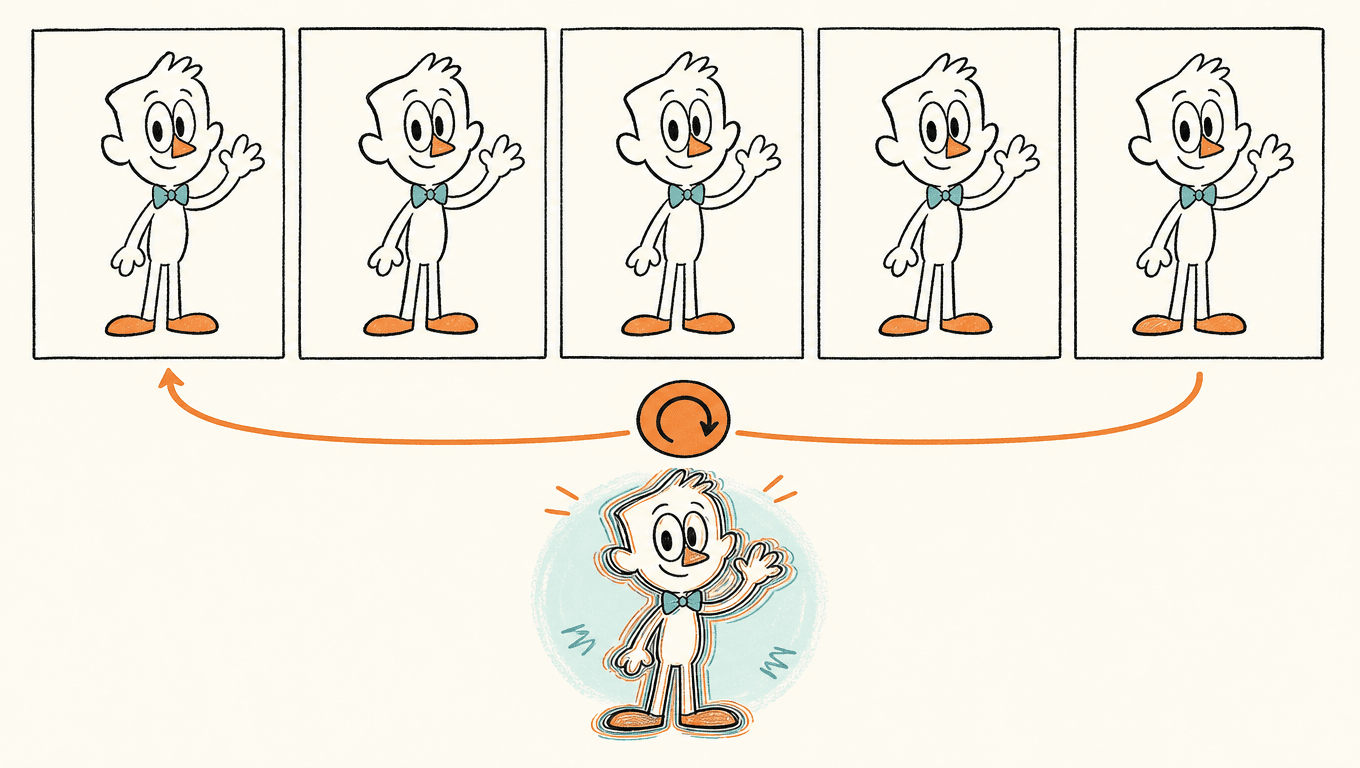
The squigglevision effect became widely recognized through shows such as Dr. Katz: Professional Therapist and the first season of Home Movies. Tom Snyder developed the technique around a loop of five similar drawings. This gave each scene a sense of movement without fully animating every pose, gesture, or background.
When you watch squigglevision animation, the movement may look loose or rough. That imperfection is intentional. It keeps your attention on the dialogue, timing, and personality of the characters rather than polished movement. Depending on the story, the style can feel funny, awkward, energetic, or nostalgic.
Today, artists can create a squiggle vision look with traditional drawings, digital 2D tools, After Effects, or Blender. The tools have changed, but the basic idea remains the same. Small changes between repeated images keep every line feeling alive.
How Does Squigglevision Work?
Squigglevision creates movement by cycling through a small set of drawings. The method is simple, but the changes between the images need to be carefully controlled.
Five Slightly Different Drawings
The traditional squigglevision method uses five drawings of the same character or object. Each drawing keeps the same pose and shape, but the outlines change slightly. A curve may bend differently, or a line may move a few pixels.
These small differences are enough to make the image feel active. If you change the drawings too much, the character will look like it is jumping instead of gently wiggling.
A Continuous Drawing Loop
The five drawings play one after another in a short repeating sequence. This loop was sometimes called a “flic” in the original production process.
Once the final drawing appears, the sequence returns to the first image and starts again. The loop happens quickly, so you notice the movement of the lines rather than five separate pictures. Modern squigglevision animation uses the same idea, whether the images are drawn by hand or created with digital software.
Line Boil
The visible movement of the outlines is known as “line boil.” It is common in animation drawn by hand, where each version of a line naturally looks a little different.
In squigglevision, line boil is created on purpose. It gives the artwork its loose, handmade quality and keeps still scenes from looking frozen. A good squigglevision effect feels lively without making the image hard to read.
To see how small changes between drawings create a natural line boil, this short TVPaint demonstration shows the process clearly:
Economy of Motion
Squigglevision also uses a principle called “economy of motion.” It shares the same practical thinking as limited animation, where artists save detailed movement for the moments that matter most. The moving outlines create visual energy, so animators do not need to animate every part of a character in every shot.
A character can sit in one position while speaking, but the scene still feels active. This allows you to focus on dialogue, facial expressions, timing, and important gestures. The squiggle vision style does not remove animation work completely. It simply puts that work where it has the greatest impact.
Who Created Squigglevision?
Squigglevision was created by animator, educator, and producer Tom Snyder in the early 1990s. He wanted a practical way to make television animation feel active without animating every movement in full detail.
Tom Snyder and Soup2Nuts
Snyder developed the technique at Tom Snyder Productions. Its animation studio later became known as Soup2Nuts. The team used squigglevision animation to build scenes around dialogue, timing, and character performance.
The studio became closely associated with the squigglevision style after producing Dr. Katz: Professional Therapist. Its simple production method also gave the show a visual identity that viewers could recognize right away.
The Early Production Tools
Animators created five slightly different drawings using Autodesk Animator on MS DOS. These drawings were played in a repeating sequence called a “flic,” producing the familiar line boil effect.
The team then used Avid Technology editing systems to combine the sequences and match them with dialogue and sound. The tools may seem basic now, but the main squigglevision effect still works in much the same way today.
Famous Squigglevision Shows
Squigglevision became closely connected with television comedy and educational animation during the 1990s. The style worked especially well in shows that relied on dialogue, timing, and strong character personalities.
Dr. Katz: Professional Therapist
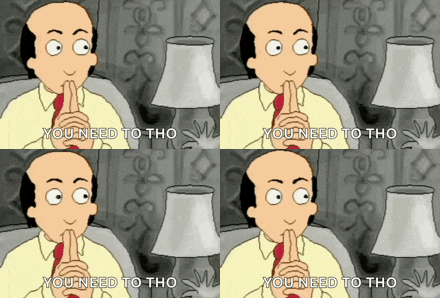
Dr. Katz: Professional Therapist is the show most people associate with squigglevision. It premiered in 1995 and followed a therapist whose patients were often played by stand up comedians.
Many scenes involved characters sitting and talking, so the squigglevision effect was a natural fit. The moving outlines kept these quiet shots visually active while leaving plenty of room for improvised dialogue and dry humor. If you have seen a clip from the show, its shaky linework is hard to forget.
Science Court
Science Court brought squigglevision animation to a younger audience in 1997. The educational series explained science through courtroom stories, with characters using evidence to solve each case.
Like Dr. Katz, the show depended heavily on conversation. The squiggle vision style helped make long explanations feel more energetic without adding unnecessary movement. It also gave the series a playful look that matched its mix of comedy and education.
Home Movies
The first season of Home Movies used squigglevision to support its relaxed dialogue and loosely improvised performances. The imperfect lines suited the show’s awkward humor and made its characters feel surprisingly personal.
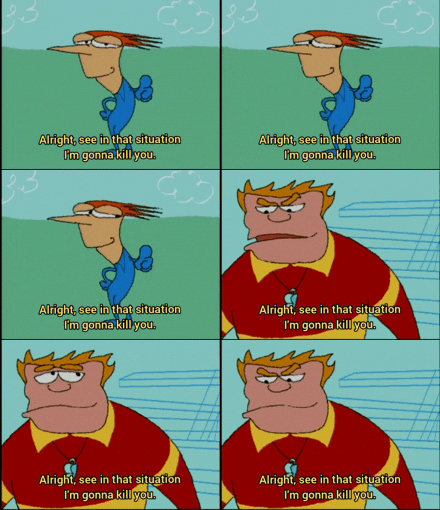
Starting with the second season, the production team moved to Flash animation. Flash produced cleaner, steadier lines and offered more control over character movement and complex scenes. The visual style became smoother, but the show kept the casual conversations, unusual timing, and character focused comedy that made the first season stand out.
How to Create the Squigglevision Effect
You can create the squigglevision effect with traditional drawings or modern animation software. The tool may change, but the main idea stays the same. You make several versions of the same lines and play them in a repeating loop.
Method 1: Create a Hand Drawn Loop
This method gives you the most natural line boil because every drawing contains small human differences.
Draw the main image
Start with one clear drawing of your character or object. Keep the pose simple while you test the effect.
Trace four more versions
Place another sheet over the first drawing and trace it four times. Let the lines change slightly, but keep the main shape, proportions, and facial expression consistent. If you create the drawings digitally, onion skinning can help you compare each version while keeping the pose steady.
Scan or photograph the drawings
Keep every image in the same position. Align them carefully in your animation software so the character does not jump around the frame.
Build the loop
Place the five drawings in order on the timeline. Hold each drawing for one or two frames, then repeat the sequence. You can change the timing until the squiggle vision movement feels lively but comfortable to watch.
The effect should come from the changing outlines, not from the entire character moving out of place.
Method 2: Create Squigglevision in After Effects
After Effects lets you create the look without drawing every version by hand. It works well for illustrations, titles, icons, and simple character animation.
Import and prepare your artwork
Import your illustration with a transparent background. Place the artwork in a composition and precompose the layer so the distortion affects it evenly.
Apply Turbulent Displace
Add the Turbulent Displace effect to the artwork. Keep the Amount low and use a fairly small Size. You only need enough distortion to make the outlines shift slightly.
Create five visual states
Adjust the Evolution setting to create five slightly different versions of the distortion. Add Hold keyframes so After Effects jumps between them instead of creating smooth movement. If you are new to this workflow, this guide to animation keyframing explains how keyframes control changes over time.
Repeat the animation
Copy the five keyframes across the timeline or loop the sequence. Preview the result at normal speed and reduce the Amount if the character looks stretched or difficult to read.
For a more traditional squigglevision animation style, avoid smooth distortion. The outlines should change in small steps, much like separate drawings.
For a practical look at creating an old school wiggly effect in After Effects, this tutorial shows how Turbulent Displace can bring controlled movement to static artwork:
Method 3: Create Squigglevision in Blender
Blender is useful when you want to apply the squigglevision effect to Grease Pencil artwork or combine loose 2D lines with a 3D scene.
Create or import the line art
Draw your character with Grease Pencil, or create line art from a 3D object. Keep the silhouette clean before adding any noise.
Add a Noise modifier
Apply a Noise modifier to the Grease Pencil object. Use a small amount of position and thickness variation. Strong settings can make the drawing look messy rather than intentionally handmade.
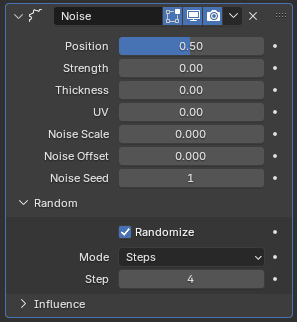
Source: Blender 5.2 Manual, Blender Documentation Team, licensed under CC BY-SA 4.0.
Create five noise states
Make five slightly different versions of the noise and place them on stepped keyframes. Set the interpolation to Constant so Blender switches directly between each state.
Loop the keyframes
Repeat the five states across the shot. You can duplicate the keyframes or use a cycle setting in the animation controls.
Test the movement
Render a short preview before applying the effect to a full scene. Check the eyes, mouth, fingers, and other detailed areas. Too much line movement can quickly make these features hard to read. Once the effect is working, you can learn more about compositing 2D animation in Blender when combining Grease Pencil artwork with video or a 3D scene.
For a more detailed Blender walkthrough, this tutorial demonstrates two ways to create a hand drawn line boil with Grease Pencil and explains how the Noise modifier affects your strokes:
Whichever method you choose, keep the changes subtle. A successful squigglevision effect adds energy and personality without pulling attention away from the character or story.
Squigglevision vs. Line Boil vs. Traditional Animation
Squigglevision, line boil, and traditional animation can all produce a handmade look, but they create movement in different ways. Squigglevision uses a repeating set of slightly different drawings. Line boil describes the natural or intentional movement between redrawn lines. Traditional animation, including cel animation, creates new poses and drawings to show the actual movement of a character. Understanding these differences can help you choose the right method for your project.
|
Feature |
Squigglevision |
Line Boil |
Traditional Animation |
|
Visual effect |
Constantly wiggling outlines with a clear, rhythmic feel |
Subtle changes in lines that create an organic handmade texture |
Smooth or stylized character movement with more stable outlines |
|
Production method |
Usually loops five slightly different versions of the same drawing |
Lines are redrawn or digitally changed across multiple frames |
Key poses and in between drawings are created for each action |
|
Typical production cost |
Usually lower for dialogue focused scenes with limited movement |
Low to medium, depending on how many lines are redrawn by hand |
Usually higher because complex actions require more drawings and production time |
|
Creative control |
Good control over the speed and strength of the squigglevision effect |
Moderate to high control, although natural line changes can be less predictable |
Very high control over poses, movement, timing, and performance |
|
Best use cases |
Dialogue scenes, comedy, experimental shorts, and nostalgic visual styles |
Independent animation, music videos, illustrations, and artwork that needs a handmade feel |
Character acting, action scenes, feature animation, and stories that need detailed movement |
Squigglevision animation is a good choice when you want still scenes to feel active without adding full character movement. Line boil works well when you want a softer, more natural sense of imperfection. Traditional animation gives you the most control over performance, but it usually requires more time, drawings, and planning.
When Should Animators Use Squigglevision?
Squigglevision works best when the visual style supports the story, mood, or personality of a project. It should feel like a creative choice rather than a shortcut added to every scene.
Projects That Suit Squigglevision
The squiggle vision style is especially effective in dialogue focused scenes. Moving outlines can keep a simple conversation visually active while you focus on voice acting, timing, and facial expressions.
It also works well for comedy. The slightly awkward movement can make pauses, reactions, and uncomfortable moments feel even funnier. This is one reason the squigglevision effect suited shows such as Dr. Katz: Professional Therapist.
Independent films, music videos, short animations, and social media content can also benefit from the style. Squigglevision gives a project an unusual handmade identity without requiring detailed movement in every shot. You can also use it to create a nostalgic look inspired by television animation from the 1990s.
Projects That May Need Another Style
Squigglevision animation is less suitable for scenes that depend on smooth action or detailed physical movement. Fast fights, dance sequences, realistic performances, and complex camera shots may become difficult to follow when every outline is moving.
The effect also needs to be used with care around small facial features, text, and detailed backgrounds. Strong line boil can make these elements look unstable or unclear. If you apply the same amount of movement across an entire scene, the result may also become tiring to watch.
A good approach is to test the squigglevision effect on a short shot first. Keep the movement subtle, watch it at normal speed, and make sure the style supports the scene instead of competing with it.
FAQs about Squigglevision
What software can you use to create Squigglevision?
You can create squigglevision with almost any software that supports frame by frame drawing, layer distortion, or keyframe animation. Common options include After Effects, Adobe Animate, Toon Boom Harmony, Krita, Procreate Dreams, and Blender Grease Pencil.
How many frames per second should Squigglevision use?
There is no required frame rate for squigglevision animation. Your final video can still run at 24 or 30 frames per second while each drawing remains visible for more than one frame.
For example, you can work at 24 frames per second and change the drawing every two frames. This creates 12 visual changes per second. Slower changes feel rough and obvious, while faster changes produce a smoother line boil.
Does Squigglevision always require five drawings?
No. The original squigglevision process commonly used five slightly different drawings, but five is not a fixed rule. You can create a simple loop with three or four drawings. Using six or more versions can make the movement feel less predictable. The most important part is keeping the pose consistent while changing the outlines just enough to create movement.
What famous shows used Squigglevision?
The best known example is Dr. Katz: Professional Therapist. Its dialogue focused scenes and dry comedy became closely connected with the squiggle vision style. Science Court and the first season of Home Movies also used the technique to make educational conversations more visually engaging.
Can you create Squigglevision in Blender?
Yes. Blender can create the squigglevision effect with Grease Pencil and a Noise modifier. You can draw the artwork directly in Blender or generate line art from a 3D object.
Create several slightly different noise states and place them on Constant keyframes. You can then repeat these states to build a short loop. Keep the position and thickness changes subtle so the outlines move without losing the shape of the character.
If your Grease Pencil effect sits inside a heavy 3D scene, test a few frames locally first. For a longer final sequence, a render farm can help when render time starts eating into your deadline.

 Ryan Thompson