
 Blender
 Cinema 4D
 Arnold
 3ds Max
 Houdini
 V-Ray
V-Ray Maya
Maya Unreal Engine
 Nuke
NukeCloth Simulation: How It Works and a Practical 3D Workflow
 Ryan Thompson
Cloth can look innocent until you ask it to move in 3D. Then it stretches, clips through a character, or flies across the scene like it has somewhere better to be. Cloth simulation replaces hours of hand animation with cloth physics that creates believable folds, weight, and motion. Whether you are building a cape, curtain, dress, or flag, a reliable cloth sim can make the result feel more natural.
In this guide, you will learn how 3D cloth simulation works, which settings matter, how to choose cloth simulation software, and how to take a clothing simulation from setup to render.

What Is Cloth Simulation?
Cloth simulation is a computer graphics technique that recreates how fabric moves and reacts in a 3D scene. Instead of shaping every fold by hand, you let cloth physics calculate how the material responds to gravity, wind, movement, and nearby objects. This gives fabric a more natural sense of weight and motion.

Image credit: CGElves, licensed under CC BY-SA 4.0, via Wikimedia Commons.
You can use 3D cloth simulation for clothing, capes, flags, curtains, blankets, and many other soft objects. A cloth sim can make a dress move with a character, help a tablecloth fall naturally over a table, or add wind driven motion to a flag. It is useful for animation, games, visual effects, product visualization, and still images.
A clothing simulation can be dynamic or static. Dynamic cloth moves throughout an animation and reacts to changing forces. Static cloth is simulated until it reaches the shape you want, then saved in place for a still scene. In both cases, the goal is the same: to create believable fabric without spending hours modeling every wrinkle. Most cloth simulation software lets you control properties such as weight, stiffness, bending, friction, and collision behavior.
How Does Cloth Simulation Work?
Cloth simulation treats fabric as a flexible mesh made of many connected vertices. These vertices move together under a set of rules called constraints. The constraints control how far the fabric can stretch, compress, shear, and bend. This allows the cloth to form natural folds while keeping its basic shape.
A cloth physics solver calculates the position of every vertex as the scene moves forward. It considers forces such as gravity, wind, and character movement. It also checks whether the fabric touches a body, floor, or another object. These calculations happen repeatedly across each frame, creating the motion you see in the final cloth sim.

Image source: Drummyfish, CC0, via Wikimedia Commons.
Mesh and Constraints
The mesh acts as the foundation of a 3D cloth simulation. A mesh with too few polygons may look stiff or produce blocky folds. A very dense mesh can capture smaller wrinkles, but it also takes longer to calculate and may become harder to control.
Constraints help the fabric behave like a real material. Stretching constraints prevent it from pulling apart, while bending constraints control how easily it folds. A silk scarf needs softer bending behavior than a leather jacket, so the settings should match the fabric you want to recreate.
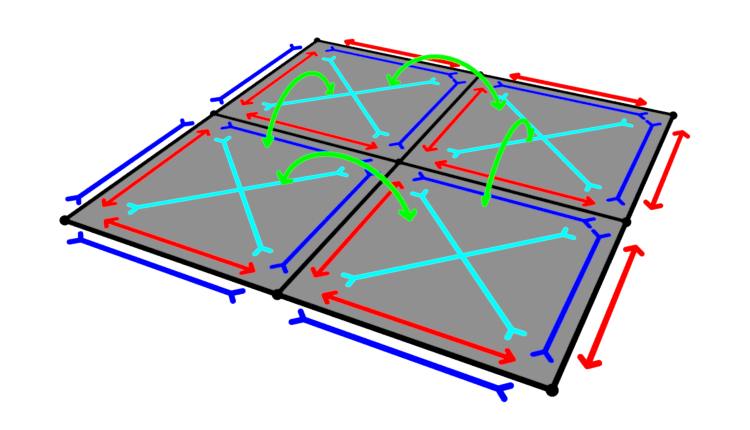
Image source: Blender 5.2 LTS Manual, licensed under CC BY-SA 4.0.
Forces and Collisions
Gravity pulls the cloth down, while wind and motion push it in different directions. Collision settings stop the fabric from passing through characters, furniture, or other objects. Self collision keeps one part of the cloth from moving through another part.
During a clothing simulation, the software calculates these interactions one step at a time. More simulation steps usually improve accuracy, especially during fast movement or complex collisions. They also require more processing time.
Once the cloth simulation looks right, you can bake or cache it. This saves the calculated movement so your cloth simulation software does not need to solve it again every time you play or render the scene.
Essential Cloth Simulation Settings
Good cloth simulation depends on more than switching on cloth physics and pressing play. The right settings help fabric feel light, heavy, soft, or stiff. The names may vary between cloth simulation software, but the main controls work in similar ways.
Mass
Mass controls how heavy the fabric feels. A silk scarf should react quickly to wind and movement, while a thick coat should feel slower and more grounded. Mass also affects how the cloth interacts with gravity and other objects.
Avoid using mass alone to define a fabric. Weight, stiffness, damping, and friction all work together to shape the final cloth sim.
Stretch and Compression
Stretch controls how much the cloth can expand when force is applied. If the value is too low, the fabric may behave like rubber. Higher resistance helps the material keep its original shape.
Compression controls how the fabric reacts when it is pushed together. These settings are especially important in a clothing simulation, where garments need to hold their shape as a character moves.
Bending Stiffness
Bending stiffness determines how easily the fabric folds. Lower stiffness creates soft folds and flowing movement. Higher stiffness produces broader folds and a more structured shape.
For example, silk usually needs less bending resistance than denim or leather. Using real fabric references will help you judge whether the 3D cloth simulation looks believable.
Damping
Damping reduces unwanted motion over time. Without enough damping, the cloth may keep shaking or bouncing long after it should have settled. Too much damping can make it feel slow and lifeless.
Start with a moderate value, run a short test, and adjust it based on the movement you see. This is often more reliable than copying settings from a different scene.
Friction
Friction controls how easily cloth slides across another surface. Low friction allows fabric to move freely. High friction makes it grip the surface.
This setting matters when a garment rests on a character or when fabric drapes over furniture. Incorrect friction can cause the cloth to slide away or stick in an unnatural position.
Collision Distance and Self Collision
Collision distance creates a small gap between the cloth and nearby objects. If the distance is too small, the mesh may pass through the character or prop. If it is too large, the fabric may appear to float above the surface.
Self collision prevents one part of the cloth from passing through another. It is useful for layered clothing and deep folds, but it adds more calculation time. Use it where the visual result justifies the extra processing.
Simulation Quality and Steps
Quality settings control how often the solver checks movement and collisions. More steps can improve fast motion, detailed folds, and complex interactions. They also make the cloth simulation slower.
Begin with lower settings while you test the scene. Increase the quality only after the basic movement, collisions, and fabric behavior are working correctly. This keeps the workflow faster and makes cloth physics problems easier to spot.
A Complete 3D Cloth Simulation Workflow
A reliable cloth simulation starts with a simple setup and builds toward the final result. Testing each stage separately makes problems easier to find and saves you from waiting through a long simulation that was broken from the first frame.
If you would like to see the setup in action, this Blender cloth simulation guide walks through the main settings, collisions, sewing, pressure, and force fields:
1. Gather Fabric References
Start with a real fabric that matches the look you want. Pay attention to its weight, thickness, stiffness, and fold size. Silk forms small, flowing folds, while denim bends more slowly and holds a stronger shape.
Reference photos and videos give you a clear target. They also make it easier to judge whether your cloth physics feels believable.
2. Prepare the Cloth Mesh
Create a clean mesh with evenly spaced polygons. Uneven geometry can produce rough folds, unstable movement, and unexpected stretching. Remove duplicate vertices and check that the surface normals face the correct direction.
Keep the simulation mesh fairly simple at first. You can add visual detail later with subdivision, displacement, or a separate high resolution mesh. A dense mesh is not always better, especially during early cloth sim tests.
3. Check the Scene Scale
Cloth simulation software uses scene scale when calculating gravity, collision distance, and fabric behavior. A cape modeled at the size of a building will not move like a real cape.
Apply object transforms and confirm that your character, garment, and environment use consistent measurements. Correct scale gives your 3D cloth simulation a much better starting point.
4. Add Cloth Physics
Enable cloth physics on the fabric mesh. Choose a basic preset if your software provides one, then adjust mass, stretching, bending, and damping to match your reference.
Change one or two settings at a time. If you adjust everything together, it becomes difficult to tell which setting improved or damaged the cloth simulation.
5. Create Pins and Constraints
Use pinned vertices to hold specific areas in place. A cape may be pinned at the shoulders, while a skirt may be constrained around the waist. The rest of the cloth remains free to move.
Check that the pinned area follows the character or object correctly. Poorly placed constraints can create sharp stretching, sliding, or sudden movement during a clothing simulation.
6. Set Up Collision Objects
Add collision properties to every object that needs to touch the cloth. This may include a character body, floor, table, or nearby props. Simple collision geometry usually calculates faster and behaves more reliably than a highly detailed model.
Make sure the cloth does not intersect these objects at the starting frame. Even a small overlap can make the cloth sim shake, stretch, or explode as soon as playback begins.
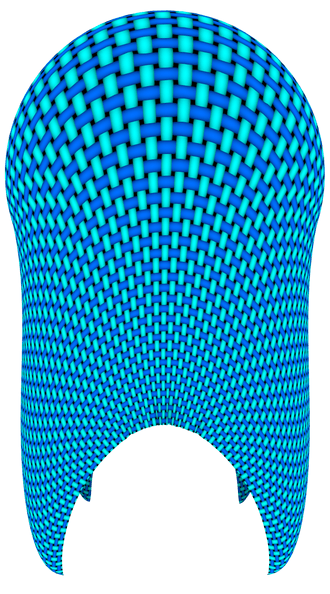
Image source: PantheraLeo1359531, CC0, via Wikimedia Commons.
7. Run a Low Quality Test
Test a short section of the animation with low quality settings. Focus on the overall movement before trying to create small wrinkles. Check whether the cloth follows the character, reacts to gravity, and stays outside collision objects.
This stage is the best time to adjust the mesh, constraints, and main fabric settings. Short tests make cloth simulation problems much faster to diagnose.
8. Refine the Fabric Behavior
Once the basic motion works, fine tune stiffness, damping, friction, and collision distance. Add wind or other forces only after the cloth is stable.
Compare every test with your references. A technically clean simulation can still look wrong if a heavy coat moves like silk or a light curtain behaves like cardboard.
9. Increase the Simulation Quality
Raise the solver steps and collision quality gradually. Enable self collision when the cloth folds over itself or when different parts of a garment come into contact.
Run another test before calculating the complete sequence. Higher settings can improve accuracy, but they will not fix poor topology, incorrect scale, or overlapping geometry.
10. Bake and Inspect the Result
Bake or cache the final cloth simulation so the calculated motion stays consistent. Watch the full sequence from beginning to end and check for clipping, sudden jumps, excessive stretching, and unstable folds.
Fix visible problems before adding final surface detail. After the cloth sim is approved, you can transfer the movement to a detailed mesh, finish the materials, and prepare the scene for rendering.
Best Cloth Simulation Software
The best cloth simulation software depends on your project, budget, and production pipeline. The table below gives you a quick comparison to choose the best cloth simulation software for you.
|
Software |
Best For |
Main Strength |
Main Limitation |
|
Blender |
General 3D work and independent artists |
Free tools for cloth physics, animation, and rendering |
Complex garments need careful setup |
|
Marvelous Designer |
Digital garments and fashion |
Pattern based workflow for realistic clothing simulation |
Not designed for complete scene production |
|
Maya nCloth |
Animation and VFX pipelines |
Flexible cloth controls inside Maya |
Higher learning and licensing costs |
|
Houdini Vellum |
Advanced simulations and procedural effects |
Detailed control over cloth and constraints |
Steep learning curve |
|
3ds Max Cloth |
Existing 3ds Max workflows |
Built in tools for common fabric effects |
Less specialized than dedicated software |
|
Unreal Engine Chaos Cloth |
Games and virtual production |
Real time cloth sim for animated characters |
Requires performance optimization |
|
Unity Cloth |
Games and interactive projects |
Lightweight clothing simulation for skinned meshes |
More limited simulation controls |
For most beginners, Blender offers the easiest starting point for 3D cloth simulation. Marvelous Designer is stronger for garment construction, while Maya and Houdini suit demanding animation and VFX work. Unreal Engine and Unity are better choices when the cloth needs to run in real time.
Common Cloth Simulation Problems and Fixes
Even a well-prepared cloth simulation can misbehave. Most issues come from incorrect scale, overlapping geometry, poor topology, or settings that are too low for the movement. The fixes below apply to most cloth simulation software, although the setting names may differ.
The Cloth Explodes or Shakes
A cloth sim may suddenly stretch, jump, or collapse when the cloth starts inside a collision object. Unapplied transforms and uneven geometry can also make the solver unstable.
How to fix it:
- Remove intersections at the starting frame.
- Apply scale and confirm that the scene uses realistic measurements.
- Use evenly spaced polygons in the simulation mesh.
- Increase solver steps gradually.
- Check that pinned vertices are not being pulled in opposite directions.
Restart the cache after changing the setup. Otherwise, you may continue seeing results from the previous cloth simulation.
The Cloth Passes Through Objects
Clipping happens when the solver does not check collisions often enough. It is common during fast movement or when the cloth and collision meshes are too thin.
How to fix it:
- Enable collision on every object that touches the cloth.
- Increase collision quality or simulation steps.
- Adjust the collision distance carefully.
- Use simple, smooth collision geometry.
- Slow down very fast movement when possible.
The Fabric Stretches Like Rubber
Excessive stretching usually means the cloth has low tension stiffness or too few solver iterations. Incorrect scene scale can make the problem worse.
How to fix it:
- Increase stretch or tension stiffness.
- Raise the number of solver steps.
- Check the scale of the cloth and character.
- Use more suitable pinning around attached areas.
- Compare the motion with a real fabric reference.
Avoid solving the problem by making every setting extremely stiff. That can turn soft fabric into cardboard and create new cloth physics issues.
The Cloth Looks Too Stiff
A stiff cloth simulation may have excessive bending resistance, heavy damping, or a mesh with too few polygons. Large polygons cannot form smaller, natural folds.
How to fix it:
- Lower the bending stiffness.
- Reduce damping slightly.
- Add enough geometry for the folds you need.
- Check that the fabric preset matches the material.
- Use subdivision after the simulation when possible.
The Cloth Clips Through Itself
Without self collision, one part of the fabric can move through another. This is especially noticeable in layered garments, folded curtains, and loose sleeves.
How to fix it:
- Enable self collision.
- Increase the self collision quality.
- Adjust the collision distance.
- Remove intersections from the starting pose.
- Avoid using an unnecessarily dense mesh.
Self collision can make a 3D cloth simulation much slower, so use it only where the fabric needs to fold over itself.
The Simulation Is Too Slow
Dense meshes, high solver settings, and too many collision objects can make a cloth sim painfully slow. Starting at final quality also makes every small test take longer than necessary.
How to fix it:
- Simulate with a low resolution proxy mesh.
- Limit collisions to objects that touch the cloth.
- Disable self collision when it is not needed.
- Test a short frame range at low quality.
- Increase the final settings only after the motion works.
The Cached Result Changes or Renders Incorrectly
A cached cloth simulation may break after you change the mesh, frame range, object transforms, or physics settings. Missing cache files can also cause different results on another computer.
How to fix it:
- Clear the old cache after making structural changes.
- Bake the complete frame range again.
- Check the first and last cached frames.
- Keep external cache files with the project.
- Test several rendered frames before starting the final render.
A stable cache is essential when moving the scene into another application or sending it to a render farm.
How to Bake, Optimize and Render Cloth Simulations
Once the cloth simulation is stable, set the final frame range and clear any old cache. Choose a cache location, increase the solver and collision quality to your final values, then select Bake or Cache Simulation in your cloth simulation software. Do not change the mesh, transforms, physics settings, or frame range after baking. Any of these changes will require you to clear the cache and bake it again.
To optimize the cloth sim:
1. Run the simulation on a simple mesh with evenly spaced polygons.
2. Transfer the baked movement to the detailed render mesh using a deformation or surface transfer tool.
3. Limit collisions to objects that actually touch the cloth.
4. disable self collision when the fabric does not fold over itself.
5. Apply subdivision and surface detail after the cloth physics calculation.
For a quick visual example, Blender Secrets shows how a low-poly cloth simulation can drive a detailed garment with Surface Deform, while a Mask modifier helps control clipping:
Before the final render, play the baked 3D cloth simulation from beginning to end. Check several frames for clipping, sudden jumps, and missing motion. Save external cache files with the project rather than leaving them in a temporary folder.
For the final output, you can use Fox Renderfarm, a cloud rendering service that provides scalable CPU and GPU rendering for 3D artists and production teams. Before uploading a project with a clothing simulation, collect the baked cache, textures, plugins, and linked assets in one folder. Make sure the cache paths remain accessible after the scene is transferred. Submit a few test frames from the beginning, middle, and end of the animation first. This helps you confirm that the cloth simulation loads correctly before rendering the full sequence.
FAQs
What is cloth simulation?
Cloth simulation uses cloth physics to recreate how fabric bends, folds, and moves in a 3D scene. It is commonly used for clothing, flags, curtains, blankets, and soft props.
What is the best cloth simulation software for beginners?
Blender is a practical starting point because it is free and includes tools for cloth simulation, collisions, pinning, and baking. Marvelous Designer is better suited to realistic garment creation.
Why does my cloth sim pass through objects?
This usually happens because of overlapping geometry, low collision quality, or fast movement. Check the starting pose, increase the solver steps, and use simple collision meshes.
Does cloth simulation need to be baked before rendering?
Yes, baking helps keep the 3D cloth simulation consistent across every frame. It is especially important when moving the project to another computer or a cloud rendering service.
Is cloth simulation CPU or GPU intensive?
It depends on the cloth simulation software and solver. Many traditional cloth simulations rely heavily on the CPU, while some real time and newer systems can use GPU acceleration.