 Blender
 Cinema 4D
 Arnold
 3ds Max
 Houdini
 V-Ray
V-Ray Maya
Maya Unreal Engine
 Nuke
Nuke Pricing
 New User Bonus
 Cost Estimator
 India Diwali Offer

Cinema 4D Plugin Submission
The plugin submission process for Cinema 4D primarily consists of four steps:
1. Download & Install;
2. Launch;
3. Submit;
4. Upload;
5. Rendering and download;
6. Uninstall the plugin.
In the following sections, we will provide a detailed description of each of these steps.
Video for Cinema 4D plugin submission
Step1: Download & Install
1.Visit the official website and download the cloud rendering client that matches your local operating system.

2. Install the Fox Renderfarm client; the plug-in will be automatically installed along with the installation process.
Step2: Launch
1.After starting the client, please log in first. For users without an account, click [Register] to start creating an account.

2.Open the Cinema 4D software and locate "Fox Renderfarm" in the menu bar. If "Fox Renderfarm" is not found in the menu bar, please go to the plug-in management page of the client to install the plug-in manually.

Step3: Submit
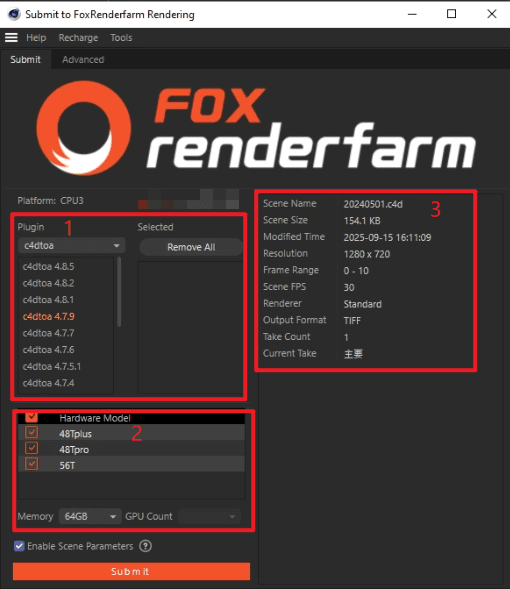
Panel Area Introduction
1.Plugin Configuration
If third-party plugins are applied in the scene, select the plugins in use and specify their corresponding versions.
2.Hardware Model
Select render machines based on project requirements. Higher-spec hardware delivers faster rendering speed and reduces task processing time.
3.Scene Information
The system automatically loads basic scene parameters, including scene name, software version, resolution, frame range, frame rate and other data.
Two Methods for Render Job Submission
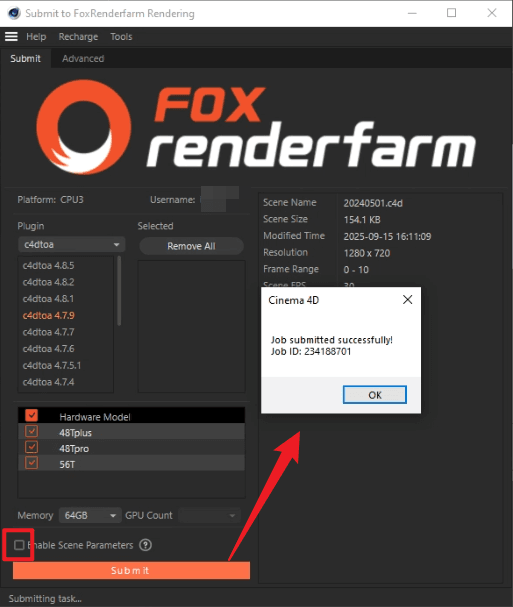
Method 1: Submit rendering directly with native scene parameters
Uncheck [Enable Scene Parameter] and click [Submit] .The job will be submitted successfully after scene analysis verification. After submission, you may check detailed rendering progress of tasks in the client.
Method 2: Customize scene parameters before submission
1. Check [Enable Scene Parameter] and click to trigger scene analysis.
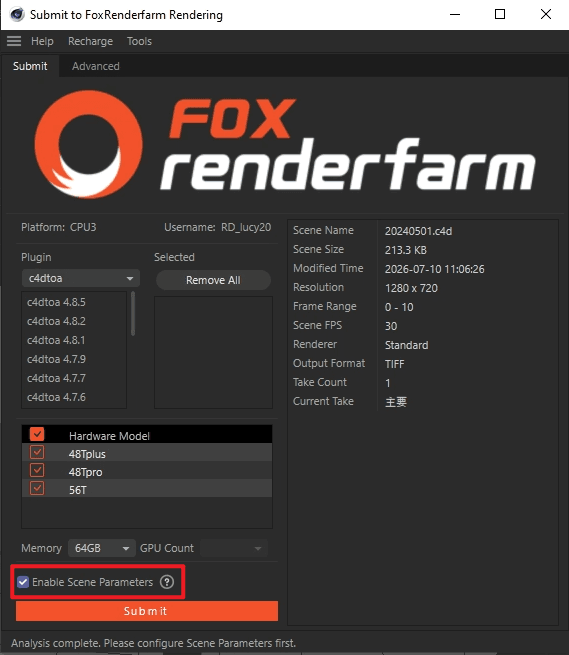
2. Adjust rendering parameters as needed after analysis completes.
2.1 Render parameter setting
Select the cameras, frames range, output name, output type, gamma, width, height, output file format to be rendered.
2.2 Priority setting
To ensure optimal results, we recommend that you prioritize test frames before clicking [Submit]. After the test frames are rendered, confirm that they meet your expectations. If so, click [Full Render] in the [Render List]. If you have any questions, please contact our online customer service.
In the initial state, three frames—the first frame, middle frame, and final frame—are automatically selected. Custom frames are allowed, with a maximum of 10 frames that can be entered.
2.3 Frames per node:
Number of frames rendered by one node(machine);
2.4 Timeout alert(h):
An email alert will be sent if the rendering frame time exceeds the set limitation. The receiving email can be configured by yourself in Web->Message seetings->Job message settings;
2.5 Timeout stop(h)
If the time - consuming of a rendering frame exceeds the set limitation, it will be automatically stopped and you will be informed via email. The receiving email can be configured by yourself in Web->Message seetings->Job message settings.
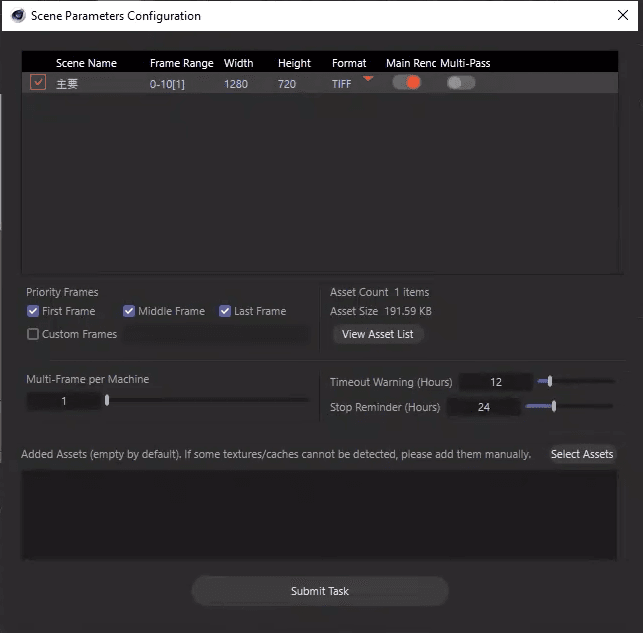
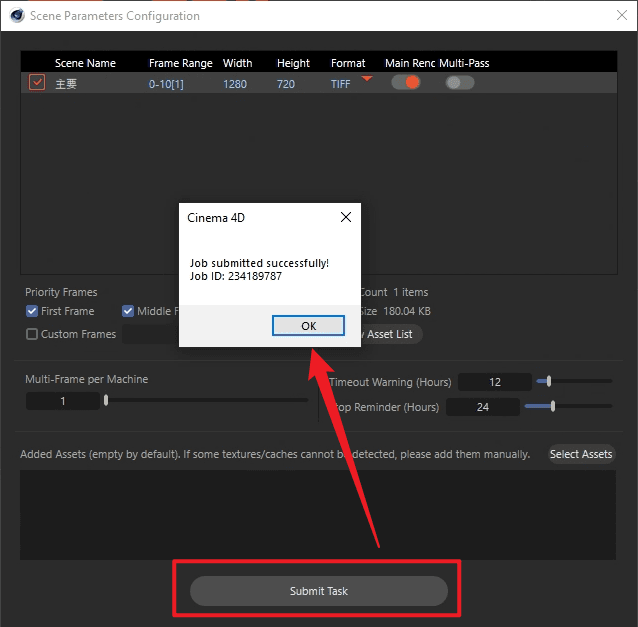
3.After confirming all parameters are correct, click [Submit Task]. You can view real-time rendering progress of jobs in the client upon successful submission.
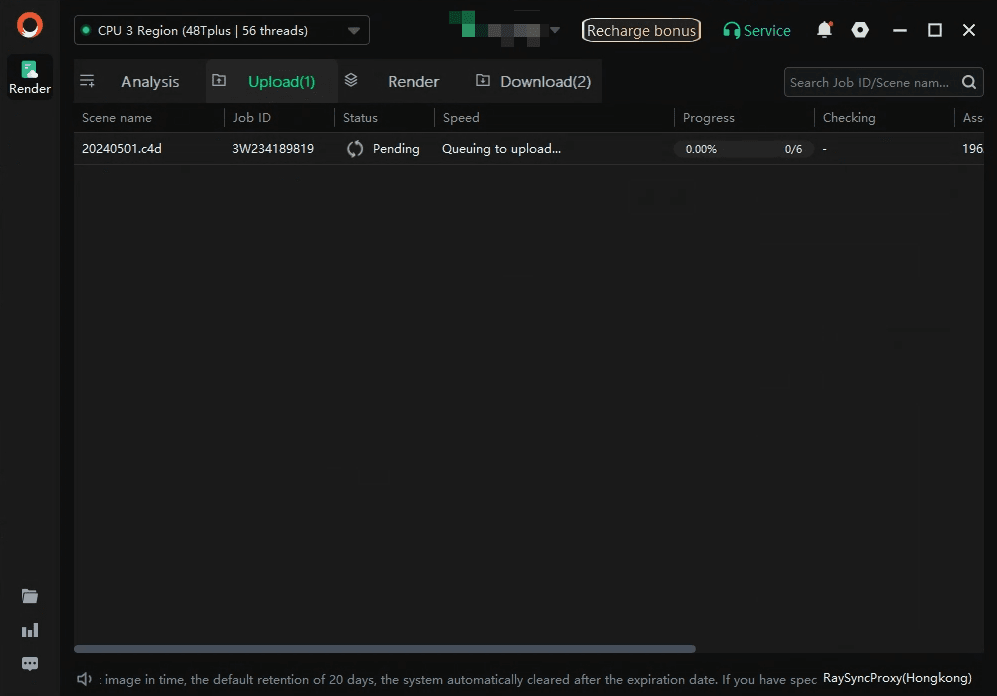
Step 4: Upload
After submitting the rendering job in Cinema 4D, return to the Fox client to view the file upload progress. After the upload is completed, it will be automatically rendered.
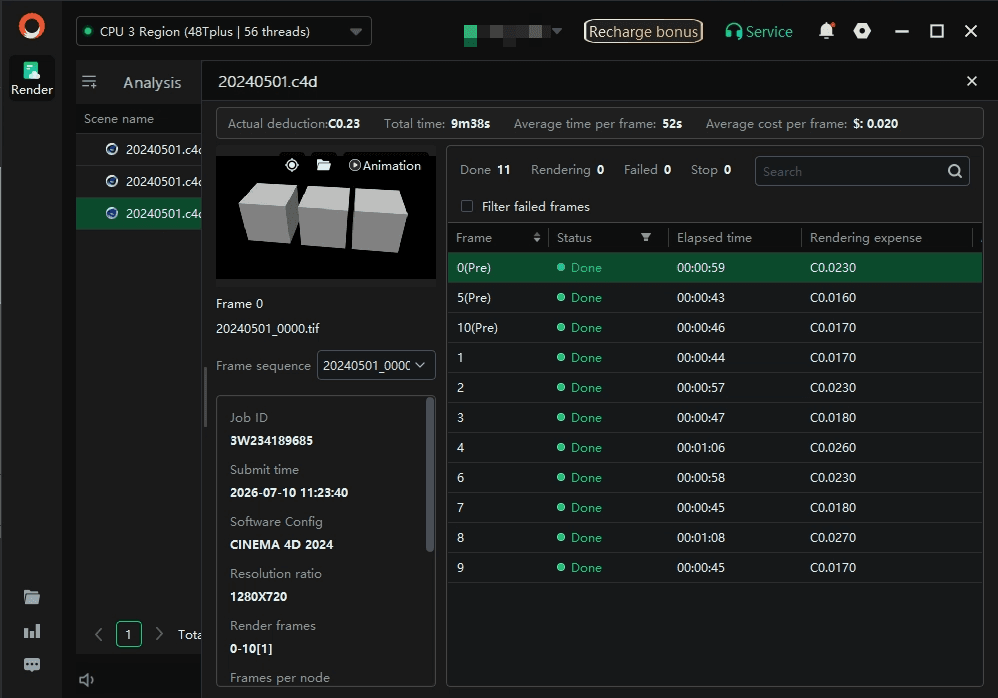
Step 5: Rendering and download
During rendering, click the target job to inspect full rendering details. Upon rendering completion, all rendered output files will be automatically downloaded to your local directory.
Step 6: Uninstall the plugin
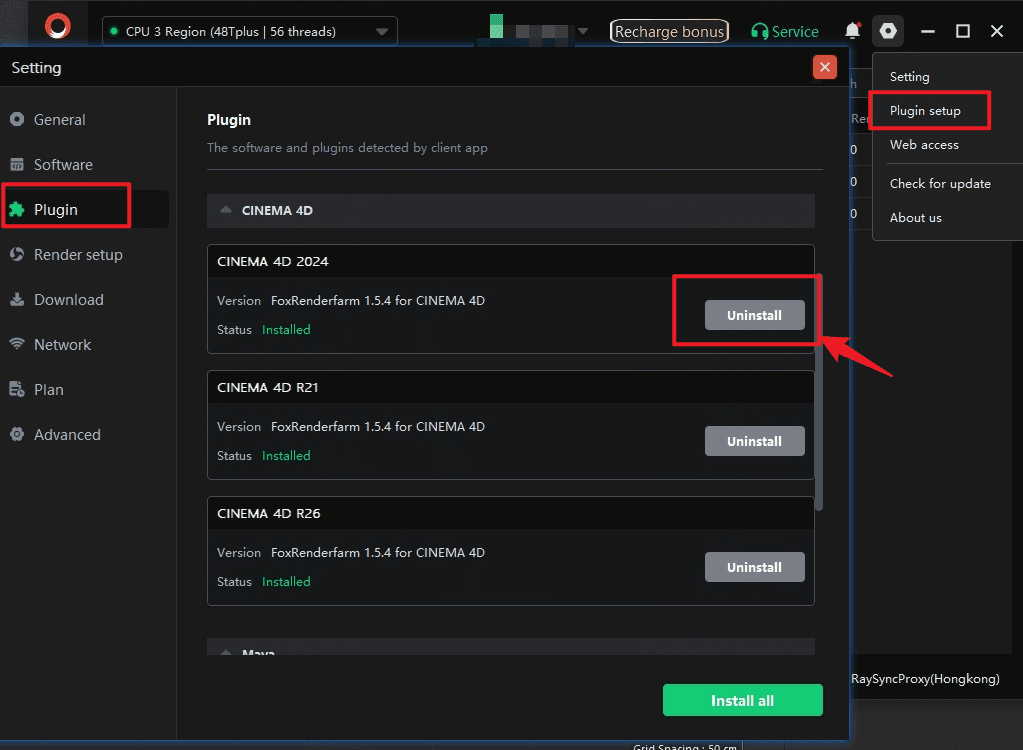
Go to the animation client, click on the "Settings" -> "Plug setup" functions in sequence, select the plugin version to be uninstalled and click "Uninstall". The uninstallation will be completed once the operation is finished.