Mixamo Blender Guide: Create Animations Without Rigging
Creating 3D animation often becomes difficult when you reach the rigging stage. This Mixamo Blender guide shows how to skip manual rigging and create animations faster using automatic tools. By combining Mixamo’s auto-rigging with Blender’s editing features, you can build smooth, ready-to-use animations in just a few steps.
Whether you are a beginner or looking to speed up your workflow, this tutorial walks you through importing models, applying animations, and refining them inside Blender. By the end, you’ll be able to create clean and professional results with less time and effort.

Part 1. What Is Mixamo and How It Works with Blender
Mixamo is a free Adobe-powered web platform that offers auto-rigged 3D characters and motion-captured animations. Users can search a massive library of 2000+ mocap clips, such as walk, dance, or fight, in common 3D formats like FBX and OBJ. As you pick the right character, either from Mixamo or Blender, you upload it to Mixamo, where it automatically adds the rig by placing a few markers on the body.

Following this, you need to select from ready-made animations, adjust speed or looping, and download the file. After that, you import the file into Blender and fix the size or position if needed. You can also use a Mixamo Blender add-on to make things easier, add better controls, or fix movement issues.
Part 2. Requirements for Using Mixamo with Blender
Mixamo 2.0 introduced a cleaner, faster interface that makes it easier to create, organize, and animate 3D characters in a single, smooth workflow. To understand Maximo animation in detail, it's important that you learn about its usage requirements via the mentioned details:
- Accounts & Software: You need a free Mixamo (Adobe ID) account and a recent version of Blender (3.x-4.x). Additionally, the Blender should have FBX import enabled, and your system just needs to run Blender smoothly with a stable internet connection.
- Files & Character Setup: Use FBX or OBJ files for your character, and ensure your model is a single, clean mesh in a simple T- or A-pose. Once this condition is met, Mixamo can rig it properly without errors.
- Blender Settings & Export: Set Blender to 30 FPS and use Metric Units (Scale 1). Furthermore, when downloading from Mixamo, choose the FBX format and pick the “With Skin” or “Without Skin” option, depending on your needs.
- Add-ons & Skills: You can work without add-ons, but they make things easier by improving control and fixing issues. Likewise, basic Blender skills and a basic understanding of animation help you edit and combine animations smoothly.
Part 3. How to Prepare Character Models for Mixamo
Once the Mixamo requirements are met, this section explains how to prepare the character models for Mixamo. After that, you can learn how to import into Blender for editing, refining animations, and creating smooth final renders.
How to Rig a Character Automatically in Mixamo
To set the model and rig it automatically, follow the given steps:
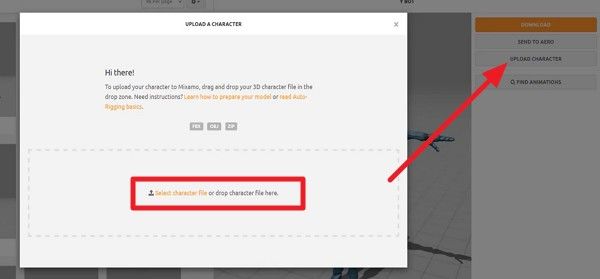
Step 1. Go to Mixamo and choose the “Upload Character” button to import your model and drag or drop it, or tap on “Select Character File.”
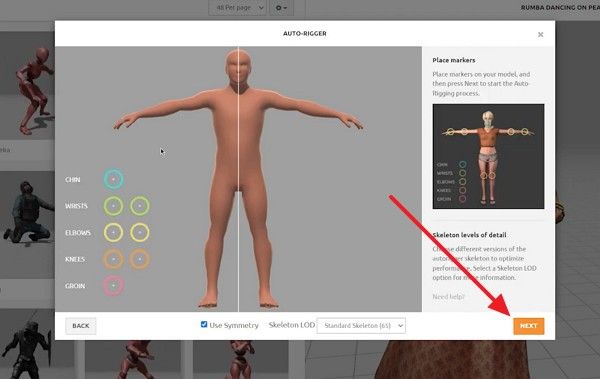
Step 2. Once the model is added, choose the “Next” button, add the markers, and press “Next.”
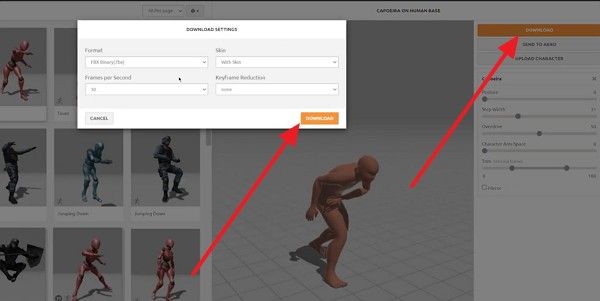
Step 3. As the model is rigged, click the “Download” button, then in the popup menu select “Skin” or “Format” settings, along with others. After that, press the “Download” button and save it for later import into Blender.
Part 4. Choosing and Customizing Animations in Mixamo
Before the final export, let’s say you want to tailor the Maximo animation. In this case, get to know how you can do so while picking the best Maximo settings.
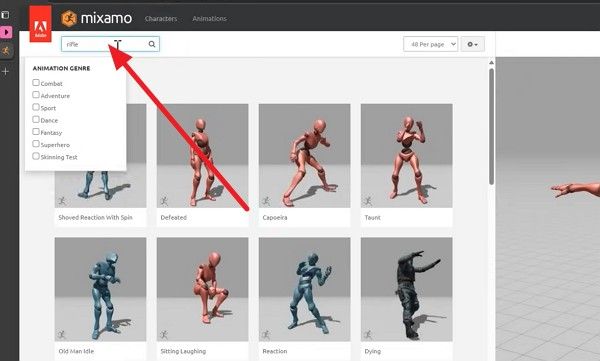
Step 1. Tap the “Search” icon, then search for an animated pose in the library.
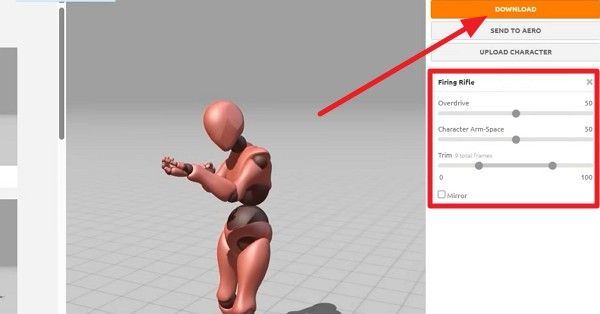
Step 2. Choose the desired option, and in the pose settings, adjust parameters like “Overdrive” or “Trim.” Once the animation is as you prefer, tap the "Download" button and import it to Blender.
Best Export Settings for Mixamo Animations
When exporting, make sure you select the list settings for your Maximo animated model:
|
Setting |
Best Option |
Why It Matters |
|
File Format |
FBX Binary |
Works best with Blender and game engines |
|
Skin Option |
With Skin / Without Skin |
With Skin = full character, Without = animation only |
|
Frames Per Second |
30 FPS |
Matches Mixamo's default for smooth motion |
|
Keyframe Reduction |
None |
Keeps full animation quality |
|
Pose |
T-Pose |
Useful for retargeting and blending |
|
In-Place |
Enabled (If needed) |
Prevents the character from sliding forward |
|
Overdrive (Speed) |
100% (default) |
Keeps natural animation timing |
|
Arm Spacing |
Adjust if needed |
Avoids arm collision or unnatural poses |
How to Import Mixamo Files into Blender
Now that you have the final Maximo animation, here is how you can import it into Blender:
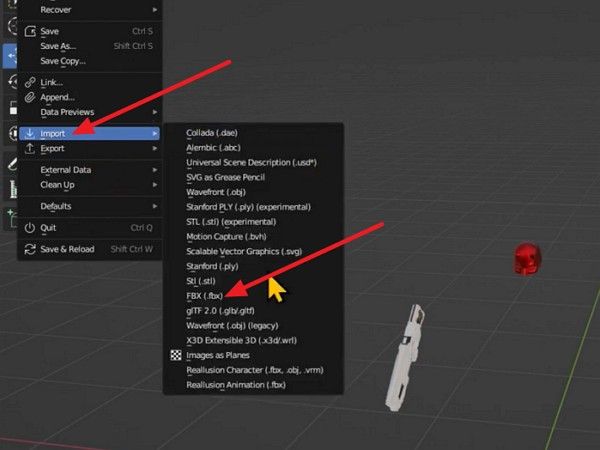
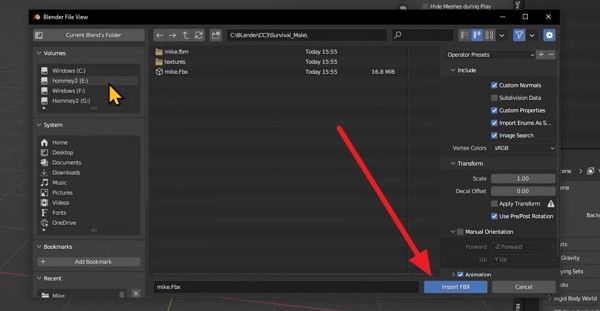
Step 1. Go to the “Files” menu in Blender and choose the “Import” option to tap the “FBX” format option.
Step 2. In the new window, choose the model file under the “Volume” section and choose the “Import FBX” button at the bottom.
Part 5. How to Blend Multiple Mixamo Animations in Blender
Before you use any Mixamo add-on Blender, sometimes you want to import multiple animations from Mixamo. If this is the case, review the mentioned steps and later learn how to use the add-on for better control:
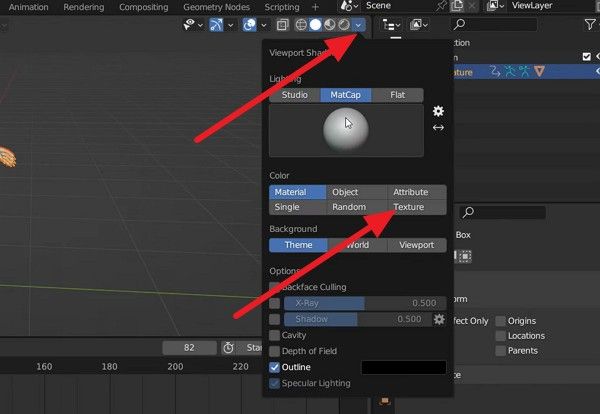
Step 1. Import the FBX file as mentioned above and go to the “Viewport Shading” menu and head to the “MatCap” tab. There, choose any MatCap and switch to any “Texture” in the “Color” section.
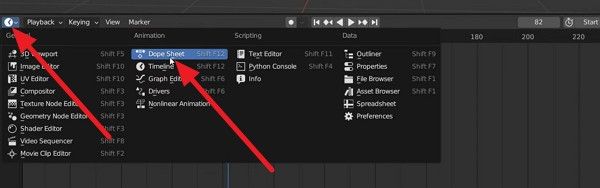
Step 2. At this point, switch the timeline editor to the “Dope Sheet” editor.
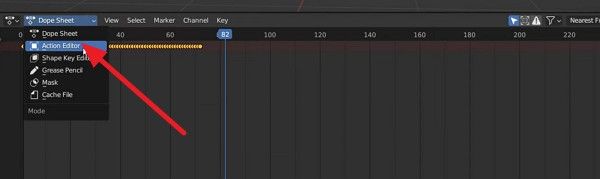
Step 3. Once changes are made, stretch the menu for the Drop Sheet, set it to the “Action Editor,” and rename the timelines based on the action models you are importing next.
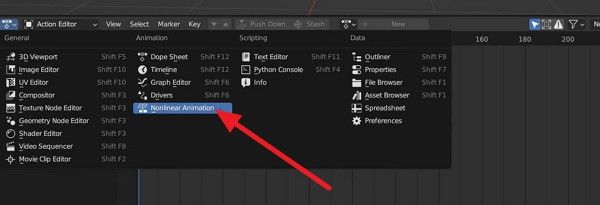
Step 4. After the model’s actions are added and saved, switch the Dope Sheet Editor to the “Nonlinear Animation.” This tool will layer different animation sequences to create complex animations, and you can also control timing, blending, and interaction between the animation actions.
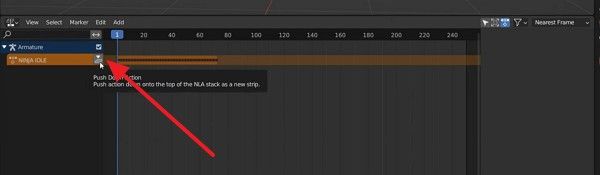
Step 5. In the “Nonlinear Animation” editor, tap on the “Push Down Action” icon and adjust the placement/position of the model.
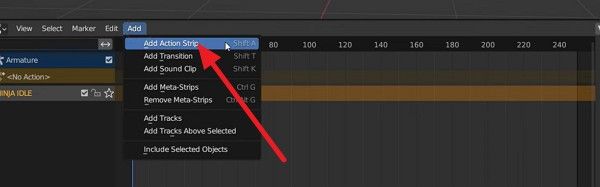
Step 6. There, you can add more actions by tapping the “Add” and “Add Action Strip” options at the top.
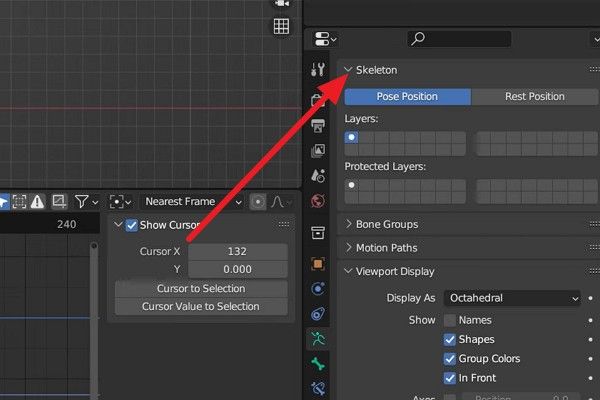
Step 7. Upon adding the action, you can adjust other parameters in the “Skeleton” settings till you get the desired smooth transition between animations. Fine-tune the timing, overlap the strips slightly for natural blending, and preview the result in the timeline to ensure the movements flow seamlessly.
How to Use Mixamo Blender Add-on for Better Animation
For better control and changes, if you want to use the Mixamo Blender add-on, the mentioned steps have you sorted:
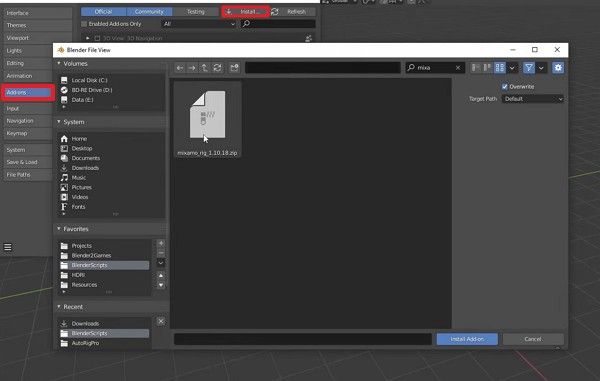
Step 1. In the Blender “File” tab, go to “Preferences” and choose the “Add-Ons” and “Install” tab. There, import the Mixamo Add-on ZIP file that you downloaded from the main site.
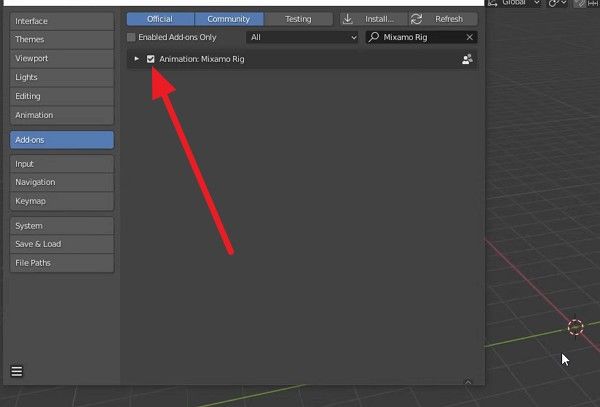
Step 2. Once installed, activate it by pressing the “Tick” icon next to the Mixamo Blender add-on.
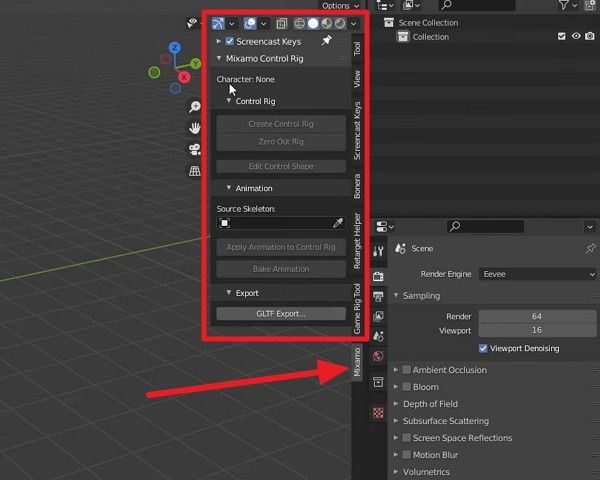
Step 3. After that, you can access the Mixamo settings from the right column and start applying controls, retargeting animations, and adjusting rigs more easily for smoother results.
Part 6. Exporting and Rendering Animation Output
As you complete your Mixamo animation in Blender, the next step is to export and render it properly for final use. This stage is important because good rendering settings directly affect the realism, lightning quality, and smoothness of your animation. So, when your animation timeline is complete and all keyframes are correctly adjusted, go to the Render Properties and choose the output settings.
When doing so, note that complex scenes with high-quality textures or advanced lighting may require more rendering time and system power. In this situation, you can use a render farm like Fox Renderfarm to handle heavy rendering workloads. It uses thousands of render notes, and the tool uses Blender with Cycles and Eevee engines, so that your Mixamo animations and rigs stay the same when you upload the project.
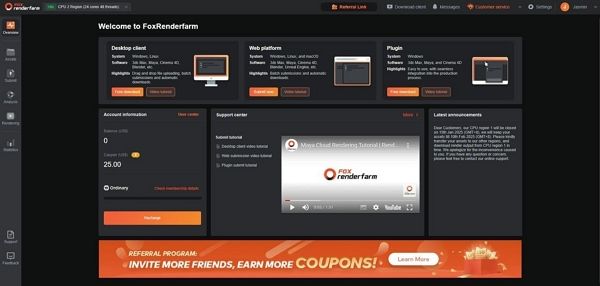
Furthermore, you can upload files using Raysync's high-speed transmission, and you can also set the Blender version, frame rate, and resolution. Unlike other farms, it can handle large animation projects of 4K/8K and your files are protected with the ISO27001 certification and NDA available.
Frequently Asked Questions
1. Is Mixamo good for professional animation projects?
Yes, Mixamo is useful, but professionals use it with Blender for high-quality final polishing. In addition, it speeds up the workflow, but detailed customization is still needed.
2. Can I use Mixamo animations on non-human characters?
Generally, Mixamo works best with humanoid rigs, but limited use with non-humanoid rigs is possible. Additionally, complex creatures may require manual adjustments in Blender to ensure proper fit.
3. Do I need an internet connection every time I use Mixamo with Blender?
You need an internet connection to use the Mixamo website, but you can work offline in Blender once you have your assets downloaded.
Conclusion
Mixamo makes 3D animation simple by removing the need for complex rigging, which is why users want to know how to use it in Blender. To guide in this regard, this detailed guide has explained the key requirements for Mixamo, how to personalize animations, and how to import them into Blender. Nevertheless, for high-quality final outputs and heavy rendering tasks, online rendering services like Fox Renderfarm help achieve realistic results with better performance.