Top 9 Best And Free Blender Render Farms of 2025
2023-05-06


Méthodes couramment utilisées pour le dépliage UV dans 3ds Max
3ds Max Tutorials
Dans cet article, Fox Renderfarm, l’un des principaux fournisseurs de services de rendu cloud et ferme de rendu dans l’industrie de la 3D, vous présente quelques méthodes couramment utilisées pour le dépliage UV dans 3ds Max. Bien que la version installée de 3ds Max soit assez ancienne (2014), cela n’a pas d’impact majeur sur les fonctionn
Métodos Comúnmente Usados para Desenvolver UVs en 3ds Max
3ds Max Tutorials
En este artículo, Fox Renderfarm, como líder proveedor de servicios de renderizado en la nube y granja de renderización en la industria CG, compartirá con usted algunos métodos comúnmente utilizados para desenvolver UVs en 3ds Max. La versión utilizada de 3ds Max es del 2014, pero en general no tiene mucho impacto.Para editar UVW, usted puede abrir:

3D Tutorial: The Production Process of 'Medieval Abandoned Cart'
3D Tutorial
In this article, Fox Renderfarm, a leading cloud rendering service provider and render farm in the CG industry, will share the process of creating the "Medieval Abandoned Cart" 3D scene. This scene was meticulously crafted by a student team over two months. Let's explore the final outcome:Analyzing the Concept Art and Constructing the Rough ModelThis is a case study of the PBR workflow. The low-po

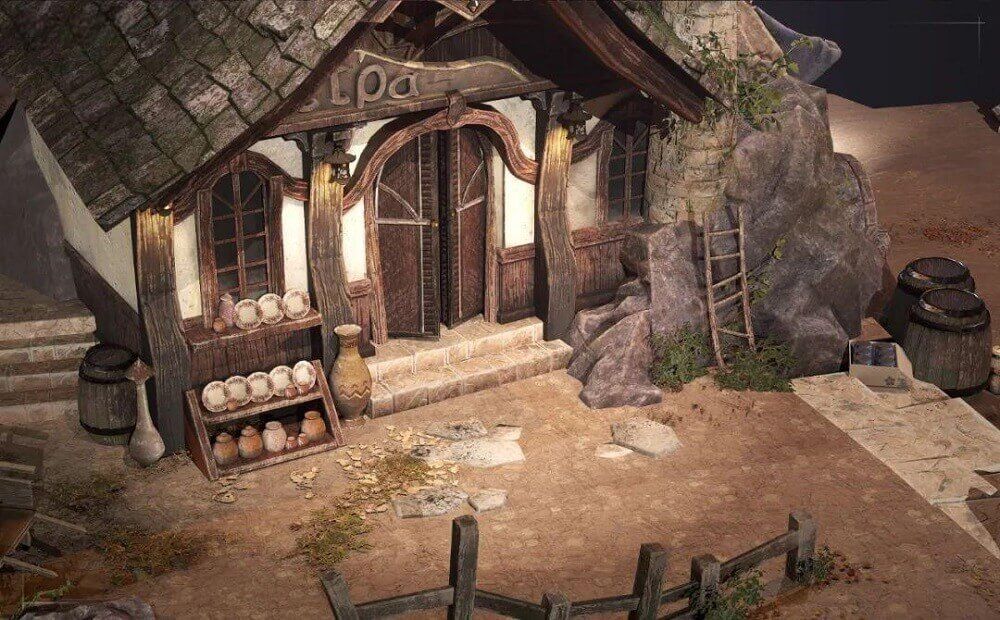
How to Create the Entrance of 'For Honor'
3ds Max Tutorials
The leading cloud rendering service provider and render farm in the CG industry, Fox Renderfarm, will show you in this post a scene inside "For Honor," the Entrance, created by a student who is learning 3D modeling. The creator completed this work over a period of four weeks by solving problems and challenges with the help of his/her teacher and his/her own efforts. This article is a summary of hi

The Ruins of David Made With 3ds Max & ZBrush
3ds Max Tutorials
In this article, Fox Renderfarm, a leading cloud rendering service provider and render farm in the CG industry, will share with you a 3D scene called "The Ruins of David" that was collaboratively created by a student team over a span of 4 weeks with the PBR process.Final result:Observing and Analyzing Concept Art &x26; Asset AllocationOur reference was inspired by the work of a skilled artist we f

Get Started on Game Modeling with 3ds Max Modeling Tips
3ds Max Tutorials
The reason why 3D is called "3D" is because it takes a 2D profile of an object and extrudes it along a certain path, forming complex 3D objects. Different shapes can be applied to different segments along the same path. This transformation path is called loft modeling. Today, Fox Renderfarm, as a leading cloud rendering service provider and render farm in the industry, will introduce the basic mod
Next-generation Style Scene "House in the Mountain" Making Tutorial
ZBrush Tutorials
In this article, Fox Renderfarm, the industry's leading cloud rendering service provider and render farm, will bring you a tutorial on making a next-gen style scene shared by a 3D art and design student. This was his first time working with ZBrush and it took almost 4 weeks to complete it as he didn't have much experience. The original painting was from the internet and although the result is not

3D Tutorial of Next-generation Scene "Magic Book Room"
3ds Max Tutorials
In this article, as a leading cloud rendering service provider and render farm in the CG industry, Fox Renderfarm will bring you a tutorial on creating the 3D scene of the next-generation "Magic Book Room".1. Analyze and Build a Rough ModelThis is a case of PBR process, specifically using 3ds Max to complete the low-poly model, ZBrush to complete the high-poly sculpting, TopoGun for topology, Subs

3D Tutorial of Making 'God Statue Corridor' Scene
3ds Max Tutorials
In this article, Fox Renderfarm, the CG industry's leading cloud rendering service provider and render farm, will bring you a tutorial on making 'God Statue Corridor' scene created by a team of students of 3D games models.Analyzing Original Painting &x26; Making the Basic ModelsFirst we analyzed the original painting, here we determined the length and width by checking the size of the original pai

3D Tutorial: "Water Temple" Scene Production
3D Tutorial
In this article, Fox Renderfarm, a leading cloud rendering service provider and render farm, brings you a collaborative 3D scene "Water Temple" created by four students. This project was inspired by artist Sergei PaninPRO.Final result:1. Analyze Original Painting and Asset AllocationThe entire scene is a PBR process case. First, we used 3ds Max's gray box to build the overall framework of the enti

3ds Max Cloud Rendering Tutorials and Render Farm Recommendations
3ds Max Tutorials
3ds Max is a 3D professional modeling software, animation and rendering application builder, formerly 3D Studio and 3D Studio Max, used to create 3D animations, models, interactive games and visual effects for the entertainment industry. 3Ds Max plays a big role in designing the 2D cross-sectional shapes of 3D models. It can bring characters to life by using a special feature called inverse kinema
Commonly Used Methods for Unwrapping UVs in 3ds Max
3ds Max Tutorials
In this article, Fox Renderfarm, a leading cloud rendering service provider and render farm in the CG industry, will share with you some commonly used methods for unwrapping UVs in 3ds Max. The installed version of 3ds Max is quite old, it's 2014, but overall it doesn't make much of an impact.To edit UVW, you can open: Modify panel > Unwrap UVW > Open UV Editor.1. Top toolbarThe toolbar cont