
 Blender
 Cinema 4D
 Arnold
 3ds Max
 Houdini
 V-Ray
 Maya
 Unreal Engine
 Nuke
 Pricing
 New User Bonus
 Cost Estimator
 Christmas Sale


Read analysis results
Overview
A job is analysed before it renders: the platform checks whether the scene file, the render plugin and the settings can actually render. The Analysis page lists every job in that stage; read the results here, then send the ones that passed into rendering. Analysis itself costs nothing — billing starts once a job reaches the Rendering list.
Page map
| Area | What is in it |
|---|---|
| Top toolbar | Submit to render, Re-analyze, Abort, Delete, acting on the ticked jobs |
| Filter row | Search box at the top right, by scene name or Job ID; the Status header filters by state |
| List | Job ID, Scene name, Status, Starting time, Ending time, Duration, the Timeout stop marker, and Details at the end of each row |
The page only shows jobs that came in through Submit a job; it has no upload and no new-entry button. Common Status values are Analyzing, Waiting, Analysis done, Analysis failed, Analysis timeout and Submitted.
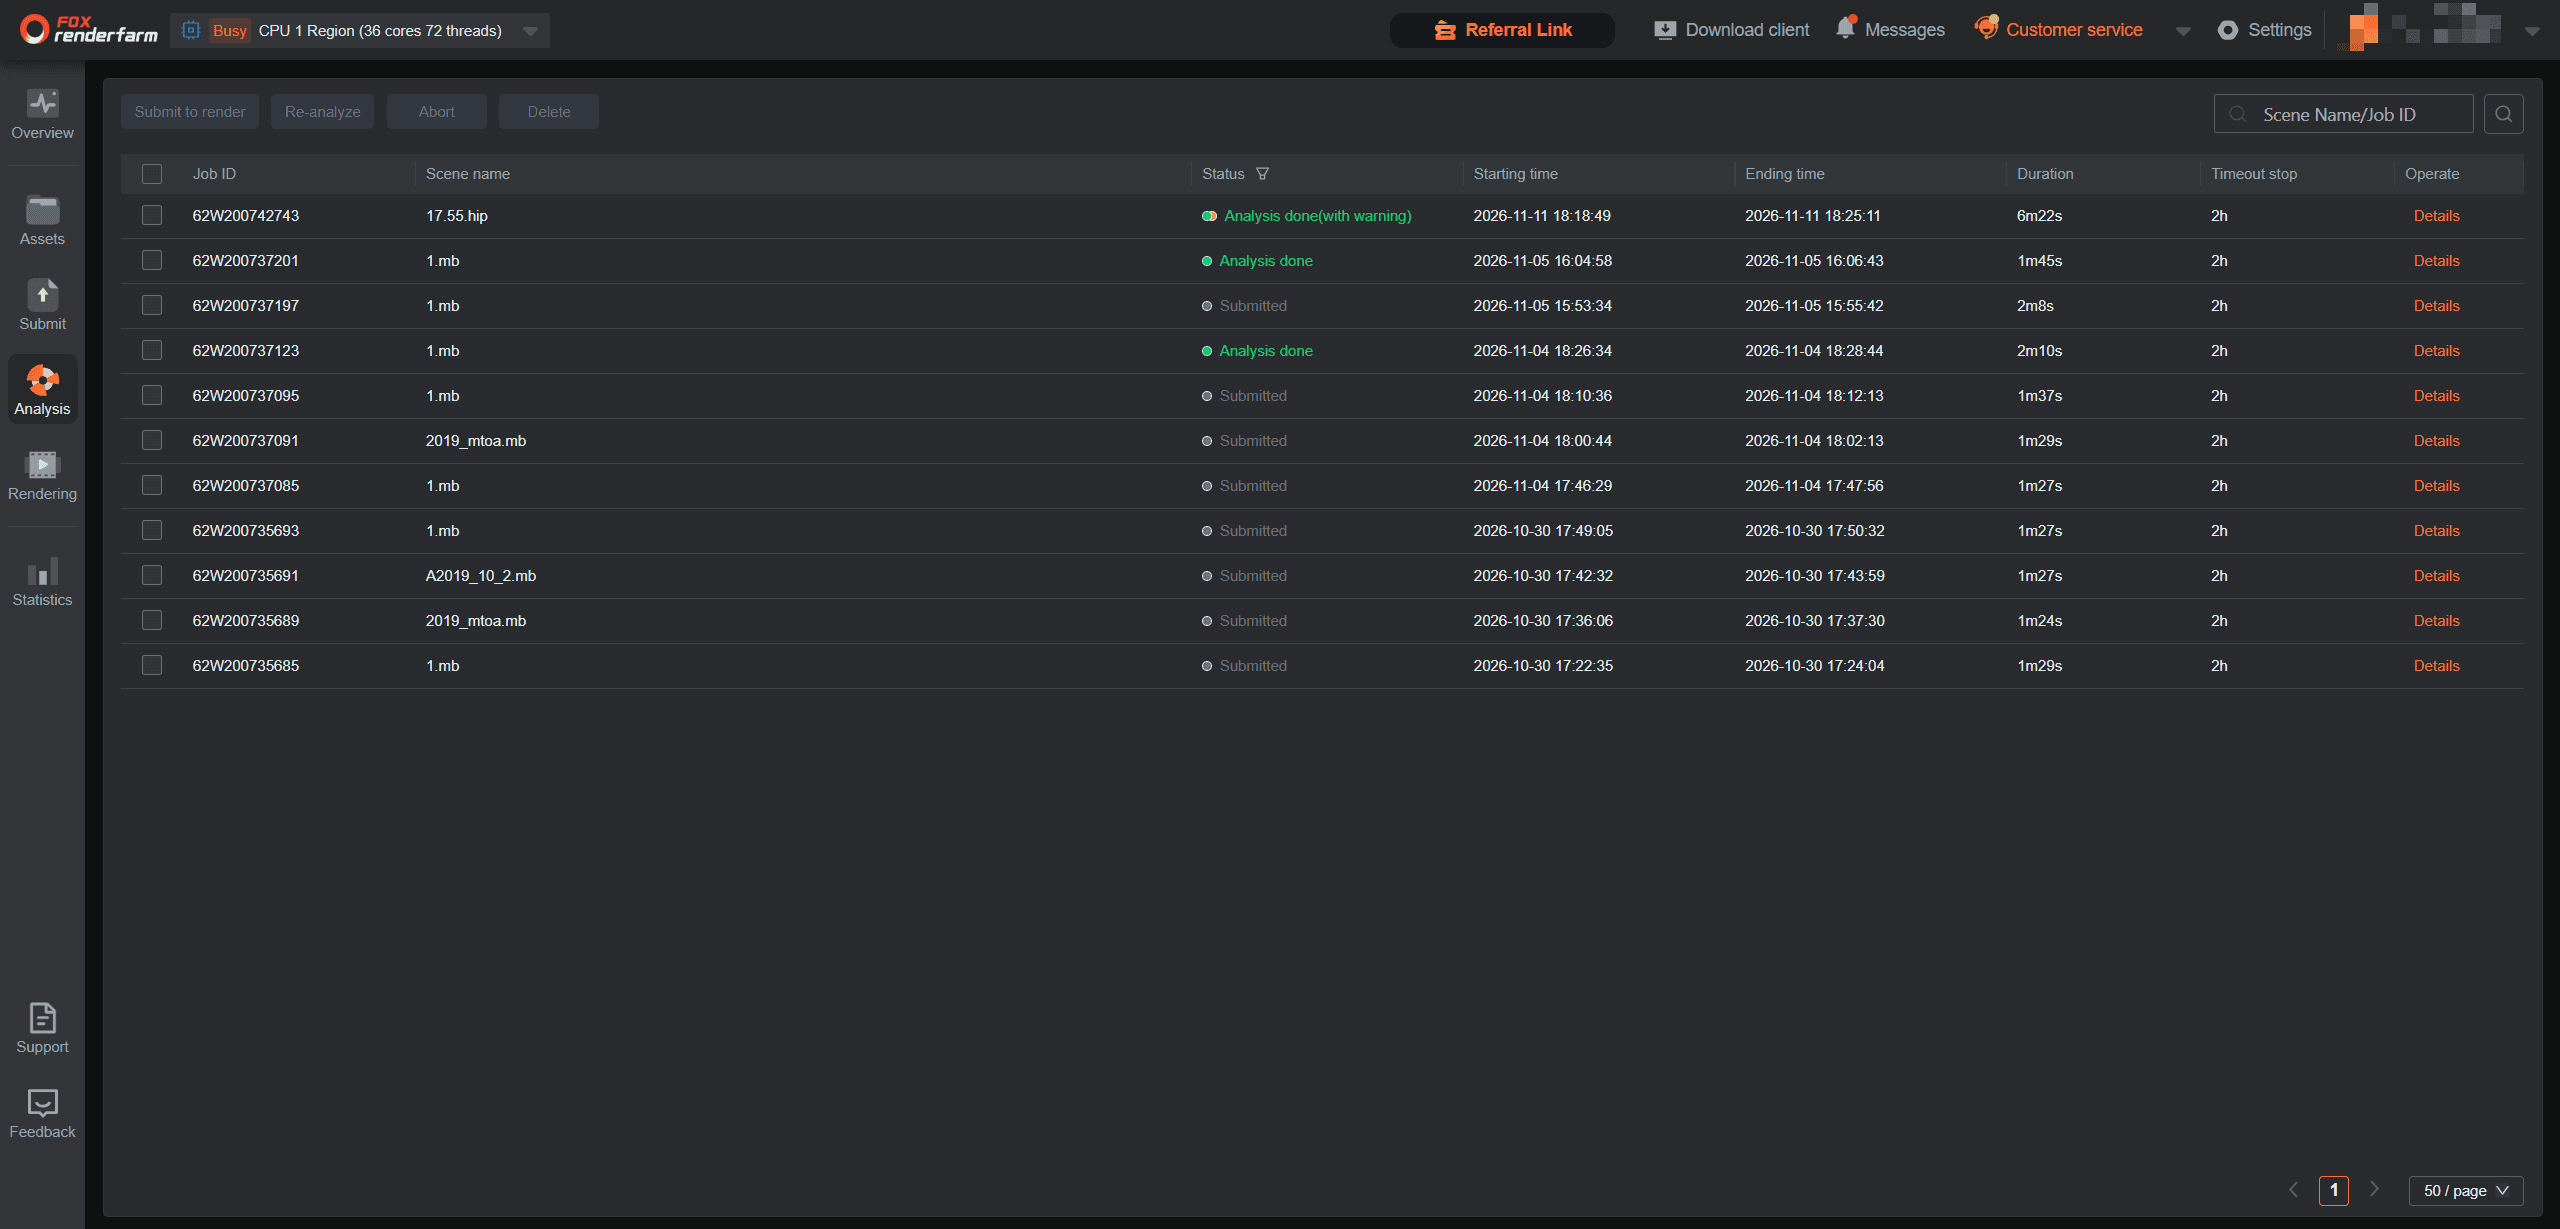
The four outcomes
Click Details at the end of a row. What the page offers next depends on the result:
| Outcome | What you see | What you can do |
|---|---|---|
| Done, no errors | Green tick, "Analysis completed! No errors found" | Continue |
| Done with warnings | Yellow marker; the log lists each warning with a suggestion | Ignore, continue |
| Done with errors | Red bar; the log lists the errors | Re-analyze |
| Analysis failed | Red marker, asking you to contact support | Re-analyze; if it keeps failing, contact support with the Job ID |
Warnings do not block submission, but they can change the output. Fix the scene as the log suggests and re-analyze; a job with warnings needs Ignore, continue before it can proceed. Errors do block it: the parameter page is not reachable until the scene is fixed and re-analysed.
Note: the table above describes the case where the parameter switch is on. With the switch off, a passing job is submitted automatically and never stops here.
How a passing job reaches rendering
This follows the switch described in Submit a job, under "Before you submit":
-
Switch off: the job renders with the scene's own settings and goes straight to the Rendering list.
-
Switch on: the job stops on the parameter page; change frame range, resolution, camera and so on, then click Submit to render. Each field is described in Set render parameters.
Progress from here is tracked in Monitor a job.
Batch submit to render
-
Tick several jobs of the same software type whose status is Analysis done, then click Submit to render.
-
In the dialog, set priority frames (first, middle, last), layer submission, project name, region tiles, frames per node, and the two timeouts — alert and stop.
-
Click Confirm; the selected jobs are submitted together with the same settings.
The batch dialog has no per-layer parameters and no entry for prerender or postproduction tasks — jobs that need either must be submitted one at a time.
Do not confuse this with the batch submit in Submit a job: that one sends several scene files into analysis at once and is available in the desktop client only; this one sends several already-analysed jobs into rendering.
Toolbar buttons
| Button | What it does | When it is available |
|---|---|---|
| Submit to render | Sends the ticked jobs into rendering | Job status is Analysis done |
| Re-analyze | Analyses again, free of charge | Any status |
| Abort | Gives up the job; it does not continue | Jobs not yet submitted |
| Delete | Removes the job from the list, permanently | Any status |


