
 Blender
 Cinema 4D
 Arnold
 3ds Max
 Houdini
 V-Ray
 Maya
 Unreal Engine
 Nuke
 Pricing
 New User Bonus
 Cost Estimator
 Christmas Sale


Priority frames and full render
Overview
Priority frames render only a few frames first, so a wrong camera, light or parameter shows up before the whole sequence is done.
This page covers the path from setting priority frames to rendering the rest. If no priority frames were set at submission, the job renders every frame straight away and this page does not apply.
Four steps: set the frames on the parameter page → submit to render → check the frames → click Render full job. The frames are set on the analysis side and checked on the Rendering side; it takes both to make one flow.
Set the priority frames
-
In Priority frames on the Set render parameters page, confirm the frames to try. The first, middle and last frame are ticked by default — keep them, or enter your own frame numbers; see Set render parameters for the details.
-
Click Submit to render. The job moves to the Rendering list, and the farm renders only those frames.
Check the frames
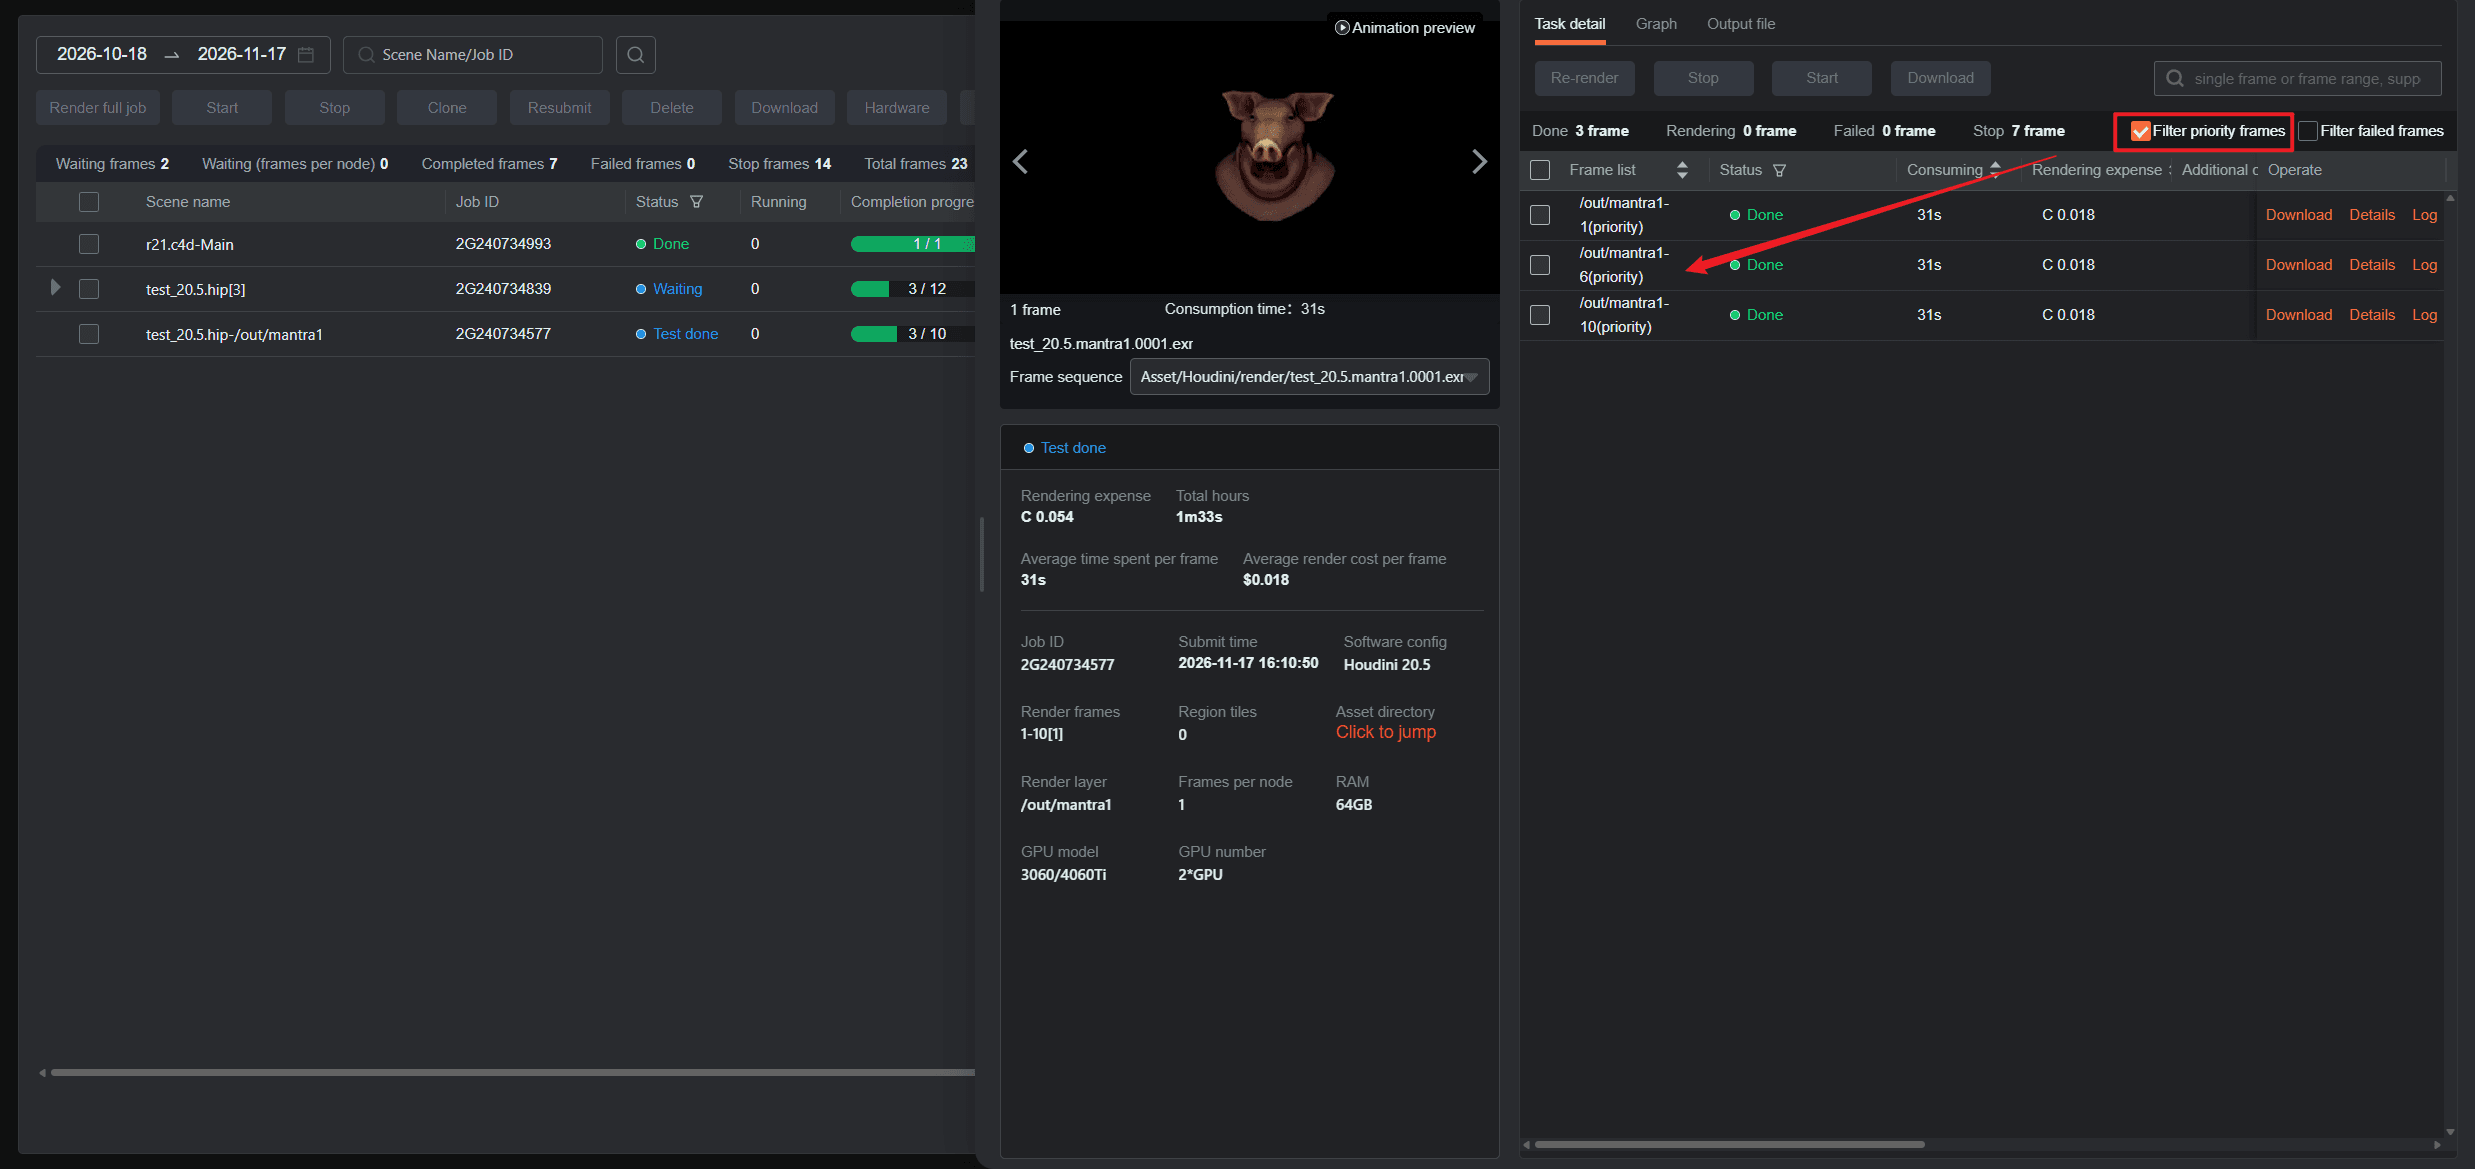
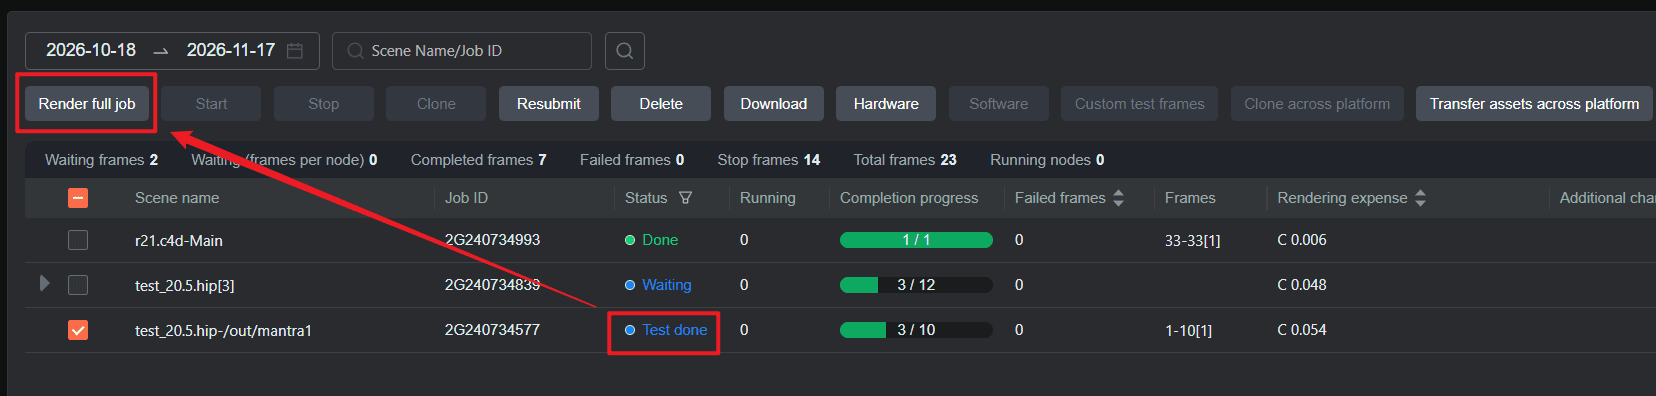
When the frames finish the job sits at Test done and waits for you. That pause is deliberate: nothing else renders until you confirm.
-
In the Rendering list, click the job to open the task detail drawer on the right.
-
Switch frames in the preview panel to look at the output. In the frame list, tick Filter priority frames to show only the ones rendered as tests.
-
If the image looks right, carry on. If not, fix the scene or the parameters and submit again.
Render full job
Once the frames look right, let the job render the rest.
1、Tick the job and click Render full job.
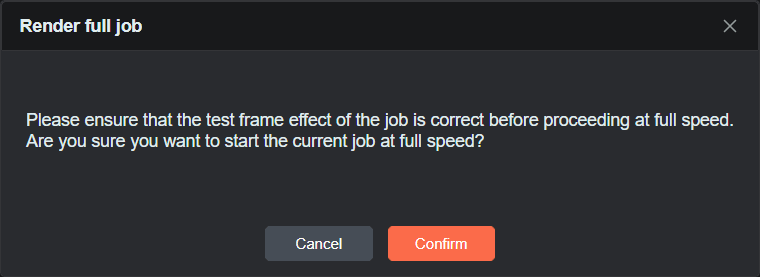
2、The dialog reminds you to confirm the frames first; click Confirm.
3、The job renders the remaining frames; follow the progress in the Rendering list.


