
 Blender
 Cinema 4D
 Arnold
 3ds Max
 Houdini
 V-Ray
 Maya
 Unreal Engine
 Nuke
 Pricing
 New User Bonus
 Cost Estimator
 Christmas Sale


Submit a job
Overview
Submitting a job hands your finished scene to Fox Renderfarm for rendering. There are three places to submit from: the web console, the desktop client, and a plugin inside your 3D software. All three share one account, one queue and one price, and the frames always render on the farm, not on your machine.
Whichever you use, the farm analyses the scene first — files, render plugin, settings. The analysis runs automatically. Whether the job renders as soon as it passes, or stops so you can change parameters first, depends on a switch.
Before you submit: change parameters after analysis?
Leave the switch off if the scene settings are fine. To adjust frame range, resolution or camera after analysis, turn it on before submitting.
1、Web console: Settings → Render settings → tick Enable scene parameter modification.

2、Desktop client: Settings → Render setup → Scene analysis → tick Modify render parameters and submit manually after analysis done.
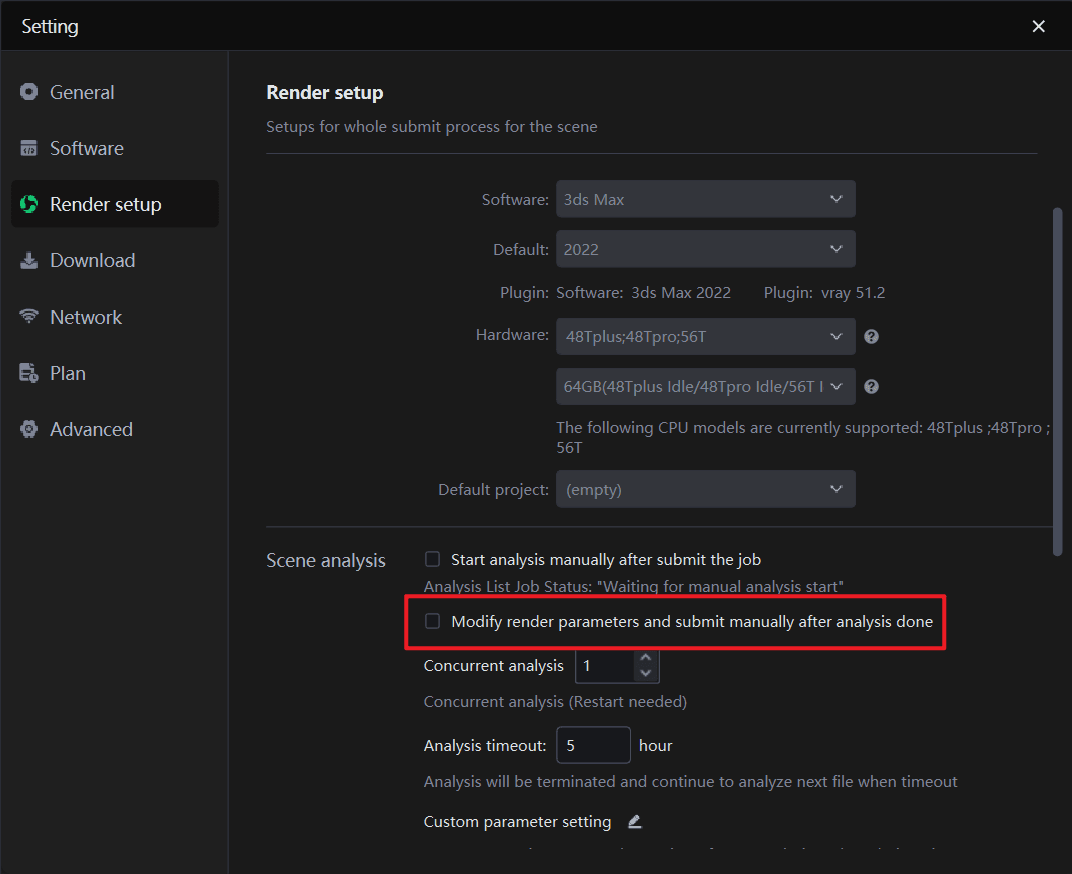
| Switch | After analysis passes |
|---|---|
| On | The job stops on the result page; click Continue to open Rendering parameter settings, change what you need, then submit |
| Off (default) | The job is submitted automatically and goes straight to the Rendering list; no parameter page appears |
The three channels
| Channel | Order of the stages | Where the scene comes from |
|---|---|---|
| Web console | Upload → submit → analyze → render | Cloud assets, so upload first |
| Desktop client | Submit → analyze → upload → render | Your local disk |
| 3D software plugin | Analyze and submit only | The scene open in the 3D application |
Software config and hardware config
Past the submit page, the web console and the client do the same two things: set the render environment, then pick the machine. The plugin skips this — see its section below.
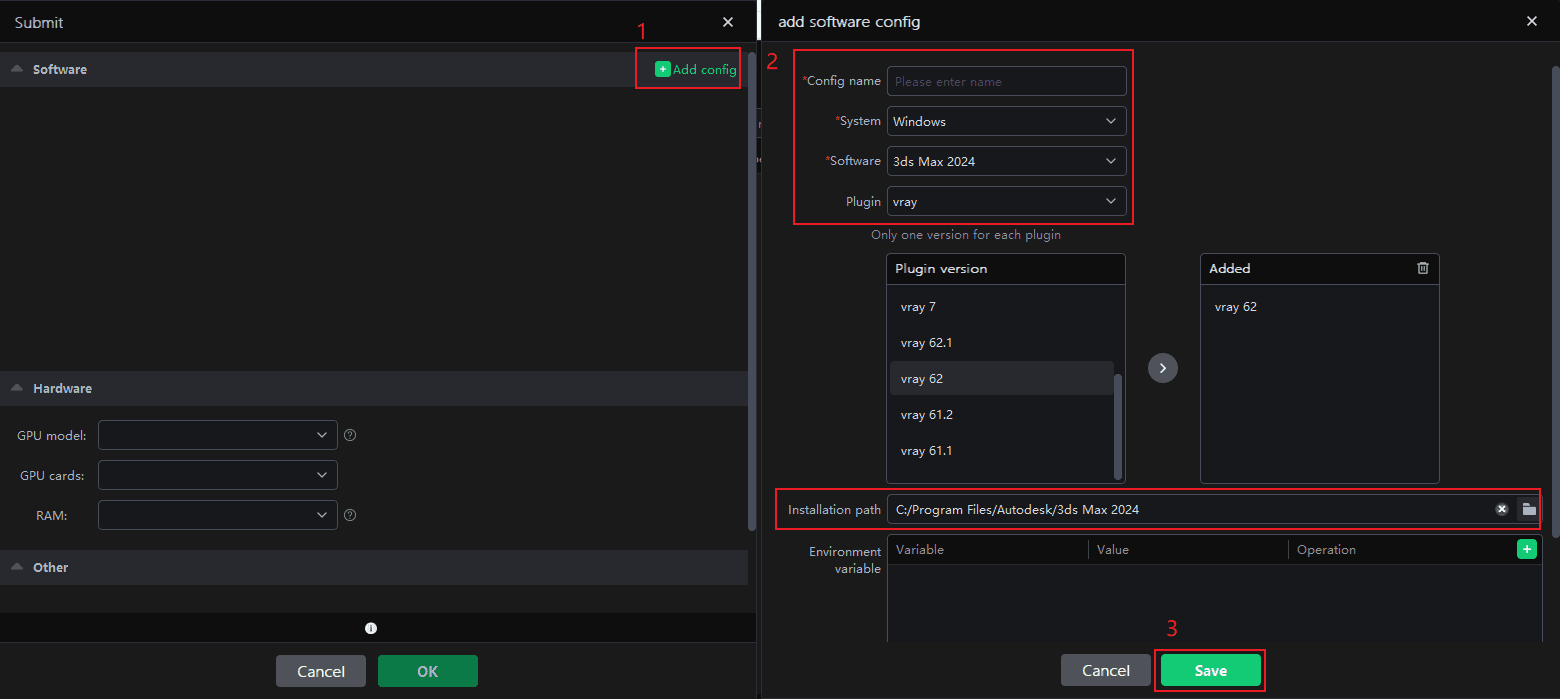
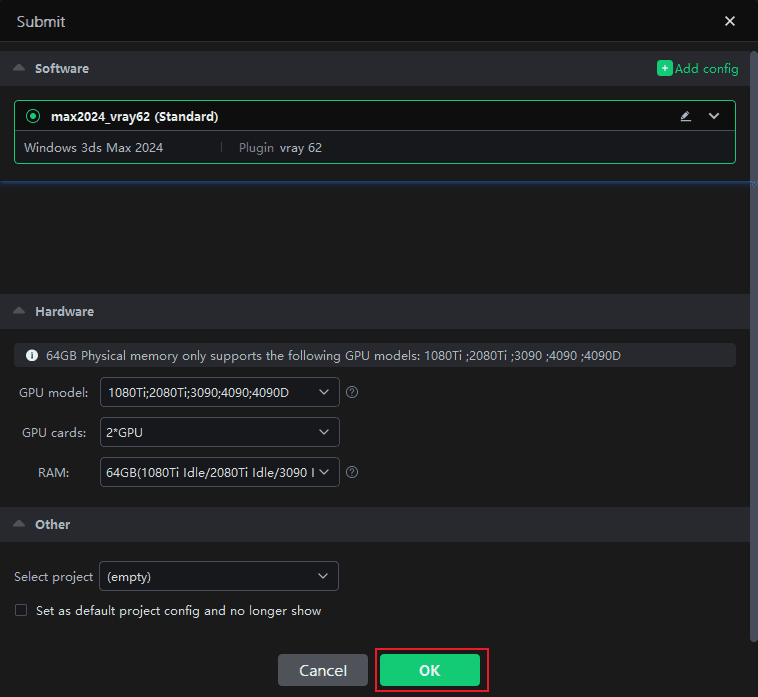
1、Click Add software config, or pick a saved one. Configurations are kept and can be reused.
2、Set the config name, render system (Windows / Linux), rendering software and version, render plugin and version, then Confirm. Software and plugin must match the scene; if a plugin is missing from the list, ask online support to add it.
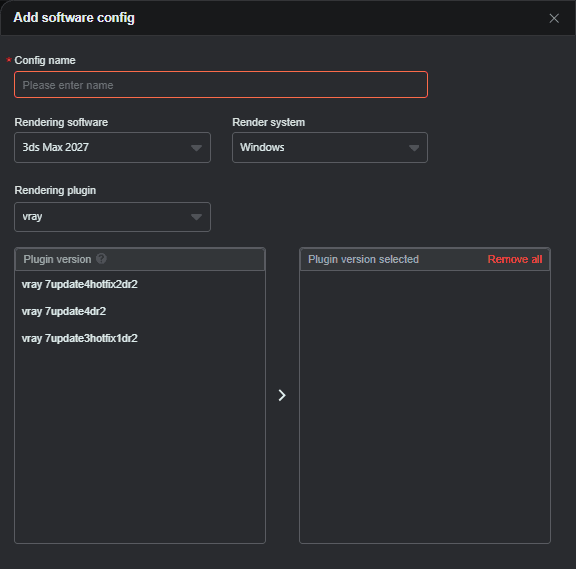
3、Select the configuration and the machine type. Several machine types can be picked; a stronger one renders faster.
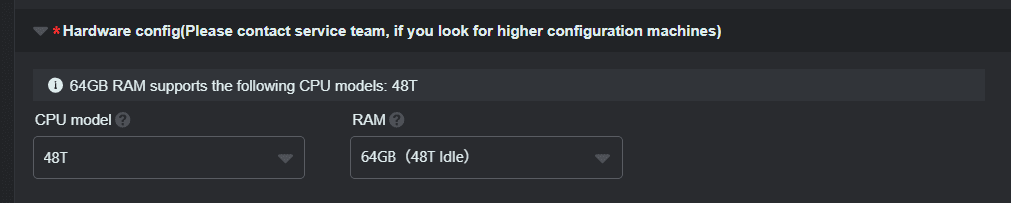
The desktop client asks for one more field: the software installation path. Scenes submitted together must share the same software and plugin versions.
Rental setup
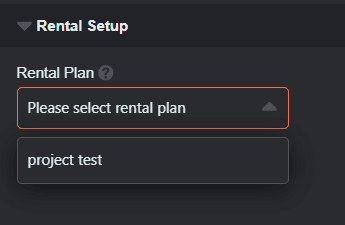
When the account has an active reserved machine plan, a Reserved machine plan settings section appears below Analysis settings:
- In the Reserved machine plan dropdown, choose the plan to use.
- After selecting, click Go analysis; the job then runs on that plan and is not charged.
💡 Note: the reserved machine plan is optional. With nothing selected, the job is billed as usual; if the account has no active plan, the whole section is hidden.
⚠️ Caution: purchase and activation status are viewed in the User Center — the submit page only selects. Once a job is submitted on a reserved machine plan, its billing method cannot be changed.
Submit from the web console
Upload the scene to Manage your assets first.
1、Either entry opens the same page:
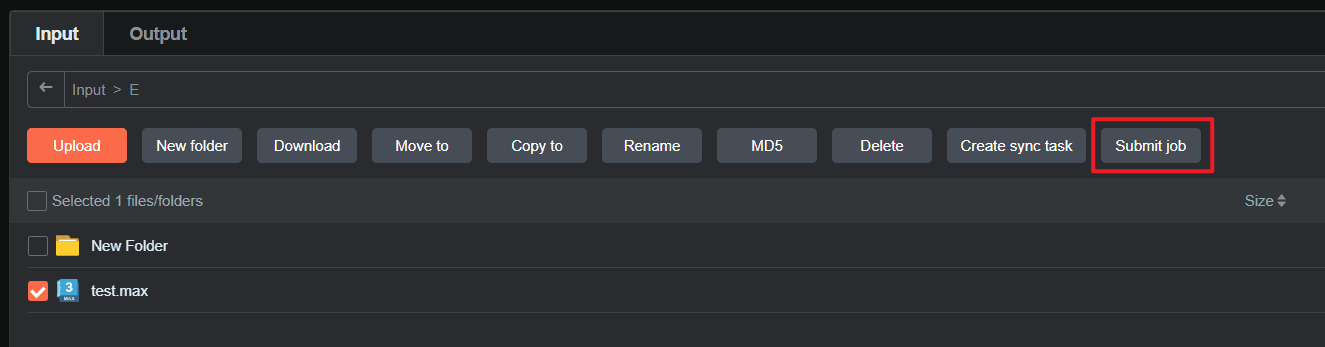
- Tick the scene in Manage your assets and click Submit job — the software is known already.
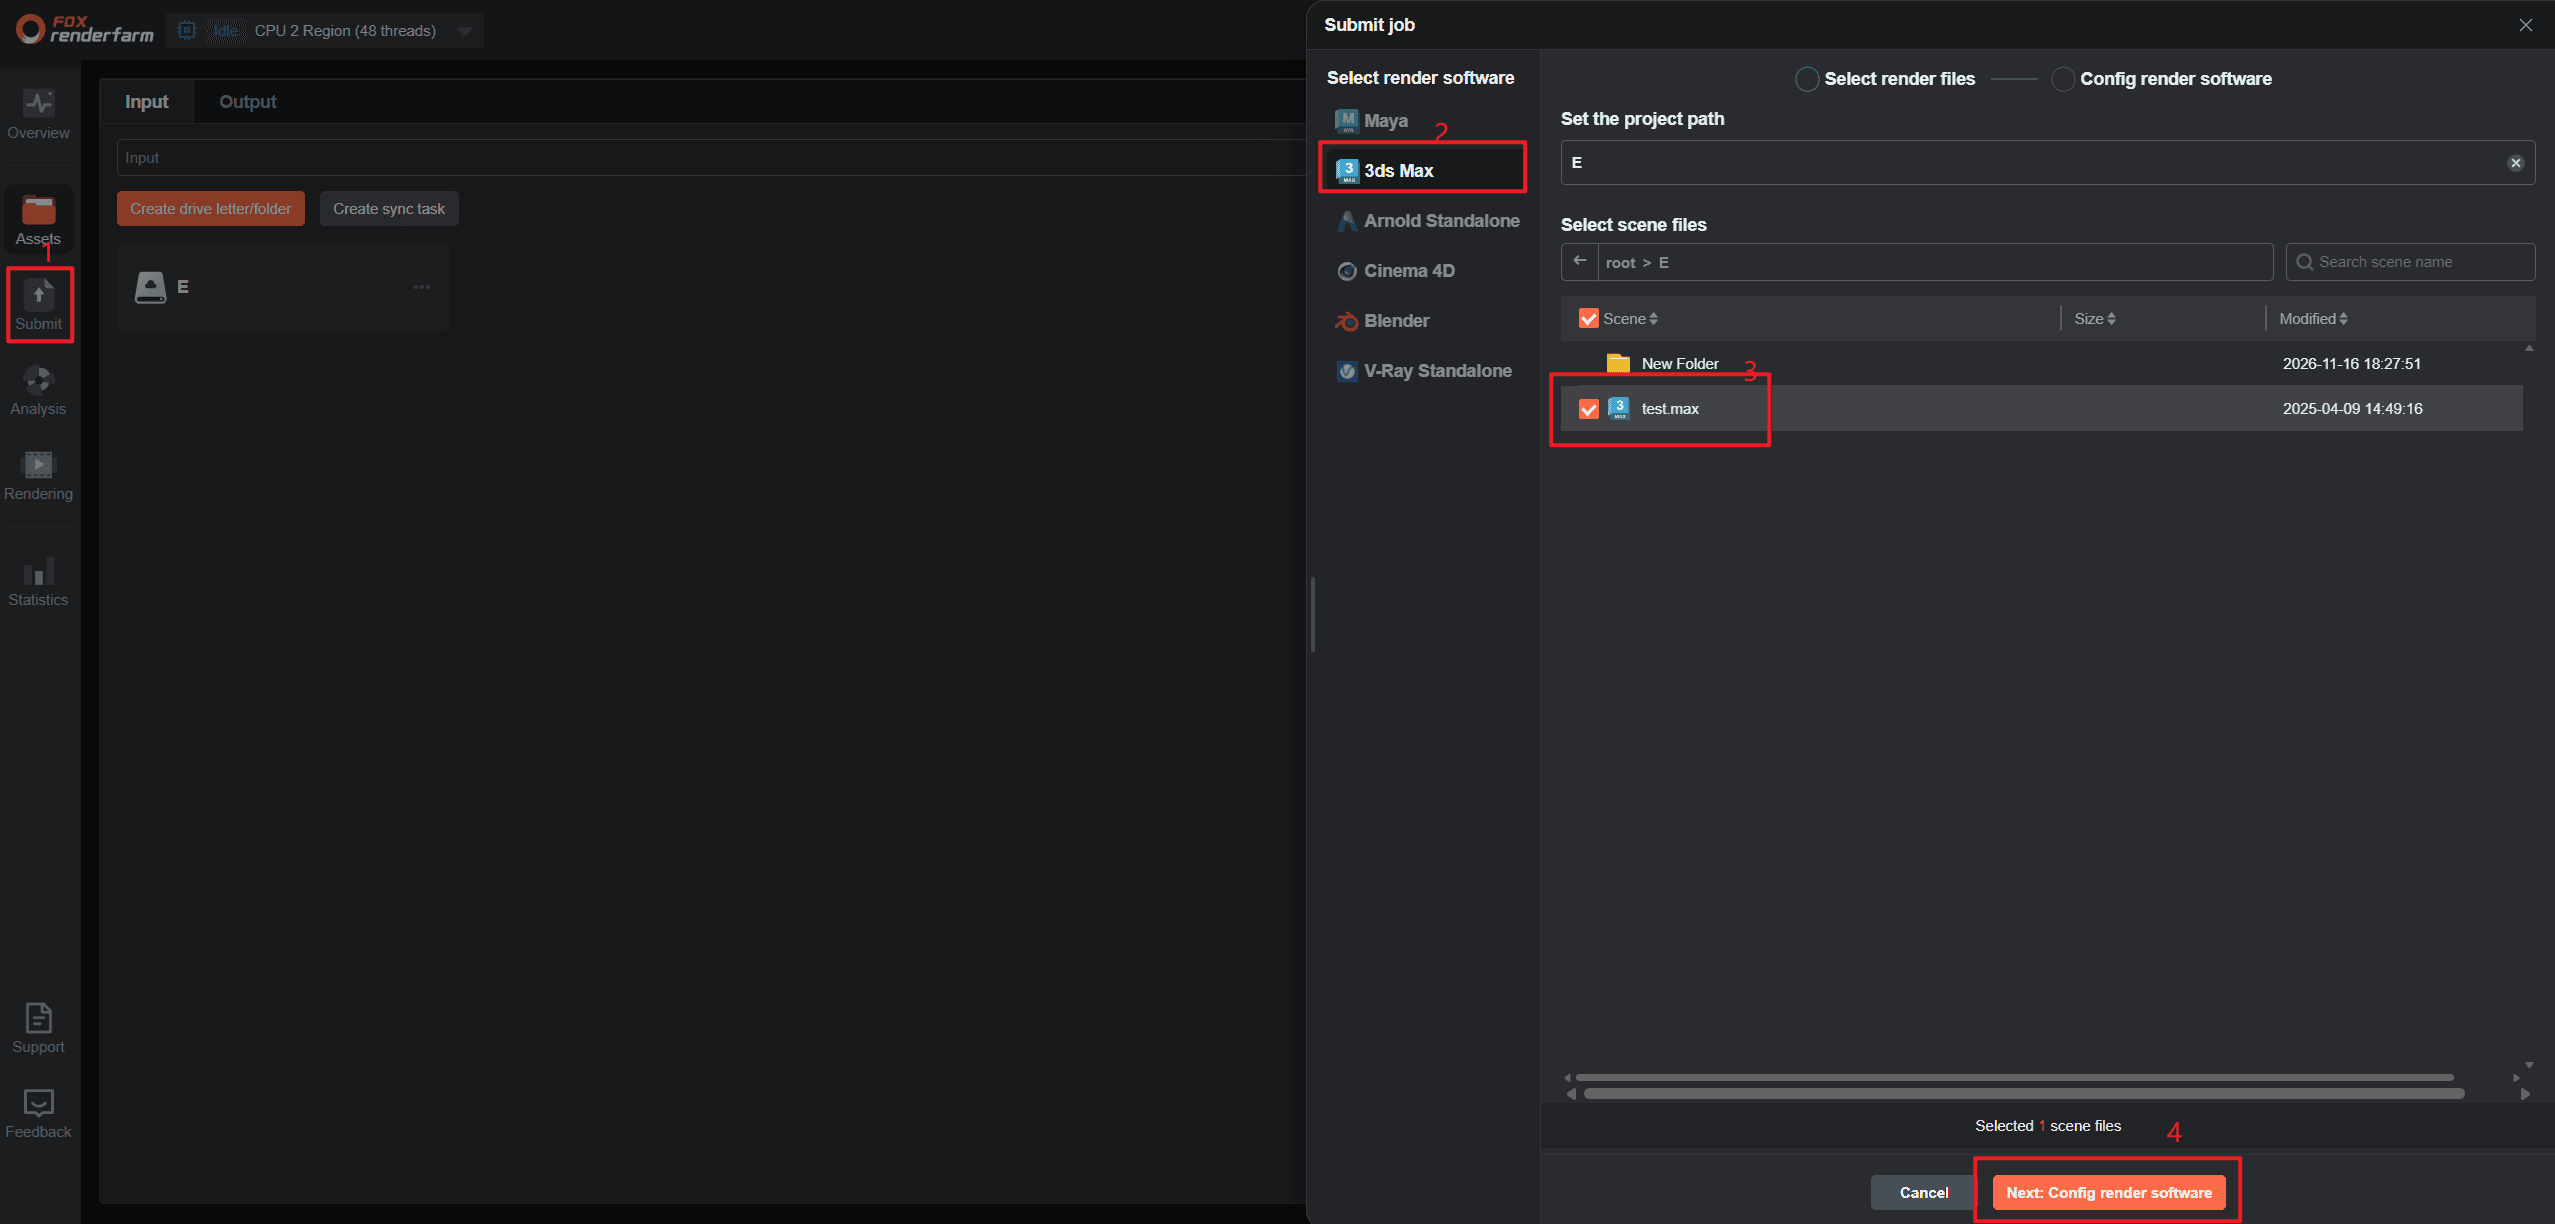
- Or click Submit in the left rail, choose the software, the project directory, then the scene.
2、Complete the configuration and pick the machine type.
3、Click Go analysis. When analysis passes, the job renders straight away or stops on the parameter page, depending on the switch.
Analysis timeout stop defaults to 2 hours; longer analysis stops by itself. It rarely needs changing.
Submit from the desktop client
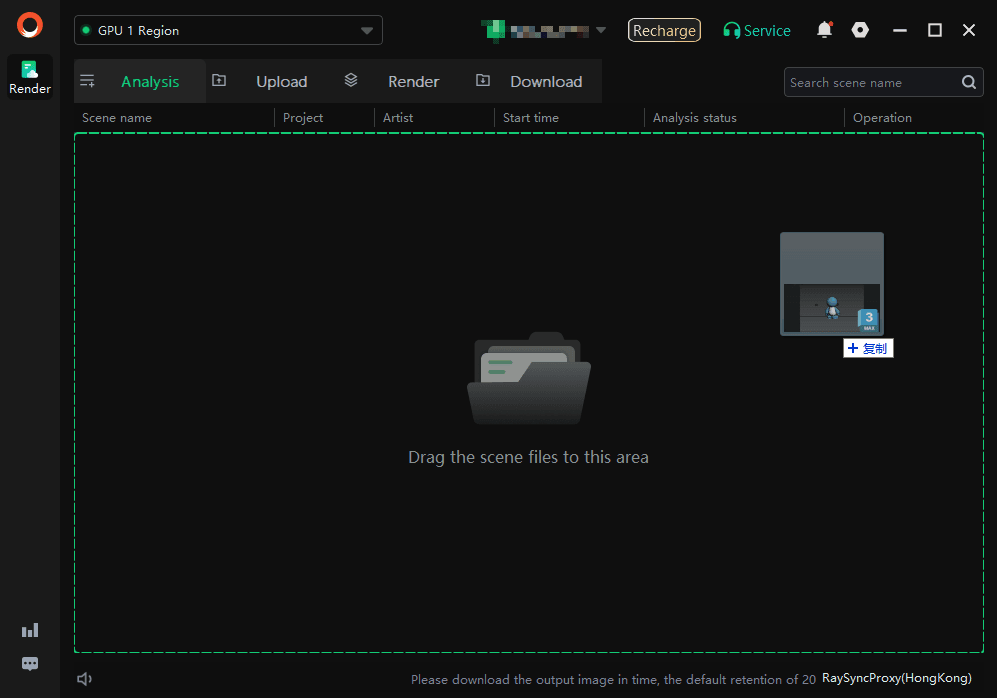
1、Drag the scene file anywhere onto the client window.
2、Complete the configuration, including the software installation path, and pick the machine type.
3、Under Select project, pick an existing project or create one, so the cost is easy to trace on the bill.
4、Click Next; the job enters analysis.
Several scenes can be dragged in at once. Each becomes an independent job, analysed and billed separately.
Submit from the 3D software plugin
The plugin analyses and submits only; rendering still runs on the farm. Install it first if missing — see Install 3D plugins — then open its submit panel and submit the open scene.
3ds Max, Maya, Cinema 4D and Blender differ in panel layout, in the parameters they expose, and in whether they allow changing parameters after analysis. Steps for each are on that software's plugin submission page under Software guides. After submitting, watch the upload progress in the desktop client; rendering starts when the upload finishes.


