As many artists know, the journey of turning a simple 3D model into something realistic starts with one important step, which is known as textures. It basically helps creators bring depth and detail to their creations, whether working on a game or 3D animation. Without them, even the most carefully built model can look plain or unfinished.
At this point, many beginners feel unsure when it comes to working with textures in Maya. That's why this article will guide you through the full process of learning how to add texture in Maya. We will show you how to apply the texture correctly and render your final result. Alongside that, you will find a helpful tip to improve rendering speed and fix common issues.
Part 1. How to Add Texture in Maya?
When you are unsure where to start, this part will show you in detail how to add texture in Maya without confusing anything:
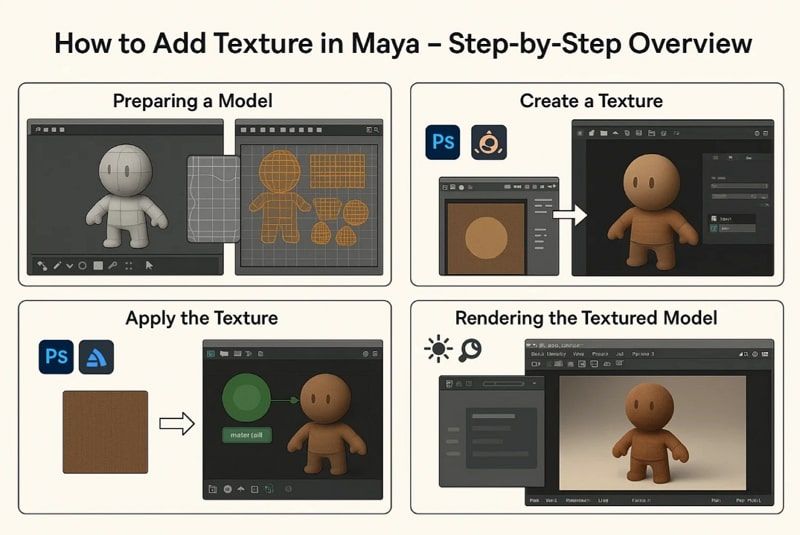
- Preparing a Model: You should start by creating a UV map with the help of Maya’s UV Editor, which acts like a layout guide. This map basically tells Maya how to place your flat texture on your 3D shape.
- Create a Texture: Upon setting the UV map, the next step is to import your texture into the tool. Here, you can design textures using tools like Photoshop or Substance Painter or utilize ready-made textures from online libraries to apply to your model.
- Apply the Texture: Following that, opt for Maya's Hypershade editor to create a material and connect your texture to it. This lets you see how the texture appears on your model in real-time and helps you make quick changes if needed.
- Rendering the Textured Model: To render your textured model in Maya, use the Arnold renderer to produce quality results. At this stage, adjust the lighting and shadow of your mode, which helps you see how the textured model will appear in a scene.
Pro Tip for Maya Artists: Improve 3D Rendering Efficiency
It is quite evident that rendering is the slowest step in 3D modeling. This is a common issue many creators face when they use limited local devices or large render files. To speed up this work, opting for an online rendering service is a smart solution. Thus, one highly recommended option is Fox Renderfarm, which is a fast and secure service.

This cloud render farm uses powerful servers, which help you finish tasks faster without waiting hours on your local computer. Alongside that, your files and other data are kept safe with its ISO27001 certification and TPN accreditation. Plus, new users get a $25 coupon when registering, so they can use this platform to test the service before paying. Whenever you face any problem, its 24/7 customer support team can help solve the issues within minutes.
Innovative Features
- Render Nodes: Fox Renderfarm’s thousands of rendering machines are always ready to handle multiple tasks at once. It means your project will ultimately be rendered without delays, even during busy hours or peak times when many users are online.
- File Transfer Speed: This advanced platform uses Raysync technology for fast file uploads and downloads. Thus, you don’t have to wait long to send or receive your project files, even if they are large in size or contain many textures.
- Different Rendering Support: In addition, artists can choose between CPU and GPU rendering depending on their project's needs. This flexibility means your scenes will be rendered effortlessly, with better performance and results based on your selected settings and file size.
- Plugin Compatibility: The platform supports various plugins, such as Arnold and Octane, which are very helpful for artists. Hence, you can keep using your favorite tools and settings without compatibility issues when you upload your project for rendering.
- Auto Project Analysis: Once you upload your files, Fox Renderfarm automatically checks your project settings. Alongside that, it detects errors or missing parts, helping you avoid failed renders and saving time on corrections or resubmissions.
Part 2. Troubleshooting Common Texture Issues in Maya
Even after mastering how to add texture in Maya, you might face issues with how textures show up or behave. Below, we will explore some common causes that can happen anytime in this editing tool while adding texture:
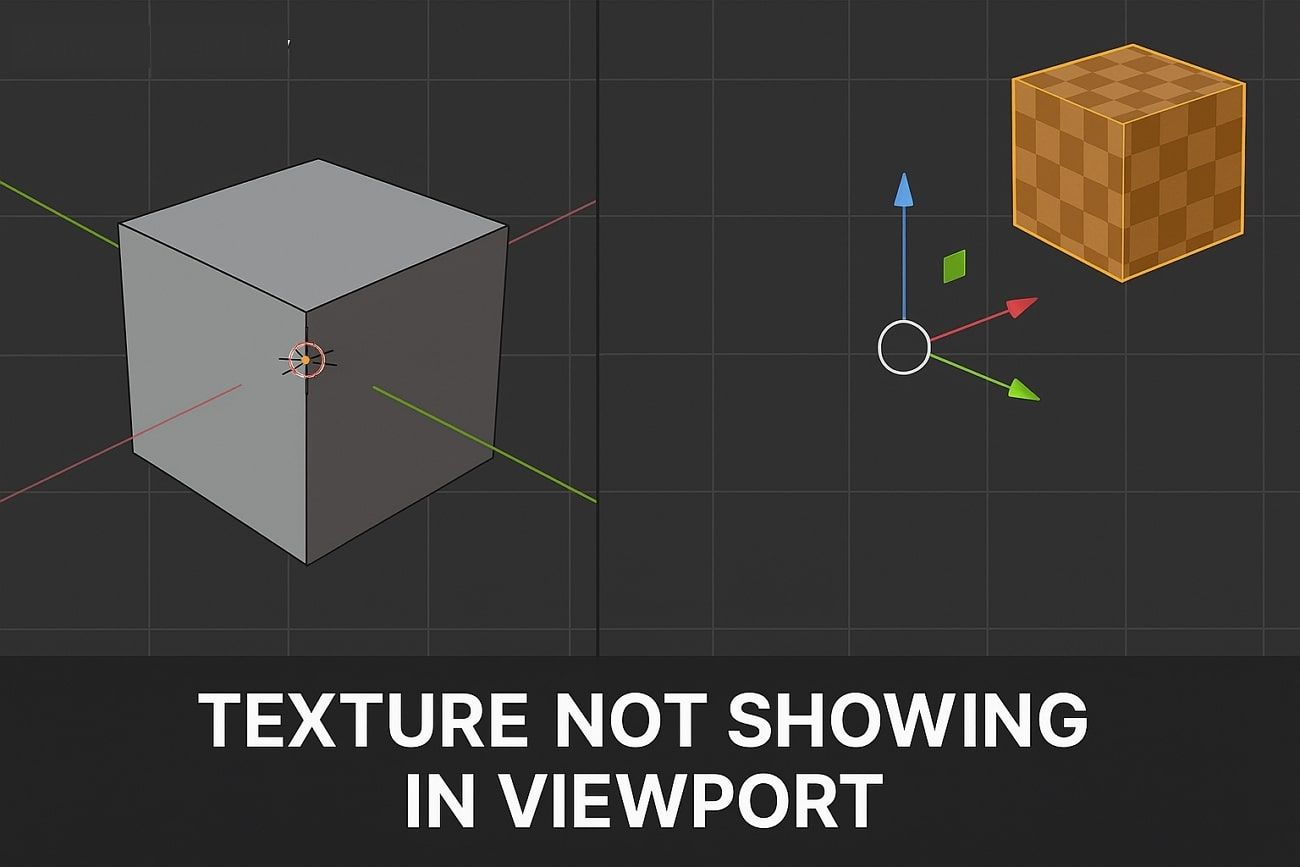
1. Texture Not Showing in Viewport
Many times, after knowing how to add a texture in Maya and applying the same procedure, results may not appear in the viewport. This usually happens due to missing connections or the wrong view mode. At this point, you should consider switching to the “Textured” mode by pressing the 6 key. Besides, check the Hypershade settings and confirm that the texture is properly linked to the material.
2. Missing a Few Textures
Whenever your model shows black or missing some textures, it’s likely that Maya cannot locate the image file. Beyond learning how to apply texture in Maya, always place the texture files in the project’s “sourceimages” folder. In addition, re-link the missing file using File Node to help Maya find and apply the image correctly.
3. UV Mapping Problems
Another major issue upon adding textures in this editing program is broken or stretched UV maps. At this point, you have to open the UV Editor to check for overlapping or missing UVs. Alongside that, fixing or redoing the UV layout usually solves the problem and improves the texture placement.

4. Blurry Textures
Apart from the above issues, blurry textures actually come from using low-resolution images or incorrect filtering settings. Before following how to apply texture in Maya, you need to make sure the image size is high enough. You can even open the material settings and try adjusting the filter type to make the texture sharper.
5. Wrong Texture Scale or Rotation
Even when you know how to add a texture in Maya, you might see that it is too small or even rotated oddly. This is actually a mapping issue, which is caused by incorrect UV placement or repeat settings. Alongside that, opt for the Attribute Editor to adjust scale and rotation settings under the designated nodes.
Conclusion
In conclusion, adding textures is a key step to making your 3D model look appealing and polished. When you learn how to add texture in Maya, you can easily bring more detail and depth to your design. Apart from that, all artists know that rendering large texture scenes can slow them down. For faster results, it’s smart to use Fox Renderfarm, which can help you render even complex projects effortlessly.